
Related Manuals for COMAC C85B-C100B


Summary of Contents for COMAC C85B-C100B
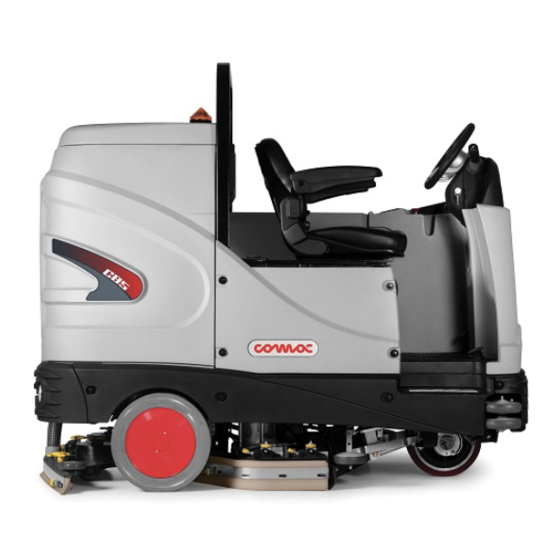
- Page 1 I ....3 GB ....29 F ....55 D ....81 E ....107 C85B-C100B Ed.03/2003 Codice 75112004...
-
Page 2: Table Of Contents
SUMMARY ON CONSIGNMENT OF THE MACHINE ....................... 30 INTRODUCTORY COMMENT........................30 TECHNICAL DATA..........................30 SYMBOLOGY USED ON THE MACHINE ...................... 31 SYMBOLOGY USED IN THE MANUAL ......................33 MACHINE PREPARATION ........................34 1. HANDLING OF THE PACKED MACHINE ..............................34 2. -
Page 3: On Consignment Of The Machine
On consignment of the machine When the machine is consigned to the customer, an immediate check must be performed to ensure all the material mentioned in the shipping documents have been received and moreover to find out that the machine has not suffered damage during transportation. If damage has occurred, get the shipping agent to verify immediately the amount and nature of the damage suffered and at the same time inform our claim department. -
Page 4: Symbology Used On The Machine
SYMBOLOGY USED ON THE MACHINE Symbol denoting solenoid valve open It is used to indicate the solenoid valve switch Symbol denoting solution tank empty Symbol denoting up – down of the brushes base It is used to indicate the signal lamp of the brushes actuator when operating Symbol denoting brush It is used to indicate the brushes motor switch Symbol denoting suction motor... - Page 5 SYMBOLOGY USED ON THE MACHINE Symbol denoting stop base side movement The green signal lamp comes on when the brushes base is moved all to the left side Symbol denoting squeegee all down (green signal lamp) Symbol denoting amperometric control of the brushes motor (red signal lamp) The signal lamp comes on when the brushes motor is under stress Symbol denoting pressure carried on the brushes Symbol denoting regulation cock...
-
Page 6: Symbology Used In The Manual
SYMBOLOGY USED IN THE MANUAL Symbol denoting a warning Read carefully the sections preceded by this symbol, for the safety of the operator and of the machine Indicates danger of gas exhalations and emission of corrosive liquids Indicates fire danger Do not approach with free flames... -
Page 7: Machine Preparation
MACHINE PREPARATION 1. HANDLING OF THE PACKED MACHINE The machine is packed in a specific package provided on a pallet for the handling with fork trucks. The packages cannot be placed on top of each other. The total weight is 560 kg for C85B and 690 kg for C100B The overall dimensions are: C85B C100B... -
Page 8: Installation Of The Batteries Into The Machine
MACHINE PREPARATION INSTALLATION OF THE BATTERIES INTO THE MACHINE The batteries are fitted in the appropriate compartment under the seat and must be handled by using appropriate lifting equipment suitable both for the weight and for the coupler system. They must moreover satisfy the requirements quoted in the Specification CEI 21-5. WARNING! For maintenance, first charge and daily recharge of the batteries, it is necessary to follow strictly all the indications given from the constructor or from his dealer. -
Page 9: Connection Of The Battery Charger
MACHINE PREPARATION 5. CONNECTION OF THE BATTERY CHARGER The connector is placed in the left lower part of the operator seat. The upper part (1), which is connected to the batteries, is the one which has to be inserted to the connector (2) fixed to the cables of the battery recharger. The coupling connector of the battery charger is delivered in the bag where this instruction booklet is found and must be assembled on the battery charger cables following the suitable instructions (see instruction booklet of... -
Page 10: Squeegee
MACHINE PREPARATION SQUEEGEE The squeegee, which is packed separately from the machine, should be assembled as shown in the figure, couple the stud bolts (1 - C85B) or the nuts (C100B) of the squeegee into their seats on the squeegee support and fix them with a key CH17. Fit the suction hose (2) into its coupling and fix it with the appropriate clamp. -
Page 11: Brushes Assembly
MACHINE PREPARATION BRUSHES ASSEMBLY 1. Connect the battery connector 2. Turn the key into position ON 3. With the manipulator lift the brushes base 4. Turn the key into position OFF and take it off from the instrument board (to carry out the operations of brushes assembly with connected current can cause damage to the hands). -
Page 12: Solution Water
MACHINE PREPARATION SOLUTION WATER Fill the solution tank with clean water at a temperature not more than 50 ° C and add liquid detergent in the proper concentration following the instructions of the manufacturer. Excess foam in the recovery tank could damage the suction motor, so use only the minimum amount of detergent necessary. -
Page 13: General Rules Of Security
If the machine does not work properly, check by conducting simple maintenance procedures. Otherwise, it is better to ask for COMAC technical service. r Where parts are required, ask for ORIGINAL spare parts to an agent and/or to an authorized COMAC dealer r Use only original COMAC brushes indicated in the paragraph “CHOICE AND USE OF BRUSHES”... -
Page 14: Performance
PERFORMANCE 1. Carry out the operations for the preparation of the machine 2. Sit on the driver’s seat 3. Check that the parking brake is released (1) 4. Connect the connector to the batteries (2) 5. Turn the key of the general switch (3) clockwise of a quarter turn. Immediately, the red signal lamp (4) on the instrument board begins to blink and the batteries’... - Page 15 PERFORMANCE 13. Push forward the brushes manipulator (1) so to lower the base. During the descent, the signal lamps of the actuator and the brushes motor come on. The brushes base will be in its working position when the yellow signal lamp (2) comes off. 14.
-
Page 16: Check Brushes Motor
PERFORMANCE CHECK BRUSHES MOTOR The brushes motor is electronically controlled. If it reaches pre-set overload limits, the red signal lamp (1) on the instrument board starts to blink. After a few seconds the motor stops and the signal lamp of the brushes switch goes off. To start up the motor again, turn the main switch key (2) off and on again. -
Page 17: Squeegee Automatic - Manual
PERFORMANCE SQUEEGEE AUTOMATIC - MANUAL Automatic: If the switch is placed on automatic, lowering of the squeegee and starting of the suction motor are obtained with the machine advancement. Also, lifting of the AUTO squeegee and stopping of the suction motor are achieved with the reverse motion of the machine. -
Page 18: On Completion Of The Work
ON COMPLETION OF THE WORK Having finished the job and before any type of maintenance is done: 1. Close the cock 2. Raise the brushes base 3. Switch off the brushes motor switch 4. Switch off the solenoid valve switch 5. -
Page 19: Daily Maintenance
DAILY MAINTENANCE CLEANING OF THE RECOVERY TANK 1. Empty the tank through the flexible hose, unscrewing of some turns the knob and then taking off the plug 2. Open the side plug by unscrewing the knob and rotating the closing blade 3. -
Page 20: Replacement Of The Squeegee Rubber
DAILY MAINTENANCE REPLACEMENT OF THE SQUEEGEE RUBBER If the squeegee rubber is worn and does not dry well, it is possible to change the drying edge proceeding as follows: 1. Push and rotate the fixing plates 2. Slip off the rubber blade and the rubber itself 3. -
Page 21: Solution Tank And Filter Cleaning (C85B)
DAILY MAINTENANCE SOLUTION TANK AND FILTER CLEANING (C85B) When the solution tank is empty: 1. Unscrew the filter and rinse the inside thoroughly 2. Take off the cartridge and clean it 3. Open the cock 4. Rinse the tank with a water jet 5. -
Page 22: Weekly Maintenance
WEEKLY MAINTENANCE ADJUSTMENT SPLASH GUARD BRUSHES BASE Periodically proceed with the height adjustment of the side covers of the brushes base. This operation has to be carried out with the brushes base down. 1. Loosen the fixing knobs of the covers 2. -
Page 23: Trouble Shooting Guide
TROUBLE SHOOTING GUIDE INSUFFICIENT WATER ONTO THE BRUSHES 1. Make sure that the cock is open 2. Make sure that the solenoid valve switch is on 3. Make sure that there is water in the solution tank (signal lamp “RESERVE” off) 4. -
Page 24: The Suction Motor Does Not Function
TROUBLE SHOOTING GUIDE THE SUCTION MOTOR DOES NOT FUNCTION 1. Check that the suction motor switch is on 2. Check whether the recovery tank is full and eventually empty it 3. Check the perfect condition of the float switch (see also “CLEANING OF THE RECOVERY TANK FILTER”... -
Page 25: Choice And Use Of Brushes
CHOICE AND USE OF BRUSHES POLYPROPYLENE BRUSH (PPL) It is used on all types of floors which are hot water resistant (not more than 60 ° C). The Polypropylene brush is nonhygroscopic and therefore conserves its characteristics even if working in the wet conditions. NYLON BRUSH It is used on all types of floors with excellent wear and hot water resistance (more than 60 °... -
Page 26: Batteries
They have to be connected in series, in order to obtain a voltage of 36V at the battery terminals. The electric connection process has to be carried out by specialised staff trained by a Comac service center. MAINTENANCE OF THE BATTERY For the maintenance and the recharge follow strictly the instructions given by the manufacturer of the batteries.
Need help?
Do you have a question about the C85B-C100B and is the answer not in the manual?
Questions and answers