Advertisement
INSTRUCTIONS FOR CARBON INFRARED HEATER
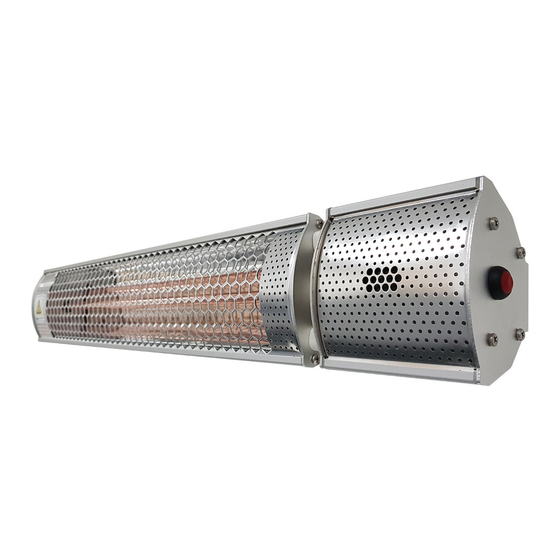
Model: ECOSTRAD SUNGLO
Introduction
This infrared heater contains a 'Helen lamp' reflector heating system that provides even heat distribution.
The energy consumption of this infrared heater is 30 - 40% more efficient in comparison to
traditional electric alternatives. Infrared heaters are commonly used for indoor or outdoor spot
heating and are perfect for garages, outdoor patios, and workshops.
Advertisement
Table of Contents

Subscribe to Our Youtube Channel
Related Manuals for Ecostrad SUNGLO


Summary of Contents for Ecostrad SUNGLO
- Page 1 INSTRUCTIONS FOR CARBON INFRARED HEATER Model: ECOSTRAD SUNGLO Introduction This infrared heater contains a ‘Helen lamp’ reflector heating system that provides even heat distribution. The energy consumption of this infrared heater is 30 - 40% more efficient in comparison to traditional electric alternatives.
- Page 2 Warning PLEASE READ THE FOLLOWING INFORMATION CAREFULLY: This infrared heater is designed for safe operation. Nevertheless, installation, maintenance and operation of this appliance can be dangerous if undertaken incorrectly. Observing the following procedures will reduce the risk of fire, electric shock, and injury. It will also keep installation time to a minimum. Save these instructions for future reference.
- Page 3 This appliance is not intended for use by persons (including children) with reduced physical, sensory or mental capabilities. It should not be used by inexperienced persons unless they have been given supervision or instruction concerning the use of the appliance by a person responsible for their safety.
- Page 4 CLEANING AND MAINTENANCE Regular and careful cleaning helps your infrared heater operate efficiently for many trouble free years. To clean your heater, follow the steps below: Unplug the power cord for your safety before cleaning the appliance. Make sure the heater is cool before continuing. To keep the heater clean, the outer shell may be wiped down with a soft, damp cloth.
- Page 5 ASSEMBLY INSTRUCTIONS Tools Needed: Pencil, hammer, spirit level, screwdriver, power drill and drill bits. A wall mounting bracket is provided with the heater, which has been specifically designed to allow this product to be attached to a wall or ceiling. Before drilling the holes for the wall or ceiling mount, check that the surface is solid and that there are no hidden water pipes or electric wires.
- Page 6 Wall Mounted Ceiling Mounted Make sure the heater is horizontally level. The heater must be installed at least 1.8 m above the floor.
- Page 7 INSTALLATION WITH PARASOL This heater is designed so it can also be mounted to a parasol or awning. Mounting Option 1: Mounting Option 2: Alternate Mounting Angle:...
- Page 8 FUNCTION & OPERATION Plug the unit into a plug socket. Ensure the power supply is suitable for the appliance. Press the power button on the right side of the heater. Turn the heater on manually or by using the remote control. Use the up and down buttons to set the desired heat output level.
Need help?
Do you have a question about the SUNGLO and is the answer not in the manual?
Questions and answers