Advertisement
1 0 0 0 - 1 5 0 0 V A R A C K 1 U
Installations- und bedienungsanleitung
Manuel d'installation et d'utilisation
Installation and operating manual
Прирачник за инсталација и употреба
Installatie– en bedieningshandleiding
Dokumentacja Techniczno-Ruchowa
Manual de instalação e funcionamento
Руководство по установке и эксплуатации
Navodila za priključitev in uporabo
NETYS PR
Manual de instalación y uso
Manuale di installazione e uso
Manual de instalare şi utilizare
Kurulum ve kullanım kılavuzu
安装及操作手册
CN
DE
ES
FR
GB
IT
MK
NL
PL
PT
RO
RU
SI
TR
Advertisement
Table of Contents

Subscribe to Our Youtube Channel
Related Manuals for socomec NETYS PR 1000 Rack 1U


Summary of Contents for socomec NETYS PR 1000 Rack 1U
- Page 1 NETYS PR 1 0 0 0 - 1 5 0 0 V A R A C K 1 U 安装及操作手册 Installations- und bedienungsanleitung Manual de instalación y uso Manuel d’installation et d’utilisation Installation and operating manual Manuale di installazione e uso Прирачник...
- Page 2 During the warranty period, SOCOMEC UPS reserves the right to decide whether the product should be repaired, or whether to replace defective parts with new parts, or used parts that are equivalent to new parts in terms of functionality and performance.
- Page 3 SUMMARY 1. SAFETY STANDARDS ............4 1.1.
-
Page 4: Safety Standards
1. SAFETY STANDARDS 1.1. IMPORTANT This manual must be kept next to the UPS, so that the operator may consult it at any time for clarification on the correct use of the UPS. Read the manual carefully before connecting the unit to the mains power supply and to the devices to be powered. Before switching on the UPS (Uninterruptible Power Supply), the operator must be fully aware of the functions and positions of all the controls and of the technical and functional characteristics of the system, in order to avoid any risk to persons and to the equipment. -
Page 5: General Description
2. GENERAL DESCRIPTION The main purpose of the UPS is to protect sensitive and critical equipment from electrical disturbances that can compromise opera- tion. Black-outs, brown-outs, variations in voltage and frequency, lightning, electrostatic discharges and rapid over voltages are phenomena found in all office and industrial environments and which cause damage to the hardware and loss of data. Netys is an Uninterruptible Power Supply designed to power computers and connected peripherals, with the exception of any other electrical device (such as household appliances, television sets, stereo systems and video recorders). -
Page 6: Installation
3. INSTALLATION 3.1. MOUNTING THE UPS IN A 19" RACK 3.1-1 Mounting Bracket for a 19" Rack Mounting Bracket M3 x6 Bracket Screws 3.1-2 Adjusting the Rail Depth Rear Hold-Down Bracket Rear Front Assembly Wing Nuts Wing Nut for Rear Hold-Down Bracket Rail Assembly 3.1-3... - Page 7 3. INSTALLATION 3.1-5 Securing the UPS in a 19" Rack 3.1-6 Rack Tray and Mounting Bracket for a 23" Cabinet Mounting Bracket Rack Tray M3 x6 Bracket Screws NOTE Rails cannot be used for 23" cabinets. Confirm that you have a rack tray. 3.1-7 Securing the UPS in a 23"...
- Page 8 3. INSTALLATION 3.1-8 Zero-U Mounting Side of Rack Cabinet (within 22.54-22.78" or 56.35-56.95 cm) 3.1-9 Mounting the UPS to a Wall Wall WARNING! The UPS MUST be positioned with the front panel at the top to prevent a battery hazard. NETYS PR RACK 1U - Ref.: IOMNETPRXX01-GB 02...
-
Page 9: Front View
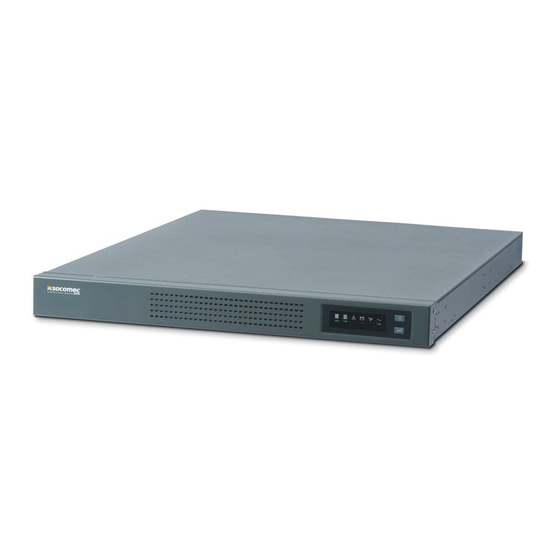
4. FRONT VIEW 4.1-1 Front view 4.1-2 Control panel ON-OFF button Test/Alarm reset button Load Service Overload segment 1 (red) (red) (green) Battery Load Power ON mode segment 2 (green) (yellow) (green) NETYS PR RACK 1U- Ref.: IOMNETPRXX01-GB 02... -
Page 10: Rear View
5. REAR VIEW 5.1-1 Rear view IEC 320 Slot for optional Input Network Transient Output sockets communication boards protection Protector (IEC 320 10 A) Main input socket USB Port DIP Switches (IEC 320) RS232 serial port NOTE The batteries charge to 90% capacity in approximately 3 hours. However, it is recommended that the batteries charge for 6 to 24 hours after installation or long-term storage. -
Page 11: Internal Battery Connection
6. INTERNAL BATTERY CONNECTION - Verify that the UPS is off and unplugged. - Remove the UPS front panel (figure 6.1-1) - Connect the battery connector (figure 6.1-2). A small amount of arcing may occur when connecting the batteries. This is normal and does not damage the unit or present any safety concern. -
Page 12: Modes Of Operation
7. MODES OF OPERATION 7.1. TURNING THE UPS ON After the UPS is connected to a power outlet, the UPS enters Standby mode. To turn on the UPS, press and hold the button until you hear the UPS beep (approximately two seconds). After the UPS is turned on, it conducts a self-test and enters Normal mode. , Load 1, and Load 2 indicators illuminate indicating that power is available from the UPS output receptacles. -
Page 13: Additional Ups Features
8. ADDITIONAL UPS FEATURES 8.1. VOLTAGE CONFIGURATION The DIP switches on the UPS rear panel (see Figure 14) are used to configure the output voltage and input voltage range. 1. The UPS must be completely shutdown. To turn off the UPS, press and hold the button for two seconds and then unplug the UPS from the power outlet. -
Page 14: Communication
9.1. COMMUNICATION SOLUTIONS Depending on the model, there are different types of connections and software compatibility as shown in the table below: • Uni Vision: local management software for local shutdown of Windows™ & Linux systems, free on www.socomec.com - RS232 interface •... -
Page 15: Troubleshooting
10. TROUBLESHOOTING This section examines some of most likely problems that can compromise correct operation of the UPS, attempting to solve them and identifying the possible causes and remedies. WARNING! The UPS internally generates hazardous electrical voltages. All maintenance must be performed solely and exclusively by authorized personnel. If you have difficulty in getting the UPS to work, the reason may be among those listed below. - Page 16 9. TROUBLESHOOTING Alarm or Condition Possible Cause Action The UPS is running on battery Correct the input voltage, if possible. The UPS continues power because the input to operate on battery until the condition is corrected or the voltage is too high (>149V battery is completely discharged.
-
Page 17: Technical Specifications
11. TECHNICAL SPECIFICATIONS Models PR 1000 Rack 1U PR 1500 Rack 1U Power (VA) 1000 1500 Power (W) 1000 Electrical specifications - Input Voltage 230 V (default); 220 V, 230 V, 240 V selectable Frequency 45÷65 Hz, 50/60 Hz auto-sensing Mains connection IEC 320 (10 A) Electrical specifications - Output... - Page 20 SALES, MARKETING AND SERVICE MANAGEMENT SOCOMEC GROUP SOCOMEC UPS Paris S.A. SOCOMEC capital 11 149 200 € - R.C.S. Strasbourg B 548 500 149 95, rue Pierre Grange B.P. 60010 - 1, rue de Westhouse - F-67235 Benfeld Cedex F-94132 Fontenay-sous-Bois Cedex - FRANCE Tel.
Need help?
Do you have a question about the NETYS PR 1000 Rack 1U and is the answer not in the manual?
Questions and answers