Advertisement
Quick Links
Download this manual
See also:
Owner's Manual
Owner's Manual
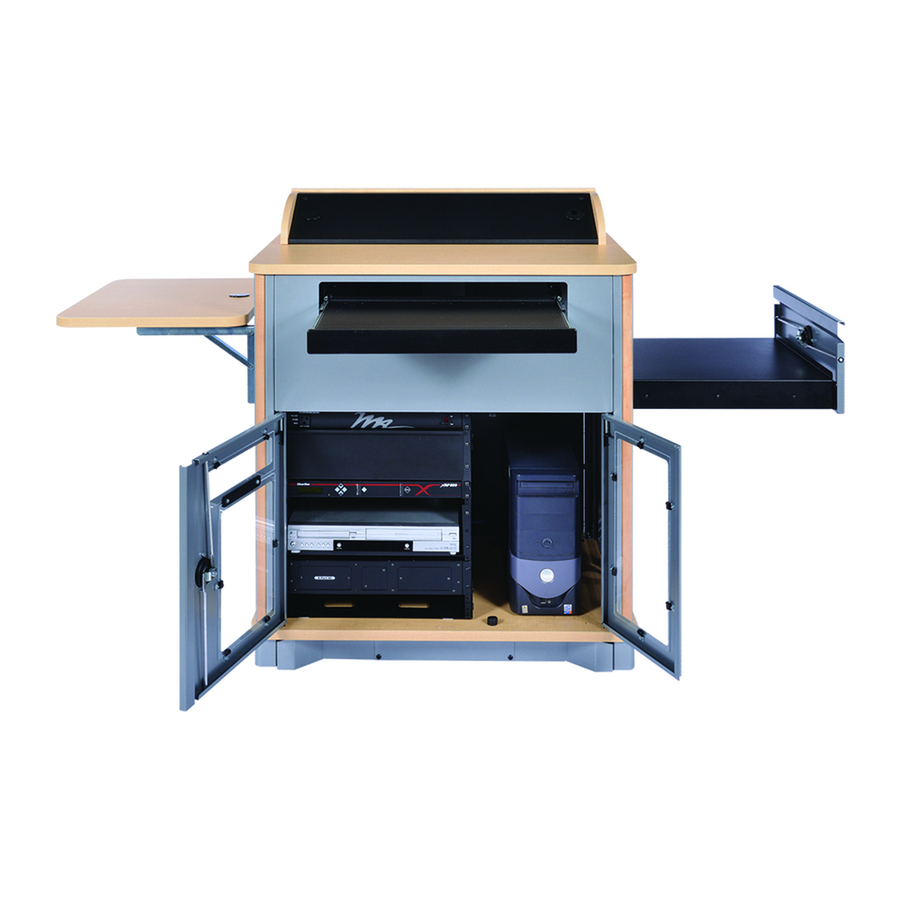
Media Manager Elite Lectern
55258
Important
Before using this product:
• Read this manual
• Comply with all safety and operating instructions
• Ensure all parts and correct quantities are included
Any parts damaged during shipment must be reported
within 15 days of receipt. To report information regard-
ing missing parts or damage, to purchase parts or
accessories, or if you have any questions, please
contact us.
Thank you for purchasing Spectrum products!
Spectrum Industries, Inc
925 First Avenue, Chippewa Falls, WI 54729 USA
800 235 1262
715 723 6750
www.spectrumfurniture.com
Media Manager Elite with surround,
left drawer, rack cube installed on right,
flip-up shelf on right
™
Media Manager Elite with overbridge,
right drawer, rack cube installed on left,
and toe kick, flip-up shelf on left
0118738R2 Page 1 of 14
Advertisement

Related Manuals for Spectrum Industries 55258


Summary of Contents for Spectrum Industries 55258
- Page 1 Thank you for purchasing Spectrum products! Spectrum Industries, Inc 925 First Avenue, Chippewa Falls, WI 54729 USA 800 235 1262 715 723 6750 www.spectrumfurniture.com...
- Page 2 If servicing is necessary, adults or with adult supervision. please contact Spectrum Industries for assistance. Warning - Relocating audio and/or video equipment to furniture not specifi cally designed to support audio and/or video equipment may result in death or serious injury due to the furnishing collapsing or over turning onto a child.
- Page 3 Hardware (2) 053310 (4) 0100167 (1) 025039 (1) 0118607 1/4-20 x 40mm 8-32 x 1/2” PH 4mm Hex Audience-side skirt JC bolts Thread-cutting screw wrench (2) 0118608 Side skirt Toe Kick (included with select configurations) (1) 0118613 (4) 053310 Toe kick 1/4-20 x 40mm JC bolts (1) 0118614...
- Page 4 Assembly / Setup 1. Install Toe kick - optional (skip to step 2 if no toe kick) 4mm Hex wrench (included) Note: If you have the toe kick option, follow this assembly process: A. Anchor toe kick to floor (optional) B.
- Page 5 2. Install 3-piece skirt 4mm Hex wrench (included) Side skirt Audience-side skirt 1. Attach the two side skirts to the audience-side skirt with (4) 8-32 x 1/2” PH Thread-cutting screws. Figure 2A. 8-32 x 1/2” PH Thread-cutting screws (4 required) 1.
- Page 6 Removable Rack Cube Phillips screwdriver The removable rack cube (12RU) simplifies installation and provides the ability to integrate equipment remotely. The cube can be installed into the lectern at a later date. The cube also provides mounting capabilities for multiple cooling fans if necessary.
- Page 7 Keyboard Tray / Drawer The dual-use tray can be used as a keyboard tray, or flipped and used as a drawer. 1. To flip, pull out the tray and locate the black plastic lever on each slide. Figure 4. 2. Release the levers (left-down, right-up) while pulling the tray out of the slides. Keyboard 3.
- Page 8 Flip-up shelf - optional Operation The shelf will automatically lock into place when lifted into the horizontal position with the levers released. Figure 6B. To lower or flip-up the shelf, press and hold the levers under each folding shelf bracket at the same time while slowly lowering or raising the shelf.
- Page 9 Overbridge insert panel - optional 4mm hex Drill wrench 1. To remove the overbridge insert panel, remove the (2) 1/4-20 x 35mm JC bolts with a 4mm hex wrench and lift out the panel. Figure 7A. Measuring Drill bit 2. To make cutouts in the insert panel [optional]: device A.
- Page 10 Media Manager Elite Lectern overbridge insert panel blank (flat view) 2” Grommet 2” Grommet Max cutout area Figure 7B Overbridge Section View Worksurface Worksurface opening below ™ Note: The Overbridge Control Console has been designed for many of the currently available controllers on the market, however, modified cutouts should be reviewed by Spectrum to ensure clearance of brackets, keyboard slides, or other objects under the worksurface.
- Page 11 Audience-side panel Phillips screwdriver The audience-side panel can be removed to access the rear portion of the rack cube and lectern. 1. To remove the panel, open the document camera drawer fully. Figure 8A. 2. While keeping a hand on the audience-side panel, unscrew the (2) knobs inside the lectern behind the panel and remove. 3.
- Page 12 Accessories (Available separately after initial configured purchased) Rack Cube - 55197 Flip-up Shelf - 55269 • One rack cube can be installed • Cooling fan compatible (for most • Shelf hinges lock into place in the upright position on the left or right side of the 4.7”...
- Page 13 Toe kick Toe Kick Kit - 55198 Customized Logo Panel - 55199 • Attaches to audience-side of lectern • Attaches to floor and lectern when mobility is not • 30”W [76.2 cm] x 12”H [30.5 cm] necessary or desired (floor fasteners not included) •...
- Page 14 Warranty WE WILL MAKE IT RIGHT FOR YOU! Spectrum is committed to provide complete customer satisfaction. Each of our products is manufactured from the best materials available and each product is stringently monitored throughout the production process through our P.A.C.E. program (Product Assurance to meet Customer Expectations). We expressly warrant that Spectrum products will be of good quality and workmanship and free from defect for the period set out in the warranty table below from the date of delivery.
Need help?
Do you have a question about the 55258 and is the answer not in the manual?
Questions and answers