Advertisement
Quick Links
Owner's Manual
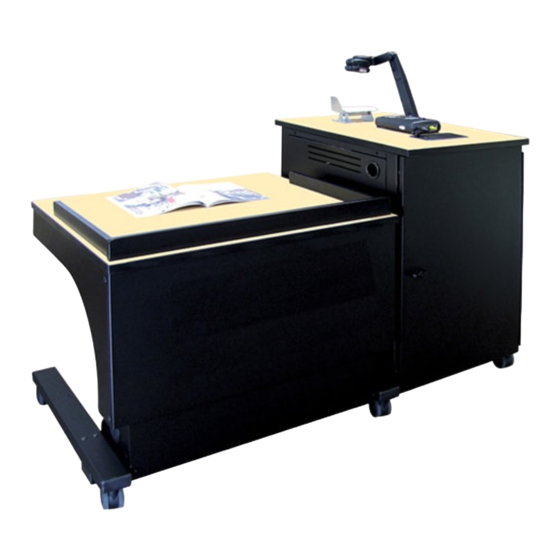
Freedom One
Freedom One Lectern
55355
(Includes lectern, equipment rack,
and unit-to-unit connector kit)
55366
Equipment rack only
55367
Unit-to-unit connector kit
55368
Freedom One Lectern only
Equipment rack
55366
Important
Before using this product:
• Read this manual
• Comply with all safety and operating instructions
• Ensure all parts and correct quantities are included
Any parts damaged during shipment must be reported
within 5 days of receipt. To report information regarding
missing parts or damage, to purchase parts or acces-
sories, or if you have any questions, please contact us.
Thank you for purchasing Spectrum products!
Spectrum Industries, Inc
925 First Avenue, Chippewa Falls, WI 54729 USA
800 235 1262
715 723 6750
www.spectrumfurniture.com
™
Sit-to-Stand (S2S) Lectern
Unit-to-unit connector kit
55367
55355
Freedom One Lectern
55368
0115923R5 Page 1 of 10
Advertisement

Subscribe to Our Youtube Channel
Summary of Contents for Spectrum Industries 55355
- Page 1 Thank you for purchasing Spectrum products! Spectrum Industries, Inc 925 First Avenue, Chippewa Falls, WI 54729 USA 800 235 1262 715 723 6750 www.spectrumfurniture.com...
- Page 2 • This lectern is intended for institutional use. It does not have any user- adults or with adult supervision. serviceable parts or user-maintenance requirements. If servicing is necessary, please contact Spectrum Industries for assistance. Warning - Relocating audio and/or video equipment to furniture not specifi cally CAUTION designed to support audio and/or video equipment may result in death or serious injury due to the furnishing collapsing or over turning onto a child.
- Page 3 Equipment rack assembly / setup Attach casters or glides 11/16” wrench (for casters) 1. Determine if you want casters or glides installed. Figure 1A. 1/2” wrench (for glides) Note: Because the equipment rack needs to be flipped caster glide upside-down to install the casters/glides, Spectrum does not recommend installing any rack-mount equipment until Figure 1A the rack has been flipped back upright.
- Page 4 Lectern assembly / setup Swapping casters for glides (optional) 11/16” wrench (for casters) 1/2” wrench Note: The Freedom One Lectern comes with factory-installed (for glides) casters. If a more permanent non-moving lectern is needed, the casters can easily be replaced with the included glides. Figure 2A. 1.
- Page 5 Unit-to-unit connector kit assembly / setup 1. Attach connector kit to equipment rack 4mm hex wrench (included) 1. Determine which side of the lectern you want the equipment rack mounted to. 2. Lay the equipment rack down on the floor with the side opposite the lectern down. Figure 3A shows assembly with the equipment rack on the left-side of the lectern.
- Page 6 6. Carefully lift and tip up the equipment rack. Be careful not to apply any side load to the casters while tipping as it could cause damage. Figure 3B. 7. Place blocking under the equipment rack to support and level the assembly. equipment rack place blocking here...
- Page 7 3. Attach lectern to equipment rack 4mm hex wrench (included) 1. Move the lectern over the short and long connector tubes on the equipment rack. Figure 3D. 2. Remove the necessary hole plugs in the lectern base. 3. Align the lectern base mounting holes with the connector tubes. 4.
- Page 8 Lectern lower modesty panel adjustment 4mm hex wrench Note: If the modesty panels become misaligned and interference occurs when extending or retracting, follow these steps to adjust. 1. Push the worksurface down to the lowest position. Figure 5A. 2. Loosen the (7) 1/4-20 x 15mm JC bolts attaching the lower modesty panel to the base. 3.
- Page 9 Accessories Clear Acrylic Locking Door Solid Locking Door Flip-up Shelf (can be mounted to be hinged (can be mounted to be hinged 21.1875”W x 30”D from the left or right-side) from the left or right side) 50 lb max capacity available in black or silver sparkle available in black or silver sparkle (mounting plate not...
-
Page 10: Warranty
• 10 Years • Cart Chassis • Lectern Chassis DESIGNED AND ASSEMBLED IN CHIPPEWA FALLS WISCONSIN.USA 925 FIRST AVENUE, CHIPPEWA FALLS, WI 54729 / 800-235-1262 / 715-723-6750 / WWW.SPECTRUMFURNITURE.COM © 2016 Spectrum Industries Inc., All rights reserved. 0115923R5 Page 10 of 10...


Need help?
Do you have a question about the 55355 and is the answer not in the manual?
Questions and answers