Table of Contents
Advertisement
Advertisement
Table of Contents

Related Manuals for Worldline YOXIMO


Summary of Contents for Worldline YOXIMO
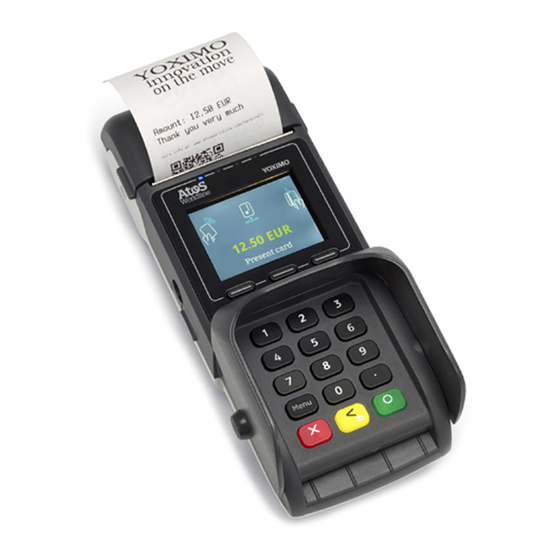
- Page 1 OWNER MANUAL YOXIMO innovation on the move •••••• an atos company...
- Page 2 Worldline S.A./N.V. (“Worldline”) The content of this document, including but not limited to trademarks, designs, logos, text, images, is the property of Worldline and is protected by the Belgian Act of 30.06.1994 related to authors’ rights and by the other applicable Acts.
- Page 3 Caring for batteries......................19 Power consumption......................20 Using the YOXIMO with a power adaptor – indoors............20 Using the YOXIMO with a power adaptor – in a vehicle ..........22 Carrying case and cradle ....................23 Carrying case ........................23 Clipping the terminal into the case ................
- Page 4 Removing the terminal from the cradle ..............32 Powering the cradle......................32 Indoors ........................33 In a vehicle ........................ 33 Maintaining the YOXIMO ....................35 Cleaning the terminal ...................... 35 Cleaning the card reader....................35 Cleaning the cradle ......................35 Cleaning the carrying case....................
- Page 5 Figure 19. Tearing off a ticket ....................17 Figure 20. Connecting a USB peripheral to the YOXIMO terminal ........18 Figure 21. Power adaptors for connection to the YOXIMO – European / universal....21 Figure 22. Vehicle power cable..................... 22 Figure 23.
- Page 6 YOXIMO owner manual empty for double-sided printing om_YoximoLOF.fm...
-
Page 7: Introduction
Introduction The YOXIMO is a mobile payment terminal offering the ideal solution for a variety of situations: on- the-road transactions, in-store promotion sales, the hospitality sector, and so on. The main features of the terminal are the following: • compact, lightweight and truly portable •... - Page 8 YOXIMO owner manual empty for double-sided printing om_yxm_introduction.fm...
-
Page 9: About The Yoximo
About the YOXIMO This chapter gives an overview of the terminal. • for information on the power supply options, see Power supply and power consumption, on page 19, and Powering the cradle, on page 32. • for information about accessories, see... -
Page 10: Terminal – Side View
YOXIMO owner manual Terminal – side view Figure 2. Side view, with detail of USB port USB protection cap USB device port external power socket Terminal – bottom view ® YOXIMO TERMINAL Manufactured by Atos Worldline SA/NV Article N°: 90700000001 Serial N°:... -
Page 11: Installing The Yoximo
48 before starting to install your YOXIMO. • if you notice that any part of the YOXIMO does not fit, blocks or shows any other malfunction, contact your vendor – do not try yourself to repair or alter it in any way. -
Page 12: Preparing The Terminal For Operation
SAMs, do this first; then fit the battery. Finally, put a roll of paper in the printer. Where to use the YOXIMO YOXIMO is a mobile payment terminal, designed for easy payment on the go. The terminal can be used in the following environmental conditions: •... -
Page 13: Installing Sim And/Or Sam – Optional
YOXIMO owner manual Installing SIM and/or SAM – optional To communicate via GSM/GPRS-EDGE-3G, you need a SIM installed in the YOXIMO terminal. Some applications also require one or more SAMs to be installed. The SIM and SAM slots are located inside the terminal underneath the battery. -
Page 14: Fitting The Battery
Trying to operate the terminal without a battery will damage the terminal. • only use the battery that is supplied with your YOXIMO • to get the best performance from the battery, make sure it is at room temperature (20°C) when operating YOXIMO •... - Page 15 YOXIMO owner manual Figure 8. Positioning the battery Position the battery with the label facing upwards and the battery contacts facing forwards. Make sure that the battery contacts touch the ones in the terminal, then press the battery down until you hear a click.
-
Page 16: Removing The Battery
Always unplug the power adaptor before removing the battery Put the PIN privacy shield in the upright position. Remove the YOXIMO battery cover at the rear side of the terminal. Lift the battery out of the terminal. Never use a sharp or pointed object when removing the battery, because this may damage the terminal Figure 11. -
Page 17: Loading Printer Paper
YOXIMO owner manual Loading printer paper • only use Worldline-approved paper, which you can recognise by the Worldline approval seal printed on the back of the paper. To order paper from your local paper supplier, contact your vendor. • do not remove the roller on the inside of the printer cover. -
Page 18: Figure 13. Inserting Printer Paper
YOXIMO owner manual Figure 13. Inserting printer paper Close the printer cover. Press firmly until you hear a click. public last updated 30/9/15 document release 1.1 om_yxm_installation.fm... -
Page 19: Powering Up The Yoximo For The First Time
Powering up the YOXIMO for the first time • the first time you power up your YOXIMO, make sure it is connected to the power adaptor • make sure the battery has been fitted, and that there is a roll of paper in the printer... - Page 20 YOXIMO owner manual empty for double-sided printing om_yxm_installation.fm...
-
Page 21: Using The Yoximo
Using the YOXIMO Reading a chip card Figure 15. Inserting a chip card in the terminal To read a chip card: Put the privacy shield in the upright position. Insert the chip card face-up in the slot at the front side of the terminal, as shown by the... -
Page 22: Reading A Contactless Card/Device
Figure 18. PIN privacy shield – closed (left) and open (right) The integrated YOXIMO privacy shield is to prevent shoulder surfing when entering a PIN. Raising the privacy shield uncovers both the chip-card interface and the magnetic stripe reader so you can operate the terminal. -
Page 23: Printer
Figure 19. Tearing off a ticket Resetting the YOXIMO To reset the YOXIMO, press the yellow Corr button for at least 5 seconds and wait for the terminal to reboot. If the Power down function is not supported by your application, you have to remove the battery, wait for 10 seconds and insert the battery again. -
Page 24: Connecting A Usb Peripheral
YOXIMO owner manual Connecting a USB peripheral The YOXIMO terminal is equipped with a USB socket, for communication with external equipment such as an ePOS terminal or a PC. The appropriate cable is available as an option. To find out what equipment is supported, contact your vendor. -
Page 25: Power Supply And Power Consumption
– do not wait for it go flat You can charge the battery by connecting the power adaptor to the YOXIMO or by placing the YOXIMO on its cradle. As Lithium-Ion batteries do not suffer from being continuously charged, you can do so without affecting the battery performance. -
Page 26: Power Consumption
• is more environmentally-friendly In stock, YOXIMO terminals are stored without a battery. This is because Li-Ion batteries discharge slowly inside the terminal, even when the terminal is switched off. Power consumption The current consumption of the YOXIMO Terminal depends on the mode: •... -
Page 27: Figure 21. Power Adaptors For Connection To The Yoximo – European / Universal
YOXIMO owner manual The adaptor output is 12 VDC at 1.0 A. Leaving the adaptor cable plugged in when the YOXIMO is connected but not in use makes sure the battery is always charged and the terminal is always ready to use. -
Page 28: Using The Yoximo With A Power Adaptor – In A Vehicle
Using the YOXIMO with a power adaptor – in a vehicle Do not remove the battery when using the YOXIMO with a power adaptor. There are three options for using the YOXIMO with a power adaptor in a vehicle: •... -
Page 29: Carrying Case And Cradle
YOXIMO safe in daily use. The cradle also includes a charger. Carrying case The case protects the YOXIMO against shocks and bumps, and has both a shoulder strap and an optional belt clip. All interfaces – chip card, magstripe card, contactless and USB – remain fully accessible when the YOXIMO is in the open case. -
Page 30: Clipping The Terminal Into The Case
YOXIMO owner manual Clipping the terminal into the case slip the recess at the front of the terminal over the tab at the front of the clip line up the terminal between the two tabs (one either side of the terminal) at the back of the... -
Page 31: Taking The Terminal Out Of The Case
Taking the terminal out of the case push open the right-hand tab at the back of the clip with your thumb lift the terminal out of the clip with your other hand Figure 25. Removing YOXIMO from carrying case public om_yxm_accessories.fm document release 1.1... -
Page 32: Shoulder-Strap And Belt-Clip
YOXIMO owner manual Shoulder-strap and belt-clip The carrying case comes with both a shoulder-strap and a belt-clip. To use the belt-clip screw the security stud on to the carrying case slip the belt-clip over your belt: it includes a spring to keep it securely in place slip the security stud into the belt-clip and wait for it to click into place Figure 26. -
Page 33: Cradle
YOXIMO owner manual Cradle The optional cradle gives you a safe place to put the YOXIMO when you are not using it immediately. It is ideal for use in vehicles and busy environments indoors. The cradle can also be used to charge the YOXIMO. -
Page 34: Unpacking The Cradle
Save the box for repacking or moving your equipment in the future. Selecting a location for the cradle Select a convenient location for the YOXIMO cradle, where you can comfortably put the terminal aside temporarily, charge the battery and possibly operate the terminal.You can install the cradle on a countertop (horizontal) or on a wall or other vertical surface. -
Page 35: Fixing The Cradle On A Countertop Or Other Horizontal Surface
YOXIMO owner manual Fixing the cradle on a countertop or other horizontal surface You can use the cradle simply by resting it on its four rubber feet. For stability, you can also screw it to a flat surface. Before fixing the cradle, make sure there will be enough space to: •... -
Page 36: Fixing The Cradle On A Wall Or Other Vertical Surface
YOXIMO owner manual Fixing the cradle on a wall or other vertical surface For convenience, you can also mount the cradle vertically. If you do this, you are advised to fit the drop protection before you screw the cradle to the wall. Note that the card interfaces are not accessible when the terminal is in a cradle with drop protection fitted. -
Page 37: Placing The Terminal On The Cradle
Figure 30. Placing YOXIMO on its cradle To place the YOXIMO on its cradle: Position the lower end of the YOXIMO on its cradle and make sure it engages with the catch. Press the YOXIMO down, until you hear a click. -
Page 38: Removing The Terminal From The Cradle
Figure 31. Removing YOXIMO from its cradle To remove the YOXIMO from its cradle, put your hand over the YOXIMO and press the two release buttons on the cradle. A spring on the cradle makes sure that the YOXIMO is released. -
Page 39: Indoors
The straight car power cable for direct wiring has a length of 2 m. The coiled cable with a cigarette lighter plug has a length of 0.60 m, and can be extended to 2.35 m. Worldline can supply these cables. - Page 40 YOXIMO owner manual Disconnecting the vehicle power cable To unplug the vehicle power cable from the cradle, push the release clip on the connector down firmly and pull the cable. public last updated 30/9/15 document release 1.1 om_yxm_accessories.fm...
-
Page 41: Maintaining The Yoximo
These products may damage surfaces and make transparent parts opaque Cleaning the terminal Disconnect the power adaptor from your YOXIMO terminal or remove the terminal from its cradle. Remove the battery. - Page 42 YOXIMO owner manual empty for double-sided printing om_yxm_maintenance.fm...
-
Page 43: Safety Information
Operating the YOXIMO • The YOXIMO is a payment terminal and is not to be used for any other purposes. Keep the YOXIMO and its cradle away from heat, fire, cold, moisture or oil, electricity, radiation, water, humidity, shocks, vibrations, chemicals or any other product that may affect electronic devices. - Page 44 YOXIMO owner manual • Do not operate the YOXIMO while driving a vehicle. Always secure the terminal in its cradle; do not place it on the passenger seat or anywhere it can come loose in a collision or sudden stop. Do not place it in the area over the air bag or in the air bag deployment area.
-
Page 45: Opening The Terminal
Disposing of the terminal and battery When your YOXIMO is at the end of its life, return it to your vendor for disposal. The terminal contains materials that have to be disposed of professionally. Do not throw batteries away with the household waste: use an appropriate recycling channel or return them to your vendor. - Page 46 YOXIMO owner manual empty for double-sided printing om_yxm_safety.fm...
-
Page 47: Technical Specifications
Technical specifications For part numbers, refer to your vendor’s catalogue item specification product name YOXIMO type mobile payment terminal keypad backlit ergonomic keypad display backlit 64k colour display, 44.64mm wide x 33.48mm high (2.2” diagonal), 320 pixels wide x 240 pixels high card readers chip-card reader conforms to EMV 4.3 Level 1... - Page 48 YOXIMO owner manual item specification approvals EMV 4.3 level 2 approved kernel for payment application development PCI PED, CE and other country-specific standards (see vendor) optional carrying case accessories cradle and drop protection vehicle power cables USB cable for connection to ePOS terminal...
Need help?
Do you have a question about the YOXIMO and is the answer not in the manual?
Questions and answers