Table of Contents
Advertisement
Quick Links
Advertisement
Table of Contents

Subscribe to Our Youtube Channel
Related Manuals for Worldline Ingenico Telium TETRA Desk/3500


Summary of Contents for Worldline Ingenico Telium TETRA Desk/3500
- Page 1 Desk/3500...
-
Page 2: Table Of Contents
Table of contents Table of contents ....................... 2 Introduction ........................ 6 Contents of box ......................6 Overview of Desk/3500 ..................... 7 Keyboard details and functionality ................8 Switching ON / OFF terminal ..................8 Terminal Setup ......................9 Location of the Desk/3500 ..................9 Operating Condition .................... - Page 3 CNP Sale ......................20 Force Transaction ....................22 Customer Present Transaction Processing ............. 23 Sale – Swiped Card ....................23 Sale – Inserted Card ....................24 Sale – Contactless ....................25 Contactless High Value Payment (HVP) – Wallet Payments ........26 Sale with Gratuity ....................
- Page 4 Account Verification Swipe Card ................. 45 Account Verification Insert Card ................46 Sample Receipts ..................... 47 End of Day Report ....................47 Not Authorised Receipts ..................48 Cancelled Receipts ....................49 Waiter Setup Receipts ..................49 Gratuity (Verified by PIN) Receipts ..............50 Gratuity (Verified by Signature) Receipts ............
- Page 5 Network Setup ..................... 68 Ethernet ....................... 68 ADMIN ......................... 72 Recommendations ....................76 Safety........................76 Security of the Terminal..................78 Standards ......................79 Troubleshooting ....................80 Notes: ........................81 Page 5 Desk/3500 User Guide Copyright© 2021 Ingenico...
-
Page 6: Introduction
Introduction Thank you for choosing an Ingenico payment terminal. We recommend that you carefully read this user guide: It gives you the necessary information about safety precautions, unpacking, installation, and maintenance of your terminal. This symbol indicates an important warning This symbol indicates a piece of advice Contents of box User Guide... -
Page 7: Overview Of Desk/3500
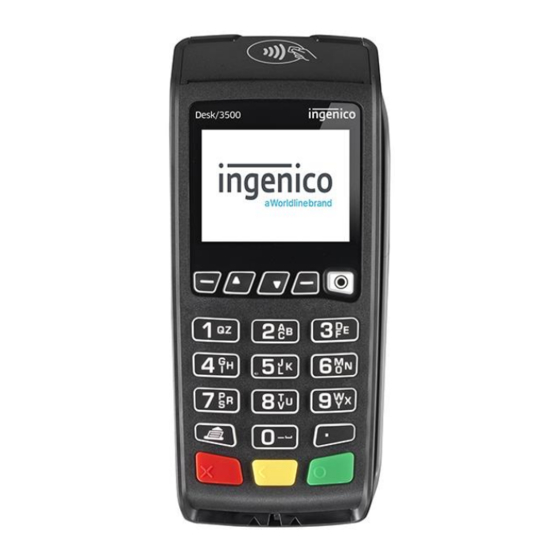
Overview of Desk/3500 The Desk 3500 is an Ethernet capable device and requires network access to install. Weight 340g paper roll or battery) Dimensions (L x w x h) 187 x 82 x 68 mm Electrical mains network 100-240VAC / 50-60 Hz - Class II equipment Terminal Connections Power connector Page 7... -
Page 8: Keyboard Details And Functionality
Keyboard details and functionality Some keys can have other functions depending on the applications on the terminal. Switching ON / OFF terminal • To power on or power off the terminal connect or disconnect the power supply Before using the terminal, always check the paper roll is present. Page 8 Desk/3500 User Guide Copyright©... -
Page 9: Terminal Setup
Terminal Setup Location of the Desk/3500 Place the terminal on flat surface near an electric socket and near to an Ethernet socket. Place the terminal far from any very hot zones; protect it from vibrations, dust, damp and electromagnetic radiation (computer screen, anti-theft barrier etc.). Operating Condition Ambient temperature 0°C to +40°C (32°F to 104°F) -
Page 10: R40 Paper Roll
R40 Paper Roll Main characteristics of Ingenico paper roll: Colour White Width 58 mm Diameter 40 mm Length Approximately 18 meters The quality of the thermal paper can be deteriorated by poor storage conditions; it is therefore recommended that the following are avoided: •... -
Page 11: Installing A Paper Roll
Installing a Paper Roll • Open the paper compartment by lifting the catch located at the rear of the terminal and pull the cover to the rear of the terminal. • Insert the paper roll in the compartment following the directions shown in the picture •... -
Page 12: Terminal Operation Icons
Terminal Operation Icons The following images may be displayed along the bottom of your terminal display. They are a reference to which physical buttons are active at that point in the transaction. This is the ‘Ok’ button and is used primarily to confirm or submit data for verification during a ‘Transaction Processing’... -
Page 13: Supervisor Functions
This is the Network Icon when a network cable IS inserted and a connection is made to a network via an Ethernet cable. Supervisor Functions Supervisor Code (If configured) Default Supervisor Code (Prior to the terminal being installed) is 0000 The ‘Supervisor Code’... -
Page 14: Voice Referral Password (If Configured)
Voice Referral Password (If configured) Default Referral Password is 0000 The ‘Referral Password’ is designed to prevent fraud during referred transactions. If your terminal is configured for ‘Referral Password’, you will be prompted during the ‘Self Install Process’ to create a password. If you forget your password, you will have to contact the helpdesk and they will set your terminal to reset the password back to ‘0000’. -
Page 15: Terminal Configuration
Terminal Configuration Connect the equipment as described above. The following screens will be displayed during the configuration of your terminal: Various screens will Various file names will be displayed be briefly displayed before the terminal disconnects as the terminal from the configuration host. powers up. - Page 16 Type in your The terminal may preferred then contact any/all ‘Supervisor Code’. acquirers for verification. The text ‘AUTH HOST’ will differ for each Acquirer Asterisks will The terminal will appear as you contact the type in the code. configuration host. Press to save the code.
-
Page 17: Card Reading
Card Reading Chip Card Insert the card horizontally into the terminal with the chip facing upwards. Leave the card in position throughout the transaction. Contactless Card Bring the card firmly up to the active zone above the contactless logo located on the paper trapdoor. -
Page 18: Transaction Selection
Transaction Selection Sale transactions may be initiated from the ‘Idle Screen’ or from the ‘Transaction Menu’. All other transaction types can only be initiated from the ‘Transaction Menu’ screen. This is the default ‘Idle Screen’ which, will be displayed once the terminal has been installed successfully. -
Page 19: Additional Prompts
Additional Prompts During transaction processing you may be requested to confirm any, or all, of the following information. These will only be displayed after ‘Amount Entry’ and only if your terminal has been configured for ‘Gratuity’: Confirm Amount This screen will be displayed after the transaction amount. Add Gratuity This screen will be displayed after: You confirm the ‘Transaction Amount’. -
Page 20: Cnp Transactions
CNP Transactions This transaction type allows you to ‘Key Enter’ the customer’s card details for all the supported transaction types for ‘Customer Not Present’ transactions or as a fallback from a failed card read. The following example is for a ‘Sale’ transaction. CNP Sale at the ‘Idle Press... - Page 21 Type in the numbers The terminal will display from the cardholder’s the acquirer result. Post Code e.g. if Post The merchant should Code is EH25 1KT, you press to accept the should enter 16 and transaction or then press decline it. Type in the numbers The terminal will print a from the cardholder’s...
-
Page 22: Force Transaction
Force Transaction If configured, ‘Force Transactions’ will allow the merchant to re-type in the details of stored/authorised transactions if a ‘MAC Key Reset’ was performed. You will only see the equivalent ‘Force’ transaction type for transaction types enabled on your terminal i.e. If ‘SALE’ and ‘REFUND’... -
Page 23: Customer Present Transaction Processing
Customer Present Transaction Processing Sale – Swiped Card at the ‘Idle Screen’ to display the ‘Transaction Menu’. Press Select ‘Sale’ on the Terminal will check the screen as described card earlier to select it. This screen will be This screen will only be displayed if ‘Sale’... -
Page 24: Sale - Inserted Card
Signature matches Tear off the customer one on the card press receipt and press if it if not press is readable or press transaction will be to reprint the receipt. reversed. A customer receipt is printed. Sale – Inserted Card at the ‘Idle Press Terminal will check the... -
Page 25: Sale - Contactless
Tear off the cardholder Tear off the merchant receipt and press if it receipt and press if it is readable or press is readable or press to reprint the receipt. to reprint the receipt. A merchant receipt will be printed. Sale –... -
Page 26: Contactless High Value Payment (Hvp) - Wallet Payments
Contactless High Value Payment (HVP) – Wallet Payments High Value Payments are contactless payments that are above the limit for contactless cards (e.g. £45.00) but are protected by the cardholder; verifying themselves to the mobile phone either by the use of a scanned thumb/fingerprint in the case of Apple Pay, or by the entry of a pass code for other mobile phone manufacturers. -
Page 27: Sale With Gratuity
Sale with Gratuity If your terminal is configured for ‘Gratuity’, the following additional screens will be displayed after the ‘Confirm Amount’ prompt during a ‘SALE’ transaction: Gratuity Amount Gratuity Percentage Press if you wish to Press if you wish to add a ‘Gratuity’. -
Page 28: Refund
Refund at the ‘Idle Press Merchant will type in Screen’ to display the their supervisor code ‘Transaction Menu’ and then press and Select ‘Refund’ Terminal will connect on the screen. to the acquirer host for approval. As the refund amount The result of the ‘Refund’... -
Page 29: Refund With Gratuity
Prints cardholder Terminal returns to the ‘Idle Screen’. receipt. Tear off the cardholder receipt and press if it is readable or press to reprint the receipt. Refund with Gratuity If your terminal is configured for gratuities the ‘Refund’ transaction flow is as follows after you select ‘Refund’... - Page 30 Terminal will go for If prompted to check authorisation and will signature press if it display the response matches one on the from the acquirer. card or press if it does not. Press cancel the transaction. A cardholder’s receipt A merchant receipt is printed.
-
Page 31: Purchase With Cashback (Pwcb)
Purchase with Cashback (PWCB) This menu option is only used to provide ‘Cashback’ where a normal ‘Sale’ transaction has been performed with a ‘Gratuity’. Selecting this option allows a transaction to be carried out with ‘Cashback’ instead of ‘With Gratuity’. Only certain types of debit cards allow ‘Purchase with Cashback’... -
Page 32: Pwcb Inserted Card
PWCB Inserted Card at the ‘Idle Press Type in the amount Screen’. Select of ‘Cashback’ ‘Purch. with required by the Cashback’ . cardholder and then press As the transaction Press to confirm amount is being the amount of typed in the screen Cashback. -
Page 33: Cash Advance
Cash Advance Please note that this option is only available for certain types of business. Please contact ‘Customer Services’ for further information. Only certain types of credit cards allow ‘Cash Advance’. Cash Advance – Swipe Card at the ‘Idle Press Swipe the Screen’. -
Page 34: Cash Advance - Insert Card
Cash Advance – Insert Card at the ‘Idle Press Cardholder to enter Screen’. Select ‘Cash their PIN code and Advance’ . then press confirm the PIN and Amount. Type in cash amount The terminal will and press check the cardholder’s card to confirm. -
Page 35: Credit Customer
Credit Customer Please note that this option is only available for certain types of business. Please contact ‘Customer Services’ for further information. at the ‘Idle Press The terminal will Screen’. Select ‘Credit connect to the Customer’ on the acquirer screen. Enter the transaction If successful, the amount, then press... -
Page 36: Reversal
Reversal Note: Reversals can only be performed, within 30 seconds of the original transaction completing and before any other function starting. at the ‘Idle Press The Terminal will Screen’. Select contact the acquirer. It ‘Reversal’. will then show reversal accepted The terminal will print Press if the printout is... -
Page 37: Pre-Authorisation (Pre-Auth)
Pre-Authorisation (Pre-Auth) Please note that this option is only available for certain types of business. Please contact ‘Customer Services’ for further information. Where there is a likelihood of a large value transaction, such as a hotel or car hire bill, a ‘Pre-Authorisation’ transaction for the expected value may be made. -
Page 38: Top-Up
Top-Up Top-Up – Insert Card Please note that this option is only available for certain types of business. Please contact ‘Customer Services’ for further information. If, following a ‘Pre-Authorisation’ transaction, the value of the transaction increases (e.g. because of an extended stay at a hotel) an additional ‘Pre-Authorisation’... -
Page 39: Top-Up - Swipe Card
Top-Up – Swipe Card Please note that this option is only available for certain types of business. Please contact ‘Customer Services’ for further information. If, following a ‘Pre-Authorisation’ transaction, the value of the transaction increases (e.g. because of an extended stay at a hotel) an additional ‘Pre-Authorisation’... -
Page 40: Completion
Completion If the final bill is more than 15% higher than the total ‘Pre- Authorised’ amount, an additional ‘Top-up’ transaction will be required for the difference which must be obtained prior to the carrying out of the ‘Completion’ transaction. The following procedure will complete a ‘Pre-Authorised’ transaction when the final amount is confirmed with the customer. -
Page 41: Completion - Insert Card
Terminal will check the Cardholder to sign the card details. receipt. Check if they match, press if OK, else press reverse transaction. Terminal will print a Terminal will print a merchant receipt. cardholder receipt. Press if the printout Press if the printout is readable;... -
Page 42: Completion - No Show
Press to submit Tear off the merchant receipt and then press value; else press the button to edit the text one digit at a time or press to clear all digits. Cardholder to enter Tear off cardholder their PIN. receipt. Press if the printout is readable;... - Page 43 Enter the Card Number You may be asked to and then press enter first Txn ID from Pre-Auth then press Enter the code as described previously in ‘Data Input’. Enter the Expiry Date Press to submit and then press value; else press the button to edit the text one digit at a time or press...
-
Page 44: Completion - Additional Charges
Completion – Additional Charges at the ‘Idle Press Enter the Security code Screen’. Select ‘CNP’ (csc) and then press then ‘Completion’ Select ‘Additional Enter the Numbers Charges’ from the Post Code and then press Enter the Completion The Terminal will then amount and then press connect to the host Enter the Card Number... -
Page 45: Account Verification
Account Verification Account Verification Swipe Card at the ‘Idle Press If the account is valid Screen’. Select ‘Verify this screen is shown. Account’. Terminal will print the cardholder receipt. Swipe the cardholder’s Press if the printout card. is readable; or press to print the cardholder receipt again. -
Page 46: Account Verification Insert Card
Account Verification Insert Card at the ‘Idle Press If the account is valid Screen’. Select ‘Verify this screen is shown. Account’. Terminal will print the cardholder receipt. Insert the cardholder’s Press if the printout card into the terminal. is readable; or press to print the cardholder receipt again. -
Page 47: Sample Receipts
Sample Receipts End of Day Report Page 47 Desk/3500 User Guide Copyright© 2021 Ingenico... -
Page 48: Not Authorised Receipts
Not Authorised Receipts Page 48 Desk/3500 User Guide Copyright© 2021 Ingenico... -
Page 49: Cancelled Receipts
Cancelled Receipts Waiter Setup Receipts Page 49 Desk/3500 User Guide Copyright© 2021 Ingenico... -
Page 50: Gratuity (Verified By Pin) Receipts
Gratuity (Verified by PIN) Receipts Page 50 Desk/3500 User Guide Copyright© 2021 Ingenico... -
Page 51: Gratuity (Verified By Signature) Receipts
Gratuity (Verified by Signature) Receipts Sale (Verified by Signature) Receipts Page 51 Desk/3500 User Guide Copyright© 2021 Ingenico... -
Page 52: Sale (Verified By Pin) Receipts
Sale (Verified by PIN) Receipts Refund (Verified by Signature) Receipts Page 52 Desk/3500 User Guide Copyright© 2021 Ingenico... -
Page 53: Self-Install Receipt
Self-Install Receipt Page 53 Desk/3500 User Guide Copyright© 2021 Ingenico... -
Page 54: Application Menu
Application Menu The ‘Application Menu’ is where the terminal sub menus are controlled from. until the ‘Application Menu’ is displayed: Press Select the required option. Or press to select the highlighted option. Totals/Reports The terminal can produce a number of reports to aid banking End of Day Banking Reconciliation report with the acquirers X Balance... -
Page 55: X-Totals / Z-Totals
Use the ▲▼ keys to Press to display the Application Menu. select the required report. Then press Select ‘Totals/Reports’. select the highlighted Or press to select option. highlighted option. Note: You will be asked to enter your ‘Supervisor Code’ to access the ‘Totals/Reports’... -
Page 56: Sample X / Z Reports
Sample X / Z Reports X - TOTALS X –Z Totals Report <Merchant Name> <Merchant Address1> <Merchant Address2> Merchant No. 6815414 Merchant ID Terminal ID. 32870069 Terminal ID ------------------------ <Acquirer Name> FOR RECEIPTS 0001- Report for receipt numbers 0001 - 0026 0026 Number and value of debit transactions (sales) 359.90DR... -
Page 57: Waiter Totals Printout
Waiter Totals Printout WAITER - TOTALS WAITER Totals Report <Merchant Name> <Merchant Address1> <Merchant Address2> Merchant No. 6815414 Merchant ID Terminal ID. 32870069 Terminal ID ------------------------ WAITER 00: SHARED Totals for Waiter ID 00 SHARED 59.90DR Number and value of debit transactions (sales) 10.00CR Number and value of credit transactions (Refunds) TOTAL... -
Page 58: End-Of-Day-Banking
End-of-Day-Banking Banking should be carried out at the end of each business day once the last customer has left the premises. This is to make checking credits and reconciliation with your bank statements easier. Please Note: To ensure that your statement totals balance, it is important that you carry out your ‘End-of-Day Banking’... -
Page 59: Banking Totals Agree Printout
Banking Totals Agree Printout BANKING TOTALS Banking Totals Agreed <Merchant Name> <Merchant Address1> <Merchant Address2> Merchant No. 6815414 Merchant ID Terminal ID. 32870069 Terminal ID <ACQUIRER NAME> Banking performed for specific acquirer TOTALS AGREED Notifications that terminal totals agree with totals ------------------------- recorded by the acquirer PREVIOUS TOTALS... -
Page 60: Banking Totals Not Agreed Printout
Banking Totals Not Agreed Printout BANKING TOTALS Banking Totals Not Agreed <Merchant Name> <Merchant Address1> <Merchant Address2> Merchant No. 6815414 Merchant ID Terminal ID. 32870069 Terminal ID <ACQUIRER NAME> Banking performed for specific acquirer TOTALS NOT AGREED Notifications that terminal totals do not agree with ------------------------- totals recorded by the acquirer PREVIOUS TOTALS... -
Page 61: Functions And Function Codes
Functions and Function Codes There may be occasions when you have further requirements of your terminal. These can be met using Function Codes. Function Codes other than the following should only be used on the advice of the Helpdesk. Entering Supervisor Code You will be asked on occasions to enter your ‘Supervisor Code’, the following screens will be displayed: Type in your... -
Page 62: Helpdesk Menu (Print Function Codes)
Helpdesk Menu (Print Function Codes) Access the ‘Helpdesk Menu’ as described above. Select the screen This screen will or press only be displayed select highlighted was pressed option. to print the systems codes. Press to print. Press to print Press to skip. -
Page 63: Function 40 Waiter Setup
Function 40 Waiter Setup A ‘Default Waiter ID’ exists to capture the gratuity amount from each transaction if ‘Gratuity’ is enabled on your terminal. However, you may wish to set up individual ‘Waiter IDs’ to record the amount of gratuity each waiter has accrued. The ‘Waiter Menu’... - Page 64 Delete Waiter Return to the ‘Waiter Press to confirm Setup Menu’ as waiter to be deleted or described above. press to return to the ‘Waiter Setup Select ‘Delete’ . Menu’. Type in ‘Waiter Code’ and then press Print Waiters Return to the ‘Waiter A list of waiters that Setup Menu’...
- Page 65 Change Name Return to the ‘Waiter Press to delete the Setup Menu’ as last character of the described above. name or press Select ‘Change Name’ . delete the entire name. Type in ‘Waiter Code’ of Type in the new name name to be changed as described previously and then press...
-
Page 66: Function 30 Set Date And Time
Create Defaults Return to the ‘Waiter The terminal will print Setup Menu’ as confirmation that ‘Waiter Defaults’ have described above. been created. Select ‘Create Defaults’. to ‘Create Press Defaults’. Press exit back to the ‘Waiter Setup Menu’ without creating the defaults. “Create Defaults”... -
Page 67: Supervisor Menu
Supervisor Menu If you know your ‘Supervisor Code’ but wish to change it; press until the ‘Application Menu’ is displayed. The following screens will be displayed: Select Type in new ‘Supervisor ‘Supervisor Menu’ to select it. Code’ and then press confirm. -
Page 68: Network Setup
Network Setup until the ‘Application Menu’ is displayed. Press Select ‘Network Select ‘Network Setup’ in the Manager’ and menu and then then press press Enter your ‘Supervisor Code’ and then press correct mistakes to enter ‘Setup Mode’ for the selected interface. Press Press to exit the function. - Page 69 Save Settings Select ‘Save The settings will be saved. settings’ on the screen to save the changes. Mode You may configure the terminal to use DHCP or Static IP addresses. The initial screen will display which mode you are in The terminal will Press display the...
- Page 70 Mask You may configure the Mask address. The initial screen will display which Mask address you are configured with. Select screen to Press select ‘Mask’ or confirm address press to select or clear the digits highlighted and re-enter new option. address.
- Page 71 DNS2 You may configure the DNS2 address. The initial screen will display which DNS2 address you are connected to. Select screen Press to select confirm address ‘DNS2’ or or clear the digits press and re-enter new select address. highlighted option. PING It is possible for the terminal to ping an IP address.
-
Page 72: Admin
ADMIN Merchant Info Display Press button. Press button Terminal will to continue or display ‘Terminal press button to ID’ and ‘GEMS print short report. Merchant ID’. Reset MAC Key Press button, Press to reset terminal will the MAC key or prompt for press ‘Supervisor... - Page 73 Terminal Information Press button Press to select and a ‘Sub Menu’ highlighted will be displayed. option or scroll to the required Press to exit option. function. Print Configuration Press to select Press button to print ‘EFT highlighted Configuration’, option. press to skip Press to exit...
- Page 74 Print Hardware Details Press to select Please wait highlighted whilst a short option. report is printed. Press to exit function. Print Applications Press to select Please wait highlighted whilst a short option. report is printed. Press to exit function. Display Press to select Type in...
- Page 75 Set Date/Time The terminal will Press if time is display the correct. current mode. Select the screen to open the window Press if date is Typing value will overwrite existing correct. value. To correct mistakes when entering data press to delete one character at a time or press delete all data entered.
-
Page 76: Recommendations
Recommendations Safety Powering down the Desk/3500 • Disconnect the Desk/3500 power supply block adapter from the electrical mains network Lithium cell • The Desk/3500 is fitted with an internal lithium cell which can only be accessed by a qualified technician Electrical power outlet The electrical power outlet must meet the following criteria: •... - Page 77 The power supply contains the following symbols: Double insulation symbol Marking for Class II product. Such product does not require a safety connection to electrical earth DC current output This marking indicates that your terminal is suitable for direct current (DC) only. It is completed by afferent values (voltage, and max current) AC current input This marking indicates that the product operates with an alternating current (AC)
-
Page 78: Security Of The Terminal
Security of the Terminal This device fulfils current applicable PCI PTS security requirements. Upon receipt of the terminal you should check for signs of tampering of the equipment. It is strongly advised that these checks are performed regularly after receipt. Check, for example: that the keypad is firmly in place and that there is no evidence of unusual wires that have been connected to any ports on the terminal or associated equipment. -
Page 79: Standards
Standards CE Mark The CE marking indicates Desk/3500 complies with the requirements of European Directive 1999/5/EC of 9 March 1999 on Radio and Telecommunications Terminal Equipment for: • The protection of the health and the safety of the user and any other person. -
Page 80: Troubleshooting
Troubleshooting The terminal does not turn on • Connect terminal to terminal power supply ensure that the supply has power. Cards are not read • Check that the magnetic card is swiped correctly (with magnetic strip facing the side of the terminal). •... -
Page 81: Notes
Notes: Page 81 Desk/3500 User Guide Copyright© 2021 Ingenico... - Page 82 Copyright © 2021 Ingenico (UK) Ltd. This User Guide relates to terminal software UT4.17.02 APACS 40. Whilst every effort has been made to ensure that the content of this document is accurate, Ingenico will not accept responsibility for any loss, damage or injury that may be incurred as a result of any errors or inaccuracies. The product is varied to suit requirements and as such some features may vary or be disabled.
Need help?
Do you have a question about the Ingenico Telium TETRA Desk/3500 and is the answer not in the manual?
Questions and answers