Table of Contents
Advertisement
Quick Links
Advertisement
Table of Contents

Related Manuals for TRENDnet TV-IP440PI


Summary of Contents for TRENDnet TV-IP440PI
- Page 2 Table of Contents TRENDnet User’s Guide Contents Live View Settings .......................... 2 5 Contents .................... i Maintenance ............................ 2 6 Product Overview .................. 3 Network .................... 27 Package Contents ........................3 ...
- Page 3 Table of Contents TRENDnet User’s Guide FTP Server ............................ 48 Schedule Tasks .......................... 5 2 Clear Config ............................ 5 3 PTZ (Pan/Tilt/Zoom) ................ 4 9 Restore Default Password .............. 54 Basic .............................. 49 ...
-
Page 4: Product Overview
Product Overview Features TRENDnet’s Indoor/Outdoor 2MP 1080p PoE+ IR PTZ Speed Dome Network Camera, model TV‐IP440PI, provides day and night surveillance with a night vision range of up to 100 meters (328 ft.) This speed dome network camera delivers year‐round surveillance with an IP66 weather rated housing to withstand harsh environments. A built‐in 20x optical zoom lens allows you to adjust the field of view to meet your installation needs. Record 1080p video (1920 x 1080) at 30 fps in a space saving H.264 compression format. Manage TRENDnet cameras with included complimentary software and mobile apps. ... -
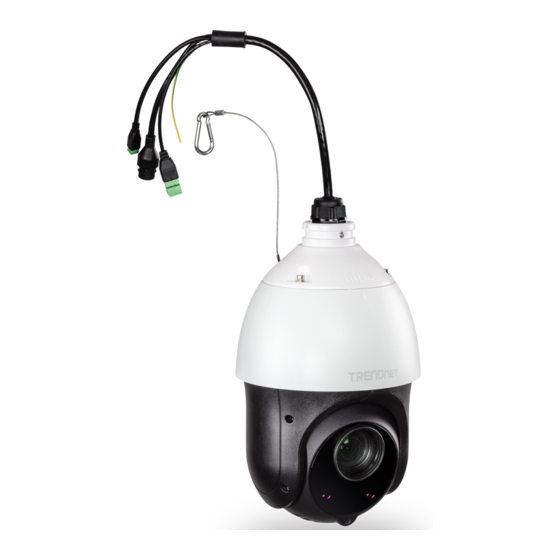
Page 5: Cables
TV‐IP440PI TRENDnet User’s Guide Advanced Playback Cables Advanced in‐camera archived video review functionality Motion Detection Audio Line in, line out, Create custom motion detection zones to record video and send email notifications and grounding wires when a zone is triggered. Tamper Detection Create custom tamper detection zones to send an email notification when the camera view has been obstructed. Line in/out for DC 12V Digital Wide Dynamic Range (D‐WDR) power Adjustable D‐WDR setting improves image quality and focusing when a camera is exposed to high contrast lighting environments by enhancing the dark areas of the image to make them more visible. Network cable Recording Flexibility connection ... -
Page 6: Cautions
TV‐IP440PI TRENDnet User’s Guide Cautions: Plan for Installation Make sure the power supply voltage is correct before using the camera. Do not drop the camera or subject to physical shock. Viewing angle Do not touch sensor modules with fingers. If cleaning is necessary, use a clean cloth with a bit of ethanol and wipe it gently. If the camera will not be used for an The camera has a wide viewing range that provides non‐distorted and detailed extended period of time, put on the lens cap to protect the sensor from dirt. images. Choose the location where has good angle to shoot the image you ... -
Page 7: Setup Camera With Cd
TV‐IP440PI TRENDnet User’s Guide Setup Camera with CD 3. Last, click Next to finish the installation 1. Insert the Installation CD‐ROM into your computer’s CD‐ROM drive to initiate the Auto‐Run program. Choose your preferred language and then click the Install Camera Utility. 4. This will also require you to install WinPcap program if you don’t have this installed before, please follow the on screen instruction to install it. ... - Page 8 TV‐IP440PI TRENDnet User’s Guide 5. Restart the computer after the installations. 7. Find the camera you would like to access and configure then double click on the IP address. 8. Continue to the next section Access your Camera with the Web Browser for detail 6. After computer is restarted, double click on the Camera Utility icon to launch the configurations of the camera. ...
-
Page 9: Access Camera Through The Web Browser
TV‐IP440PI TRENDnet User’s Guide Access Camera through the Web Browser 3. The camera management page will detect if you installed the camera video streaming plug‐in or not. Click the link to download the plug‐in from the camera. Logging‐in to the Camera for the First Time (Windows) 1. Find the camera from the Utility and double click on the IP address to open the browser. ... - Page 10 TV‐IP440PI TRENDnet User’s Guide 5. Permission request may show up depends on the Internet security settings on your 7. Click Finish to finish the installation. computer. Click Yes to install the plug‐ in. 8. Open the browser and login again. Enter the user name admin and new password again to start secured session. 6. Click Next to install the plug‐in. ...
-
Page 11: Logging‐In To The Camera For The First Time (Os X)
TV‐IP440PI TRENDnet User’s Guide 9. The Live View page will show up and begin streaming video. Logging‐in to the Camera for the First Time (OS X) 1. Open the web browser on your computer. In the address bar, enter the default IP address of the camera 192.168.10.30. If the camera is connected to a router/network, please use the Windows Camera Utility to find the exact IP address. 2. Activate the admin User Account by entering your desired password, and then click OK. ... - Page 12 TV‐IP440PI TRENDnet User’s Guide 3. The camera management page will detect if you installed the camera video streaming 5. Go to the Finder and navigate to the Download folder. Command‐Click the plug‐in or not. Click the link to download the plug‐in from the TV‐IP340PI camera. WebComponents.pkg and then click Open. (If you are install the plug‐in from the CD, just browse to /Mac folder and double click the WebComponents.pkg file.) 4. Quit your browser completely by command‐Click on the browser icon and then click Quit before installing the plug‐in. 6. Click Open to start installation. ...
- Page 13 TV‐IP440PI TRENDnet User’s Guide 7. Click Continue to install the plug‐in. 9. Use the default location and click Install. 10. Enter your password and click Install Software 8. Select a destination to install the plug‐in. Then click Continue. © Copyright 2017 TRENDnet. All Rights Reserved. 12 ...
- Page 14 TV‐IP440PI TRENDnet User’s Guide 11. Installation will process automatically. 13. Open the browser and login again with the default IP 192.168.10.30 or the IP that was dynamically assigned by your router. 14. Enter your user name and password, then click Login 12. Click Close to exit the installation. 15. Click Trust (You’ll have to do this again when your camera changes to a new IP ...
-
Page 15: Basic Settings 1
TV‐IP440PI TRENDnet User’s Guide Basic Settings The camera has two video streams: H.264 and MJPEG. Live View Video Stream Switch to view the different video streams by clicking this icon After you log‐in into the camera management page, you’ll see the Live View page. Click the position of the live video, the corresponding position will be moved to the center of the live feed. 3D Zoom Click and hold the mouse for a desire portion of the live image, then that position will be moved to the center of the live feed 2‐way Audio Click to enable 2‐way audio Double click the picture to view in full screen mode. Full Screen Mode Double click again or press escape key on your keyboard to exit full screen mode The status bar shows the status you are at, including ... -
Page 16: Presets
TV‐IP440PI TRENDnet User’s Guide Calling a Preset position Speed of pan/tile movement In the PTZ control panel, select a defined preset from the list and click to call the Presets Use the presets panel to move to previously saved preset. locations Presets Configure a Preset position A preset is a predefined image position. For the defined preset, you can click the Call button to quickly view the desired image position. 1. In the PTZ control panel, select a preset number from the preset list. The following presets are predefined with special commands. You can only call them but not configure them. For instance, preset 99 is “Start auto scan”. If you call preset 99, the speed dome starts auto scan function. Special Special Function ... -
Page 17: Patrols
TV‐IP440PI TRENDnet User’s Guide Patrols 42 Call pattern 2 103 Call patrol 6 A patrol is a memorized series of preset functions. It can be configured and called on the 43 Call pattern 3 104 Call patrol 7 patrol settings interface. There are up to 8 patrol available for customization. A patrol 44 Call pattern 4 105 Call patrol 8 can be configured with 32 presets. 45 One‐touch patrol Configure a Patrol route 92 Start to set limit stops 1. In the PTZ control panel, click ... -
Page 18: Pattern
TV‐IP440PI TRENDnet User’s Guide Delete all the presets in the selected patrol path 4. Click to save a preset into the patrol. 5. Repeat the steps from 3 to 5 to add more presets. 6. Click to save all the patrol settings. Pattern A pattern is a memorized series of pan, tilt, zoom, and preset functions. A pattern can Calling a Patrol route be called in the pattern settings interface. There are up to 4 patterns available for customization. In the PTZ control panel, select a defined patrol from and click to call the patrol. Configure a Pattern 1. In the PTZ control panel, click to enter the pattern settings interface. ... -
Page 19: Playback
TV‐IP440PI TRENDnet User’s Guide Playback 5. Click to save the pattern settings. You can playback the video recording on the network storage and download the video Buttons on the Patterns interface: clip and snapshots to your local computer. Buttons Description Start recording a pattern. Stop recording a pattern. Call the current pattern. Stop the current pattern. Delete the current pattern. These 4 patterns can be operated separately and with no priority level. When configuring and calling the pattern, proportional pan is valid; the limit stops and auto flip will be invalid; and the 3D positioning operation is not supported. ... - Page 20 TV‐IP440PI TRENDnet User’s Guide Search for video recordings Click this button to zoom out of the scale Click the date selection, and then choose a date for the date range of your recording. Click this button to specify a specific time of the day. Click Search to start searching. then click to confirm selection and then click X to close this dialog box. Play video Time line Use playback controls to play back the video recordings There is a playback head in the center of the time line represented by a yellow vertical line. To look for a specific video recording, move the time line by clicking and dragging it. Click this button to play the video If the recording is short, zoom in by clicking button. Click ...
- Page 21 TV‐IP440PI TRENDnet User’s Guide Take Images from a video playback Download sections of a video You can take snapshots from playback video or make new video clips from the video you To save complete video sections or snapshots, you can download the files directly. are playing back. Click this button to enable zoom. Then click and drag on the video to Click this button to download video sections define the area you want to zoom in. Click again to get back to 100% zoom. Double click to show video in full screen and press ESC on keyboard to exit full screen mode Click this button to disable zoom Click this button to take a snapshot of current playback Click this button to start clipping a video from playback Click this button to stop clipping a video from playback ...
- Page 22 TV‐IP440PI TRENDnet User’s Guide Download snapshots Log The log of the TV‐IP440PI will be saved on the network storage. You can search the snapshots Click this button to download relevant records and save to your local computer. Search for logs Select the type of event that triggered the snapshots. Choose the Start Time and End ...
-
Page 23: System
TV‐IP440PI TRENDnet User’s Guide System Advanced Settings System Information page shows the camera basic information. Click System then click System System Info to show the page. Device Settings Setup your camera name and location for easy identification. This camera name will also be recognized by other network camera software as the name of this camera. OSD, On Screen Display, the camera name is setting up here as well. Basic Information Device Name: User defined device name Firmware Version: Firmware Version MAC Address: MAC address of the camera System Time: Display the system time Network Information IP Address: IP address of the camera ... -
Page 24: User Accounts
TV‐IP440PI TRENDnet User’s Guide OSD, On Screen Display. The default is the camera’s User Accounts model name: You can setup up to 32 user accounts to access the camera’s video stream with a web browser or real time video stream (RTSP). Only one administrator account can be setup to configure the camera and cannot be deleted. Location: Label where you installed this camera Authentication RTSP: Camera’s video stream can be accessed with RTSP, Real Time Streaming Protocol. Only the administrator and users can view this video stream. Un‐checking this box will allow everyone access to this video stream without authentication. Default: checked. HTTP: Camera can be accessed via password protected web management interface. Un‐checking this box will allow anyone to access this camera and change its settings. Default: checked. Service Enable Telnet Camera embedded Telnet service for multiple camera ... -
Page 25: Time Settings
TV‐IP440PI TRENDnet User’s Guide Time Settings The accuracy of the system clock is important for scheduling and accurate logging. You Manual Time Sync. can synchronize the system time with your computer, or automatically check the time Device Time: The system time of this camera. accuracy with a network time server (NTP server). Set Time: Click the calendar icon and manually select the date. Check the Sync. with computer time to copy the time from your computer. Click Save to save the changes Daylight Savings Setup daylight settings for the camera. Automatic Update NTP Server: Specify a time server (NTP server) to synchronize with. (e.g. time.windows.com) Interval: The time interval that the camera will synchronize ... -
Page 26: Live View Settings 2
TV‐IP440PI TRENDnet User’s Guide Daylight Saving Live View Parameters Enable DST: Check this box if your time zone has daylight Live View Buffer: Configure the buffer size for live view video savings stream. With low buffer size setting, you can get real‐time video stream, but the video may be stop Start Time: Enter the Month and Date that daylight savings starts and go if the network is congested. With high buffer setting, you can have smooth video End Time: Enter the Month and Date that daylight savings streaming, but the video is delayed from the time ends happening. Medium size can have moderate video DST Bias: Enter how much time the daylight saving adjusted stream smoothness and time delay. by daylight savings Click Save to save the changes Record File Settings ... -
Page 27: Maintenance 2
Status: Shows the status in firmware upgrade. Click Save to save the changes * TRENDnet may periodically release firmware upgrades that might add features or fix problems associated with your TRENDnet model and version. To find out if there is a firmware upgrade available for your device, please check your TRENDnet model and version using the link. http://www.trendnet.com/downloads/ ... -
Page 28: Network
TV‐IP440PI TRENDnet User’s Guide Network Network interface MAC Address: Click this button to reboot this camera. TCP/IP Duplex and Speed: Choose one of the Ethernet duplex and speed to match your network. Default: auto. Setup your basic IPv4 and IPv6 network settings on this page. MTU: Maximum transmission unit. The maximum byte size Ethernet data field. Primary DNS: Enter your first IPv4 or IPv6 DNS server address Secondary DNS: Enter your second IPv4 or IPv6 DNS server address IPv4 DHCP: Check this box if the IP address is assigned by DHCP server. IPv4 Address: Load complete factory default to the camera. Subnet Mask: Network range of the subnet Default Gateway: The default route going further from camera IPv4 ... -
Page 29: Port 2
TV‐IP440PI TRENDnet User’s Guide Port disable the service by uncheck the box. The default port number is 554. You can change the service ports number of the camera or disable RTSP HTTPS Port: The secured web service port. You can change the or HTTPS services. port number, or you can disable the service by uncheck the box. The default port number is 443. Click Save to save the changes DDNS Dynamic Domain Name Service, DDNS, allows you to find your camera from the Internet with an easy to remember domain name. Port Numbers HTTP Port: The default web access port. You can change the port number. However, you cannot disable the web service. The default port number is 80. DDNS RTSP Port: The Real‐Time Streaming Protocol port for video ... -
Page 30: Pppoe 2
TV‐IP440PI TRENDnet User’s Guide Domain: Enter your registered domain name on selected SNMP DDNS service. SNMP Settings allows you to assign the contact details, location, community name and User Name: Enter the account name. trap settings for SNMP. This is a networking management protocol used to monitor network‐attached devices. SNMP allows messages (called protocol data units) to be sent Password: Enter the password. to various parts of a network. Upon receiving these messages, SNMP compatible devices Click Save to save the changes (called agents) return data stored in their Management Information Bases. ... - Page 31 TV‐IP440PI TRENDnet User’s Guide Authentication Password: Specify the authentication password between 8 to SNMP V1/V2 32 letters. Enable SNMPv1: Check this box to enable SNMP v1 management. Private‐key Algorithm: Choose the privacy key to encrypt SNMP messages: Enable SNMPv2c: Check this box to enable SNMP v2c management. DES or AES. Read SNMP Community: Specify the password for access the SNMP Private‐key Password: Specify the privacy key between 8 to 32 letters. community for read only access SNMP Other Settings Write SNMP Community: Specify the password for access to the SNMP community with read/write access SNMP Port: SNMP service port number. Trap Address: Specify the IP address for the SNMP trap Click Save to save the changes community ...
- Page 32 TV‐IP440PI TRENDnet User’s Guide EAPOL version: Extensible Authentication Protocol (EAP) over LAN Modify: To modify an entry on the list, highlight the entry by (EAPoL). Choose version 1 or 2. This version number clicking on it. Then, click the Modify button. must matches to your 802.1X service EAPOL version. Enter the IP address then click OK. User Name: Enter the account name. Password: Enter the password. Confirm: Enter the password again. Delete: To delete an entry on the list, highlight the entry by Click Save to save the changes clicking on it. Then, click Delete. Click Save to save the changes IP Address Filter ...
-
Page 33: Video
TV‐IP440PI TRENDnet User’s Guide External Port: Choose the port number for mapping. QoS Click Save to save the changes Video/Audio DSCP: Enter Video/Audio DSCP. Default: 0. Event/Alarm DSCP: Enter Event/Alarm DSCP. Default: 0. Video Management DSCP: Enter Management DSCP. Default: 0. Click Save to save the changes Video Format Adjust the format of video. UPnP Universal Plug‐and‐Play is a device discovery protocol set. It allows your camera to easily be found, for example, on a Windows operation system. Video Format UPnP Stream Type: Select Main Stream (Normal), Sub Stream or Third Steam (live ... - Page 34 TV‐IP440PI TRENDnet User’s Guide Resolution: H.264 H.264/MJPEG I Frame Interval An I Frame is a frame that records a complete picture. Frames between I frames, (P frame or B frame) only records the image differences between two frames. Choose the I Frame Interval here. The default is 60. Bitrate Type: Choose between variable bit rate or constant bit rate for Click Save to save the changes video compression. The default is variable rate. Audio Video Quality: Choose the video quality. The default is medium quality. Adjust the audio settings for the camera. Frame Rate: Choose the capturing frame rate. The default value is 30 ...
-
Page 35: Display Settings 3
TV‐IP440PI TRENDnet User’s Guide Display Settings Adjust video image quality, lightness, and color settings here. Display Settings Brightness: Use the slider or enter a number (0‐100) to adjust the image brightness. Default: 50 Contrast: Use the slider or enter a number (0‐100) to adjust the image contrast. Default: 50 Saturation: Use the slider or enter a number (0‐100) to adjust the color saturation. The greater number means the color will be more saturated. Default: 50 Limit Gain: Use the slider or enter a number (0‐100) to adjust the color shade. Default: 50 © Copyright 2017 TRENDnet. All Rights Reserved. 34 ... - Page 36 TV‐IP440PI TRENDnet User’s Guide Exposure Mode: Manual: Once selected, you can adjust the Iris and shutter speed from the extended options menu. Iris Auto: The iris and shutter values will be adjusted ...
- Page 37 TV‐IP440PI TRENDnet User’s Guide Smart IR D‐WDR: This Digital Wide Dynamic Range feature helps to Video Standard: This is the base frequency for the video refresh rate. improve the image quality under limited light source. Higher value brings brighter images. It is recommended to set to the same frequency of your local video standard (NTSC: 60, PAL: 50). Default: ...
- Page 38 TV‐IP440PI TRENDnet User’s Guide When IR Light Mode is set to manual and the IR Light Bright is 0, you can set The camera retains color balance automatically the day/night mode manually. according to the current color temperature. When IR Light Mode is set to manual and the IR Light Bright is not 0, night mode is set as the default mode. Manually setting the day/night mode is invalid. On Screen Display (OSD) Settings Digital Noise Reduction : Enable or disable noise reduction. Noise Reduction Level: Adjust the effect of digital You can display the camera name and the time the video is shooting on the screen. noise reduction. Range: 0‐100%, default : 100% Defog Mode Select defog mode ON for a foggy environment. The ...
-
Page 39: Text Overlay 3
TV‐IP440PI TRENDnet User’s Guide Text Overlay OSD Display Display extra information on the screen over the image. Display Name: Check this box to display the product name that was setup in the device settings (refer to page 25 to change the device name.) Display Date: Check this box to display system time. Display Week: Check this box to display time of the week. Time Format: Select 12 or 24 hours’ time format. Data Format: Select different date format. Display Mode: Select transparent/flashing format. OSD Size: Select different size format. (Auto, 16*16, 32*32, 48*48, 64*64) Click Save to save the changes Sub stream can be used for lower resolution needed application, for example mobile ... -
Page 40: Video Recording 3
TV‐IP440PI TRENDnet User’s Guide Video Recording Edit: Click Edit to edit the recording schedule. 1. Select day of the week you want to edit the schedule. 2. Select All Day or Customized schedule of the day. 3. Set the time period and the event you want to trigger the video recording continuous (always recording) or motion detection. 4. Click Copy to Week if you want the same ... -
Page 41: Events
TV‐IP440PI TRENDnet User’s Guide Events Motion Detection Set up how the motion detection event will be triggered and what actions will be triggered. Motion Detection Enable Motion Detection: Check this box to enable motion detection. Click Save to save the choice. Enable Motion Tracking: Check this box to enable motion tracking. Motion tracking is a dynamic display that shows the current status of motion detection. The motion tracking is displayed by a green grid. The grid area represents that the camera detects motion in this area. Click Save to save the choices. © Copyright 2017 TRENDnet. All Rights Reserved. 40 ... - Page 42 TV‐IP440PI TRENDnet User’s Guide Draw Area: Click Draw Area button to start drawing. Click and Arming Schedule drag on the area you want to set up the motion Edit: Click Edit to define when you want the motion detection. You can draw up to 8 different areas. detection works. Click Stop Drawing to stop drawing motion detection areas. The red grids represent the detection area. Sensitivity: Move the slider to adjust detection sensitivity. Clear All: Click this button to clear all the set up areas. 1. Select day of the week you want to edit the schedule. 2. Set the time period you want to enable ...
-
Page 43: Video Tamper 4
TV‐IP440PI TRENDnet User’s Guide Upload Snapshot: Check this box to send snapshots to an FTP server or Tamper‐proof configured Network Storage when motion is Enable Tamper Detection: Check this box to enable tamper detection. Click Save detected. Go to Network Storage or FTP to setup to save the settings. server information Draw Area: Click Draw Area button to start drawing. Click and Network Storage Check this box to send video clip to network storage drag on the area you want to set up the tamper ... - Page 44 TV‐IP440PI TRENDnet User’s Guide 1. Select the day of the week you want to edit the schedule. 2. Set the time period you want to enable tamper detection. (Default is 0‐24 hours, all day). 3. Click Copy to Week if you want the same daily schedule every day. Or, you can select other day of the week and click Copy to copy ...
-
Page 45: Exception 4
TV‐IP440PI TRENDnet User’s Guide Exception Snapshot Provides notifications for other system events, set up your notifications here. You can set up your camera to continuously take snapshots or take snapshots when an event happens. Notification Exception Type: First choose the exception type, then choose the corresponding action. Send Email: Check this box to send an e‐mail notification when motion is detected. Go to Events / Email to setup Continuous email account information. Enable: Check this box to continuously take snapshots. Click Save to save the changes Format: Save snapshots in JPEG format Resolution: Uses the same resolution set in Video Format for the ... -
Page 46: Email 4
TV‐IP440PI TRENDnet User’s Guide Click Save to save the changes Email Set up email accounts for notifications. Event Triggered Enable: Check this box to take snapshots when an event is occurred. Format: Save snapshots in JPEG format Resolution: Uses the same resolution set in Video Format for the snapshot resolution. Quality: Choose a compression quality for snapshot. Interval: State the time interval between this series of snapshots. The default interval is 1 second. Capture Number: State how many snapshots you want to take in a ... -
Page 47: Storage
TV‐IP440PI TRENDnet User’s Guide SMTP Server: Simple Mail Transportation Protocol Server Storage address, the outgoing email server address. Please ask your email service provider for details. Storage Management SMTP Port: Service port number for outgoing email.* * Micro SD card or Network storage device must be setup / formatted before it can be Check this box if your service provider requires a managed / stored. Camera will save to SD card only when there is no additional NAS Enable SSL: SSL secured connection. device setup. Attach Image/Interval: Check Attach Image if you want to send a snapshot image with the email notification and select the interval of snapshots in seconds. Authentication: Check this box if your server requires a password in order to send email. Most email servers require authentication when sending an email. User name: Enter the user name of outgoing email account Password: ... -
Page 48: Network Storage 4
TV‐IP440PI TRENDnet User’s Guide first one is full. Click on the entry to change the settings and click Save to save the settings. Network Storage * Network Storage must be setup before it can be managed. For storage management, please refer to the next section. The camera supports two formats of network storage file systems: NFS and SMB/CIFS. NFS, Network File System, is natively supported by Linux computers and most NAS, Network Attached Storage. SMB/CIFS, Common Internet File System, is natively ... -
Page 49: Ftp Server
TV‐IP440PI TRENDnet User’s Guide File System: Choose between NFS or CIFS for file system. If you FTP Server assign the network storage on a Windows® computer, set it to SMB/CIFS. (if you use an anonymous account, please still enter a random user ID and password before saving) User Name: Enter the user name if the network storage requires authentication. Leave it blank if no authentication is required. Password: Enter the password to access the network storage. Tip: To create network storage on your Windows® based system, create a shared folder and then test your set up with another computer. Enter the IP ... -
Page 50: Ptz (Pan/Tilt/Zoom) 4
TV‐IP440PI TRENDnet User’s Guide Save in root directory: You can choose to store all PTZ (Pan/Tilt/Zoom) files in the same folder of FTP login. Save in directory: Structure your folders with Basic camera name or IP address. Directory: Use Camera Name: Use the camera name to organize the saved files. Use Camera IP: Use the camera IP address to organize the saved files. Click Save to save the changes Basic Parameters Enable Proportional Pan: If you enable this function, the pan/tilt speeds change according to the amount of zoom. Preset Speed: You can set the speed of defined preset from 1 to 8. Keyboard Control Speed: Define the speed of PTZ control by a keyboard as Low, Normal or High. © Copyright 2017 TRENDnet. All Rights Reserved. ... -
Page 51: Limit
TV‐IP440PI TRENDnet User’s Guide Auto Scan Speed: The camera provides 5 scan modes: auto scan, tilt Limit scan, frame scan, random scan and panorama scan. The camera can be programmed to move within the configured stops. (left, right, up or down) The scan speed can be set from level 1 to 40. Max. Tilt‐angle: The maximum angle that the camera can revolve in the tilt direction is adjustable. The values range from (0‐90) to (‐5‐90) Auto Flip: You can enable/disable the auto flip function PTZ OSD Zoom Status: Set the OSD duration of zooming status as 2 seconds to 10 seconds, always on or off. PT Status: Set the angle display duration white panning and tilting as 2 seconds to 10 seconds, always on or off. Preset Status: Set the preset name display duration as 2 seconds to 10 seconds, always on or off. POWER OFF MEMORY Set Resume Time Point: ... -
Page 52: Initial Position
TV‐IP440PI TRENDnet User’s Guide Initial Position Park Action Set the camera initial position, you can also call a preset for the position. Click Set to The feature allows the camera to start at a predefined park action. (scan, preset, pattern) automatically after a period of inactivity (park time). save the position and Clear to clear the position. Scheduled Tasks function has higher priority over Park Action function therefore when two functions are set at the same time, Scheduled Tasks function takes effect. ... -
Page 53: Private Mask
TV‐IP440PI TRENDnet User’s Guide Private Mask Schedule Tasks Create masking area to keep your privacy. You can create up to four independent You can configure the camera to perform a certain action automatically in a user‐ masking areas by clicking and dragging on the screen. defined time period. Private Mask Enable the Scheduled Task, define the Park Time and Edit the Tasks that you would like Enable Privacy Mask: Check this box to enable privacy masking. to perform at certain time. Draw Area: Click this button to start drawing. Stop Drawing: Click this button to stop drawing. Clear All: Click this button to clear all the masking areas. Add: Click this button to add the mask. Delete: Click this button to delete the mask. Click Save to save the changes © Copyright 2017 TRENDnet. All Rights Reserved. ... - Page 54 TV‐IP440PI TRENDnet User’s Guide Clear Config You can clear PTZ configurations all at once in this section, select the desire function and click Save to clear. 1. Choose the day you would like to set the task schedule 2. Click All Day or Customize to enter the Start Time and End Time for each task. 3. Choose the task type from the drop down list. 4. Click OK to save the settings. Note: The time for each task cannot be overlapped, up to 10 tasks can be configured for each day. ...
-
Page 55: Restore Default Password
TV‐IP440PI TRENDnet User’s Guide Restore Default Password For security purpose, if you find yourself in need of restoring the camera to factory default setting, you will need to contact technical support. Toll Free English Technical Support USA/Canada: 855‐373‐4741 Monday – Friday (Except holidays) 7:00 AM – 5:30 PM Pacific Standard Time After hours: 866‐845‐6373 Global Support: Find the support number for your country at: www.trendnet.com/contat Online Support: www.trendnet.com/support/helpdesk © Copyright 2017 TRENDnet. All Rights Reserved. ... -
Page 56: Troubleshooting
TV‐IP440PI TRENDnet User’s Guide 4. White vertical lines appear on the image from the camera Troubleshooting It could be that the CMOS sensor (a square panel situated behind the lens that measures the light signals and changes it into a digital format so your computer 1. The camera is not work properly with standard 802.3af POE can present it into an image that you are familiar with) has become overloaded when it has been exposed to bright lights such as direct exposure to sunlight or This camera is an 802.3at PoE+ compatible appliance. If powered by an 802.3af halogen lights. Reposition the Network Camera into a more shaded area power sourcing equipment, it will not draw enough power for camera’s IR LEDs. immediately as prolonged exposure to bright lights will damage the CMOS ... - Page 57 TV‐IP440PI TRENDnet User’s Guide Federal Communication Commission Interference Statement Europe – EU Declaration of Conformity This equipment has been tested and found to comply with the limits for a Class B digital device, TRENDnet hereby declare that the product is in compliance with the essential requirements pursuant to Part 15 of the FCC Rules. These limits are designed to provide reasonable and other relevant provisions under our sole responsibility. protection against harmful interference in a residential installation. This equipment generates, uses and can radiate radio frequency energy and, if not installed and used in accordance with EMC the instructions, may cause harmful interference to radio communications. However, there is EN 60950‐1: 2006 + A11: 2010 + A12: 2011 + A2: 2013 no guarantee that interference will not occur in a particular installation. If this equipment does ...
- Page 58 Dansk [Danish] Undertegnede TRENDnet erklærer herved, at følgende udstyr TV‐ Magyar Alulírott, TRENDnet nyilatkozom, hogy a TV‐IP440PI megfelel a IP440PI overholder de væsentlige krav og øvrige relevante krav i [Hungarian] vonatkozó alapvetõ követelményeknek és az 2004/108/EK. direktiv 2004/108/EF. Polski [Polish] Niniejszym TRENDnet oświadcza, że TV‐IP440PI jest zgodny z Deutsch Hiermit erklärt TRENDnet, dass sich das Gerät TV‐IP440PI in zasadniczymi wymogami oraz pozostałymi stosownymi [German] Übereinstimmung mit den grundlegenden Anforderungen und den postanowieniami Dyrektywy 2004/108/WE. übrigen einschlägigen Bestimmungen der Richtlinie 2004/108/EG. Português TRENDnet declara que este TV‐IP440PI está conforme com os Eesti [Estonian] Käesolevaga kinnitab TRENDnet seadme TV‐IP440PI vastavust [Portuguese] requisitos essenciais e outras disposições da Directiva direktiivi 2004/108/EÜ põhinõuetele ja nimetatud direktiivist 2004/108/CE. tulenevatele teistele asjakohastele sätetele. Slovensko TRENDnet izjavlja, da je ta TV‐IP440PI v skladu z bistvenimi English Hereby, TRENDnet, declares that this TV‐IP440PI is in compliance [Slovenian] zahtevami in ostalimi relevantnimi določili direktive 2004/108/ES. with the essential requirements and other relevant provisions of Slovensky TRENDnettýmtovyhlasuje, že TV‐IP440PI spĺňazákladnépožiadavky Directive 2004/108/. [Slovak] a všetkypríslušnéustanoveniaSmernice 2004/108/ES. Español Por medio de la presente TRENDnet declara que el TV‐IP440PI ...
- Page 59 INSTALLATION, MAINTENANCE, USE, PERFORMANCE, FAILURE, OR INTERRUPTION OF THE Replacement products may be new or reconditioned. TRENDnet does not issue refunds or credit. POSSIBILITY OF SUCH DAMAGES, AND LIMITS ITS LIABILITY TO REPAIR, REPLACEMENT, OR REFUND Please contact the point‐of‐purchase for their return policies. OF THE PURCHASE PRICE PAID, AT TRENDNET’S OPTION. THIS DISCLAIMER OF LIABILITY FOR TRENDnet shall not be responsible for any software, firmware, information, or memory data of DAMAGES WILL NOT BE AFFECTED IF ANY REMEDY PROVIDED HEREIN SHALL FAIL OF ITS ESSENTIAL customer contained in, stored on, or integrated with any products returned to TRENDnet pursuant PURPOSE. to any warranty. ...
- Page 60 ...
Need help?
Do you have a question about the TV-IP440PI and is the answer not in the manual?
Questions and answers