
Related Manuals for Schacht Wolf Pup 8.10


Summary of Contents for Schacht Wolf Pup 8.10
- Page 1 WOLF PUP 8.10 ssembly nstructIons Find out more at schachtspindle.com Schacht Spindle Company 6101 Ben Place Boulder, CO 80301 p. 303.442.3212 f. 303.447.9273 Copyright © 2017 Schacht Spindle Co., Inc. 09.17...
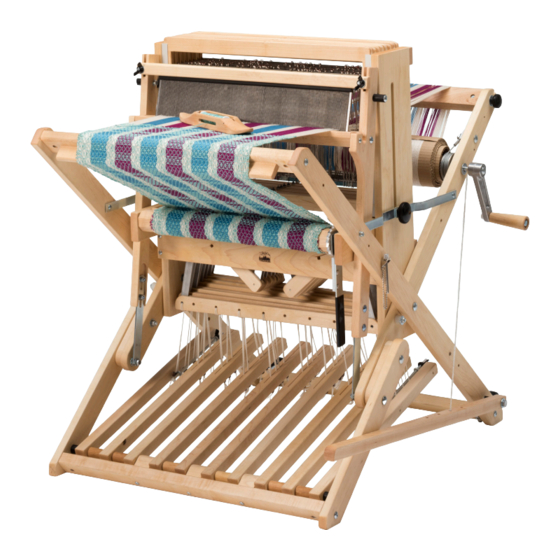
- Page 2 WOLF PUP 8.10 ssembly nstructIons shafts slide lock (visible from rear) rear beam reed castle side beater top beam knob beater side upper right inside leg left outside leg warp beam front beam warp beam crank handle front beam extension...
- Page 3 PARTS CHECK LIST Hardware Bag 1: 4 – 1-1/2” machine screws Accessory pack: 4 – lock nuts 1 – brass reed hook 1 – warp beam crank handle Hardware Bag 2: 8 – 29" apron cords 1 – 3 /8" cap nut for crank handle 2 –...
- Page 4 INSTALL THE BEATER PEGS beater upright Loosen the wing nuts holding the top of the beater, and remove the beater top. washer Remove the reed from the beater. Install 1/4-20 x 2” screw through 1” black spacer and beater outer side. Use #12 washer and 1”...
- Page 5 INSTALLING THE HEDDLES rubber hex nut shaft O-ring Remove the shafts from the loom by frame jack removing the rubber rings and unscrew- ing the small hex nuts from the jack pins. Pull a shaft straight up and out of the loom.
- Page 6 There are 2 treadle styles on the 8.10. The 2 outer treadles are different from the 8 inner treadles between them. The 2 outer treadles have a bolt-and-thumb nut tie-up system. To attach tie-up cords to these treadles, remove the thumb nut and back the long bolt out of the first eye screw securing it to the treadle, loop the end of the tie-up cord over the bolt, slide...
- Page 7 INSTALL THE TREADLE TRACKER. slot With the clip on the treadle tracker facing the front of the loom, insert the treadle tracker into the slot in the top of the rear castle cross brace. TREADLE TRACKER INSTALLATION (LOOKING DOWN AT CASTLE) BEATER PIN beater beater...
- Page 8 FRICTION BRAKE ADJUSTMENT The friction brake can be adjusted by tightening or loosening the eyebolt. This will increase or decrease the tension on eyebolt the spring, which will in turn increase or decrease the tension on the brake bar and the brake cable.
Need help?
Do you have a question about the Wolf Pup 8.10 and is the answer not in the manual?
Questions and answers