Advertisement
Quick Links
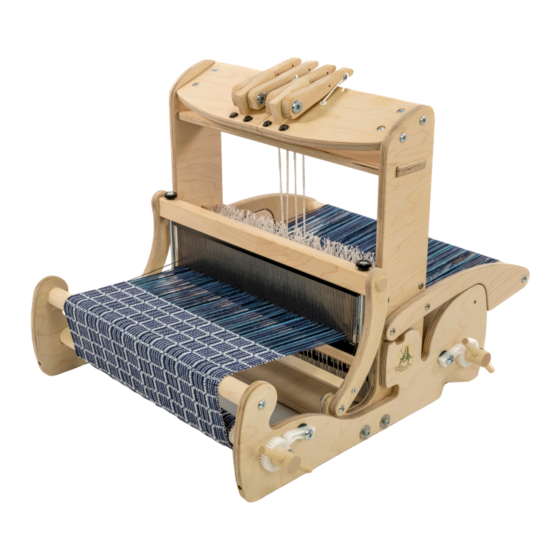
CRICKET QUARTET
A
ssembly
Watch the assembly video
on Schacht's YouTube
channel.
Find out more at schachtspindle.com
Schacht Spindle Company 6101 Ben Place Boulder, CO 80301
303.442.3212
© 2022 Schacht Spindle Company, Inc.
SL2045-05
SL2045-08
SL2045-10
TM
Register your
product here!
SL2045-12
SL2045-15
09.22
Advertisement

Subscribe to Our Youtube Channel
Related Manuals for Schacht CRICKET QUARTET SL2045-05


Summary of Contents for Schacht CRICKET QUARTET SL2045-05
- Page 1 SL2045-08 SL2045-15 SL2045-10 CRICKET QUARTET ssembly Watch the assembly video on Schacht’s YouTube Register your channel. product here! Find out more at schachtspindle.com Schacht Spindle Company 6101 Ben Place Boulder, CO 80301 303.442.3212 © 2022 Schacht Spindle Company, Inc. 09.22...
-
Page 2: Tools Required
10-24 barrel nuts paper clip or safety pin (optional) 10-24 x 2" Phillips truss head machine screws Watch the assembly video on Schacht’s YouTube ASSEMBLY channel. SET OUT THE PARTS Identify all the hardware, measuring the shafts of bolts and screws to determine their size. - Page 3 castle sides lever brace pulley brace beam extensions cross brace shaft, fixed side and heddle bars shaft free side rear shaft guides front shaft guides beater top (seen from the back) left beater bottom right beater beater side side beater brace FIGURE 2: QUARTET PARTS –...
- Page 4 ASSEMBLE THE CASTLE FRONT REAR Lay the castle sides flat on a work surface so that they mirror each other. The taller straight edges will sit at the back of the loom; the shorter curved edges will sit at the front (Figure 3). Place a front shaft guide on the inner front shaft rear shaft...
- Page 5 Orient the beam extensions on the outer sides of the castle, with their widest edges at the back of the loom (Figure 6). Insert #8 x 1-1/4" Phillips pan head sheet metal screws into each hole in the beam extensions, then attach to the castle side and the shaft guides through the lower holes of the shaft guides.
- Page 6 ASSEMBLE THE SHAFTS Each shaft has a fixed side with heddle loop to cut bars installed and a free side with a dimple on the outer edge and two larger holes on the inner side (see Figure 8B). You’ll install 75 heddles on each shaft, then attach the free side and a lever cord.
- Page 7 Install a lever cord on the upper heddle rod of each shaft: Wrap one end of lever cord the cord around the heddle rod. Find the first complete hole in this end of the cord, then run the other end through it (Figure heddle rod 9).
- Page 8 CONNECT THE SHAFTS & LEVERS shaft Feed the lever cord for shaft 1 through the slot closest to the front of the pulley brace, up and over the pulley in the middle, under the pulley to the right, and up through the slot (Figure 11A).
- Page 9 shaft FIGURE 12: CONNECTING LEVER CORDS TO LEVERS If your Cricket does not sit on a INSTALL THE QUARTET ON THE Cricket Stand, remove the barrel nuts and CRICKET machine screws that attach the Cricket If your Cricket sits on a Cricket Stand, cross brace;...
- Page 10 Set the Quartet castle inside the loom, cross brace (Figure 14). Make sure the with its front at the front of the Cricket holes of the barrel nuts are perpendicular and the beam extensions resting on the to the short edges of the cross brace. Cricket sides.
- Page 11 its groove. Insert two 5-1/2" hex bolts INSTALL THE PIVOT BEATER through the underside of the beater Before you assemble the pivot beater, bottom, then through the beater top. refer to the cover photo and Figure 18B Secure the hex bolts, beater top, and so you understand how it fits together.
- Page 12 Set the pivot beater on the castle sides CONVERTING BACK TO RIGID as shown in Figure 19, with the bumpers HEDDLE WEAVING at the back of the beater. Align the holes Repeat steps 21 through 28 in reverse in the beater sides with the holes in the order—do not remove the pivot beater.
Need help?
Do you have a question about the CRICKET QUARTET SL2045-05 and is the answer not in the manual?
Questions and answers