Table of Contents
Advertisement
Quick Links
Advertisement
Table of Contents

Related Manuals for Arbor Technology Em104P-i2904


Summary of Contents for Arbor Technology Em104P-i2904
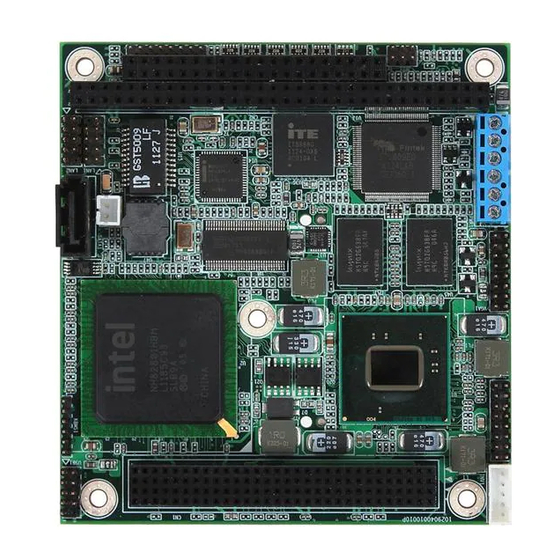
- Page 1 Em104P-i2904 PC/104-Plus CPU Module User’s Manual Version 1.0 2012.11...
- Page 2 This page is intentionally left blank.
- Page 3 Index Table of Contents Chapter 1 - Introduction ............1 1.1 Copyright Notice ............2 1.2 Declaration of Conformity .........2 1.3 About This User’s Manual .........4 1.4 Warning ..............4 1.5 Replacing the Lithium Battery ........4 1.6 Technical Support ............4 1.7 Warranty ..............5 1.8 Packing List..............6 1.9 Ordering Information ..........6 1.10 Specifications ............7...
- Page 4 Index 3.6 Security..............34 3.7 Save & Exit ...............35 Chapter 4 - Appendix .............37 4.1 I/O Port Address Map ..........38 4.2 Memory Address Map ..........38 4.3 Interrupt Request Lines (IRQ) .........39 4.4 DMA Map ..............39 - ii -...
-
Page 5: Chapter 1 - Introduction
Introduction Chapter 1 Introduction Chapter 1 - Introduction - 1 -... -
Page 6: Copyright Notice
Introduction 1.1 Copyright Notice All Rights Reserved. The information in this document is subject to change without prior notice in order to improve the reliability, design and function. It does not represent a commitment on the part of the manufacturer. Under no circumstances will the manufacturer be liable for any direct, indirect, special, incidental, or consequential damages arising from the use or inability to use the product or documentation, even if advised of the possibility of such... - Page 7 RoHS ARBOR Technology Corp. certifies that all components in its products are in compliance and conform to the European Union’s Restriction of Use of Haz- ardous Substances in Electrical and Electronic Equipment (RoHS) Directive 2002/95/EC.
-
Page 8: About This User's Manual
Introduction 1.3 About This User’s Manual This user’s manual provides general information and installation instructions about the product. This User’s Manual is intended for experienced users and integrators with hardware knowledge of personal computers. If you are not sure about any description in this booklet. please consult your vendor before further handling. -
Page 9: Warranty
Introduction 1.7 Warranty This product is warranted to be in good working order for a period of two years from the date of purchase. Should this product fail to be in good working order at any time during this period, we will, at our option, replace or repair it at no additional charge except as set forth in the following terms. -
Page 10: Packing List
1.8 Packing List Before you begin installing your single board, please make sure that the following materials have been shipped: 1 x Em104P-i2904-N4 1 x Driver CD 1 x Quick Installation Guide If any of the above items is damaged or missing, contact your vendor immediately. -
Page 11: Specifications
Introduction 1.10 Specifications Form Factor PC/104-Plus CPU module Soldered onboard Intel® Atom™ N455 1.6GHz Processor processor Chipset Intel® ICH8M BIOS AMI PnP Flash BIOS System Memory Soldered onboard DDR3 1GB SDRAM Integrated Intel® Graphics Media Accelerator 3150 VGA/ LCD Controller Analog RGB supports resolution up to 2048 x 1536 LCD: Single channel 18-bit LVDS Ethernet... -
Page 12: Board Dimensions
Introduction 1.11 Board Dimensions 82.55 50.72 21.6 8.89 5.08 85.09 Ø Unit: mm - 8 -... -
Page 13: Chapter 2 - Installation
Installation Chapter 2 Installation Chapter 2 - Installation - 9 -... -
Page 14: Block Diagrams
Installation 2.1 Block Diagrams CPU Atom N455 VGA & LVDS DDR3 1G Onboard 18bit PINEVIEW DMI * 4 8Mbit SPI ROM SATA Conn. SATA PC104 PLUS CF Card USB Port USB 2.0 Intel ICH8M ITE8888 CF Card PC104 PCIE Intel 82583V CF Card LAN (PH) CF Card... -
Page 15: Jumpers And Connectors
Installation 2.2 Jumpers and Connectors USB1 CN1 (PC/104) CN3 (PCI/104) INV1 KBMS1 LVDS1 VGA1 SATA1 PWR1 LAN1 LAN2 JRS1 FPT1 - 11 -... - Page 16 Installation Connectors Quick Reference Label Function PC/104 Connector PCI/104 Connector USB1 USB 0, 1 Connector SATA1 Serial ATA Connector VGA1 Analog RGB Display Connector KBMS1 PS/2 interface Keyboard and Mouse Connector JRS1 COM1,COM2 FPT1 Reset/Power LED/HDD LED/Speaker INV1 Inverter Power Output PWR1 12V/5V Power Input LVDS1...
- Page 17 Installation KBMS1: Keyboard & Mouse Connector (4) Connector type: 2.0mm pitch 1x6-pin header Description KB_DATA MS_DATA KB_CLK PS2_VCC MS_CLK SATA1: Serial ATA Connector (5) High speed transfer rates (300MB/s). Description PWR1: 12V/5V Power Input (10) Connector type: 1x6-pin terminal Pin Description VCC 12V VCC 12V VCC 5V...
- Page 18 Installation JRS1: COM1, 2 (9) Pin 1, 3, 5: COM1 PIn 2, 4, 6: COM2 Connector type: 2.00mm pitch 2x3-pin dip Desc. Pin Desc. RXD1 RXD2 TXD1 TXD2 FPT1: Reset/Power LED/HDD LED/Speaker (8) Connector type: 2.00mm pitch 1x8-pin header Description RESET PWR LED+ HDD LED+...
- Page 19 Installation VGA1: Analog RGB Output Connector (11) Connector type: 2.00mm pitch 2x8-pin header Pin Description Pin Description 1 CRT_RED CRT_GREEN 3 CRT_BLUE 5 GND 7 GND 9 CRT_VCC5 10 CRT_EN 11 N/C (key) 12 CRT_DDCDATA 13 CRT_HSYNC 14 CRT_VSYNC 15 DDC_CLK 16 N/C LVDS1: LVDS LCD Panel Connector (12) Supports single channel 18-bit LVDS...
-
Page 20: The Installation Paths Of Cd Driver
Installation 2.3 The Installation Paths of CD Driver Windows XP Driver Path CHIPSET \Em104P-i2904\CHIPSET\INF9.2.0.1009 \Em104P-i2904\GRAPHICS\WIN_XP_GMA3150 \Em104P-i2904\ETHERNET\WIN_allos_Ver16.3 \Em104P-i2904\ISA\ITE8888 Windows 7 Driver Path CHIPSET \Em104P-i2904\CHIPSET\INF9.2.0.1009 \Em104P-i2904\GRAPHICS\WIN_7_GMA3150_32 \Em104P-i2904\GRAPHICS\WIN_7_GMA3150_64 \Em104P-i2904\ETHERNET\WIN_allos_Ver16.3 \Em104P-i2904\ISA\ITE8888 - 16 -... -
Page 21: Chapter 3 - Bios
BIOS Chapter 3 BIOS Chapter 3 - BIOS - 17 -... -
Page 22: Bios Main Setup
BIOS 3.1 BIOS Main Setup The AMI BIOS provides a setup utility program for specifying the system configurations and settings which are stored in the BIOS ROM of the system. When you turn on the computer, the AMI BIOS is immediately activated. After you have entered the setup utility, use the left/right arrow keys to highlight a particular configuration screen from the top menu bar or use the down arrow key to access and configure the information below. -
Page 23: Advanced Settings
BIOS System Date Set the system date. Note that the ‘Day’ automatically changes when you set the date. Day : Sun to Sat The date format is: Month : 1 to 12 Date : 1 to 31 Year : 1999 to 2099 System Time Set the system time. -
Page 24: Cpu Configuration
BIOS CPU Configuration This section is used to configure the CPU. It will also display detected CPU information. IDE Configuration This section is used to configure the IDE drives. Super IO Configuration This section is used to configure the I/O functions supported by the onboard Super I/O chip. -
Page 25: Cpu Configuration
BIOS 3.2.1 CPU Configuration The CPU Configuration setup screen varies depending on the installed processor. Hyper Threading Technology This item is used to enable or disable the processor’s Hyper-threading feature. Enabled for Windows XP and Linux4 (OS optimized for Hyper-threading Technology) and disabled for other OS (OS not optimized for Hyper-threading Technology). -
Page 26: Ide Configuration
BIOS 3.2.2 IDE Configuration ATA/IDE Configuration The choice: Disabled; Compatible; Enhanced Legacy IDE Channels When ATA/IDE Configuration is set to Enhanced mode, you can select IDE or AHCI mode in this item. When select Compatible mode you can select SATA only / SATA pri, PATA sec. The choice: SATA Only;... -
Page 27: Super Io Configuration
BIOS 3.2.3 Super IO Configuration You can use this item to set up or change the Super IO configuration for serial ports. Serial Port1~2 Address Select an address for the serial port. Serial Port Mode The choice: Normal; IrDA(1.6us); IrDA(31/16bit) - 23 -... -
Page 28: Hardware Health Configuration
BIOS 3.2.4 Hardware Health Configuration H/W Health Function This item allows you to control H/W monitor display. - 24 -... -
Page 29: Ahci Configuration
BIOS 3.2.5 AHCI Configuration AHCI Port0 It shows the status of auto detection of IDE device. SATA Port0 Select the type of device connected to the system. The choice: Not Installed; Auto SMART Stands for self-monitoring Analysis and Reporting Technology. The choice: Enable;... -
Page 30: Usb Configuration
BIOS 3.2.6 USB Configuration Legacy USB Support Enabled option supports for legacy USB. Auto option disables legacy sup- port if no USB devices are connected. The choice: Enabled (Default); Auto; Disabled USB 2.0 Controller Mode Configures the USB 2.0 controller in High Speed (480Mbps) or Full Speed (12MBPS). -
Page 31: Chipset
BIOS 3.3 Chipset This submenu allows you to configure the specific features of the chipset installed on your system. The chipset manages bus speed and the access to system memory resources, such as DRAM. It also coordinates communications with the PCI bus. Notice: Beware of that inappropriate setting values in items of this menu may cause system malfunction. -
Page 32: North Bridge Configuration
BIOS 3.3.1 North Bridge Configuration Initiate Graphic Adapter This item allows you to select which graphics controller to use as the primary boot device. Internal Graphics Mode Select Select the amount of system memory used by the Internal graphics device. DVMT Mode Select Use the DVMT Mode Select option to select the Intel Dynamic Video Memory Technology (DVMT) operating mode. -
Page 33: South Bridge Configuration
BIOS 3.3.2 South Bridge Configuration USB Functions This item allows you to active USB ports. The choice: Disabled, 2 USB Ports, 4 USB Ports, 6 USB Ports, 8 USB Ports, 10 USB Ports USB 2.0 Controller Use the option to enable or disable the USB 2.0 controller. HDA Controller This item allows you to select the chipset family to support High Definition Audio Controller. -
Page 34: Pcipnp
BIOS 3.4 PCIPnP The PCIPnP screen provides advanced setting options for your PCI or PnP (plug and play) peripherals. Allocate IRQ to PCI VGA Yes: Assigns IRQ to PCI VGA card if card requests IRQ. No: Does not assign IRQ to PCI VGA card even if card requests an IRQ. [Available]: if an item is specified “Available”, the particular item can be used by PCI or PnP peripherals/devices [Reserved]: if an item is specified as “Reserved”, the particular item can only... -
Page 35: Boot Settings
BIOS 3.5 Boot Settings The Boot menu items allow you to change the system boot options. Hard Disk Drives 1st Drive Select the type of device connected to the system. The choice: SATA: SM-4GB Compact; Disabled - 31 -... -
Page 36: Boot Settings Configuration
BIOS 3.5.1 Boot Settings Configuration Quiet Boot Displays normal POST messages when it’s selected as “Disabled”. When it is set as “Enabled”, OEM messages will be displayed instead of POST messages. The default is “Disabled”. Bootup Num-Lock Modifies Number Lock setting when the system boots up. Select “On” to automatically enable the Number Lock on keyboard when the system is booting up. -
Page 37: Boot Device Priority
BIOS 3.5.2 Boot Device Priority Press Enter and it shows Bootable add-in devices. Items in this sub-menu specify the boot sequence from the available devices. - 33 -... -
Page 38: Security
BIOS 3.6 Security Change Supervisor Password This item allows you to install or change supervisor password. ENTER PASSWORD Type the password, up to eight characters in length, and press <Enter>. The password typed now will clear any previously entered password from CMOS memory. -
Page 39: Save & Exit
BIOS Additionally, when a password is enabled, you can also require the BIOS to request a password every time your system is rebooted. This would prevent unauthorized use of your computer. You can determine when the password is required within the BIOS Features Setup Menu and its Security option. -
Page 40: Discard Changes And Exit
BIOS Save Changes and Exit Pressing <Enter> on this item and it asks for confirmation: Save configuration changes and exit setup? Pressing <OK> stores the selection made in the menus in CMOS - a special section of memory that stays on after you turn your system off. The next time you boot your computer, the BIOS configures your system according to the Setup selections stored in CMOS. -
Page 41: Chapter 4 - Appendix
Appendix Chapter 4 Appendix Chapter 4 - Appendix - 37 -... -
Page 42: I/O Port Address Map
Appendix 4.1 I/O Port Address Map Each peripheral device in the system is assigned a set of I/O port addresses which also becomes the identity of the device. The following table lists the I/O port addresses used. Address Device Description 00000000-0000001F DMA Controller 0000020h-000002Dh... -
Page 43: Interrupt Request Lines (Irq)
Appendix 4.3 Interrupt Request Lines (IRQ) Peripheral devices use interrupt request lines to notify CPU for the service required. The following table shows the IRQ used by the devices on board. Level Function IRQ0 Interval timer IRQ1 Keyboard IRQ2 Interrupt from controller 2 (cascade) IRQ3 COM2 IRQ4...
Need help?
Do you have a question about the Em104P-i2904 and is the answer not in the manual?
Questions and answers