Table of Contents
Advertisement
Quick Links
Download this manual
See also:
Installation Manual
Advertisement
Table of Contents

Related Manuals for DFI BPC370-BW


Summary of Contents for DFI BPC370-BW
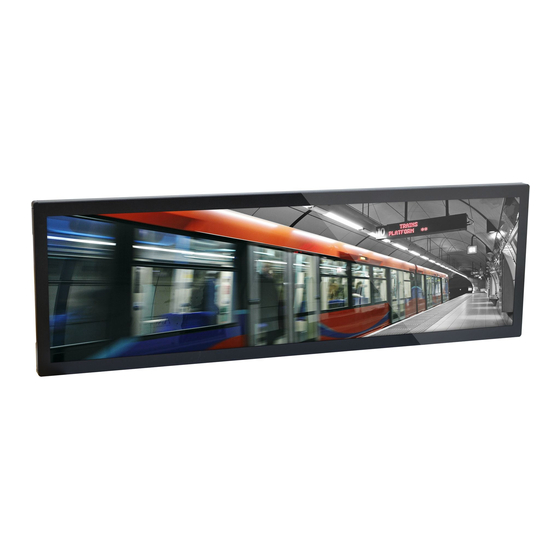
- Page 1 BPC370-BW TFT-LCD Bar Type Panel PC User’s Manual A47500743 Chapter 1 Introduction www.dfi.com...
-
Page 2: Copyright
Product names or trademarks appearing in this manual are for identification purpose only and Shielded interface cables must be used in order to comply with the emission limits. are the properties of the respective owners. Chapter 1 Introduction www.dfi.com... -
Page 3: Table Of Contents
Chapter 6 - Mounting Options ......27 Overview ...............6 Chapter 7 - BIOS Setup ........28 Key Features ..............6 Specifications ..............7 Main ......................29 Getting to Know the BPC370-BW ........8 Advanced ....................29 Security ...................... 37 Mechanical Dimensions ...........9 Boot......................38 Motherboard Dimension ..........10 This section configures boot options. -
Page 4: About This Manual
After installation or servicing, cover the system chassis before plugging the power cord. Battery: • Danger of explosion if battery incorrectly replaced. • Replace only with the same or equivalent type recommend by the manufacturer. • Dispose of used batteries according to local ordinance. Chapter 1 Introduction www.dfi.com... -
Page 5: Safety Precautions
• Unplug the power cord before removing the system chassis cover for installation or servic- ing. After installation or servicing, cover the system chassis before plugging the power cord. • One BPC370-BW Panel PC • 1 CD disk includes • Danger of explosion if battery incorrectly replaced. -
Page 6: Chapter 1 - Introduction
Chapter 1 Chapter 1 - Introduction Key Features Overview BPC370-BW Processor Intel ® Pentium ® /Celeron ® Processor N3000 Family, BGA 1170 ® ® Intel Pentium Processor N3710, Quad Core, 2M Cache, 1.6GHz (2.56GHz), 6W Two LAN ports Two RS-232/422/485 COM ports (DB-9) -
Page 7: Specifications
- Operating: -5 C ~ 50 - Storage: -10 C ~ 65 • Storage Humidity - 5% ~ 95% (non-condensing) Vibration • Non-operating: Sweep sine, 3Grms @ 10~500Hz, 30min Shock • Non-operating: Half-sine, 5G @ 11ms Chapter 1 Introduction www.dfi.com... -
Page 8: Getting To Know The Bpc370-Bw
Chapter 1 Getting to Know the BPC370-BW I/O Panel Power button Front View Antenna hole COM 1 COM 2 LAN 1/LAN 2 USB 3.0 DP++ Power Button with LED (green) Connects an M12 power plug. LAN Ports Connect the system to a local area network. -
Page 9: Mechanical Dimensions
Chapter 1 Mechanical Dimensions BPC370-BW Top View 948.10 905.9 Left View Right View Bottom View Chapter 1 Introduction www.dfi.com... -
Page 10: Motherboard Dimension
Motherboard Dimension 18.98 98.40 Chapter 1 Introduction www.dfi.com... -
Page 11: Chapter 2 - Getting Started
Make sure a 2.5” SATA drive is already installed. Refer to the following chapters for information on connecting a CD-ROM drive and install- ing an mSATA card. Refer to your operating system manual for instructions on installing the operating system. Chapter 2 Getting Started www.dfi.com... -
Page 12: Chapter 3 - Installing Devices
5. The Mini PCIe slots are on the front side and the SODIMM slot are on the rear side of the system board. Mini PCIe and mSATA Mounting screw Note: The system also has a half-size Mini PCIe slot that uses PCIe and USB signals. Chapter 3 Installing Devices www.dfi.com... -
Page 13: Chapter 4 - Jumper Settings
2. Set the jumper pins 2 and 3 to On. Wait for a few seconds and set the jumper pins back to its default setting, pins 1 and 2 On. 3. Now plug the power cord and power on the system. Chapter 4 Jumper Settings www.dfi.com... -
Page 14: Backlight Power Select
Before powering on the system, make sure that the power settings of JP8 match the power specification of backlight control. Selecting the incorrect voltage will seriously LCD panel’s specification. Selecting the incorrect voltage will seriously damage the damage the backlight. LCD panel. Chapter 4 Jumper Settings www.dfi.com... -
Page 15: Lvds Channel And Bpp Select
COM 3/COM 4 2 Off: JEIDA or VESA SATA 3.0 (18bpp) Chrontel CH7517 SATA 0 SATA Power DP++ System Fan Switch 1 allows you to select the LVDS channel and the color of bits per pixel. Chapter 4 Jumper Settings www.dfi.com... -
Page 16: Chapter 5 - Ports And Connectors
• 2 GbE (RJ-45) ports may fail to boot the system or cause damage to the system board. • 4 USB 3.0 ports • 1 VGA port • 1 DP++ port • 2 serial ports Chapter 5 Ports and Connectors www.dfi.com... -
Page 17: Graphics Interfaces
Configuration” submenu) of the BIOS. Driver Installation Driver Installation Install the graphics driver. Refer to Chapter 8 for more information. Install the LAN drivers. Refer to Chapter 8 for more information. Chapter 5 Ports and Connectors www.dfi.com... -
Page 18: Usb Ports
2 additional USB 2.0 ports (USB 4-5) for a variety of purposes. BIOS Setting Configure the onboard USB in the Advanced menu (“USB Configuration” submenu) of the BIOS. Refer to Chapter 7 for more information. Chapter 5 Ports and Connectors www.dfi.com... -
Page 19: Com (Serial) Ports
6 7 8 9 RI_2 BIOS Setting RS485 Configure the serial COM ports including the communication mode in the Advanced menu (“Super IO Configuration” submenu) of the BIOS. Refer to Chapter 7 for more information. Chapter 5 Ports and Connectors www.dfi.com... -
Page 20: I/O Connectors
2W+2W speaker. Driver Installation Pins Function Pins Function Install the audio driver. Refer to Chapter 8 for more information. DIO7 DIO6 DIO5 DIO4 DIO3 DIO2 DIO1 DIO0 Chapter 5 Ports and Connectors www.dfi.com... -
Page 21: Standby Power Led
On Suspend) state, it will blink every second. When the system is in the S3 (STR - Suspend To RAM) state, it will blink every 4 seconds. Pin Pin Assignment Pin Pin Assignment HDD_LED Reset Button RESET- HDD-LED Power Button SUS_LED PWR-BTN PWR-LED V_LED Chapter 5 Ports and Connectors www.dfi.com... -
Page 22: Sata (Serial Ata) Connector
SATA power connector and the other end to your storage device. BIOS Setting Configure the Serial ATA drive in the Advanced menu (“SATA Configuration” submenu) of the BIOS. Refer to Chapter 7 for more information. Chapter 5 Ports and Connectors www.dfi.com... -
Page 23: Lvds Lcd Panel Connector
Refer to the right side for the pin functions of these connectors. Panel Power Panel Power BIOS Setting Panel Power Panel Power Configure the LCD panel in the Advanced menu (“Video Configuration” sub- menu) of the BIOS. Please refer to Chapter 7 for more information. Chapter 5 Ports and Connectors www.dfi.com... -
Page 24: Expansion Slot
The mSATA port supports SATA III (6Gb/s) transmission rate and is used to connect an mSATA card. It is used for the system’s storage. SIM Slot (optional) The SIM slot on the system board is used to insert a SIM card. Chapter 5 Ports and Connectors www.dfi.com... -
Page 25: Smbus Connector
When the system’s power is off and a chassis intrusion to act as a master by initiating data transfer. occurred, the alarm will sound only when the system restarts. Chapter 5 Ports and Connectors www.dfi.com... -
Page 26: Battery
Safety Measures • Danger of explosion if battery incorrectly replaced. • Replace only with the same or equivalent type recommend by the manufacturer. • Dispose of used batteries according to local ordinance Chapter 5 Ports and Connectors www.dfi.com... -
Page 27: Chapter 6 - Mounting Options
The VESA-mount specifications for this device is 400 x 200 (mm). Please use a compatible VESA-mount kit that can sustain the weight and size of this device. Please refer to the following illustration for screw-hole positions. Chapter 6 Mounting Options www.dfi.com... -
Page 28: Chapter 7 - Bios Setup
When ““ appears on the left of a particular field, it indicates that a submenu which contains additional options are available for that field. To display the submenu, move the highlight to that field and press <Enter>. Chapter 3 BIOS Setup www.dfi.com Chapter 7 BIOS Setup... -
Page 29: Main
The time format is <hour>, <minute>, <second>. The time is based on the 24-hour military-time clock. For example, 1 p.m. is 13:00:00. Hour displays hours from 00 to 23. Minute displays minutes from 00 to 59. Second displays seconds from 00 to 59. Chapter 3 BIOS Setup www.dfi.com Chapter 7 BIOS Setup... - Page 30 TDP. Always Off The system is in soft-off state. Chapter 3 BIOS Setup www.dfi.com Chapter 7 BIOS Setup...
- Page 31 <PWM Mode> LCD Panel Type 800x480 800x600 1920x540 1366x768 1280x1024 1920x1080 Help ↑/↓ Select Item F5/F6 Change Values Setup Defaults Exit ←/→ Select Item Enter Select SubMenu Save and Exit Chapter 3 BIOS Setup www.dfi.com Chapter 7 BIOS Setup...
- Page 32 Select Item Enter Select SubMenu Save and Exit Audio Controller Set to enable or disable the onboard Azalia controller. Disabled Azalia will be unconditionally disabled. Enabled Azalia will be unconditionally enabled. Chapter 3 BIOS Setup www.dfi.com Chapter 7 BIOS Setup...
- Page 33 Interface). Serial ATA Port 0, and 1 Enable or disable the SATA port: SATA Port 0 controls SATA Port 0. SATA Port 1 controls the full-size Mini PCIe slot (mSATA). Chapter 3 BIOS Setup www.dfi.com Chapter 7 BIOS Setup...
- Page 34 Select the speed of the PCI Express Root Port: Gen 1 or Gen 2. Help ↑/↓ Select Item F5/F6 Change Values Setup Defaults Exit ←/→ Select Item Enter Select SubMenu Save and Exit Chapter 3 BIOS Setup www.dfi.com Chapter 7 BIOS Setup...
- Page 35 Configure the settings of each serial port. • Disable: Disable this serial port. • Enable: Enable this serial port. Type Choose RS232/RS422/RS485 (Peer-to-Peer) for the serial port type for COM port 1 and COM port 2. Chapter 3 BIOS Setup www.dfi.com Chapter 7 BIOS Setup...
- Page 36 AC power loss event. When set to Always on, the system’s status will be power-on after power restoration from an AC power loss event. Chapter 3 BIOS Setup www.dfi.com Chapter 7 BIOS Setup...
-
Page 37: Security
10 characters. Power-on Password If you select to set the supervisor password, this option will be shown. Enable or dis- able prompt for password at boot. Chapter 3 BIOS Setup www.dfi.com Chapter 7 BIOS Setup... -
Page 38: Boot
Enable or disable network stack in UEFI mode. This option will be shown only if the PXE Boot Capability is enabled. USB Boot Enable or disable the booting to USB boot devices. Chapter 3 BIOS Setup www.dfi.com Chapter 7 BIOS Setup... -
Page 39: Updating The Bios
Copyright(c) 2012 - 2016, Insyde Software Corp. All Rights Reserved. Initializing Current BIOS Model name: BPC370 New BIOS Model name: BPC370 Current BIOS version: 65.05A New BIOS version: 65.05A Updating Block at FFFFF000h 100% 100% C:\BPC370>_ Chapter 3 BIOS Setup www.dfi.com Chapter 7 BIOS Setup... -
Page 40: Chapter 8 - Supported Software
Chapter 8 Chapter 8 Chapter 8 - Supported Software Intel Chipset Software Installation Utility The system requires you to install drivers for some devices to operate properly. To download the latest driver, please go to the Intel Download Center: The Intel Chipset Software Installation Utility is used for updating Windows INF files so that ®... - Page 41 Chapter 8 Chapter 8 Intel Graphics Driver 3. Go through the readme document for system re- quirements and installation To install the driver, follow these steps: tips, and then click “Next”. Please wait while the instal- lation is in progress. 1.
-
Page 42: Audio Driver
Chapter 8 Chapter 8 Audio Driver 3. Go through the readme document for system re- quirements and installation To install the driver, follow these steps: tips, and then click “Next.” 1. Setup is now ready to install the audio driver. Click “Next.” 2. - Page 43 Chapter 8 Chapter 8 Intel LAN Driver 4. Click “Install” to begin the installation. To install the driver, follow these steps: 1. Setup is preparing to install the driver. Click “Next” to continue. 5. After the installation is complete, click “Finish.” 2.
- Page 44 Chapter 8 Chapter 8 Intel Trusted Execution Engine Driver 3. The step displays the installing status in the progress. To install this driver, follow these steps: 1. Setup is ready to install the driver. Click “Next” to continue. 4. After the installation is complete, click “Finish.”...
- Page 45 Chapter 8 Chapter 8 Intel USB 3.0 Driver (For Windows 8.1 and 7 only) 3. Go through the readme docu- ment for more installation tips, and then click “Next.” To install this driver, follow these steps: 1. Setup is ready to install the driver. Click “Next”...
- Page 46 Chapter 8 Chapter 8 Serial IO Driver (For Windows 8.1 and Windows 10) To install the driver, follow these steps: 4. Setup is ready to install the driver. 1. Setup is ready to install the driver. Click “Next” to continue. Click “Next”...
- Page 47 Chapter 8 Chapter 8 Kernel Mode Driver Framework (For Windows 7 only) 3. Click “Restart Now“ to restart your computer when the installation is complete. To install this update, follow these steps: 1. Click “Yes“ to install the update. 2. The update is being installed now. Chapter 8 Supported Software...
- Page 48 Chapter 8 Chapter 8 SparkLAN WPEA-121N Wireless Driver (optional) To install this driver, follow these steps: 1. Setup is preparing the installation. 2. Read the license agreement and Please wait. click “Yes” and follow the on- screen instructions for the rest of the installation process.
Need help?
Do you have a question about the BPC370-BW and is the answer not in the manual?
Questions and answers