Table of Contents
Advertisement
Quick Links
Advertisement
Table of Contents

Related Manuals for Compex CGX3224


Summary of Contents for Compex CGX3224
-
Page 2: Trademark Information
Novell Inc. All other brand and product names are trademarks or registered trademarks of their respective owners. Notice: Copyrights © 2004 by Compex, Inc. All rights reserved. Reproduction, adaptation, or translation without prior permission of Compex, Inc. is prohibited, except as allowed under the copyright laws. Manual Revision by Ong Manual Number: U-0355-V1.4C... -
Page 3: Fcc Notice
Declaration of Conformity Compex, Inc. declares the following: Product Name: Compex 24-port 10/100 Mbps Managed Switch with 2 Optional Modules Model No: CGX3224 conforms to the following Product Standards: This device complies with the Electromagnetic Compatibility Directive (89/336/EEC) issued by the Commission of the European Community. - Page 4 Therefore, this product is in conformity with the following regional standards: FCC Class A ⎯ following the provisions of FCC Part 15 directive; CE Mark ⎯ following the provisions of the EC directive. This Class A digital apparatus complies with Canadian ICES-003.
-
Page 5: Technical Support Information
The warranty information and registration form are found in the Quick Install Guide. For technical support, you may contact Compex or its subsidiaries. For your convenience, you may also seek technical assistance from the local distributor, or from the authorized dealer/reseller that you have purchased this product from. -
Page 6: About This Document
In this document, special conventions are used to help and present the information clearly. The Compex 24-port 10/100Mbps Managed Switch with 2 Optional Modules CGX3224 is often referred to as Compex CGX3224 in this document. Below is a list of conventions used throughout. - Page 7 References on Menu Command, Push Button, Radio Button, LED and Label appear in Bold. For example, “Click on the Ok button”...
-
Page 8: Table Of Contents
Hyper Terminal Configuration .............. 9 Chapter 4 Access to Web-based Interface............. 11 Login to Web Browser Interface ..................11 Chapter 5 Configure Compex CGX3224 using Web Interface ......16 Port Configuration........................16 Virtual Local Area Network (VLAN) Configuration ............18 5.2.1 Simple application on VLAN Configuration ............19 Trunk Configuration......................19... - Page 9 Filtering Setting........................29 Chapter 7 Configuring Your Wide Area Network ..........31 Selecting the right connection for your Broadband Internet Service ........31 Setup on Compex CGX3224 for Broadband Internet Access..........32 Configuring Static IP Connection ..................33 Configuring Dynamic IP Connection ...................33 7.4.1 How to Configure Singapore Cable Vision (SCV) Service ........34...
- Page 10 Using SYSTEM TOOLS Menu ............59 Set System Clock .........................59 Remote Management......................60 System Configuration......................62 System Information ......................63 Change Password .........................64 9.5.1 Forget your Password ....................64 Upgrading Compex CGX3224 Firmware................65 Save or Reset Settings ......................66 9.7.1 Save .........................67 9.7.2 Backup........................67 9.7.3 Restore........................68 9.7.4...
-
Page 11: Chapter 1 Product Overview
Introduction Compex CGX3224 is a SNMP Managed Switch with 24 10/100Mbps Fast Ethernet ports capable of full or half duplex transmission with flow control. CGX3224 has N- Way Auto-Negotiation capability, thus allowing the ports to be automatically configured for the highest possible operation mode between two network nodes. It comes with 2 slots that allow insertions of 2 modular Gigabit modules or Fiber Optics modules. - Page 12 • Optional Modules Compex CGX3224 is designed with 2 expansion slots to support 3 types of optional modules, 1000 Base-T Gigabit Fiber module, 1000 Base-SX Gigabit Fiber module and 100 Base-FX Fast Ethernet Fiber module. Please note that 1000 Base-LX and 100 Base-FX Single Mode modules are also available upon request.
-
Page 13: Packaging Content
1. Hardware Installation of Compex CGX3224. Refer to Chapter 2 “Hardware Installation” on Page 7 2. Set IP address to Static (Since the DHCP default setting for Compex CGX3224 is disabled) Refer to Appendix III “TCP/IP Configuration” on Page 79 3. -
Page 14: Network Applications
Network Applications Compex CGX3224 may be used in the Backbone with an ADSL broadband internet connection as shown in Figure 1.5a. Virtual LAN may be defined on Compex CGX3224 to logically segmentize your LAN into multiple broadcast domains with workgroup classifications. - Page 15 Hub/Switch to increase the number of users for Internet access. Using a UTP network cable, connect one end to Compex CGX3224 and the other to the network switch. Figure 1.5b shows how Compex CGX3224 can be connected to an existing switch to increase the Internet access for the LAN users from just one dedicated Internet access to multiple accesses.
- Page 16 CGX3224 and any of the four modems power off, connect one end of the Ethernet cable to any port of Compex CGX3224. The other end of the Ethernet cable is to be connected to your own ADSL/Cable modem. (You may need to refer to your respective Modem’s manual for the set up.)
-
Page 17: Chapter 2 Hardware Installation
4. The surface to place Compex CGX3224 should be clean, smooth, level and sturdy. 5. Ensure there is enough space around the unit to allow the attachment of network cables. 6. Connect the power cord to the power socket on the rear panel of Compex CGX3224. 2.1.2 Rack-Mounted Installation 1. -
Page 18: Expansion Module Installation
Chapter 2 Hardware Installation 3. Connect the power cord to the power socket on the rear panel of Compex CGX3224. NOTE For proper ventilation, do allow about 4 inches of clearance on the front and back of the switch. This is especially important in an enclosed rack. -
Page 19: Chapter 3 Hyper Terminal Configuration
Hyper Terminal Configuration Chapter 3 Hyper Terminal Configuration This chapter explains the basic setup procedures of configuring Compex CGX3224. For more detailed information about Compex CGX3224, please refer to Chapter 8 “Advanced Configuration for Compex CGX3224” on Page 39. We can configure Compex CGX3224 through Hyper Terminal. Please follow the procedures... - Page 20 Chapter 3 Hyper Terminal Configuration After setting all configurations, reset the power supply of Compex CGX3224. A Hyper Terminal screen will appear to list out all configurations. You can modify the configuration on the screen itself, such as changing the IP Address...
-
Page 21: Chapter 4 Access To Web-Based Interface
Chapter 4 Access to Web-based Interface After setting up Compex CGX3224, install a browser on the PC or workstation. Make sure that TCP/IP protocol is installed and configured. Configuration will be much simpler if you decided to obtain IP address dynamically and use the gateway default IP addresses. Compex CGX3224 is designed with a built-in DHCP server. - Page 22 After logging in to the Management system, the Main Page will display as shown below. The image of Compex CGX3224 is shown on the upper right window. The status of each switch port (i.e. link, speed and duplex mode) can be seen clearly from the LED displays on the image.
- Page 23 Chapter 4 Access to Web-based Interface The Main menu includes four sections in the Command Menu Window, namely CONFIGURATION, ADVANCED, SYSTEM TOOLS and HELP. The overall descriptions for individual sub-functions are listed as shown: CONFIGURATION menu • Port Configuration – configuration for communications via network Please refer to Section 5.1 Port Configuration on Page 16 •...
- Page 24 Please refer to Section 9.5 Change Password on Page 64 • Firmware Upgrade – uploading latest firmware to Compex CGX3224 Please refer to Section 9.6 Upgrading Compex CGX3224 Firmware on Page 65 • Save or Reset Settings – saves or resets all settings Please refer to Section 9.7 Save or Reset Settings on Page 66...
- Page 25 Chapter 4 Access to Web-based Interface • Logout – exit Please refer to Section 9.10 Logout on Page 69 HELP menu • Technical Support – make enquiries when you encounter problems while setting up the device Please refer to Chapter 10 Technical Support on Page 70...
-
Page 26: Chapter 5 Configure Compex Cgx3224 Using Web Interface
Here, we will briefly discuss each Menu components and its functions. An interactive image is located at the main page of Compex CGX3224. It allows you to view the real time situation in the network. In addition, you may click on any of the ports, including the expansion module, to view the port status. - Page 27 Allows you to specify the VLAN priority to expedite the VLAN Port Priority traffic. Port VLAN ID VLAN ID is the sequence number of a VLAN. Compex CGX3224 has 32 VLANs to specify and therefore the VLAN ID is from 1 to 4091. Port State Enabling this function allows the chosen port to receive, forward packets, and learn the respective MAC Addresses of the source.
-
Page 28: Virtual Local Area Network (Vlan) Configuration
Configure Compex CGX3224 using Web Interface Virtual Local Area Network (VLAN) Configuration Compex CGX3224 supports Virtual LAN, which logically groups every connection into VLANs for traffic isolation and security purposes. Both tagged and untagged based VLAN are supported with a total maximum of 32 groups. Each VLAN group only forwards traffic within its member ports. -
Page 29: Trunk Configuration
Please refer to “Application on Virtual LAN” on Page 71. Trunk Configuration Port Trunking is the ability to group together several switch ports to increase the bandwidth between Compex CGX3224 and other switch. This is an inexpensive method to increase throughput between switches. NOTE... -
Page 30: Simple Application On Port Trunking
Port Trunking. Port #25 and #26 are set as trunking ports for both Unit #1 and #2. After selecting the trunking group (refer to Figure 5.3c), CGX3224 Unit #1 and Unit #2 has created a pipeline with an aggregated bandwidth of Port #25 and Port #26 combined. -
Page 31: Dhcp Configuration
Chapter 5 Configure Compex CGX3224 using Web Interface DHCP Configuration Dynamic Host Configuration Protocol (DHCP) allows a PC to join an IP-based network without the need of configuring the IP Addresses. It assigns a unique IP address to the device. When this device leaves the network, DHCP server will release the IP address, and when it re-joins, the DHCP server will then renew the IP address. - Page 32 The users may configure the network with Class A (255.0.0.0) and Class B (255.255.0.0) Subnet Mask as well. In addition, Compex CGX3224 can be configured for Classless Subnet to support certain applications. These parameters specify the range of the IP addresses of DHCP Start IP Address &...
-
Page 33: Dhcp Active Leases
Chapter 5 Configure Compex CGX3224 using Web Interface 5.4.1 DHCP Active Leases This section indicates the information of the PC whereby the IP addresses are dynamically assigned to it in the same network. The Expire Time indicates the time when the system needs to update the IP Address of that particular PC. -
Page 34: Delete Ip Address In Server Reservations
Chapter 5 Configure Compex CGX3224 using Web Interface 2. Click Add button to create an entry into the DHCP Server Reservations. 3. After the address is entered, click on Save button to save your setting. Keep on adding the IP Address onto it by repeating the procedures as mentioned previously if you need to reserve more IP Addresses. -
Page 35: Wan Configuration
LAN uses the IP address 192.168.100.xxx and Compex CGX3224 is using the same settings as defaults. However, if you have assigned a different IP address for Compex CGX3224, then use the new settings in the setup procedures. - Page 36 Chapter 5 Configure Compex CGX3224 using Web Interface Procedures 1. Go to WAN Config from the Command window. 2. Select a WAN port and then a WAN Type. Any one of the 4 WAN Types are eligible to configure, depending on which Internet Service Provider you subscribed.
-
Page 37: Chapter 6 Nat Configuration
It modifies the source or destination address in the IP header to reflect the mapping between internal and external addressing for that network. NAT functionality appears on Compex CGX3224 with low-level access to packets at the network boundary. Several variations on NAT have also been implemented to provide additional support for application-level protocols. -
Page 38: Static Port Setting (Port Forwarding)
Port Forwarding redirects any incoming Internet request on the Public IP, based on its TCP/UDP Port number to another computer in the Private IP. Hence, when a user from WAN sends a request to your network, Compex CGX3224 (based on the Port– Forwarding configurations) will forward these requests to the assigned PC. -
Page 39: Filtering Setting
Filtering Setting Compex CGX3224 allows Packet Filtering rules be defined based on three factors, Source IP Address, TCP Port and Time. IP Packet Filtering examines the outgoing packets and decides whether to bypass or to block them. After the Packet Filtering rules have been defined, the users may select to bypass or to block the outgoing packets that do not match the rules. - Page 40 To delete a rule, select the rule on the Select to Edit column and click Delete button. CAUTION You must synchronize the clock of Compex CGX3224 to your PC’s time for the rules to execute accurately. Refer to “Set System Clock” on Page 59 to...
-
Page 41: Chapter 7 Configuring Your Wide Area Network
For the purpose of illustration, it is assumed that LAN environment uses the IP address 192.168.100.xxx and Compex CGX3224 is using the default settings. However, if you have assigned a different IP address for Compex CGX3224, then use the new settings in the setup procedures. -
Page 42: Setup On Compex Cgx3224 For Broadband Internet Access
Setup on Compex CGX3224 for Broadband Internet Access For such services, you should have the IP address info ready before proceeding. This is provided by the ISP. 1. Connect a network cable from the Ethernet port of Compex CGX3224 to your workstation. Internet... -
Page 43: Configuring Static Ip Connection
Static IP connection to your ISP. Configuring Dynamic IP Connection Compex CGX3224 uses Dynamic IP as the default WAN type. Hence, if you are using Cable Internet, you do not need to configure the WAN connection. However, if your account requires a DHCP Client ID in order to release an IP address, you may need to configure the name of Compex CGX3224 with the DHCP Client ID issued by your ISP. -
Page 44: How To Configure Singapore Cable Vision (Scv) Service
7.4.1 How to Configure Singapore Cable Vision (SCV) Service SCV provides Dynamic IP address connection service. Assume that your CGX3224 is not in the Dynamic IP setting, please follow these procedures to change to the appropriate WAN type. Procedures 1. Go to WAN Config. Click on the pull-down menu from the WAN Port field. -
Page 45: How To Configure @Home Cable Service
Chapter 7 Configuring Your Wide Area Network 7.4.2 How to Configure @HOME Cable Service Many broadband services require a simple DHCP request for connection. Two such cable services are Optus@Home and Roger@Home. Description of parameters System Name You can obtain this information from your ISP. You may leave it as it is or fill in your ISP contact System Contact and Location... -
Page 46: Configuring Ppp Over Ethernet Session (Pppoe)
ADSL modem together with the logon account on your PC. Make sure it can connect successfully before attempting to run it with Compex CGX3224 Procedures 1. Go to WAN Config. Click on the pull-down menu from the WAN Port field. - Page 47 Chapter 7 Configuring Your Wide Area Network The WAN Setup screen below shows PPPoE configuration that allows you to configure your ADSL Internet subscription. Description of parameters Username and The information is given by the Internet Service Provider. Password Certain ADSL Internet subscriptions require the user to Service Name enter the service name.
- Page 48 Please note that before you click on the Connection button, make sure you have connected the broadband modem to Compex CGX3224’s remote port. The cable connection is good when the indicating light for the LAN on the broadband modem and the remote port on the switch is lighted up.
-
Page 49: Chapter 8 Advanced Configuration For Compex Cgx3224
The example shown in Figure 8.1a illustrates a redundant link between Compex CGX3224 Unit #1 and #2. The probability of having a bridging loop is quite high. This is because, a broadcast or multicast packets might be circulating repeatedly between... - Page 50 Chapter 8 Advanced Configuration for Compex CGX3224 CGX3224 Unit #1 Before implementing Workstation A Broadcast Workstation B CGX3224 Unit #2 However, if STP is activated on both switches, broadcast and multicast packets would be transmitted as shown in Figure 8.1b. To provide this desired path redundancy, as well as preventing bridging loops, STP defines a tree that spans all switches in an extended network.
-
Page 51: Stp Port
8.1.1 STP Port When Compex CGX3224 first powers up, all bridges will declare themselves to be the root. The one with the lowest priority will be the root. The bridges will stop advertising themselves and use the Bridge Protocol Data Units (BPDUs) of the root bridge. - Page 52 Chapter 8 Advanced Configuration for Compex CGX3224 The lower the number the higher the priority. Priority (from 0 to 65535) Designated Cost If the designated bridge is the root bridge itself, then the cost is 0. The identity of the designated bridge is shown in the Design Bridge field.
-
Page 53: Stp Bridge
Chapter 8 Advanced Configuration for Compex CGX3224 8.1.2 STP Bridge Spanning-Tree Protocol defines a tree that spans all switches in an extended network. It forces certain redundant data paths into a standby (blocked) state. If one network segment in the Spanning-Tree Protocol becomes unreachable,... -
Page 54: Igmp Configuration
Internet Group Management Protocol (IGMP) is an Internet protocol that provides a way for an Internet computer to report its multicast group membership to adjacent routers. It allows Compex CGX3224 to forward multicast traffic intelligently. The switch "snoops" the IGMP query and report messages and forwards traffic to only the ports that request the multicast traffic. - Page 55 Chapter 8 Advanced Configuration for Compex CGX3224 The membership of a host group is dynamic - hosts may join and leave groups at any time. There is no restriction on the location or number of members in a host group. A host may be a member of more than one group at a time.
-
Page 56: Definition On Igmp V1.0 And V2.0
Chapter 8 Advanced Configuration for Compex CGX3224 8.2.1 Definition on IGMP v1.0 and v2.0 For IGMP v1.0, The Internet Group Management Protocol (IGMP v1.0) is used by IP hosts to report their host group memberships to any immediately neighboring multicast routers. -
Page 57: Stack Configuration
Chapter 8 Advanced Configuration for Compex CGX3224 Stack Configuration Stacking Management can be implemented in a multi-storey building or even in a geographically dispersed campus. Upon activating the stacking management functions, the system administrator is able to access to other switches easily. -
Page 58: Simple Application On Stack Management
Chapter 8 Advanced Configuration for Compex CGX3224 A pull down menu is created under the CGX3224 image. From there, you may select the types of switch you wish to access, and the information will be listed. Switch selection 8.3.1 Simple Application on Stack Management... - Page 59 You may also use the console port to activate the stacking function of all switches. We are using 3 switches in this example, therefore, please repeat the procedures of Steps 1 and 2 for CGX3224 Unit #3. Select Slave option in the Stacking State field. CGX3224 Unit #1...
- Page 60 Chapter 8 Advanced Configuration for Compex CGX3224 5. After selecting the options for individual switches, use RJ45 MDI straight Ethernet cables to connect all three switches as shown in Figure 8.3b and power up all switches. 6. Access to the web-based interface again. This time, you will be able to view all switches attached to this stack.
-
Page 61: Snmp Configuration
SNMP is a communication specification that defines how management information is exchanged between network management applications and management agents. You can manage Compex CGX3224 using an SNMP application if the switch and the application contains the same community string. Use this page to set or modify the SNMP configuration parameters. -
Page 62: Rmon Statistics
Chapter 8 Advanced Configuration for Compex CGX3224 RMON Statistics Remote monitoring (RMON) is a standard monitoring specification that enables various network monitors and console systems to exchange network-monitoring data. RMON provides network administrators with more freedom in selecting network-monitoring probes and consoles with features that meet their particular networking needs. -
Page 63: Port Security
Chapter 8 Advanced Configuration for Compex CGX3224 Port Security Of all 26 ports, some of the ports may need to be assigned to one specific port. In order to fulfill this act, MAC Address should be added to that particular port. This is to restrict other users from using the static port. -
Page 64: To Delete Mac Address/Es
Chapter 8 Advanced Configuration for Compex CGX3224 8.6.1 To delete MAC Address/es If you want to delete MAC Address/es, simply • Click on Del button for single MAC Address, or • Hit on DeleteAll button to delete all the MAC Addresses. -
Page 65: Simple Application On Port Mirroring
Chapter 8 Advanced Configuration for Compex CGX3224 8.7.2 Simple Application on Port Mirroring From the example illustrated in Figure 8.7b, we are using Port 22 to monitor the activities at PC #1 to 3. Notice that Port 22 is set as mirror port, and PC #1 to #3 is connected to Port 6, 12 and 16 respectively. -
Page 66: Aging Control
Chapter 8 Advanced Configuration for Compex CGX3224 Aging Control Aging control is for the aging of address entries in the switch’s forwarding table. If the aging control is enabled, a learned address entry (not including the static entry) will be removed from the forwarding table if there is no update within a pre-determined period. -
Page 67: Address Search
Chapter 8 Advanced Configuration for Compex CGX3224 Address Search 8.9.1 Host Search Host Search is used for searching a host by IP address on the network, and getting the port number to which the host is connected. It is useful while configuring the VLAN. -
Page 68: Mac Address Search
Chapter 8 Advanced Configuration for Compex CGX3224 8.9.2 MAC Address Search This feature helps to look for the particular MAC Address stated in the field, which provides a useful way while configuring the VLAN. The system will search through the device for the port’s ownership of that particular PC. -
Page 69: Chapter 9 Using System Tools Menu
Using SYSTEM TOOLS Menu Chapter 9 Using SYSTEM TOOLS Menu In this chapter, you will be able to retrieve the system information of Compex CGX3224, to change the administrator’s password and also upgrading new downloaded firmware version. Set System Clock It is recommended that you configure Compex CGX3224’s timer to synchronize with... -
Page 70: Remote Management
This function allows you to access your Compex CGX3224 through Internet (WAN) or Local Area Network. The figure illustrates that you can configure the Compex CGX3224 even when you are at home. This can be done by activating the remote management function from your workplace. - Page 71 3. You may go to WAN Config to check for your WAN port’s IP address. NOTE You need to set the gateway of your Compex CGX3224 to 0.0.0.0 in order to allow WAN access from your home. 4. Go to System Config from the Command window.
-
Page 72: System Configuration
This helps you configure the system. You can configure IP address, Subnet Mask or Default Gateway of the management board in Compex CGX3224. It is likely that several VLANs are on the single switch, and each VLAN can be regarded as an independent network, so their network addresses may be different. -
Page 73: System Information
3. Upon making amendments on this page, the screen will appear a message, “Reboot the switch?”. Click on Yes button to let the changes take effect. Click on Logon button again if you still wish to access to Compex CGX3224 web page. This cannot apply to the changing of IP Addresses. -
Page 74: Change Password
9.5.1 Forget your Password You can simply reset the password using Hyper Terminal program. In the Hyper Terminal environment, switch OFF and ON Compex SGX3226. When “Press ENTER to stop auto-boot …” message appear on the screen, hit “Enter” key on the keyboard within 5 seconds. -
Page 75: Upgrading Compex Cgx3224 Firmware
This indicates that the system has successfully reset the password to default setting. Type in reboot to switch your Compex SGX3226 to normal mode. This time, you can enter the default password, which is password to login to the configuration page. -
Page 76: Save Or Reset Settings
2. Click Browse button to select the file where you have just saved. 3. Next, click on the Upgrade button to start replacing the latest firmware revision. The system will prompt you to reboot Compex CGX3224. Click Yes button to restart the device. -
Page 77: Save
Using SYSTEM TOOLS Menu 9.7.1 Save By clicking Save button, you will save all the changes made from Compex CGX3224. You need to reboot the switch to ensure that the profile is updated correctly. 9.7.2 Backup This option allows you to backup the switch’s configuration into a file. -
Page 78: Restore
2. Click Restore button to start the process. 3. The system will request you to reboot Compex CGX3224. Click Yes button to restart the switch. 4. Wait for 60 seconds and the system will automatically return to the Login Web page, prompting you to enter password again. -
Page 79: Message Window
IP address, which you have assigned to the switch. NOTE If you changed a new IP Address for Compex CGX3224, the system will NOT automatically changed to the new IP address after you click on the Logon button. -
Page 80: Chapter 10 Using Help Menu
Chapter 10 Using HELP Menu 10.1 Technical Support For more information on technical support, click on “Technical Support” in the HELP menu. Here, you can refer to the respective technical group supported by Compex in the different countries as shown below:... -
Page 81: Chapter 11 Application On Virtual Lan
Chapter 11 Application on Virtual LAN Chapter 11 Application on Virtual LAN In an untagged VLAN application, you can assign a group of ports within a switch as members of a specific VLAN. Data traffic would be confined within the member ports. In this way, devices connected with the switch can be partitioned into distinct groups each corresponds to a different VLAN. - Page 82 Chapter 11 Application on Virtual LAN VLAN C, VLAN D and VLAN E are assigned with VID of 02, 03 and 04 respectively. Switch 1 and Switch 2 are interconnected via Port 26, whereby the port are tagged with an ID. Control Station, PC 1, PC 2 and PC 3 are connected to Port 2, 9, 16 and 22 respectively.
- Page 83 Chapter 11 Application on Virtual LAN Untagged and Tag VLAN setting for Switch 1 Configuration for Switch 2 Follow the procedures as shown in configuring Switch 1. Now, users within the same VLAN is able to communicate with one another. NOTE Please note that for Tagged VLAN, VID number MUST BE the same from Switch 1 and 2.
-
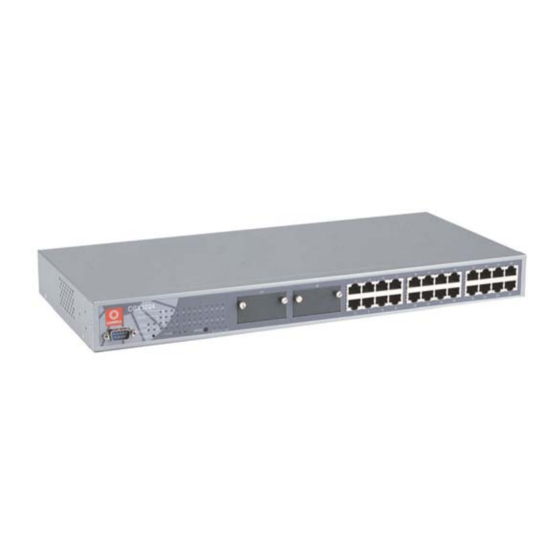
Page 84: Appendix I Panel Views & Descriptions
Please note that the actual product appearance may slightly differ depending on the hardware version. Figure 11.1a Front Panel View of Compex CGX3224 3 4 5 Figure 11.1b Front Panel View of Compex CGX3224 (Section #1) Figure 11.1c Front Panel View of Compex CGX3224 (Section #2) - Page 85 Appendix I Panel Views & Descriptions Figure 11.1d Back Panel View of Compex CGX3224 Features Status and Indication LINK LEDs Steady Green A link has established. No connection is detected. MODE LEDs If the Mode button is in ACT mode, Blinking Green Activity is present in the network.
- Page 86 Appendix I Panel Views & Descriptions Features Status and Indication 100M LED Steady Green The Mode button is toggled to 100M mode. The Mode button is either toggled to ACT or FULL mode. POWER LED Steady Green Power supply is in normal condition. Console Port A serial 9 Pin (DB9) socket is connected to PC COM Port for monitoring the switch.
-
Page 87: Appendix Ii Specifications
Appendix II Specifications Appendix II Specifications Industry Standards Complies with • IEEE 802.1d: Spanning Tree Protocol • IEEE 802.1Q: Tagged VLAN • IEEE 802.3: 10 Base-T • IEEE 802.3u: 100 Base-TX, 100 Base-FX • IEEE 802.3ab: 1000 Base-T • IEEE 802.3ad: Link Aggregation •... - Page 88 Appendix II Specifications • LED Indicators Power • Link • Activity • Mode • Speed (10/100/1000Mbps) • Duplex status • Operation Mode N-Way Auto-negotiation • Force Mode • Transmission Mode Full Duplex • Half Duplex • Optional Modules 100Base-FX • 1000Base-SX •...
-
Page 89: Appendix Iii Tcp/Ip Configuration
Compex CGX3224 is pre-configured with a default IP address 192.168.100.128 with a network mask of 255.255.255.0. By default, the DHCP Server is not activated. You need to set your PC’s IP address to static in order to configure Compex CGX3224. kindly follow the procedures as shown below: AIII-1 For Windows 95/98/98SE/ME/2000 1. - Page 90 From the list of network adapters availability, select the adapter that you currently are using. If the IP address stated is in the same subnet as your Compex CGX3224, you can continue with the configuration under Chapter 7 “Configure Compex CGX3224...
-
Page 91: Aiii-2 Windows Xp/Nt
Appendix III TCP/IP Configuration AIII-2 Windows XP/NT When using these operation systems, you also need to set your IP addresses to dynamic. For example, under Windows XP, 1. Select View Network Connections and then click on LAN Area Connections. Activate Properties with the right mouse key and the following window will appear: 2. - Page 92 4. Go to Start menu, Accessories, select Command Prompt and execute the command ipconfig/all. The following information will be displayed: If the IP address stated is in the same subnet as your Compex CGX3224, you can continue with the configuration under Chapter 7 “Configure Compex CGX3224...
Need help?
Do you have a question about the CGX3224 and is the answer not in the manual?
Questions and answers