
Related Manuals for Value Hobby 96in Super Decathlon


Summary of Contents for Value Hobby 96in Super Decathlon
-
Page 1: Instruction Manual
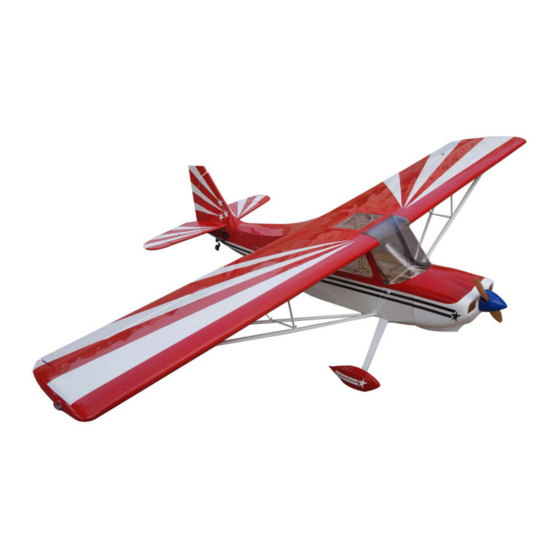
96in Super Decathlon ARF Instruction Manual Specifications Wingspan: 96in (2438mm) Length: 63.5 in (1614mm) Weight: Approx. 13lbs (6.5kg) - Page 2 AMA sanctioned sites. Value Hobby guarantees this model to be free of defects in materials and workmanship at the date of purchase. This warranty does not cover any parts damaged by use or modifications. In no way shall Value Hobby’...
- Page 3 Examination Unpack your airplane and examine the components. Check for damage of any kind. If you see any damage, please contact Value Hobby immediately. Covering Your airplane was packed in plastic at the factory without any wrinkles in the covering. You may notice some wrinkles now;...
-
Page 4: Main Parts
www.valuehobby.com/super-decathlon-arf.html Main Parts: Cowling x 1 Fuselage x 1 Wing panel x 2 Stab and elevator x 1 Rudder x 1... - Page 5 www.valuehobby.com/super-decathlon-arf.html Accessories: Accessories for wings Wing Tube x 1 Wing Nylon Screw x 2 Ball Link x 4 set Control Horn x 2 Servo Extended Arm x 2 Wood Cover for Wing Strut x 2 Wing Strut x 1set M2 x 20mm Screws for Wing Strut x 4 M3 x 15mm Screws for Wing Strut x 6 M2 Washer x 8 M3 Washer x 6...
- Page 6 www.valuehobby.com/super-decathlon-arf.html Accessories for fuselage M3 x 15mm screws for canopy x 2 M3 x 12mm screws for cowling x 4 450cc Fuel Tank x 1 set Upper Window x 1 Side Window x 1set M2 x 8 Self-tapping screws with washer x 4 Accessories for landing gear Main Landing Gear x 1 M4 x 15 screws for main landing gear x 3...
- Page 7 www.valuehobby.com/super-decathlon-arf.html RECOMMENDED RADIO EQUIPMENT Product Quantity Radio Transmitter and receiver with minimum 6CH Servo High torque standard servo Servo Extension 24in heavy duty extension Y-Harness RECOMMENDED Engine SETUP Product Motor 30cc-60cc gasoline engine, such as DLE 30 or DLE 55 Prop 18 x 8...
- Page 8 www.valuehobby.com/super-decathlon-arf.html Section1. Aileron and aileron servo installation Step5. Use the hobby knife to remove the covering as shown below. Step1. Insert four hinges into the slots in the aileron. Step6. Locate the items shown below. Step2. Attach the aileron to the wing through the hinges. Step7.
- Page 9 www.valuehobby.com/super-decathlon-arf.html Step8. Snap the small wood piece off from the aileron servo opening. Step11. install the aileron servo to the servo opening using the screws provided with the servo. Step9. Tie the servo wire to the small wood piece. Step12. Prepare the linkage and control horn for the servo installation.
- Page 10 www.valuehobby.com/super-decathlon-arf.html Section2. Horizontal stabilizer and elevator Step14. Install the control horn to the aileron. installation Step1. Remove the mask tape and get the ball links off the opening for the stab. Step15. Screw the clevis to the control horn and adjust the length of the linkage if necessary.
- Page 11 www.valuehobby.com/super-decathlon-arf.html Step4. Apply the epoxy to the bare wood of the stab, and Section3. Elevator servo installation slide back the stab into the fuselage. Step1. Remove the covering for the elevator servo openings on the both sides of the fuselage. Step5.
- Page 12 www.valuehobby.com/super-decathlon-arf.html Section4. Elevator servo installation Step1. Insert three hinges into the slots in the rudder. Step3. Install two control horns into the elevators. Step2. Drill a mounting hole in the bottom of the rudder. Step4. Install the elevator servo linkages using the same methods in the section of aileron servo linkage installation.
- Page 13 www.valuehobby.com/super-decathlon-arf.html Step4. Install the rudder to the fuselage. Step7. Drill a mounting hole for rudder control horn. Step5. Prepare a tail wheel assembly as shown below. Step8. Install the control horn to the rudder. Step6. Install the tail wheel assembly to the fuselage using three self-tapping screws.
- Page 14 www.valuehobby.com/super-decathlon-arf.html Step10. Prepare a servo with pull-pull servo arm. Step11. Install the rudder servo onto the servo tray inside the fuselage. Step15. locate the steel cable and fittings. Step13. Connect the push rod wire to the servo arm. (Note that the cables cross once inside the fuselage. The cable from the right side of the servo exits.
- Page 15 www.valuehobby.com/super-decathlon-arf.html Step17. Pass the cable through the fitting and the brass tube as shown. Section5. Main Landing Gear Installation Step1. Locate the items shown below. Step18. Crimp the brass tube with a crimping tool or pliers. Step2. Install the axle to the landing gear.
- Page 16 www.valuehobby.com/super-decathlon-arf.html Step3. Attach the wheel to the axle using two wheel collars. Step6. repeat steps 1 to 5 to finish the other wheel and wheel pant installation. Step4. Install the wheel pant to the landing gear. Step7. Use three M4 x 15mm socket head screws to in stall the landing gear to the fuselage.
- Page 17 www.valuehobby.com/super-decathlon-arf.html Step2. Use the glue to attach the side windows into Step4. Install the canopy to the the fuselage using two position. M3 x 15mm screws. Step3. Install the upper window in the fuselage. Section6. Wing and wing strut installation Step1.
- Page 18 www.valuehobby.com/super-decathlon-arf.html Step5. Remove the covering for wing strut in the Step2. Use wing tube to attach two wing panels to the fuselage and wing panel as shown below. fuselage. Step3. locate two nylon screws shown below. Step6. Insert one end of the wing strut into the fuselage. Step4.
- Page 19 www.valuehobby.com/super-decathlon-arf.html Step8. Install the other end of the wing strut onto the wing panel. Step11. Install the wood cover to the wing panel. Step12. Locate these items as shown below. Step9. Use a screw to secure the wing strut to the fuselage.
- Page 20 www.valuehobby.com/super-decathlon-arf.html Step14. Use two M2 x 15mm and two M2 x 20mm Step2. Locate your engine and mount assembly. Offset screws to install the aluminum support for wing strut. your engine so the center of the prop shaft( at the propeller) lines up with the center lines on the firewall so your cowl will sit straight.
- Page 21 www.valuehobby.com/super-decathlon-arf.html Step1. Slide the cowl over the engine and align the side graphics so that they are straight and even. Test fit the cowl so the distance from the front edge of the cowl to the firewall is 6-1/4 inches leaving 1/16 to 1/8 inches clearance of the propeller.
- Page 22 www.valuehobby.com/super-decathlon-arf.html Linear measurement (inches) measured at root. Recommended CG Rudder For the first flights, the recommended Center of Gravity 11/2" (28º) Left 11/2" (28º) Right location is 5in behind the leading edge of the wing against the fuselage. Use the battery pack, moving it Linear measurement (inches) measured at front of forward or backward, to achieve the correct balance.
- Page 23 www.valuehobby.com/super-decathlon-arf.html...
- Page 24 www.valuehobby.com/super-decathlon-arf.html...
- Page 25 www.valuehobby.com/super-decathlon-arf.html...
Need help?
Do you have a question about the 96in Super Decathlon and is the answer not in the manual?
Questions and answers