
Related Manuals for ACME IL-2420 II


Summary of Contents for ACME IL-2420 II
- Page 1 IL-2420II User Guide Please read these instructions carefully before use Innovation, Quality, Performance...
-
Page 2: Table Of Contents
CONTENTS 1. Features........................3 2. General Instructions....................4 3. Overview........................5 3.1. Front View ....................5 3.2 Rear View ...................... 8 4. Operation Guide ..................... 8 4.1 Programming Mode ..................8 4.2 Setting a scene..................... 9 4.3 Program a Scene with Movement ............10 4.4 Program a Scene .................. - Page 3 5.1 Create a new Fixture Profile ..............39 Technical Specification 5.2 Modify a Fixture Profile................40 5.3 Delete a Fixture Profile................41 5.4 Patch a Fixture ................... 42 Power Input ....…………………………..….. 100-240VAC 50/60Hz 5.5 Reverse channel setup................43 Fuse....……………………………………..….T1A 250V 5x20mm 5.6 Fade mode setup ..................
-
Page 4: Features
484 DMX Channels in total, including 481Ch. for DMX fog, 482Ch. for future use, 483-484Ch. for DMX strobe Fixture Library ( for built-in ACME lighting fixtures; Other brand fixtures can be set manually but Max. with 50 fixtures) Built-in 10 MOVEMENTS - Can adjust PAN/TILT Position、PAN/TILT Range、Fade EC Declaration of Conformity time or Wait time、LOOP... -
Page 5: General Instructions
2. General Instructions "F_A"; "FUNCTION A" Please read the user manual carefully, as it includes important information regarding details "F_B"; "FUNCTION B" of operation, maintenance, and technical data. Keep this manual with the unit for future "F_C"; "FUNCTION C" consult. "F_D";... -
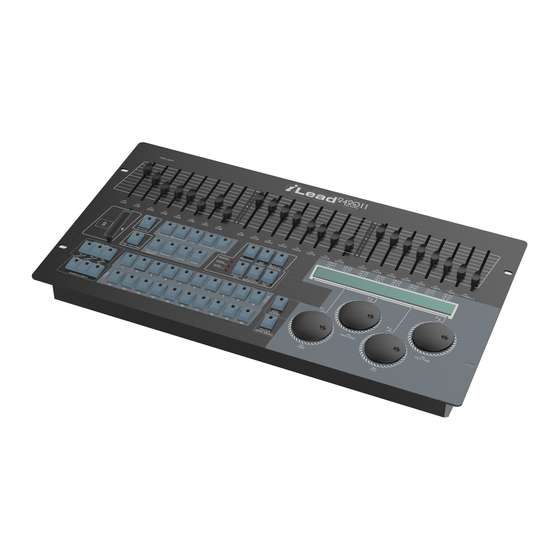
Page 6: Overview
3. Overview "SHUT"; "SHUTTER" "PAN"; "PAN" 3.1. Front View PF "P_F"; "PAN FINE" "TILT"; "TILT" TF "T_F"; "TILT FINE" PT "PT_S"; "P/T SPEED" "GB1"; "GOBO 1" "RGB1"; "GOBO 1 ROT" "GB2"; "GOBO 2" "RGB2"; "GOBO 2 ROT" "GB3"; "GOBO 3" "ROB3";... - Page 7 12 G "R_G2"; "GOBO 2 ROT" 11. Center Button Select/set the pan & tilt center. 13 G "RG2L"; "GOBO 2 ROT LOW" 12. Manual/Rec Button Used to control manual operation or to record 14 N "EFFT"; "EFFECT" programs. 15 N "R_EF";...
- Page 8 ;******** 2. 1-10 10 MOVEMENT can be selected. 3. 1-10 can be used to select 10 groups of COLOR ADD ACME AND OTHER LIGHT LIBBER SELECT PRESET; 11-20 can be used to select another 10 groups DEFAULT ACME; ACME AND OTHER of GOBO PRESET.
-
Page 9: Rear View
The finished file should use a short name below 8 characters, All use capital letters and suffix with CIF transitorily. (IL-2420 controller nonsupport long file name) or the controller can’t read up the profile information. 11.2 IM-1200S.CIF is the profile of ACME IM-1200S Power in AC100-240V 50/60Hz. -
Page 10: Setting A Scene
9. Super Password 4.2 Setting a scene 1. Enter Program mode. Power off, and Press Enter/main manual and Auto/Del and 2. Press the button 1-20 to select Fixture,you can select several numberButton1 at the same time, Power on afresh, input the fixtures at a time by tapping of these buttons. -
Page 11: Program A Scene With Movement
MIDI Channel = 0 4.3 Program a Scene with Movement 1. Enter Program mode. MIDI note command Channe number 2. Press the button 1-20 to select Fixture,you can select several fixtures at a time by tapping of these buttons. Bank 1 - Bank 4 MIDI 1 00 ~ 79 Turn on or turn off scenes from Bank 1 ~ 4... -
Page 12: Program A Scene
9. Press the number button 1-20 to select the Scene number going to be saved,all LEDs and the Segment Display will flicker for three Use jog wheel #3 or #4 to set the value of DIMMER (0-255) or times briefly indicating this operation, then the LCD will show the SPEED (0-255) that out of the strobe light. -
Page 13: Copy A Scene
7. Fog Machine operation 7.1 Set up another 481CH DMX signal to control the fog machine(keep out the 482CH). 6. Press the button BANK. 7.2 Fog Machine operation: 1. Connection: connect the fog machine with the DMX information. 2. Setting: Keep the power on , hold the FOG MACHINE button the press PROGRAM button to enter the output menu, 7. -
Page 14: Delete A Scene
NOTE:When you press TAP/INSERT to adjust the speed, adjusting the running speed of 4. Press MANUAL/REC to store,LEDs on CUE、OVERRIDE、 the scene is based on the interval of pressing the Press TAP /INSERT Button twice which CENTER 、 FIXTURE GROUP 、 PRESET 、 CHASE 、 BANK 、 no more than 10 minutes. -
Page 15: Bank Copying
2. Press MUSIC/BANK COPY Button to enter sound mode, the LED of MUSIC/BANK COPY will be on. 3.Press the number button 1-20 to select the scene you are going to delete. 3. Press number Button 1-20 to select the program you anticipant, 4. -
Page 16: Program A Chase
6.2 Run Program 3. Use the Jog wheel #1 to select the Bank number of the being Please finish the program and scene before running the program. copied scene. 1. Auto Mode 1. Press CHASE Button, use jog wheel #1 to select chase page. 4. - Page 17 3. Use Jog wheel #1 to select the bank you need, then the scene in 1. Enter Program mode. the bank will run with music. When it is running the scene with 2. Press the button CHASE, LEDs on CHASE will be all lit. Use jog Movements in sound activation mode , it will process repeatedly wheel #1 to select the page number of the chase.
-
Page 18: Program All The Scenes In A Bank
4.9 Program all the Scenes in a Bank 1. Manual Mode 1. Enter Program mode. 2. Press the button CHASE use jog wheel #1 to select the page 1. Press BANK Button。 number, choose the programming chase. 3. Press the number button 1-20 to select the Chase number, LEDs 2. -
Page 19: Program A Step
5.17 Channel value display mode 9. Finally press the button CHASE to store the chase then exit the 1. Enter Menu Mode. programming state. 2. Turn Jog wheel #1 up to when 17.Channel value display mode shown on the monitor press ENTER/MAIN MENU Button to enter. 10. -
Page 20: Insert Steps Into A Chase
5.15 Erase all memory 6. Use the Jog wheel #3、#4 to adjust the FADE TIME and WAIT TIME which are going to be added to the single Chase. If you do not 1. Enter Menu Mode. make any adjustments, the system will remember the last FADE 2. - Page 21 5.14 Enable Password 1. Enter Menu Mode. 4. Use the Jog wheel #2 to select the position of inserted steps. 2. Turn Jog wheel #1 up to when the 14. Enable password shown on the monitor press ENTER/MAINMENU button to enter. 3.
-
Page 22: Delete Steps From Program
11. Press the button CHASE to store the chase and exit the chase 6. Press ENTER/MAIN MENU Button to store, it will be finish after programming state. about 2 minutes. 7. Press ESC/CLEAR Button to back to the last menu, 2 times to 12. -
Page 23: Delete A Chase
NOTE: Please backup the programs before you load program file, or the program file you load will replace all the program in the controller. The controller should store finite bank files, 7. Press the button CHASE to store the operation and exit from the except the current bank files, you can store 50 include create by the controller immediacy present programming state. -
Page 24: Program A Preset
4.14 Program a Preset 1. Enter Menu Mode. 1. Enter Program mode. 2. Turn Jog wheel #1 up to when the 11. Read SD card is shown on 2. Press the button FIXTURE the monitor Press ENTER/MAIN MENU Button to enter. 3. -
Page 25: Preset Editing
8. Press one of the number button 1-10 to store a COLOR preset 4. Press ENTER/MAIN MENU Button to set the address of the or Pres one of the number button 11-20 to store a GOBO preset, all fixture, wait for 3 seconds, so the fixture can receive the signal of LEDs flicker for 3 times to indicate that you have successfully store the controller and move all the motors to their “home”... - Page 26 5.9 Chase run by inside/outside time 6. Press the number button1-20 to select the concerned fixtures to program Preset. 1. Enter Menu Mode. 2. Turn jog wheel #1 up to when the 09.Chase run by inside/outside time is shown on the monitor, Press ENTER/MAINMENU Button to 7.
-
Page 27: Program A Fixture Group
5.7 Blackout mode select 4.16 Program a Fixture Group 1. Enter Menu Mode. 1. Enter Program mode. 2. Turn Jog wheel #1 up to when the 07. Blackout mode select is 2. Press FIXTURE button. shown on the monitor press ENTER/MAIN MENU button to enter. 3. -
Page 28: Fixture Group Editing
4.17 FIXTURE GROUP Editing 6. Press ENTER/MAIN MENU Button to enter, all the LEDs will 1. Enter Program mode. shake for 3 times. 2. Press FIXTURE GROUP button. 7. Repeat 3-6 to reverse other channels. 8. Back to the last menu please press ESC/CLEAR button. 3. -
Page 29: Program A Center
5. Press ENTER/MAIN MENU Button to enter, all the LEDs strobe 8. Press the number button 1-20 to select the fixture group number for 3 times. you selected in step 2, all LEDs flicker for 3 times 6. Repeat 3-5 to patch all the fixtures. 9. -
Page 30: Center Editing
1. Enter Program mode. patch. 2. Press CENTER button. 4. Turn Jog wheel #3 to chose the profile of other manufacturers 3. Press the number button1-20 to select the edited Center position and Jog wheel #4 to chose ACME’s. number. - Page 31 8. Press CENTER button. 3. Use Jog wheel #3 to delete the profile of other manufacturers, and Jog wheel #4 to delete the ACME’s. 9. Press the number button 1-20 to select the location to store the Center, all LEDs flicker for 3 times to indicate that you have successfully edited a Center position.
-
Page 32: Program An Override
3. Press the number button 1-20 to select the concerned fixtures to be programmed. 3. Use Jog wheel #3 to chose the bank of other manufacturers, and Jog wheel #4 to chose the ACME’s. 4. Use FADERS1-24 and 4 Jog wheels to adjust the selected fixture to your desired effect. -
Page 33: Override Editing
6. Press ENTER/MAIN MENU to enter 3. Press number Button 1-20 to select the Override number to be edited. 7. Use jog wheel #2 to select profile (ACME LIBRARY or OTHER 4. Press FIXTURE button. LIBRARY) you want to store the fixture profile. - Page 34 Exiting from the Menu 5. Press the number button 1-20 to select the concerned fixtures to be edited with Override. Press ESC/CLEAR button to exit from the last menu until exit from the Menu totally. 6. Use FADERS1-24 and 4 Jog wheels to adjust the selected fixture The main Menu including the following 17 settings: to your desired effect.
-
Page 35: Program A Cue
3. Move FADERS1-24 to vary the channel outputs or use Jog 4.22 Program a CUE wheel #1 、#2 to adjust PAN and PAN FINE or use Jog wheel #3 , #4 to adjust TILT、TILT FINE. 1. Enter Program mode. 2. Press CUE button use jog wheel #1 to select the page number. 4. -
Page 36: Cue Editing
4.23 CUE Editing 4.24 Delete a CUE 1. Enter Program mode. 1. Enter Program mode. 2. Press CUE button, use jog wheel #1 to select the page number. 2. Press and hold AUTO/DEL button. 3. Press CUE use jog wheel #1 to select the page number. 3.
Need help?
Do you have a question about the IL-2420 II and is the answer not in the manual?
Questions and answers