Table of Contents
Advertisement
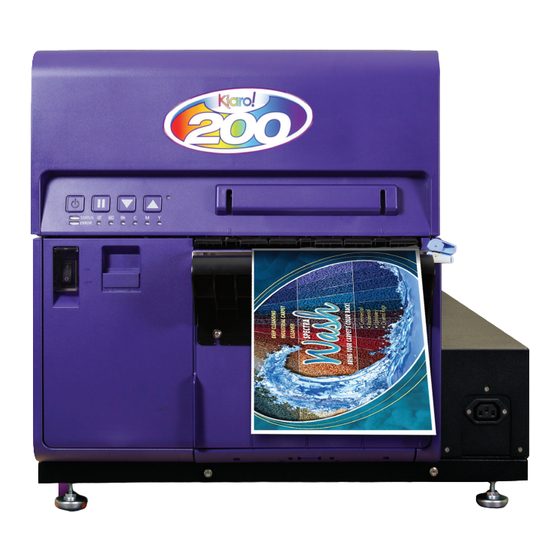
The Labels You Want When You Need Them.
USER
GUIDE
Congratulations on owning a Kiaro!
200 inkjet color label printer. This
User Guide will help you start printing
labels, re-load printing supplies,
troubleshoot problems, and
perform routine maintenance.
•
Create Custom Labels 4"-8" wide
•
Print 1200 dpi at 8" per second
•
No wasting labels
®
QuickLabel.com
Advertisement
Table of Contents

Related Manuals for QuickLabel Kiaro! 200


Summary of Contents for QuickLabel Kiaro! 200
- Page 1 200 inkjet color label printer. This User Guide will help you start printing labels, re-load printing supplies, troubleshoot problems, and perform routine maintenance. • Create Custom Labels 4"-8" wide • Print 1200 dpi at 8" per second • No wasting labels QuickLabel.com...
- Page 3 Kiaro! 200 User Guide Part Number 22834630-EN-E Revision 1.4 8/2016 QuickLabel, An AstroNova™ Division World Headquarters 600 East Greenwich Ave., West Warwick, RI 02893 Tel: (877) 757-7978 Fax: (401) 822-2430 E-mail: info@QuickLabel.com www.QuickLabel.com Technical Support Tel: (877) 757-7310 E-mail: support@QuickLabel.com...
- Page 4 If the customer discovers a defect, this defect must be reported promptly to QuickLabel. QuickLabel will, at its option, repair the printer or repair or replace its defective component(s) at no additional charge under our QuickSwap™ Parts Service. Repair parts and replacement parts will be furnished on an exchange basis and will be either reconditioned or new.
- Page 5 QuickLabel Kiaro! 200 printing system. If the customer suspects a defect in a Kiaro! 200 ink cartridge, the customer must notify QuickLabel within the warranty period. Upon return of the ink cartridge to the...
-
Page 6: Obtaining Service
Obtaining Service To obtain warranted service, please contact QuickLabel Technical Support through one of the Factory Sales and Service Centers. Contact Information for Factory Sales and Service QuickLabel USA and World Headquarters 600 East Greenwich Avenue West Warwick, RI 02893 USA... - Page 7 Ownership Information Congratulations and thank you for your business. Your purchase of a QuickLabel digital label printer is an investment in production flexibility and packaging efficiency. Please record the model number and serial number of your product. FCC Part 15 Compliance NOTE: This equipment has been tested and found to comply with the limits for a Class A digital device, pursuant to part 15 of the FCC rules.
- Page 8 WEEE Directive European Union (and EEA) only. These symbols indicate that this product is not to be disposed of with your household waste, according to the WEEE Directive (2002/96/EC), the Battery Directive (2006/66/EC) and/or your national laws implementing those Directives. If a chemical symbol is printed beneath the symbol shown above, in accordance with the Battery Directive, this indicates that a heavy metal (Hg = Mercury, Cd = Cadmium, Pb = Lead) is present in this battery or accumulator at a concentration above an...
- Page 9 For more information regarding return and recycling of WEEE products, please contact QuickLabel. Also, this product complies with the "India E-waste Rule 2011" and prohibits use of lead, mercury, hexavalent chromium, polybrominated biphenyls or polybrominated diphenyl ethers in concentrations exceeding 0.1 % by weight and 0.01 % by weight for...
-
Page 10: Declaration Of Conformity
Tel: +44 (0)1628 668836, Fax: +44 (0)1628 664994 Note: The Kiaro! 200D is identical to the Kiaro! 200E except for the ink type used. Kiaro! 200D uses a pigment based aqueous ink while the Kiaro! 200 & Kiaro! 200E uses a dye based ink. -
Page 11: Table Of Contents
About the Kiaro! 200 ........19... - Page 12 Chapter: 4 Kiaro! 200 Maintenance Utility .....55 About the Maintenance Utility ......55 Printer Information Tab .
- Page 13 Ink Tank and the Maintenance Cartridge ..... . . 131 Chapter: 9 Specifications ......133 Kiaro! 200 User Guide...
- Page 14 Contents Kiaro! 200 User Guide...
-
Page 15: Quick Start Guide
• The room must be properly ventilated. • Install printer at least 3.5 inches (88.9 mm) away from each wall with a sufficient work space around it. Kiaro! 200 User Guide... -
Page 16: Installation Precautions
32-bit or 64-bit Microsoft® Windows® XP, Windows Vista®, Windows 7, or Windows 8 • Microsoft .NET Framework 3.5 SP1 • 350 MB free hard drive space • CD/DVD drive • One available USB 2.0 port for USB installation or network connectivity for network installation Kiaro! 200 User Guide... -
Page 17: Unpacking The Printer
Note: The printer model on the left has the roll cover. The printer model on the right does not have the roll cover. Use a wrench to remove the two 9/16” bolts from the bracket that secures the printer to the pallet. Remove the bracket. Kiaro! 200 User Guide... -
Page 18: Checking The Included Parts
Check to make sure the following items are included with the printer. • Starter ink tanks (one for each color) • Starter roll of labels • AC power cable • USB cable • Quick Start Guide • Installation CD Kiaro! 200 User Guide... -
Page 19: Installing The Printer
Do not touch the ink outlet and terminal to prevent soiling of the surrounding work area, damage to the ink tank, and poor printing. Never drop or apply excessive force to an ink tank. If you are using the Kiaro! 200D printer, rotate the ink tank to stir the ink. Kiaro! 200 User Guide... - Page 20 Quick Start Guide Note: This step applies only to the Kiaro! 200D ink. If you are using the standard Kiaro! 200, skip this step. Slowly insert the ink tank as far as it will go, and then close the ink tank lever.
-
Page 21: Initial Ink Filling
Caution: Never use a wrong power cord. Connect the power cord to the outlet. Turn on the main power switch. This switch is located directly above where the power cord connects to the unit. Kiaro! 200 User Guide... -
Page 22: Loading Media
Loading Media Some steps for loading media will differ slightly depending on the Kiaro! 200 model you are using. You can identify the Kiaro! 200 model based on whether it has a roll cover over the supply mandrel area. If your printer model has a roll cover, open it. - Page 23 • If your printer model does not have a roll cover, do not tighten the mandrel at this time. Open the ink tank door. Push the upper unit release lever up to open the upper unit. Kiaro! 200 User Guide...
- Page 24 Do not turn the supply mandrel by hand to advance the media. • If your printer model does not have a roll cover, ensure the mandrel is not tightened at this time. The media roll should rotate freely on the mandrel during this process. Kiaro! 200 User Guide...
- Page 25 Pull the media until it advances slightly past the manual cutter. If your printer model does not have a roll cover, turn the mandrel adjustment knob [3] clockwise to tighten the mandrel. Close the upper unit and then close the ink tank door. Kiaro! 200 User Guide...
-
Page 26: Verifying Label Width
In this situation, ink will be injected into the transport assembly and will require cleaning. Use the ruler on the manual cutter to verify the width of your label media before printing. Kiaro! 200 User Guide... -
Page 27: Installing The Printer Driver (Usb)
Ensure the Kiaro! 200 is powered on but not connected to your computer via the USB cable. Power on your computer and insert the Kiaro! 200 Installer CD in the CD drive. The Installer CD wizard will open. Choose Next. -
Page 28: Resolving Windows 7 And Windows 8 Usb Installation Issues
When you install the printer driver via USB, you first run the installation wizard on the Kiaro! 200 Installer CD and then connect the printer to your PC via the USB cable. If you connected the USB cable before running the installation wizard on the Kiaro! 200 Installation CD, Windows 7 and Windows 8 will not recognize the printer correctly. - Page 29 Quick Start Guide Right-click the QuickLabel Kiaro 200 in the Unspecified list. Then choose Properties. The QuickLabel Kiaro 200 Properties window will open. Choose the Hardware tab. Select Astro-Med IncQuickLabel Kiaro 200 and choose Properties. The Properties window will open. Choose the General tab.
-
Page 30: Installing The Printer Driver (Network)
Ensure the printer is powered on and connected to the network via a LAN cable. Power on your computer and insert the Kiaro! 200 Installer CD in the CD drive. The Installer CD wizard will open. Choose Next. Note: If the autorun program does not start automatically, use Windows Explorer to launch the “Setup.exe”... - Page 31 DHCP communication. • Select an installation location for the Kiaro! 200 Maintenance Utility when prompted. Choose Finish in the installation wizard after successfully installing the Kiaro! 200 Maintenance Utility and driver. Kiaro! 200 User Guide...
- Page 32 Quick Start Guide Kiaro! 200 User Guide...
-
Page 33: Introduction
Economy mode, you'll still print beautiful labels in 1200 dpi. The compact size of the Kiaro! 200 label printer makes it the perfect fit for a tabletop or work bench, easy to add to any production line or packaging room operation. The Kiaro! 200 comes included with Custom QuickLabel®... -
Page 34: Printer Part Names And Functions
Adobe® Photoshop® and Illustrator®. To get started printing labels, contact your QuickLabel Media Specialist to stock up on blank labels and Kiaro! 200 inks. Printer Part Names and Functions... -
Page 35: Kiaro! 200 Right Side View
Introduction Kiaro! 200 Right Side View [2] [3] [4] Part Description Maintenance Cover Open this cover when replacing items from print modules. LAN Port Connect a LAN cable here to connect to the computer. USB Port Connect a USB cable here to connect to the computer. -
Page 36: Printer Details
Open this door when replacing ink tanks. Media Delivery Slot Media is ejected through this slot. Manual Cutter Use the manual cutter to cut printed labels. Maintenance Cartridge Door Open this door when replacing the maintenance cartridge. Kiaro! 200 User Guide... -
Page 37: Inside The Printer
Push this lever up to release the upper unit. Ink Tanks Black (Bk), cyan (C), magenta (M), and yellow (Y) ink tanks are loaded. Transport Unit The transport unit feeds label media. Maintenance Cartridge Ink used to clean the print head is collected here. Kiaro! 200 User Guide... -
Page 38: Operation Panel
• On - Full. Maintenance Cartridge Warning • Blinking - Nearly full. • Off - Sufficient room to collect ink. • On - Media out. Media Out LED • Off - Media detected at media sensor. Kiaro! 200 User Guide... -
Page 39: Switching The Printer On And Off
Note: When the printer is in sleep mode, press the power key to return the printer to online mode. The printer will also wake up from the sleep mode automatically as soon as it starts receiving a print job. Kiaro! 200 User Guide... -
Page 40: Switching The Printer Off
If the printer is to remain operational, it should be powered on to prime/clean the printheads every 8 weeks. If the printer is to be stored, it should be powered on to prime/clean the printheads every 2 weeks. Kiaro! 200 User Guide... -
Page 41: Quicklabel Services
We provide factory-direct technical support for the Kiaro! 200 label printer, including ongoing maintenance, training, troubleshooting, and repair consultations. This support service is a standard part of the One Year Warranty that comes with your Kiaro! 200 purchase. We offer additional support in the form of an optional Customer Support Agreement, which acts as an extended warranty for your Kiaro! 200. - Page 42 We guarantee that when you call our technical support line, 877-757-7310 in the USA, (see Contact Information for Factory Sales and Service in the front of this manual for telephone numbers in other QuickLabel locations), someone in our Technical Support Department will help you troubleshoot your problem or assist you in the use of your label printer.
-
Page 43: Designing And Printing Labels
Most graphic design software applications provide anti-aliasing features that result in the appearance of smooth color transitions. When designing labels that will be printed on the Kiaro! 200, do not use anti-aliasing. This is especially important if you are printing text or barcodes. For example, an anti-aliased barcode may not scan correctly due to the color transitions between lines. -
Page 44: Printing Black
This will ensure such design elements never run to or over the edge of the label. Printing Black There are two ways to print black with the Kiaro! 200 printer. The printing method will vary based on the RGB values of the black color being printed. •... -
Page 45: Setting Up Labels In Third-Party Design Applications
This option is typically found in the application’s print window. Ensure the Color Adjustment in the Kiaro! 200 printer driver is set to “Application Managed”. Color management should be enabled in either the design application or printer driver, but not both. -
Page 46: Setting Up The Printer Driver
Kiaro! 200 Printing Preferences window will open. Note: You can also access the driver preferences via the application’s print dialog. From the Print window in your software, select QuickLabel Kiaro! 200 from the printer list and choose Properties or Setup (varies based on program). -
Page 47: Setting Up A Custom Label Stock
Kiaro! 200 Printing Preferences window will open. Note: You can also access the driver preferences via the application’s print dialog. From the Print window in your software, select QuickLabel Kiaro! 200 from the printer list and choose Properties or Setup (varies based on program). - Page 48 Up to four degrees of vertical overbleed can be used. Each vertical bleed degree increases the label length by .1 mm in each vertical direction. Up to eight degrees of horizontal overbleed can be used in each horizontal direction. Each horizontal Kiaro! 200 User Guide...
-
Page 49: Setting Up Appearance Options
Note: Driver instructions apply only to printing via third party design applications. If you are using Custom QuickLabel Omni, this process is not required. Open the appropriate printer window based on your version of Windows. •... - Page 50 Designing and Printing Labels Note: You can also access the driver preferences via the application’s print dialog. From the Print window in your software, select QuickLabel Kiaro! 200 from the printer list and choose Properties or Setup (varies based on program).
-
Page 51: Setting Advanced Color Options
Select whether to enable seam dithering. The Kiaro! 200 uses two adjacent printheads to print wide format labels. These printheads overlap slightly near the center of the print area. In some label designs, a printing artifact may appear resulting from the line where both printheads overlap. - Page 52 Kiaro! 200 Printing Preferences window will open. Note: You can also access the driver preferences via the application’s print dialog. From the Print window in your software, select QuickLabel Kiaro! 200 from the printer list and choose Properties or Setup (varies based on program).
- Page 53 - Select whether to adjust the image contrast. Choose Apply. Choose the Color Balance tab. Set the color balance options. You can choose whether to increase or decrease the cyan, magenta, yellow, and black colors. Choose Apply. Choose OK. Kiaro! 200 User Guide...
-
Page 54: Setting Up Layout Options
Kiaro! 200 Printing Preferences window will open. Note: You can also access the driver preferences via the application’s print dialog. From the Print window in your software, select QuickLabel Kiaro! 200 from the printer list and choose Properties or Setup (varies based on program). -
Page 55: Printing Labels
Open the label file using the appropriate software. Then choose to print the label, and enter the number of copies you would like to print. Note: If your software has a collate option, disable it before printing. Kiaro! 200 User Guide... -
Page 56: Using The Manual Cutter
Hold the printed label. If the printed label is short, press the FEED key to eject paper to the position where you can hold the label with ease. Kiaro! 200 User Guide... - Page 57 Feed Direction If the cut is not located in the center of the reflective mark, label feeding errors may occur. Adjust the stop position so the cut is centered on the mark. Setting the Stop Position Kiaro! 200 User Guide...
-
Page 58: Using The Status Monitor
Designing and Printing Labels Using the Status Monitor Viewing the Printer Status Open the Kiaro! 200 Status Monitor. You can access the Status Monitor from the Windows Start Menu, Kiaro! 200 Maintenance Utility, or the printer driver. • From the Windows Start Menu, choose Start >... -
Page 59: Viewing The Job Status And Cancelling Jobs
Designing and Printing Labels Viewing the Job Status and Cancelling Jobs Open the Kiaro! 200 Status Monitor. You can access the Status Monitor from the Windows Start Menu, Kiaro! 200 Maintenance Utility, or the printer driver. • From the Windows Start Menu, choose Start >... -
Page 60: Changing Or Replacing Media
Removing Media Some steps for removing media will differ slightly depending on the Kiaro! 200 model you are using. You can identify the Kiaro! 200 model based on whether it has a roll cover over the supply mandrel area. If your printer model has a roll cover, open it. - Page 61 Adjust the input guide inside the upper unit. Press the green lever and slide the guide fully away from the media. Then release the green lever. Pull the media out from the entry slot on the rear of the printer. Kiaro! 200 User Guide...
- Page 62 Grasp the roll of label media [5] and remove it from the mandrel. Reinstall the outer flange [4] and then turn the mandrel adjustment knob [3] clockwise to tighten the mandrel. If your printer model has a roll cover, close it. Kiaro! 200 User Guide...
-
Page 63: Loading Media
Loading Media Some steps for loading media will differ slightly depending on the Kiaro! 200 model you are using. You can identify the Kiaro! 200 model based on whether it has a roll cover over the supply mandrel area. If your printer model has a roll cover, open it. - Page 64 Designing and Printing Labels Open the ink tank door. Push the upper unit release lever up to open the upper unit. Turn the power switch on the supply mandrel to the on position. Kiaro! 200 User Guide...
- Page 65 Pull the media until it advances slightly past the manual cutter. If your printer model does not have a roll cover, turn the mandrel adjustment knob [3] clockwise to tighten the mandrel. Kiaro! 200 User Guide...
- Page 66 Label media should be able to move smoothly without being hindered by the exit guide. Note: The guide should be positioned to just touch the edge of the liner and not cause exposed liner to curl. If your printer model has a roll cover, close it. Kiaro! 200 User Guide...
- Page 67 Designing and Printing Labels Ensure the power switch on the supply mandrel is in the on position. Kiaro! 200 User Guide...
- Page 68 Designing and Printing Labels Kiaro! 200 User Guide...
-
Page 69: Kiaro! 200 Maintenance Utility
Kiaro! 200 Maintenance Utility About the Maintenance Utility The Kiaro! 200 Maintenance Utility is installed during the driver installation process. The utility allows you to view printer information and perform a variety of maintenance functions. Printer Information Tab Use the... -
Page 70: Viewing Printer Information
Start > All Programs > QuickLabel Kiaro! 200 > Kiaro! 200 Maintenance Utility. A language and printer prompt will open. Select a display language and the Kiaro! 200 printer you want to connect to. Choose OK. Choose the Printer Information tab. -
Page 71: Setting The Clock
Start > All Programs > QuickLabel Kiaro! 200 > Kiaro! 200 Maintenance Utility. A language and printer prompt will open. Select a display language and the Kiaro! 200 printer you want to connect to. Choose OK. Choose the Printer Information tab. -
Page 72: Position Tab
Start > All Programs > QuickLabel Kiaro! 200 > Kiaro! 200 Maintenance Utility. A language and printer prompt will open. Select a display language and the Kiaro! 200 printer you want to connect to. Choose OK. Choose the Position tab. -
Page 73: Setting The Horizontal Baseline
Start > All Programs > QuickLabel Kiaro! 200 > Kiaro! 200 Maintenance Utility. A language and printer prompt will open. Select a display language and the Kiaro! 200 printer you want to connect to. Choose OK. Choose the Position tab. -
Page 74: Setting The Stop Position
Start > All Programs > QuickLabel Kiaro! 200 > Kiaro! 200 Maintenance Utility. A language and printer prompt will open. Select a display language and the Kiaro! 200 printer you want to connect to. Choose OK. Choose the Position tab. -
Page 75: Cleaning Tab
Start > All Programs > QuickLabel Kiaro! 200 > Kiaro! 200 Maintenance Utility. A language and printer prompt will open. Select a display language and the Kiaro! 200 printer you want to connect to. Choose OK. Choose the Cleaning tab. -
Page 76: Preparing For Moving
Start > All Programs > QuickLabel Kiaro! 200 > Kiaro! 200 Maintenance Utility. A language and printer prompt will open. Select a display language and the Kiaro! 200 printer you want to connect to. Choose OK. Choose the Cleaning tab. -
Page 77: Priming The Printheads
Start > All Programs > QuickLabel Kiaro! 200 > Kiaro! 200 Maintenance Utility. A language and printer prompt will open. Select a display language and the Kiaro! 200 printer you want to connect to. Choose OK. Choose the Cleaning tab. -
Page 78: Test Print Tab
Start > All Programs > QuickLabel Kiaro! 200 > Kiaro! 200 Maintenance Utility. A language and printer prompt will open. Select a display language and the Kiaro! 200 printer you want to connect to. Choose OK. Choose the Test Print tab. -
Page 79: Adjustments Tab
Start > All Programs > QuickLabel Kiaro! 200 > Kiaro! 200 Maintenance Utility. A language and printer prompt will open. Select a display language and the Kiaro! 200 printer you want to connect to. Choose OK. Choose the Adjustments tab. - Page 80 Kiaro! 200 Maintenance Utility Choose Vertical Printhead Alignment. The Vertical Printhead Alignment window will open. This window provides a coarse and fine alignment pattern. Start with the coarse adjustment and align the printheads as close as possible. Then use the fine adjustment for precision alignment.
-
Page 81: Setting Up Standard Registration
Kiaro! 200 Maintenance Utility Use a magnifying glass or loupe to examine the pattern closely. Note if vertical adjustment is needed based on line alignment. If the reference line (V) is aligned with zero, no adjustment is needed. Enter the value that is aligned with the reference line (V) in the pattern. If the reference line is between values, visually estimate the measurement. - Page 82 Start > All Programs > QuickLabel Kiaro! 200 > Kiaro! 200 Maintenance Utility. A language and printer prompt will open. Select a display language and the Kiaro! 200 printer you want to connect to. Choose OK. Choose the Adjustments tab.
- Page 83 Kiaro! 200 Maintenance Utility Choose Print Registration Pattern. Use a magnifying glass or loupe to examine the patterns closely. The top pattern is used for vertical registration, and the bottom pattern is used for horizontal registration. Note if vertical or horizontal adjustments are needed based on color alignment.
- Page 84 Select whether to optimize printhead adjustment for seam dithering. The Kiaro! 200 uses two adjacent printheads to print wide format labels. These printheads overlap slightly near the center of the print area. In some label designs, a printing artifact may appear resulting from the line where both printheads overlap.
-
Page 85: Setting Up Manual Registration
Start > All Programs > QuickLabel Kiaro! 200 > Kiaro! 200 Maintenance Utility. A language and printer prompt will open. Select a display language and the Kiaro! 200 printer you want to connect to. Choose OK. Choose the Adjustments tab. - Page 86 Kiaro! 200 Maintenance Utility Choose Manual Color Registration. The Color Registration window will open. Manual registration can be adjusted for three media width groups, or brackets. Select the width bracket you will adjust. These brackets are based on the total width (TW) of the media construction, including the narrow portions of exposed liner near the edges of the media.
- Page 87 Kiaro! 200 Maintenance Utility Note the positive and negative adjustment directions for the left printhead relative to the right printhead. • Horizontal - Use this adjustment to move the left and right printheads horizontally relative to each other. Positive values move the printheads closer.
-
Page 88: Using The Slant Adjustment
Start > All Programs > QuickLabel Kiaro! 200 > Kiaro! 200 Maintenance Utility. A language and printer prompt will open. Select a display language and the Kiaro! 200 printer you want to connect to. Choose OK. Choose the Adjustments tab. - Page 89 Kiaro! 200 Maintenance Utility Choose Slant Adjustment. The Slant Adjustment window will open. Choose Print Slant Pattern. Use a magnifying glass or loupe to examine the patterns closely. Note if slant adjustments are needed based on color alignment. Kiaro! 200 User Guide...
-
Page 90: Using The Missing Nozzle Adjustment
Start > All Programs > QuickLabel Kiaro! 200 > Kiaro! 200 Maintenance Utility. A language and printer prompt will open. Select a display language and the Kiaro! 200 printer you want to connect to. Choose OK. Choose the Adjustments tab. - Page 91 Kiaro! 200 Maintenance Utility Choose Missing Nozzle Adjustment. The Missing Nozzle Adjustment window will open. Choose Print Missing Nozzle Adjustment Pattern. The pattern will be printed. Kiaro! 200 User Guide...
- Page 92 Kiaro! 200 Maintenance Utility Examine the pattern for missing lines within the grids. Note the locations of any missing lines for each color grid. The printhead (left or right) is indicated after the color abbreviation for each pattern. The left printhead is indicated as 2, and the right printhead is indicated as 1. For example, K1 indicates the black pattern printed by the right printhead.
-
Page 93: Adjusting The Top-Of-Form Threshold
Kiaro! 200 Maintenance Utility • Head - Select the color of the missing line and the affected printhead. In the previous example, a missing line appeared in the black pattern of the right printhead (K1). • Page - Choose whether the missing line is on the first or second test page for the selected color. - Page 94 Start > All Programs > QuickLabel Kiaro! 200 > Kiaro! 200 Maintenance Utility. A language and printer prompt will open. Select a display language and the Kiaro! 200 printer you want to connect to. Choose OK. Choose the Adjustments tab.
-
Page 95: Turning On Auto-Calibration
Start > All Programs > QuickLabel Kiaro! 200 > Kiaro! 200 Maintenance Utility. A language and printer prompt will open. Select a display language and the Kiaro! 200 printer you want to connect to. Choose OK. Choose the Adjustments tab. - Page 96 Kiaro! 200 Maintenance Utility Choose Density Adjustment. The Density Adjustment window will open. Choose Print Density Adjustment Pattern. A density pattern for each color will be printed. The left/right color pairs in this pattern allow you to compare densities for each printhead.
-
Page 97: System Logs Tab
Start > All Programs > QuickLabel Kiaro! 200 > Kiaro! 200 Maintenance Utility. A language and printer prompt will open. Select a display language and the Kiaro! 200 printer you want to connect to. Choose OK. Choose the System Logs tab. -
Page 98: Saving Log Files
Start > All Programs > QuickLabel Kiaro! 200 > Kiaro! 200 Maintenance Utility. A language and printer prompt will open. Select a display language and the Kiaro! 200 printer you want to connect to. Choose OK. Choose the System Logs tab. -
Page 99: Parts Replacement Tab
Start > All Programs > QuickLabel Kiaro! 200 > Kiaro! 200 Maintenance Utility. A language and printer prompt will open. Select a display language and the Kiaro! 200 printer you want to connect to. Choose OK. Choose the Parts Replacement tab. -
Page 100: Replacing The Purge Unit
Start > All Programs > QuickLabel Kiaro! 200 > Kiaro! 200 Maintenance Utility. A language and printer prompt will open. Select a display language and the Kiaro! 200 printer you want to connect to. Choose OK. Choose the Parts Replacement tab. -
Page 101: Advanced Tab
Kiaro! 200 Maintenance Utility Advanced Tab Advanced tab is reserved for use only by Technical Support. Kiaro! 200 User Guide... - Page 102 Kiaro! 200 Maintenance Utility Kiaro! 200 User Guide...
-
Page 103: Printer Maintenance
It is recommended that ink tanks be stored where temperature does not rise extremely. • Be careful not to stain your clothes or the surrounding area by the used ink tank. Open the ink tank door. Kiaro! 200 User Guide... - Page 104 Do not touch the ink outlet and terminal to prevent soiling of the surrounding work area, damage to the ink tank, and poor printing. Never drop or apply excessive force to an ink tank. If you are using the Kiaro! 200D printer, rotate the ink tank to stir the ink. Kiaro! 200 User Guide...
- Page 105 Printer Maintenance Note: This step applies only to the Kiaro! 200D ink. If you are using the standard Kiaro! 200, skip this step. Slowly insert the ink tank as far as it will go, and then close the ink tank lever.
-
Page 106: Replacing The Maintenance Cartridge
Otherwise, ink may leak and cause stains. • Ink adheres to the top of the maintenance cartridge after it has been used. Handle the maintenance cartridge carefully during replacement. The ink may stain clothing. Open the maintenance cartridge door. Kiaro! 200 User Guide... - Page 107 The spilled or scattered ink may stain the floor or clothing. Insert a new maintenance cartridge. Close the maintenance cartridge door. The error message on the Status Monitor will disappear, and printing will start. Kiaro! 200 User Guide...
-
Page 108: Cleaning The Printer
This could cause personal injury or damage to the printer. Press the power key for at least one second. The Power LED will blink at long intervals, and then the printer will enter sleep mode. Kiaro! 200 User Guide... - Page 109 Printer Maintenance Turn off the power switch, and then remove the power plug from the wall outlet. Open the ink tank door. Push the upper unit release lever up to open the upper unit. Kiaro! 200 User Guide...
- Page 110 The transport unit [1] and upper unit bottom areas [2] are illustrated below. [ 1 ] [ 2 ] Note: Do not clean with tissues or paper towels. Torn pieces of paper or paper dust may get inside printer and cause malfunctions. Kiaro! 200 User Guide...
- Page 111 If the “Paper length error” or “Paper jam error” occurred and an error message is continuously displayed, the paper detection area may be soiled with paper dust. Clean the area with a cotton swab. Close the upper unit and then close the ink tank door. Kiaro! 200 User Guide...
-
Page 112: Upgrading The Printer Firmware
Start > All Programs > QuickLabel Kiaro! 200 > Kiaro! 200 Maintenance Utility. A language and printer prompt will open. Select a display language and the Kiaro! 200 printer you want to connect to. Choose OK. Choose the Printer Information tab. -
Page 113: Troubleshooting
Close the maintenance door open tridge door is open. cartridge door. Removing a Paper Jam If a paper jam occurs during printing, an error message will be displayed and printing will be suspended. Open the ink tank door. Kiaro! 200 User Guide... - Page 114 Troubleshooting Push the upper unit release lever up to open the upper unit. Remove the media jammed on the transport unit. Cut the media before the jam. Reload the label media. Kiaro! 200 User Guide...
-
Page 115: Printer Not Operating Correctly
Check the ink tanks and make sure that they are installed correctly. The printer driver is not selected on the Make sure that the Kiaro! 200 printer is computer. selected when you start the print job. Print data contains an image with a If you see the STATUS LED flashing, large capacity. -
Page 116: Paper Is Not Feeding Correctly
With some Status Monitor settings, printer errors will not be displayed and the Status Monitor will not start. Open the printer driver Status tab and then click Status Monitor. Set the details after the Status Monitor starts. Kiaro! 200 User Guide... -
Page 117: Print Results Are Unsatisfactory
Check the interface cable and make sure that it is connected to the printer and the computer. The printer driver is not selected on the Make sure that the Kiaro! 200 printer is computer. selected when you start the print job. Slow to Print... -
Page 118: Printed Colors Appear Incorrect
As media passes through the transport assembly, these gears come into contact with the surface of the label material. Possible Solutions Clean the spur gears with a slightly damp lint-free cloth and let air-dry before use. Kiaro! 200 User Guide... -
Page 119: Background Pattern
As media passes through the transport assembly, nozzles that are not firing based on the position and the label content being printed will fire the smallest amount of ink possible based on a built-in algorithm. Possible Solutions A solution is not applicable because the pattern is normal. Kiaro! 200 User Guide... -
Page 120: Printhead Not In Correct Position
Cause The print module is obstructed and did not fully lower into a printing position. The distance between the media and the printheads will produce abstract printed output. Possible Solutions Contact Technical Support. Kiaro! 200 User Guide... -
Page 121: Media Contacting Printheads
Media is physically coming into contact with the printhead surfaces as it passes through the transport assembly. Possible Solutions Reload the media, ensuring it is perfectly aligned and the media guides are not causing wrinkling. Inspect the roll of media for defects. Kiaro! 200 User Guide... -
Page 122: Poor Print Quality
Severe mottled look across the printable web. Ink unable to be absorbed further. Ink may exhibit signs of cracking across the top of the media. Cause Using unapproved media type or using wrong media profile. Possible Solutions Use approved media or the correct media profile. Kiaro! 200 User Guide... -
Page 123: Media Surface Contamination
Cause Contaminants on the label surface can cause undesirable defects or anomalies because it interferes with the absorption of ink into the media. Possible Solutions Handle the media with care. Kiaro! 200 User Guide... -
Page 124: Scuffing Of Surface Material
Inherent flaws in the surface of a media can become more visible after printing solid color fills. Possible Solutions Try using a rewinder with a dancer-arm, as this helps ensure the media is as flat and moves as smoothly as possible. Kiaro! 200 User Guide... -
Page 125: Non-Functioning Nozzle
Cleaning Printheads Running a missing nozzle adjustment routine in the maintenance utility and adjusting based on which number has broken lines around it will help compensate by firing the adjacent nozzles more. Using the Missing Nozzle Adjustment Kiaro! 200 User Guide... -
Page 126: Clogged Nozzle
Running a printhead cleaning routine from the maintenance utility will attempt to resolve the clog. Cleaning Printheads Running a printhead priming routine from the maintenance utility will drain and refill the printheads with ink. Priming the Printheads If the problem persists, please contact Technical Support. Kiaro! 200 User Guide... -
Page 127: Debris On Printhead
Running a heavy printhead cleaning routine from the maintenance utility will attempt to resolve the clog. Cleaning Printheads Running a printhead priming routine from the maintenance utility will drain and refill the printheads with ink. Priming the Printheads If the problem persists, please contact Technical Support. Kiaro! 200 User Guide... -
Page 128: Wide Voids In Print
Description Wide areas across one or more printheads are not printing. Cause The printheads are not correctly seated in the print module and data is being lost as a result. Possible Solutions Please contact Technical Support. Kiaro! 200 User Guide... -
Page 129: Changes In Density Due To Torque
Horizontal lines of density change across the web. Cause Too much torque is causing the label roll to get pulled during printing. Possible Solutions Lower rewinder torque. Ensure the rewinder is properly aligned to the media. Kiaro! 200 User Guide... -
Page 130: Physical Smearing Of Wet Ink
Smear marks on media surface after printing. Cause Media is physically coming into contact with surfaces before ink is dried. Possible Solutions Handle media with care post-printing. Ensure media is loaded correctly and is flat while passing through the transport assembly. Kiaro! 200 User Guide... -
Page 131: Media Being Pulled At Label Exit
As the ink is being sprayed in the printer, the media moves faster or slower than intended and a print defect results. Possible Solutions If a rewinder is in use, ensure the rewinder is aligned with the exiting media. Ensure the label exit is uninhibited. Lower rewinder torque. Kiaro! 200 User Guide... -
Page 132: Printhead Contamination
Possible Solutions Perform a printhead priming and then immediately one or more heavy cleanings via the maintenance utility to flush the ink out. • Priming the Printheads • Cleaning Printheads Kiaro! 200 User Guide... -
Page 133: Setting Up Image Placement For Full-Bleed Printing
Center the box on the label, so that the box covers the entire label and extends past all edges of the label. Print the label to the Kiaro! 200 with a quantity of 10 or more. Inspect all of the labels printed. - Page 134 Ensure that the liner from the right edge of the physical label to the right edge of the total construction is 14mm. If it is not exactly 14mm, the media is made out of specification and full horizontal bleed is not possible on this roll. Kiaro! 200 User Guide...
-
Page 135: Rewinder
Ensure the power switch [1] on the rewinder is in the off position. Use a 1/8” hex key to install the two shoulder screws [2] provided with the rewinder. Fasten the shoulder screws into the two threaded holes on Kiaro! 200 black frame as illustrated. - Page 136 Lower the rewinder while ensuring the slots engage with the screws. Plug the rewinder power cord [3] into the power receptacle [4] on the Kiaro! 200. If necessary, you can rotate the feet on the bottom of the frame to adjust the height of each corner.
-
Page 137: Rewinding Labels
Rewinder Rewinding Labels The rewinder automatically winds printed media exiting the Kiaro! 200 onto rolls. The setup process for rewinding labels requires an empty label core and tape. Note: Do not turn the rewinder mandrel by hand to rewind the media. Turning the mandrel by hand can result in rewinder damage. - Page 138 Do not turn the mandrel by hand to rewind the media. The media rewind path is illustrated below. Resume the print job on the Kiaro! 200. The rewinder will rewind media automatically as needed. The rewinder will stop when the printer stops advancing media or when the printer is out of media.
-
Page 139: Adjusting Rewinder Alignment
The edge of the media [2] should be squarely aligned with the inner flange [3]. When the adjustment is complete, tighten the four screws [1] to secure the rewinder in place. Repeat the rewinder setup process. Rewinding Labels Kiaro! 200 User Guide... - Page 140 Rewinder Kiaro! 200 User Guide...
-
Page 141: Safety Warnings And Precautions
RH (with no condensation). • To ensure normal operation of the printer and avoid possible damage, never install the printer near large office equipment or any other type of electrical device that emits a strong magnetic field. Kiaro! 200 User Guide... -
Page 142: Power Supply And Power Cord
To avoid damaging the power plug, which could cause a short circuit and cause a fire or electrical shock, never pull on the power cord to unplug the cord from the power supply. Always grip the plug to remove it from the power supply. Kiaro! 200 User Guide... -
Page 143: General Safety
If you continue to use the printer, this could cause a fire or serious electrical shock. • To avoid a fire or electrical shock, never use flammable sprays around the printer. Kiaro! 200 User Guide... -
Page 144: Moving The Printer
Lift only by the black frame on the bottom of the printer. Do not grasp any other part of the printer to lift it. Do not lift the unit by the print engine. Kiaro! 200 User Guide... -
Page 145: Ink Tank And The Maintenance Cartridge
Important • Do not install or remove the ink tank or maintenance cartridge unless it needs to be replaced. Doing so can accelerate wear of the printer components. Kiaro! 200 User Guide... - Page 146 Safety Warnings and Precautions Kiaro! 200 User Guide...
-
Page 147: Specifications
Minimum length: 1.00 in or 25.4 mm Paper thickness 145 ~ 255 µm Paper capacity 12” O.D. supply roll TOF type Reflective mark only Ink used Aqueous dye-based ink Yellow (Y), Magenta (M), Cyan (C), and Black (Bk) Kiaro! 200 User Guide... - Page 148 Operating environment (temperature) 59 to 86 degrees Fahrenheit 15 to 30 degrees Celsius Operating environment (humidity) 10% to 90% relative humidity (no con- densation) Power rating 100-240 VAC 50-60 Hz 3.5A Power consumption Maximum power: 350W or less Kiaro! 200 User Guide...
- Page 149 Ho rizontal Baseline 59 Paper Jam Removal 99 Paper Retainer 22 PAUSE Key 24 Ink Filling 7 Power Connector 21 Ink Levels 46 Power Key/LED 24 Ink Tank Door 22 Power On/Off 25 Ink Tank Installation 5 Kiaro! 200 User Guide...
- Page 150 Upgrade 56, 98 Rewinder 121, 123, 125 Upper Unit 22 Upper Unit Release Lever 23 USB Port 21 Safety 127 Shipping 62 Slant Adjustment 74 Vertical Baseline 58 Specifications 133 Vertical Printhead Alignment 65 Standard Registration 68 Kiaro! 200 User Guide...
Need help?
Do you have a question about the Kiaro! 200 and is the answer not in the manual?
Questions and answers