
Related Manuals for Argon 18 Electron Pro


Summary of Contents for Argon 18 Electron Pro
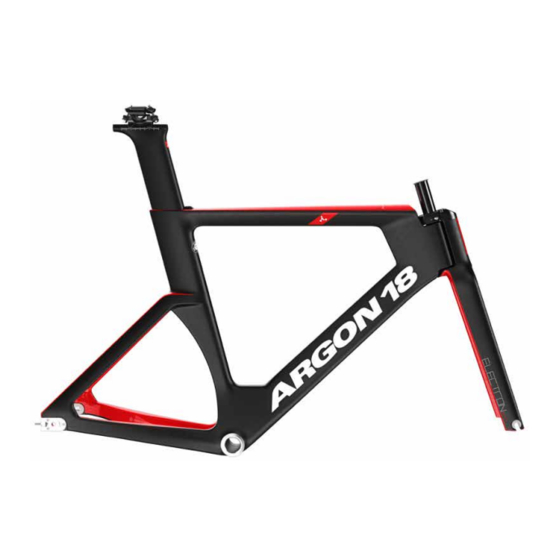
- Page 1 ELECTRON PRO: ASSEMBLY GUIDE Revision 1.0 – 10-20-2016 – Valid for MY2017 Electron Pro...
-
Page 2: Table Of Contents
For the warranty to be valid, the bicycle must be fully ......................24 9.6. Extension Bars assembled by an authorized Argon 18 dealer. High-end components, particularly carbon parts, need extra care 10. Parts’ SKUs and Descriptions................25 when assembled. These components must be installed using ........................26... -
Page 3: Tools Needed And First Aid Kit
ELECTRON PRO: 1. Tools Needed and First Aid Kit Tools needed for assembly 1. Allen Key Set 2. 8mm Wrench 3. Grease 4. Loctite #242 or #243 5. Clean Rags 6. Carbon Paste 7. Torque Wrench and Hex bits 8. Extension for Hex Bit or Extended 5mm Hex Bit First Aid Kit: Essential parts to always have on hand IN CASE OF EMERGENCY…THIS MIGHT SAVE YOUR RIDE! -
Page 4: Specifications
ELECTRON PRO: 2. Specifications Wheels • Rear: Track 120mm; 10mm axle • Front: Track 100mm; 10mm axle Tire Clearance • Frame/Fork design according to ETRTO 22-622 standard (European Tire and Rim Technical Organization) • Possible fit of 23mm tires depending on rim and manufacturer. Check and test before riding. -
Page 5: Configurations
ELECTRON PRO: 3. Configurations (Pursuit)* The Electron Pro can be assembled in either Pursuit (Aerobar) or Sprint/Track (standard drops) configuration. Refer to sections 9.1 and 9.2 for instructions (pp.17-19). *Aerobar is optional (sold separately). - Page 6 ELECTRON PRO: 3. Configurations (Track/Sprint)
-
Page 7: Geometry
ELECTRON PRO: 4. Geometry* Electron Pro (with pursuit bar) – Stack and Reach* Size Stack Min Stack Max Reach Min Reach Max Extension Spacing Spacing 537.3 637.3 463.6 508.6 120 or 150 120 to 150 551.9 651.9 475.6 520.6 120 or 150 120 to 150 566.4... -
Page 8: Frameset Inspection
ELECTRON PRO: 5. Frameset Inspection BEFORE ASSEMBLING YOUR NEW ELECTRON PRO, MAKE SURE THAT YOU HAVE ALL THE FOLLOWING: 1. Frameset parts checklist (see p.10) 2. Inspect the frame for cosmetic aspect (scratches, bumps, cracks, paint defect, etc.) 3. For reference, check serial number and write it on p.2 4. -
Page 9: Frameset Parts
SKU: 80591 SKU: 80592 SKU: 80593 SKU: 80594 SKU: 80595 SKU: 80294 SKU: 80295 Images are for reference only. Proportions are not accurate. Argon 18 reserves the right to modify/change parts of the frameset at any moment without prior notice. -
Page 10: Seat Post Collar Assembly
ELECTRON PRO: 6. Seat Post Collar Assembly Apply carbon paste on the seat post where it inserts inside the frame. Insert seat post CARBON PASTE into frame at desired height. Insert seat post clamp into frame cavity and tighten seat post clamp’s screw at 5.5Nm. -
Page 11: Seat Post Head Assembly
ELECTRON PRO: 7. Seat Post Head Assembly Slide seat post shuttle (3) into seat post rail at desired position. Screw seat post chariot (1) onto shuttle (make sure shuttle M5 (5) 80582 holes are aligned upwards) with M5x16 (7) screws and tighten to 6Nm. - Page 12 ELECTRON PRO: 7. Seat Post Head Assembly MIN. SETBACK ZERO SETBACK MAX. SETBACK 5.2 (± 2.6)
-
Page 13: Rear Dropouts
ELECTRON PRO: 8. Rear Dropouts 80602 1.5Nm 35987 Textured surface must face outward 80601 Assemble as shown. Apply blue thread locking compound (Loctite #242 or #243) on all screws. Tighten at 1.5Nm. -
Page 14: Fork And Steerer/Aerobar Setup
ELECTRON PRO: 9. Fork and Steerer/Aerobar Setup 1. Clean both upper and lower bearing bores. Fit check with bearings and make sure there is no interference. 2. Apply grease in both upper and lower bearing bores and insert bearings. 80475 3. - Page 15 ELECTRON PRO: 9. Fork and Steerer/Aerobar Setup Top bearing (80475) Loose Lower bearing (80476) 5. Screw in steerer. Make sure fork collar screw is loosened. 6. Lightly compress fork bearings until there is no possible movement but can rotate fork without any restriction.
- Page 16 ELECTRON PRO: 9. Fork and Steerer/Aerobar Setup 1-2mm Loose 5.5Nm...
-
Page 17: Steerer Module Setup Instructions
ELECTRON PRO: 9.1. Steerer Module Setup Instructions 1. Assemble steerer module using bolts provided (2x front M6x12 + 1x central M6x35). Make sure washer is placed under central bolt. Tighten all bolts at 10Nm. Use an extended M5 Hex bit or extension to access central bolt. - Page 18 ELECTRON PRO: 9.1. Steerer Module Setup Instructions 2. The design of the steerer module allows it to be cut to length based on stem height position, similar to a standard fork steerer. You will need to cut the aluminum steerer as shown (use standard steerer cutting jig).
-
Page 19: Aerobar Setup Instructions
ELECTRON PRO: 9.2. Aerobar Setup Instructions* 1. Assemble aerobar with provided M6 screws (2x 20mm, 1x 30mm and 1x 40mm). Apply dab of grease under all bolt heads and threads. 2. Tighten all bolts at 12Nm. 3. Install screw cover with provided 80600 M3 screws. -
Page 20: Extension Bar Setup
ELECTRON PRO: 9.3. Extension Bar Setup Refer to Frameset Parts Checklist for specific parts’ SKUs and descriptions, p.15. Install as shown and choose appropriate spacers, sleeve nuts and screw length based on required fit. Apply carbon paste onto extension bars prior... - Page 21 ELECTRON PRO: 9.3. Extension Bar Setup Optional bridge Choose length: 15, 25, 35, 45 or 55mm Choose length: 5, 10, 20, 40 or 70mm Choose length: 0, +10, +30 or +60mm...
-
Page 22: Optional Bridge
ELECTRON PRO: 9.4. Optional Bridge Bridge is optional and can be installed to increase armrest lateral stiffness (e.g.: when set up at maximum height.) It also can be cut to reduce overall length (cut at marked lines.) Optional cut line... -
Page 23: Armrest Positioning Options
ELECTRON PRO: 9.5. Armrest Positioning Options Extension bars center-to-center: from 120mm to 150mm 120mm 150mm Armrests height: from 39.5mm to 139.5mm Bridge/No bridge • Armrests in/out position: 0/+15mm (total center-to-center from 120mm to 180mm) • Armrests foward/aft position: from -20mm to +25mm 139.5mm... -
Page 24: Extension Bars
ELECTRON PRO: 9.6. Extension Bars Cut the extension bars at the desired length. Note that end-plugs might not fit well if you cut more than 70mm. Apply carbon fibre paste in the clamping area. 70mm Controlled Inside Diameter CONTROLLED OUTSIDE... -
Page 25: Parts' Skus And Descriptions
SKU: 80591 SKU: 80592 SKU: 80593 SKU: 80594 SKU: 80595 SKU: 80294 SKU: 80295 Images are for reference only. Proportions are not accurate. Argon 18 reserves the right to modify/change parts of the frameset at any moment without prior notice. -
Page 26: Frameset
ELECTRON PRO: 10.1. Frameset* Description Picture Frame 80601 Rear dropout insert - Outside part 80602 Rear dropout insert - Inside part 80475 Top bearing - FSA - MR055E 80476 Bottom bearing - FSA - MR054 *Except for the frame itself, which is not sold as a spare part, all parts can be ordered by referring to their respective SKU number. - Page 27 ELECTRON PRO: 10.1. Frameset Description Picture FK.ELECPRO.S.245A FK.ELECPRO.M.245A Fork (cut for small, medium, large) FK.ELECPRO.L.245A 80485 Steerer (Medium size) 80486 Steerer (Large size) 80484 Steerer (Small size) 80653 L-Tool...
-
Page 28: 5 Steerer Module
ELECTRON PRO: 10.1. Frameset Description Picture 80576 Seat post clamp wedge 80577 Seat post clamp Base 35987 Chain Tensioner - Subassembly 80584 SHCS_M5x16 80585 Hex bolt_M5x35 80648 Steerer Module... - Page 29 ELECTRON PRO: 10.1. Frameset Description Picture SP.ELECPRO.245A Seat post 80578 Seat post chariot 80579 Seat post barrel nut 80580 Seat post shuttle 80581 Lower clamp 80582 Upper clamp 80583 Half-moon nut...
-
Page 30: Aerobar
ELECTRON PRO: 10.2. Aerobar* Description Picture 80480 Track Pursuit Aerobar 80586 Aerobar extension clamp - bottom 80587 Aerobar extension clamp - top 80588 Bridge 80399 Armrest - Right 80399 Armrest - Left 80472 Armrest pad - Right 80472 Armrest pad - Left... - Page 31 ELECTRON PRO: 10.2. Aerobar Description Picture 80589 AB Screw Cover 38997 TT05-HB-WSR150 Spacer 5mm 38998 TT05-HB-WSR150 Spacer 10mm 38999 TT05-HB-WSR150 Spacer 20mm 39000 TT05-HB-WSR150 Spacer 40mm 39001 TT05-HB-WSR150 Spacer 70mm 80293 PAH1 -407A -Rev1 Sleeve nut min PAH1 -407A -Rev1 Sleeve nut min...
- Page 32 ELECTRON PRO: 10.2. Aerobar Description Picture PAH1 -407A -Rev1 Sleeve nut min 80294 +30mm PAH1 -407A -Rev1 Sleeve nut min 80295 +60mm 80591 FHCS_M5x18 80590 FHCS_M5x15 80592 FHCS_M5x25 80593 FHCS_M5x35 80594 FHCS_M5x45 80595 FHCS_M5x55...
- Page 33 ELECTRON PRO: 10.2. Aerobar Description Picture 80596 FHCS_M5x12 80597 FHCS_M3x8 80598 FHCS_M6x30 80599 FHCS_M6x40 80600 FHCS_M6x20 39279 EXTENSION BARS 80651 EXTENSION END CAPS...
Need help?
Do you have a question about the Electron Pro and is the answer not in the manual?
Questions and answers