Algo 8036 Installation/Configuration Manual
Sip multimedia intercom
Hide thumbs
Also See for 8036:
- User manual (59 pages) ,
- User manual (75 pages) ,
- Install manual (4 pages)
Table of Contents
Advertisement
Quick Links
8036 SIP Multimedia Intercom
Installation & Configuration
Document 90-00081
2017-05-11
Page 1
FW Version 1.5.1
Order Codes
8036
SIP Multimedia Intercom
Algo Communication Products Ltd
4500 Beedie St Burnaby BC Canada V5J 5L2
www.algosolutions.com
8036 SIP Multimedia Intercom (FW 1.5.1)
support@algosolutions.com
(604) 454-3792
Advertisement
Table of Contents

Related Manuals for Algo 8036


Summary of Contents for Algo 8036
- Page 1 8036 SIP Multimedia Intercom (FW 1.5.1) 8036 SIP Multimedia Intercom FW Version 1.5.1 Installation & Configuration Order Codes 8036 SIP Multimedia Intercom Document 90-00081 Algo Communication Products Ltd (604) 454-3792 2017-05-11 4500 Beedie St Burnaby BC Canada V5J 5L2 support@algosolutions.com Page 1 www.algosolutions.com...
-
Page 2: Table Of Contents
8036 SIP Multimedia Intercom (FW 1.5.1) Table of Contents IMPORTANT SAFETY INFORMATION ...................... 8 ABOUT THE ALGO 8036 SIP MULTIMEDIA INTERCOM ................9 PRODUCT TOUR ........................... 10 GETTING STARTED - QUICK INSTALL & TEST ..................11 INSTALLATION ............................. 12 WALL MOUNTING ..........................12 ................... - Page 3 8036 SIP Multimedia Intercom (FW 1.5.1) ) ................. 29 AXIMUM URATION NBOUND UTBOUND ALLS BASIC SETTINGS TAB - VIDEO ....................... 30 ..........................30 IDEO ............................. 31 ROFILE EVEL ............................31 ACKET ........................31 UALITY ONTROL ETHOD ........................31 AXIMUM ANDWIDTH QP M ............................
- Page 4 8036 SIP Multimedia Intercom (FW 1.5.1) ............................40 ESCRIPTION ............................. 41 ACKGROUND ..........................41 UTTON AYOUT ) ..............41 CTION ON ACKGROUND OUCH VENT OUTSIDE OF BUTTONS ............................. 41 UTTON ........................... 41 UTTON # ............................41 UTTON ..............................41 ............................. 42 CTION –...
- Page 5 8036 SIP Multimedia Intercom (FW 1.5.1) ADVANCED SETTINGS TAB – TONES ..................... 57 ......................57 PLOADING USTOM UDIO ILES ADVANCED SETTINGS TAB – ADVANCED SIP ..................58 ..........................58 UTBOUND ROXY STUN S ............................ 58 ERVER ) ........................58 EGISTER...
- Page 6 / transient. Algo recommends that this product be installed by a qualified electrician. If you are unable to understand the English language safety information then please contact Algo by email for assistance before attempting an installation support@algosolutions.com. Consignes de Sécurité Importantes Ce produit est alimenté...
- Page 7 Spannungssprüngen geschützt werden. Algo empfiehlt das Produkt von einem qualifizierten Elektriker installieren zu lassenv. Sollten Sie die englischen Sicherheitsinformationen nicht verstehen, kontaktieren Sie bitte Algo per Email bevor Sie mit der Installation beginnen, um Unterstützung zu erhalten. Algo kann unter der folgenden E- Mail-Adresse erreicht werden: support@algosolutions.com.
-
Page 8: Important Safety Information
“sound to air” acoustic testing. WET OR OUTDOOR ENVIRONMENTS The 8036 SIP Multimedia Intercom is intended for indoor or outdoor locations and may be subjected to spray or weather, provided the rear wiring cavity is properly sealed to prevent water ingress. -
Page 9: About The Algo 8036 Sip Multimedia Intercom
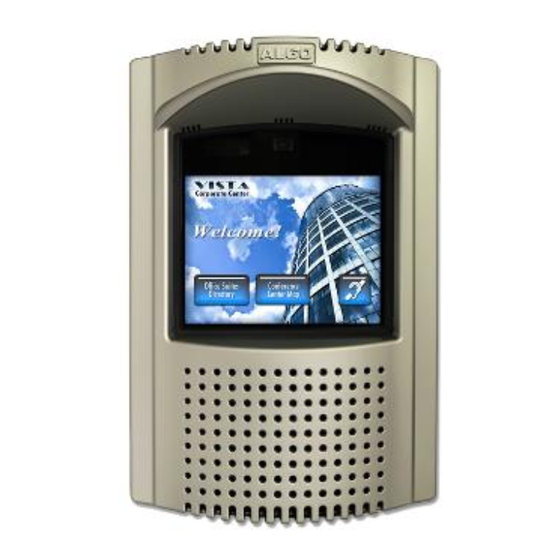
8036 SIP Multimedia Intercom (FW 1.5.1) About the Algo 8036 SIP Multimedia Intercom The 8036 is a multimedia SIP endpoint from Algo combining the functionality of an IP phone, security camera, and interactive kiosk. Easily configurable to support multiple applications and interface... -
Page 10: Product Tour
8036 SIP Multimedia Intercom (FW 1.5.1) Product Tour Document 90-00081 Algo Communication Products Ltd (604) 454-3792 2017-05-11 4500 Beedie St Burnaby BC Canada V5J 5L2 support@algosolutions.com Page 10 www.algosolutions.com... -
Page 11: Getting Started - Quick Install & Test
PoE network switch. The LCD screen will turn on and the 8036 will display the IP address on the screen. If the 8036 is unable to obtain an IP address from the DHCP server, it will default to the fixed IP address 192.168.1.111. -
Page 12: Installation
This section will guide you with the physical installation of your new 8036 SIP Multimedia Intercom. Wall Mounting The 8036 can be either surface or flush mounted. The unit is designed to shed rainwater and allow air ventilation only when oriented in the correct position (ALGO logo at top) and installed vertically. -
Page 13: Flush Mounting Into Drywall (Interior)
3. After connecting the Ethernet cable, use the #8 x 1.5” Type A Pan Head screws to secure the 8036 housing to the Drywall Bracket. 4. Replace the Front Bezel and keep the Algo Security Tool in a safe location. -
Page 14: Flush Mounting Into Other Materials Or Outdoors
(see “PoE Network Connection” on page 15). 2. While the 8036 is designed to withstand rain, it may be undesirable for water to enter the wall cavity. This can be achieved by sealing the cable hole prior to mounting or using the Mounting Gasket between the 8036 and wall. -
Page 15: Surface Mounting
The Surface Mount Bracket may be used on a wall surface where flush mounting is undesirable, or not practical. The bracket also may be good option when integrating the 8036 into stonework. 1. Mount the Surface Mount Bracket using the #8 x 1.5” Type A Pan Head screws supplied. - Page 16 Head screws to secure the 8036 housing to the Surface Mount Bracket. 3. Replace the Front Bezel and keep the Algo Security Tool in a safe location. Replace the ALGO Logo Badge. Note: The Drywall Bracket is not required when surface mounting.
-
Page 17: Mounting Height
8036 SIP Multimedia Intercom (FW 1.5.1) Mounting Height The 8036 should be mounted at an appropriate height for your intended application. The considerations are: 1. Easy readability of the interface screens for users of different heights. 2. Highest quality camera and video images. -
Page 18: Poe Network Connection
PoE Network Connection The 8036 is powered by the Ethernet PoE network connection. Typically a network cable is run to the 8036 location and then terminated with a male RJ45 plug. If you don’t have a PoE switch, you’ll need a PoE injector that installs between the 8036 and the network switch. -
Page 19: Web Interface
8036 SIP Multimedia Intercom (FW 1.5.1) Web Interface Primary configuration of the 8036 is through the web interface control panel. Here is where you will be able to set up your 8036 and also develop interface screens to create interactive applications. Accessing the Control Panel To access the 8036 Control Panel, your first need to determine the 8036’s... - Page 20 8036 SIP Multimedia Intercom (FW 1.5.1) If the 8036 in unable to obtain an IP address from the DHCP server, it will default to the fixed IP address 192.168.1.111. The IP address may be discovered by downloading the Algo locator tool to find Algo devices on your network: www.algosolutions.com/locator...
-
Page 21: Application Development
Example 8036 Custom Graphics Screen using 3x3 Full Button layout with three active buttons. You can set all of this up using the 8036 Control Panel. You’ll also be able to back up all the configuration and user interface information to a PC for safekeeping. -
Page 22: Custom Graphic Screens
You can also easily create graphics screens with standard image editing programs and then import them into the 8036. Either way, you can set up multiple pages with different button configurations and layouts, enable or disable specific button locations, and set different actions associated with each button. -
Page 23: Reset
8036 SIP Multimedia Intercom (FW 1.5.1) Reset A soft reset of your 8036 may be necessary if, for example, the administrative password has been changed and then forgotten. To do a soft reset: 1. Disconnect the network cable from the 8036 and reconnect it again. -
Page 24: Web Interface Login
Status The device’s Status page will be available before and after log on. The section can be used to check 8036’s SIP Registration status of the SIP extension, Call Status, Proxy Status, and general MAC, IP, Netmask, Date/Time information. -
Page 25: Status Tab - Video
8036 SIP Multimedia Intercom (FW 1.5.1) Status Tab – Video The video can be seen in the “Status > Video” tab when the user is not logged in. A separate video password can also be enabled, to allow users to access the video, but not the rest of the device settings. -
Page 26: Basic Settings Tab - Sip
SIP Domain (Proxy Server) SIP Server Name or IP Address Extension Used to register the 8036 on the SIP Server. Authentication ID May also be called Username for some SIP servers, and in some cases may be the same as the SIP extension. -
Page 27: Authentication Password
8036 SIP Multimedia Intercom (FW 1.5.1) Authentication Password SIP password provided by the system administrator for the SIP extension. Document 90-00081 Algo Communication Products Ltd (604) 454-3792 2017-05-11 4500 Beedie St Burnaby BC Canada V5J 5L2 support@algosolutions.com Page 27 www.algosolutions.com... -
Page 28: Basic Settings Tab - Features
Select the microphone volume of the 8036. UI Volume The 8036 provides click sounds to provide users with audible feedback to assure them their key presses were registered. You can adjust the sound volume for these feedback sounds from Mute to 10 (loudest). -
Page 29: Outbound Ring Limit
8036 SIP Multimedia Intercom (FW 1.5.1) Outbound Ring Limit Typically set to ensure that a call will not reach voicemail. This feature can be used to set a limit on how long the 8036 speaker will ring before timing out. Ringback Tone Allow audible ringback tone to be played on the 8036 speaker until the call is answered. -
Page 30: Basic Settings Tab - Video
One-way Video (outgoing only): The 8036 only sends video to the remote end (eg. a video phone). It does not show any video on the 8036 itself. Two-way audio is still maintained in this configuration. Document 90-00081 Algo Communication Products Ltd... -
Page 31: Profile Level
8036 SIP Multimedia Intercom (FW 1.5.1) Two-way Video: Video communication in both directions if remote end supports video. Profile Level Refer to phone specifications to determine best supported profile level (“1.3 Baseline” or “3 Baseline”). Packet Type Refer to phone specifications to determine best supported packet type (“Single NAL Unit”... -
Page 32: Manual Exposure Override
8036 SIP Multimedia Intercom (FW 1.5.1) Manual Exposure Override When “Enabled” allows DTMF controls on the answering phone to modify the video exposure (brightness) during a call. Press the '3' key on the answering phone to make the image brighter, or the '2' key for darker. -
Page 33: Basic Settings Tab - Door Control
8036 SIP Multimedia Intercom (FW 1.5.1) Basic Settings Tab – Door Control The 8036 can be configured with up to four optional 8061 IP Relay Controllers to provide door control and security for up to four doors. Each 8061 allows one door to open via a pre-configured “Door Access Keypad”... -
Page 34: Number Of Network Door Controllers
Default password is algo. Note: the Password is used solely to secure the link between the 8036 and the 8061. It is not the same as the Momentary Open Code. Momentary Open Code Enter a 1-4 digit DTMF code (default 6) that can be used to unlock the door for a brief period of time. -
Page 35: Latch Closed Code
8036 SIP Multimedia Intercom (FW 1.5.1) Latch Closed Code Enter a 1-4 digit DTMF code that will lock the door again when it is latched open. Leave this field blank to disable this feature. Access Code Enter a 1-8 digit numeric code that can be used, from the touch screen, to unlock the door for a brief period of time. -
Page 36: User Interface Tab - General
8036 SIP Multimedia Intercom (FW 1.5.1) User Interface Tab – General Number of Active Pages Select the number of configurable pages that will be created as part of the User Interface. A new “Page #” tab will appear in the tabs area. -
Page 37: Home Page
8036 SIP Multimedia Intercom (FW 1.5.1) Home Page Select an active page to be displayed as the start page of the 8036 User Interface. Default LCD Brightness Set the default LCD screen brightness, from 1 (lowest) to 10 (highest). Door Unlock Message If “Enabled”... -
Page 38: Lcd Brightness After Timeout Event
Action at End of Call Choose the 8036 screen to “Return to Previous Page” or “Go to Homepage” after the call to/from the 8036 unit ends. Document 90-00081... -
Page 39: User Interface Tab - Page (Button Template)
“Home” and “Back” buttons. The chosen layout can be customized further by enabling/disabling the appearance/activation of specific buttons on the 8036 screen. For instance, to display 3 vertical buttons in the first column, only the... -
Page 40: Template
8036 SIP Multimedia Intercom (FW 1.5.1) Template Choose a display screen/page type: “Button” or “Directory”. Description Enter a page description (optional). This description will be seen in the button “Target Page” drop down menus as well as the web interface tabs. -
Page 41: Background
8036 SIP Multimedia Intercom (FW 1.5.1) Background Set a background image for the screen. Several standard options have been supplied and are marked by “(default)” tag. Uploaded custom graphics will be preceded with “(user)” tag. For more information about uploading the graphics see page 45. -
Page 42: Action
8036 SIP Multimedia Intercom (FW 1.5.1) Action Specify whether you want the button to direct the user to a page/keypad or “Call” an extension. Action – Call Destination Displayed when Action Type is set to “Call”. Enter the extension to be dialed after the button is clicked. -
Page 43: User Interface Tab - Page (Directory Template)
8036 SIP Multimedia Intercom (FW 1.5.1) User Interface Tab – Page (Directory Template) Directory (Addressbook) Text Files Tab-delimited text files can be uploaded to the “addressbook” (in the File Manager) to display directory entries (see page 45). These entries can then be used by visitors to make calls to individuals listed in the file. - Page 44 3. Enter a name for the document and click Save. The Addressbook entries should be sorted before upload to the 8036, as the device will not sort the entries in the file. Document 90-00081 Algo Communication Products Ltd (604) 454-3792...
-
Page 45: User Interface Tab - File Manager
640 x 480 pixels, 16 bit high color, and in PNG, JPEG, or GIF format. Note: the 8036 UI may need to be rebooted (in System > Maintenance tab) after uploading certain files (e.g. slides) in order for them to be visible on the screen. - Page 46 To delete, rename, cut/copy an existing file, right-click on the file of choice. The 8036 UI can also be backed up and restored to/from a ZIP file in the System > Maintenance tab. See page 61 for more details. Document 90-00081...
-
Page 47: Advanced Settings Tab - Network
DHCP is an IP standard designed to make administration of IP addresses simpler. When selected, DHCP will automatically configure IP addresses for each 8036 SIP Multimedia Intercom on the network. Alternatively the 8036 SIP Multimedia Intercom can be set to a static IP address. VLAN Mode Enables or Disables VLAN Tagging. -
Page 48: Vlan Id
8036 SIP Multimedia Intercom (FW 1.5.1) known as IEEE 802.1p and defines the Generic Attribute Registration Protocol. VLAN ID Specifies the VLAN to which the Ethernet frame belongs. A 12-bit field specifying the VLAN to which the Ethernet frame belongs. The hexadecimal values of 0x000 and 0xFFF are reserved. -
Page 49: Advanced Settings Tab - Admin
8036 SIP Multimedia Intercom (FW 1.5.1) Advanced Settings Tab – Admin Password Password to log into the 8036 SIP Multimedia Intercom web interface. You should change the default password algo in order to secure the device on the network. If you have forgotten your... -
Page 50: Device Name (Hostname)
8036 SIP Multimedia Intercom (FW 1.5.1) Device Name (Hostname) Name to identify the device in the Algo Network Device Locator Tool. Introduction Section on Status Page Allows the introduction text to be hidden from the login screen. Web Interface Session Timeout Set the maximum period of inactivity after which the web interface will log out automatically. -
Page 51: Allow Secure Sip Password
The Realms may be the same or different for all the extensions used. SNMP Support (v1 get only) Additional SNMP support is anticipated for future, but the 8036 SIP Multimedia Intercom will respond to a simple status query for automated supervision. Contact Algo technical support for more information. -
Page 52: Advanced Settings Tab - Time
8036 SIP Multimedia Intercom (FW 1.5.1) Advanced Settings Tab – Time Network time is used for logging events into memory for troubleshooting. Timezone Select timezone. NTP Time Servers 1/2/3/4 The Intercom will attempt to use Timer Server 1 and work down the list if one or more of the time servers become unresponsive. - Page 53 8036 SIP Multimedia Intercom (FW 1.5.1) external NTP server, the “Sync with browser” button can be used to temporarily set the time on the device. Note, this time value will be lost at power down, or overwritten if NTP is currently active. Time and date are used only for logging purposes and for the Scheduler.
-
Page 54: Advanced Settings Tab - Provisioning
8036 SIP Multimedia Intercom (FW 1.5.1) Advanced Settings Tab – Provisioning Provisioning allows installers to pre-configure 8036 SIP Multimedia Intercom units prior to installation on a network. It is typically used for large deployments to save time and ensure consistent setups. -
Page 55: Md5 Checksum
Generating a generic configuration file 1. Connect 8036 to the network 2. Access the 8036 Web Interface Control Panel 3. Configure the 8036 with desired options 4. Click on the System tab and then Maintenance. 5. Click “Download” to download the current configuration file 6. -
Page 56: Generating A Specific Configuration File
SIP Multimedia Intercom with the MAC address specified in the configuration file name. Since all the necessary settings can be included in this file, the 8036 will be ready to work immediately after the configuration file is downloaded. The MAC address of each 8036 SIP Multimedia Intercom can be found on the back label of the unit. -
Page 57: Advanced Settings Tab - Tones
8036 SIP Multimedia Intercom (FW 1.5.1) Advanced Settings Tab – Tones Uploading Custom Audio Files Custom audio files (WAV format) may be uploaded into memory (1 GB) to play for notification applications. An existing file may also be modified by downloading the original via the links in the web interface, making the desired changes, and then uploading the new version with a different name. -
Page 58: Advanced Settings Tab - Advanced Sip
STUN Server IP address for STUN server if present. Register Period (seconds) Maximum requested period of time where the 8036 SIP Multimedia Intercom will re-register with the SIP server. Default setting is 3600 seconds (1 hour). Only change if instructed otherwise. -
Page 59: Keep-Alive Method
Backup Server #1 If primary server is unreachable the 8036 SIP Multimedia Intercom will attempt to register with the backup servers. If enabled, the 8036 SIP Multimedia Intercom will always attempt to register with the highest priority server. Backup Server #2 If backup server #1 is unreachable the 8036 SIP Multimedia Intercom will attempt to register with the 2nd backup server. -
Page 60: Automatic Failback
8036 SIP Multimedia Intercom (FW 1.5.1) Automatic Failback Reconnect with higher priority server once available, even if backup connection is still fine. Polling Method SIP message used to poll servers to monitor availability. Document 90-00081 Algo Communication Products Ltd (604) 454-3792... -
Page 61: System Tab - Maintenance
Restore Configuration File Restore settings from a backup file. Restore Configuration to Defaults Resets all 8036 SIP Multimedia Intercom device settings to factory default values. This will not restore the UI to defaults. Download UI Backup SIP File Save the device UI settings to a ZIP file for backup. -
Page 62: Restore From Ui Backup Zip File
Restore from UI Backup ZIP File Restore UI settings from a backup ZIP file. Restore All UI Settings and File to Defaults Resets all 8036 SIP Multimedia Intercom device settings to factory default values. This will not restore the general device settings to defaults. -
Page 63: System - System Log
8036 SIP Multimedia Intercom (FW 1.5.1) System – System Log System log files are automatically created and assist with troubleshooting in the event the 8036 SIP Multimedia Intercom does not behave as expected. Document 90-00081 Algo Communication Products Ltd (604) 454-3792... -
Page 64: Specifications
8036 SIP Multimedia Intercom (FW 1.5.1) Specifications SIP Compliance: RFC3261 Power Input: 48 V PoE Class 0 (Max 12.95 W - Idle 3 W) Physical Connection: RJ45 LCD Display: Active TFT 5.7” (14.5cm) color VGA, 80° viewing, sunlight readable, 1000:1 contrast, and 800... - Page 65 8036 SIP Multimedia Intercom (FW 1.5.1) Dimensions: Height: 10-3/4” (27.3 cm) Width: 7” (17.8 cm) Depth: 3” (7.6 cm) Document 90-00081 Algo Communication Products Ltd (604) 454-3792 2017-05-11 4500 Beedie St Burnaby BC Canada V5J 5L2 support@algosolutions.com Page 65 www.algosolutions.com...
-
Page 66: 8061 Ip Relay Controller
The 8036 can provide door control functionality when used with the optional Algo 8061 IP Relay Controller. The 8061 serves as a bridge between the 8036 and peripheral hardware such as door strike. As a door opening controller, the 8061 can be located in a secure environment to prevent tampering of the public-facing intercom. -
Page 67: Configuring The 8061
8061. For more wiring information please visit: www.algosolutions.com/doorstrike. Configuring the 8061 1. Find the IP address of the Algo 8061 using the Algo locator tool available from the Algo website www.algosolutions.com/locator). This tool displays all of the Algo devices available on the network, and their corresponding IP addresses. - Page 68 6. In the “Door Control Password” field set a password that will be used for configuring the intercom for door control. Note this password down as you will be reusing it when configuring the 8036 with this device. See section “Basic Settings Tab – Door Control” page 33 for configuring the 8201 with the parameters from above.
-
Page 69: Button Positioning Table
8036 SIP Multimedia Intercom (FW 1.5.1) Button Positioning Table The following table provides the location and sizing of standard button layouts for 8036 User Interface Screens. Document 90-00081 Algo Communication Products Ltd (604) 454-3792 2017-05-11 4500 Beedie St Burnaby BC Canada V5J 5L2 support@algosolutions.com... -
Page 70: Adobe® Photoshop® Templates
Tool to draw buttons using the guides. After completing the button graphics, choose the File>Save for Web and Devices menu and use the PNG-24 preset to create the PNG file for importing into the 8036. Document 90-00081 Algo Communication Products Ltd... -
Page 71: Fcc Compliance Statement
8036 SIP Multimedia Intercom (FW 1.5.1) FCC Compliance Statement This equipment has been tested and found to comply with the limits for a Class A digital device, pursuant to Part 15 of the FCC Rules. These limits are designed to provide reasonable protection against harmful interference when the equipment is operated in a commercial environment.
Need help?
Do you have a question about the 8036 and is the answer not in the manual?
Questions and answers