
Related Manuals for Deagostini RB7


Summary of Contents for Deagostini RB7
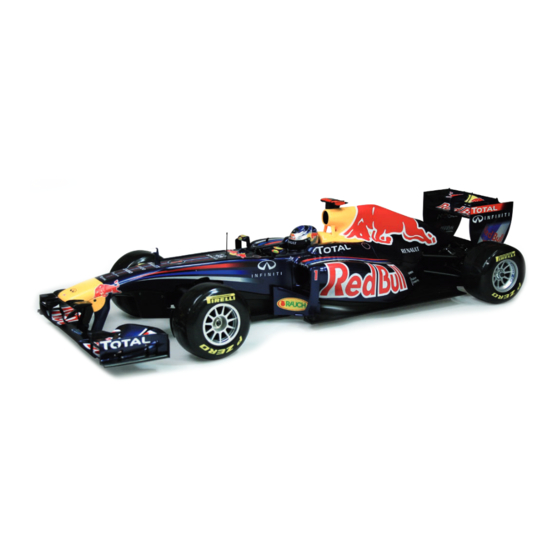
- Page 1 Red Bull Racing RB7: Step by Step ™ ™ RADIO CONTROLLED • BUILD IT YOURSELF • NITRO ENGINE Pack 20 Stages 77-80...
-
Page 2: Table Of Contents
All rights reserved © 2014 De Agostini UK Ltd, Battersea Studios 2, 82 Silverthorne Road, London SW8 3HE RED BULL RACING RB7 complies with CE regulations. NOT SUITABLE FOR CHILDREN UNDER THE AGE OF 14. THIS PRODUCT IS NOT A TOY AND IS... -
Page 3: The Gx21 Silencer System
Red Bull Racing RB7: Step by Step ™ THE GX21 SILENCER SYSTEM UNLIKE THE SILENCER SYSTEM OF A FOUR-STROKE ENGINE, THAT OF A TWO- STROKE NOT ONLY EXPELS THE EXHAUST GASES AND REDUCES THE NOISE, BUT ALSO HELPS COMPRESS THE FUEL-AIR MIXTURE IN THE COMBUSTION CHAMBER. - Page 4 30,000rpm at full throttle. The silencer system of your increase. In the case of your RB7 racer this occurs at the GX21 is designed so that the resonance effect starts when transition from the manifold to the main chamber of the the extra power can be most effective –...
-
Page 5: The Gx21 Air Filter
Red Bull Racing RB7: Step by Step ™ THE GX21 AIR FILTER ANY DIRT ENTERING THE GX21 ENGINE THROUGH THE AIR INTAKE COULD DAMAGE ITS CARBURETTOR, PISTON AND CYLINDER. A FINE AIR FILTER ENSURES THAT DIRT PARTICLES CANNOT PENETRATE INTO THE INSIDE OF THE POWER UNIT. - Page 6 Red Bull Racing RB7: Step by Step ™ Right helmet air filter cover Air filter element Air filter cap Air filter base Air filter pipe The air filter unit is concealed within the driver’s helmet, and a rubber pipe connects it to the It’s advisable to saturate the filter element with air filter oil before fitting it...
-
Page 7: Cleaning The Air Filter
YOU SHOULD GIVE THE AIR FILTER A THOROUGH CLEAN AT REGULAR INTERVALS. HERE’S HOW YOU DO IT. The air filter of your RB7 model contains a cylindrical Before any prolonged period in which the engine will not foam insert. This traps grains of dust and dirt that would... - Page 8 Red Bull Racing RB7: Step by Step ™ The air filter of the GX21 engine is concealed inside the driver’s helmet. To open the two half-shells of the helmet so that the air filter can be reached, you have to cut through the two decorative stickers on the front section of the helmet because they cross the join.
-
Page 9: The Rc Power Switch
™ THE RC POWER SWITCH YOUR RB7 MODEL’S RC RECEIVER AND SERVOS ARE SUPPLIED WITH ELECTRICAL POWER FROM ITS BATTERIES. THERE IS NO NEED TO MAINTAIN THIS POWER SUPPLY WHEN THE CAR IS NOT IN USE, SO THE RC SYSTEM IS FITTED WITH A SWITCH TO BREAK THE CIRCUIT. - Page 10 Red Bull Racing RB7: Step by Step ™ The switch itself is a slide switch. Connected to it are a pair of two-core cables (one core with red insulation, the other black). These cables are soldered to the switch, which is housed in a rectangular plastic casing.
- Page 11 Red Bull Racing RB7: Step by Step ™...
-
Page 12: Stage 77
Red Bull Racing RB7: Step by Step ™ Stage 77 FITTING THE SILENCER COMPLETE THE MAIN BUILD OF YOUR RB7’S GX21 ENGINE BY FITTING IT WITH ITS PRE-ASSEMBLED SILENCER SYSTEM, AND THEN MOUNT IT ONTO THE CAR’S CHASSIS. Tools & Materials Phillips screwdriver (size 02) 2.5mm Allen key... - Page 13 Red Bull Racing RB7: Step by Step ™ For this assembly session, you will need your RB7 chassis assembly, your GX21 The exhaust manifold is attached engine and the parts supplied with this stage. to the top of the body of the...
- Page 14 Red Bull Racing RB7: Step by Step ™ The photo above shows how the silencer and engine will be joined. The two must Place a 3 x 10mm cap screw be perfectly aligned, with the gasket sitting between the manifold and the engine’s through each of the holes on the exhaust port.
- Page 15 Red Bull Racing RB7: Step by Step ™ The next step is to prepare the chassis to hold the engine. To do this, lay your RB7 Undo the screws using a Phillips chassis on your work surface with the underside facing upwards. The two screws screwdriver and keep them safely circled in the picture will be removed in the next step.
- Page 16 Red Bull Racing RB7: Step by Step ™ Next, carefully remove the brake You are now ready to mount the GX21 engine and silencer assembly onto the rod and cam. chassis of your RB7. Hold the engine above the When about 2cm of the tailpipe Next, set down the engine so that chassis with the silencer’s tailpipe...
- Page 17 Red Bull Racing RB7: Step by Step ™ Hold the chassis assembly Now tighten each screw a little Place the four 3 x 8mm dome- together and carefully turn it further with the screwdriver, headed screws supplied with this over. Gently slide the engine back and but don’t tighten them fully.
- Page 18 Red Bull Racing RB7: Step by Step ™ Carefully position the gears so that Holding the engine carefully in Turn the chassis over again and your assembly looks like this, with place, turn the chassis over again check that the gears are still...
- Page 19 Red Bull Racing RB7: Step by Step ™ To ensure that the gears will Take the brake rod and cam that Now replace the gearbox cover operate smoothly, use a toothpick you removed in Step 15 and removed in Steps 13 and 14, and...
-
Page 20: Stage 78
Red Bull Racing RB7: Step by Step ™ Stage 78 FITTING THE AIR FILTER THE FIRST TASK IN THIS SESSION IS TO ASSEMBLE THE AIR FILTER AND MOUNT IT WITHIN THE DRIVER’S HELMET. THEN YOU APPLY THE DETAILING STICKERS TO THE HELMET AND ATTACH THE COMPLETED ASSEMBLY TO THE ENGINE. - Page 21 Red Bull Racing RB7: Step by Step ™ Remove and discard the central Though not essential, it‘s a good idea to work some air filter oil into the element section of the air filter element. at this stage, as it will make the filter more effective (see page 375). Then push the element over the star-shaped projection on the air filter base, as shown by the red arrow, until it butts up against the circular rim.
- Page 22 Red Bull Racing RB7: Step by Step ™ Tighten the screw fully with a Lay the left side of the helmet Next, join the right side of the screwdriver. air filter cover on your work air filter cover to the left. Fit the surface, as shown.
- Page 23 Red Bull Racing RB7: Step by Step ™ Very carefully cut out sticker 1 Next, fit the narrower end of Your assembly should now look from the sheet, using scissors. the air filter pipe over the base like this. Make sure that you don‘t cut into any of of the air filter.
- Page 24 Red Bull Racing RB7: Step by Step ™ Your assembly should look like this from the front. Repeat the process described in Steps 13 to 17 to apply the stickers numbered 3-6, as shown above, to the right side of the helmet cover. Again, apply the stickers very carefully to ensure no air bubbles or creases occur.
- Page 25 Red Bull Racing RB7: Step by Step ™ If you removed the air filter pipe in Step 16, re-insert it before Finally, apply stickers 10-12 to the top surface of the helmet cover. Use the yellow proceeding. Press the wider end of the dotted lines shown in the photo above for guidance.
-
Page 26: Stage 79
Red Bull Racing RB7: Step by Step ™ Stage 79 FITTING THE RC POWER SWITCH IN THIS SESSION, YOU WILL ATTACH THE RC POWER SWITCH TO YOUR RB7’S RIGHT CHASSIS PLATE. Tools & Materials Phillips screwdriver (size 1) RC power switch... - Page 27 Red Bull Racing RB7: Step by Step ™ Remove the two screws at the Put the switch onto the right chassis plate, with the cable with the black plug top of the switch, then take off leading towards the rear of the chassis and the ON/OFF slider facing down. Run the the ON/OFF cover plate.
-
Page 28: Stage 80
Red Bull Racing RB7: Step by Step ™ Stage 80 THE BATTERY BOX AND ANTENNA TUBE IN THIS SESSION, YOU WILL ATTACH THE BATTERY BOX TO THE SWITCH FITTED IN THE PREVIOUS STAGE, THEN CONTINUE APPLYING STICKERS TO THE TYRES (IF THE MODEL IS BEING USED PRIMARILY AS A DISPLAY PIECE). - Page 29 It will only fit side of the chassis. tube away safely until it is needed, and if in one way. you are building your RB7 to be primarily a display model, continue with the following steps to apply stickers to your RB7’s tyres.
- Page 30 Red Bull Racing RB7: Step by Step ™ If you are choosing to apply the Rest the wheel on your work Carefully cut out the first curved stickers to the tyres, begin by surface with the inner edge P ZERO sticker from the sticker removing the front left wheel and tyre by facing up.
- Page 31 Red Bull Racing RB7: Step by Step ™ Carefully remove the first P ZERO Apply the P ZERO sticker to the As you did for Step 12, carefully sticker from its backing, trying inside edge of the tyre, as shown.
- Page 32 Red Bull Racing RB7: Step by Step ™ ™...
Need help?
Do you have a question about the RB7 and is the answer not in the manual?
Questions and answers