D-Link KVM-440 User Manual
8/16 port combo kvm switch
Hide thumbs
Also See for KVM-440:
- Product manual (55 pages) ,
- User manual (37 pages) ,
- Quick installation manual (32 pages)
Table of Contents
Advertisement
Advertisement
Table of Contents

Related Manuals for D-Link KVM-440


Summary of Contents for D-Link KVM-440
-
Page 1: User Manual
® D-Link KVM-440/KVM-450 8/16 Port Combo KVM Switch User Manual V2.00... - Page 2 PREFACE D-Link reserves the right to revise this publication and to make changes in the content hereof without obligation to notify any person or organization of such revisions or changes. DISCLAIMER Information in this document is subject to change without notice. The manufacturer...
-
Page 3: Table Of Contents
Table of Contents INTRODUCTION ..........................5 SPECIFICATIONS .......................... 6 SYSTEM REQUIREMENTS ......................7 INSTALLATION ..........................7 4.1. Front View ..........................7 4.2. Rear View ..........................8 4.3. Single Stage Installation ......................8 4.3.1. Precautions: ............................ 8 4.3.2. Console Connection: ........................9 4.3.3. - Page 4 7.1.5. Cascade parent channel number ....................21 7.1.6. Page Down/Up Indicator ....................... 21 7.1.7. Function Control Menu ........................21 7.2. Channel selection in OSD ....................22 7.2.1. Channel select to computer ......................22 7.2.2. Channel select in cascade port ..................... 22 7.2.3.
-
Page 5: Introduction
1. Introduction Thank you for purchasing a D-Link Combo KVM Switch. You now have a durable, high quality system that lets you control multiple PCs through a single console. Features • Connect your console keyboard and mouse via PS/2 and/or USB. -
Page 6: Specifications
• Package Contents The product you purchased should contain the following equipment and accessories: 1 x 8-Port or 16-Port Combo KVM Switch 1 x CD containing the User Manual, QIG, and the firmware utility 1 x Quick Installation Guide booklet 1 x Power Adapter 1 x Rack Mount Bracket Kit 4 x Custom combo 4-in-1 cable... -
Page 7: System Requirements
3. System Requirements • Console o Monitor with a VGA connector o PS/2 and/or USB Keyboard/Mouse • Computer or Server o Each attached computer or server must have the following: • Available VGA port for video output • USB and/or PS/2 ports for keyboard and mouse input •... -
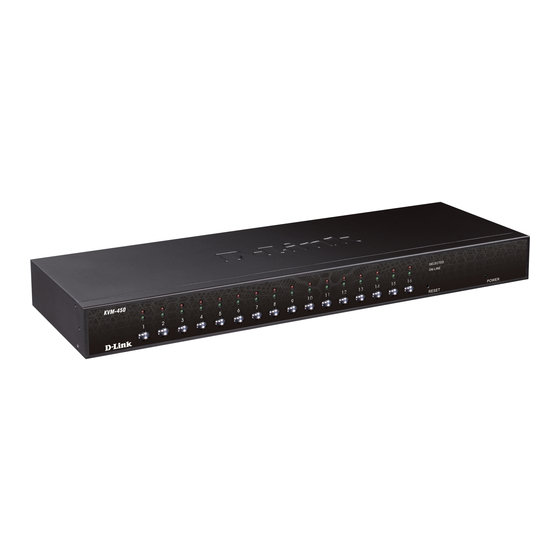
Page 8: Rear View
• Reset Switch: o To reset the device, press the reset button located on the front panel. The reset switch must be depressed using a thin object, such as an unfolded paperclip. 4.2. Rear View • 8-Port Figure 3: 8-port KVM rear view •... -
Page 9: Console Connection
4.3.2. Console Connection: Plug your keyboard, mouse, and monitor into the console ports on the rear panel of the KVM switch. ( Figure 5 Figure 5: Console connection 4.3.3. System Connection: Use the included custom combo 4-in-1 cables to connect your computers to the KVM. - Page 10 You can connect the KVM switch to the computers using one of the three methods shown below: Connect the USB, PS/2 (keyboard/mouse), and VGA connectors to your computer. We recommend that you connect all additional systems in this way. ( Figure 7 Figure 7: USB &...
-
Page 11: Cascade Chaining
C. Only connecting the USB and VGA connectors to the computers. Figure 9 Figure 9: USB and VGA video connected 4.4. Cascade Chaining A cascade configuration expands the system’s capabilities and allows you to select computers connected to the Master or Slave switch. The KVM switch supports cascades of up to 3 levels, letting you control up to 64/256/4096 PCs from a single console. - Page 12 The power-on sequence should be as follows: Master KVM switch Second level Slave KVM switch (connected to the Master KVM switch), if any. Third level Slave KVM Switch (connected to the second level Slave KVM switch), if any. All computers connecting to the Master/Slave KVM switches. When all the KVM switches are powered on, turn on the computers.
-
Page 13: Rack Mounting
4.5. Rack Mounting Figure 11: Rack mounting shows you how to attach mounting brackets to the KVM switch unit for a Figure 11 standard 19-inch rack cabinet. 1. Attach the mounting brackets onto both sides of the KVM switch unit using screws. -
Page 14: Hotkey Operation
6. Hotkey Operation 6.1. Call OSD Menu Press <Scroll Lock> twice and then <Enter> to bring up the OSD “Main Menu” on the monitor screen. All of the KVM parameters can be set up in OSD mode. You can also execute some KVM functions in OSD mode. <Scroll Lock>... -
Page 15: Channel Select - Single Kvm
6.3. Channel Select - Single KVM 6.3.1. Specific channel selection You can quickly select specific computers using a two-step hotkey sequence. Press <Scroll Lock> twice (Step 1), then enter the corresponding number key (1 to 8/16) and press <Enter> (step 2) to directly select the computer you want to control. -
Page 16: Alt> Channel Shift Function
6.3.3. <ALT> Channel Shift Function 1. Start <ALT> Channel Shift Function The <ALT> channel shift function is turned off by default. To enable/disable this function, press the leading hotkey <Scroll Lock> twice, followed by <ALT> and then <Enter>. 2. Switch channels using the <ALT> key With the <ALT>... -
Page 17: Buzzer Sound Disable/Enable
Note: With 3 cascading layers, you can select the last layer directly; Example: Press <Scroll Lock> twice, then D2D5D7, and <Enter>: D2 : layer 1 - channel 2 links to D5 : layer 2 - channel 5 links to D7 : layer 3 - channel 7 selected Note: You can also select active channels in the cascade chain from within the OSD menu. -
Page 18: Start Auto-Scan Function
necessary to prevent errors such as erratic mouse movement and incorrectly displayed characters when accidentally touching the mouse or keyboard. Note that pressing any key on the keyboard will interrupt the scan. 6.6.1. Start Auto-Scan Function <Scroll Lock> → <Scroll Lock> → <S> → <Enter>. The auto-scan banner will then appear, displaying the channel currently being scanned. -
Page 19: Console Lock
Note: You can also start the auto-scan function by pressing <F2> in the OSD main menu. Please refer to section 7.4 Auto-Scan in OSD. 6.7. Console Lock If the security mode is enabled in OSD mode (by pressing <F5> in OSD mode), you can lock the console by pressing <Scroll Lock>... -
Page 20: Osd Operation
7. OSD Operation 7.1. OSD Main Menu Pressing <Scroll Lock> twice and then <Enter> will bring up the OSD (On-Screen-Display) main menu. The channel number, name, and status will be displayed on the monitor screen. Please refer to figure 16 Figure 16: OSD main menu 7.1.1. -
Page 21: Current Active Channel Number
Channel LOCK indicator ( Status TA ) L: Indicates that this channel is locked. BLANK: Indicates that this channel is unlocked. Computer power on indicator ( Status S A ): The OSD menu will update the flag automatically if the computer status changes. A: Indicates that this computer is powered on and selectable. -
Page 22: Channel Selection In Osd
F1: Setup: Basic setup menu F2: Scan: Auto-scan function F3: Lock: Lock/unlock console, only available when Security is enabled F4: Rename: Rename the selected channel F5: Security: Security and user authority settings F6: Lock Port: PC port lock function (for administrator only) 7.2. -
Page 23: Setup In Osd:
7.3. Setup in OSD: <F1> Pressing <F1> in the OSD main menu brings up a list of basic settings. You may use the <Up> and <Down> arrow keys to select the item from the list that you want to change, and use the <Left> or <Right> arrow key to change that setting. -
Page 24: Hotkey
Figure 20: Menu Position Setup Banner: Use the four arrow keys to move the channel banner into the desired position. Press <ESC> to save the changes to the banner position. Figure 21: Banner Position Setup 7.3.5. Hotkey Scroll Lock: <Scroll Lock> becomes the leading hotkey. ... -
Page 25: Language
7.3.7. Language The 3 available languages are English (En) / Deutsch (De) / Français (Fr). 7.4. Auto-Scan in OSD: <F2> 7.4.1. Start to Auto-Scan in OSD To start auto-scanning, press <F2> in the OSD main menu. The auto-scan banner will appear, displaying the channel currently being scanned. ─┬──... -
Page 26: Console Lock In Osd:
7.5. Console Lock in OSD: <F3> If the security mode is enabled (by pressing <F5> in OSD mode, please refer to section 7.7 Security Setup in OSD), you can logout and lock the console by pressing <F3> while in OSD mode. The Console Lock Banner will appear on the screen. -
Page 27: Security Setup:
Figure 25: Channel rename window 7.7. Security Setup: <F5> 7.7.1. Security mode login Press <F5> in the OSD main menu to access the security mode settings. In order to enter the security setup, you will first be asked to sign in with the administrator account. -
Page 28: Security Mode
Figure 27: Security setup main window 7.7.2. Security Mode To enable the security mode feature, move the highlight bar over Security Mode and press the <Left> or <Right> arrow key to change it. The <F3> Console Lock, <F6> Port Lock, and user authority functions can only be used when security mode is enabled. -
Page 29: Authorized User Setup
7.7.4. Authorized user setup Up to 3 authorized users can manage the KVM switch. To change the user name and password, move the highlight bar over the user name. Pressing the <Left> or <Right> arrow key will bring up the user name and password setup window on the screen. -
Page 30: Lock Port:
Figure 30: User authority setup window 7.8. Lock Port: <F6> 7.8.1. Lock Port Only the administrator can lock ports. To lock a channel, move the highlight bar over the channel you wish to lock and press <F6>. A red L will appear in the STA column next to the locked port. -
Page 31: Unlock Port
7.8.3. Unlock Port You can only unlock a port by logging in as the administrator. After logging in as the administrator, the red L mark in the STA column will disappear. 7.9. Exit OSD: <ESC> Press <ESC> to exit OSD mode and return to the selected computer. A banner with the channel name will appear on the upper-left corner of the screen. -
Page 32: Sun Microsystems Function Key Emulation
8. Sun Microsystems Function Key Emulation: There are 16 special function keys on the Sun Microsystems keyboard. The Combo Free KVM Switch can emulate these function keys using a PS/2 and/or USB keyboard. Please refer to the table shown below for the Sun Microsystems keyboard special functions. -
Page 33: Troubleshooting
9. Troubleshooting: Symptom Possible Cause Recommended Solution The keyboard The keyboard and/or mouse Unplug the keyboard and/or mouse and/or mouse is need to be reset from the console port(s) and then plug not working or it / them back into the console. freeze. -
Page 34: Firmware Upgrade Procedures
10. Firmware Upgrade Procedures Future updates may be released to improve the functionality of this KVM switch. You can check if new updates are available for your product by visiting http://support.dlink.com. This KVM switch provides firmware upgrades for the following functions: ... - Page 35 On a different computer, run the firmware update utility labeled KVM_Utility_V1.00.EXE which can be found on the included CD. Figure 33 Next, use a mini-USB cable to connect the KVM firmware upgrade port to the USB port of the computer running the firmware update utility. Figure 34...
- Page 36 The utility will automatically scan for the KVM programmer. Figure 35 Mark the checkbox next to each component you wish to update (in this example, the USB Console), and click the File Browser button “…” to locate the appropriate firmware file. Figure 36...
- Page 37 Browse to the folder where the firmware file is saved, then select the firmware file to be loaded and click Open. Figure 37 10. Click the Program button to start programming the firmware. Figure 38 11. A status bar will appear at the bottom of the panel showing the update progress.
- Page 38 Figure 39 12. The utility will display the following message to indicate that the firmware has been successfully updated. Figure 40 13. Unplug the power adapter for a moment and then plug it back in to restart the device.
-
Page 39: Safety Statements
11. SAFETY STATEMENTS SAFETY STATEMENTS Federal Communication Commission Interference Statement This equipment has been tested and found to comply with the limits for a Class A digital device, pursuant to part 15 of the FCC Rules. These limits are designed to provide reasonable protection against harmful interference when the equipment is operated in a commercial environment. -
Page 40: Safety Instructions
Any acts taken that are inconsistent with ordinary use of the product, including improper testing, etc., and those not expressly approved by D-Link may result in the loss of product warranty. Unless expressly approved by an authorized representative of D-Link in writing, you may not and may not permit others to: ... - Page 41 for your device or for any AC -powered option intended for your device, purchase a power cable that is approved for use in your country and is suitable for use with your device. The power cable must be rated for the device and for the voltage and current marked on the device's electrical ratings label.
- Page 42 in your troubleshooting guide or contact your trained service provider. Use the device only with approved equipment. Move products with care; ensure that all casters and/or stabilizers are firmly connected to the system. Avoid sudden stops and uneven surfaces. Environment ...
- Page 43 D-Link and the environment At D-Link, we understand and are committed to reducing any impact our operations and products may have on the environment. To minimise this impact D-Link designs and builds its products to be as environmentally friendly as possible, by using recyclable, low toxic materials in both products and packaging.
- Page 44 D-Link ist sich den möglichen Auswirkungen seiner Geschäftstätigkeiten und seiner Produkte auf die Umwelt bewusst und fühlt sich verpflichtet, diese entsprechend zu mindern. Zu diesem Zweck entwickelt und stellt D-Link seine Produkte mit dem Ziel größtmöglicher Umweltfreundlichkeit her und verwendet wiederverwertbare, schadstoffarme Materialien bei Produktherstellung und Verpackung.
- Page 45 En D-Link, comprendemos y estamos comprometidos con la reducción del impacto que puedan tener nuestras actividades y nuestros productos en el medio ambiente. Para reducir este impacto, D-Link diseña y fabrica sus productos para que sean lo más ecológicos posible, utilizando materiales reciclables y de baja toxicidad tanto en los productos como en el embalaje.
- Page 46 D-Link cerca da sempre di ridurre l'impatto ambientale dei propri stabilimenti e dei propri prodotti. Allo scopo di ridurre al minimo tale impatto, D-Link progetta e realizza i propri prodotti in modo che rispettino il più possibile l'ambiente, utilizzando materiali riciclabili a basso tasso di tossicità...
- Page 47 D-Link raadt aan om steeds uw D-Link producten uit te schakelen of uit de stekker te halen wanneer u ze niet gebruikt. Door dit te doen bespaart u energie en beperkt u de CO2-emissies.
- Page 48 životní prostředí i lidské zdraví. D-Link a životní prostředí Ve společnosti D-Link jsme si vědomi vlivu našich provozů a výrobků na životní prostředí a snažíme se o minimalizaci těchto vlivů. Proto své výrobky navrhujeme a vyrábíme tak, aby byly co nejekologičtější, a ve výrobcích i obalech používáme recyklovatelné...
- Page 49 D-Link og miljøet Hos D-Link forstår vi oss på og er forpliktet til å minske innvirkningen som vår drift og våre produkter kan ha på miljøet. For å minimalisere denne innvirkningen designer og lager D-Link produkter som er så miljøvennlig som mulig, ved å bruke resirkulerbare, lav-toksiske materialer både i produktene og forpakningen.
- Page 50 D-Link og miljøet Hos D-Link forstår vi og bestræber os på at reducere enhver indvirkning, som vores aktiviteter og produkter kan have på miljøet. For at minimere denne indvirkning designer og producerer D-Link sine produkter, så de er så miljøvenlige som muligt, ved at bruge genanvendelige materialer med lavt giftighedsniveau i både produkter...
- Page 51 D-Link och miljön På D-Link förstår vi och är fast beslutna att minska den påverkan våra verksamheter och produkter kan ha på miljön. För att minska denna påverkan utformar och bygger D-Link sina produkter för att de ska vara så miljövänliga som möjligt, genom att använda återvinningsbara material med låg gifthalt i både produkter och...
- Page 52 Na D-Link compreendemos e comprometemo-nos com a redução do impacto que as nossas operações e produtos possam ter no ambiente. Para minimizar este impacto a D-Link concebe e constrói os seus produtos para que estes sejam o mais inofensivos para o ambiente possível, utilizando meteriais recicláveis e não tóxicos tanto nos produtos como nas embalagens.
Need help?
Do you have a question about the KVM-440 and is the answer not in the manual?
Questions and answers