Table of Contents
Advertisement
Advertisement
Table of Contents

Summary of Contents for Craftex CX509
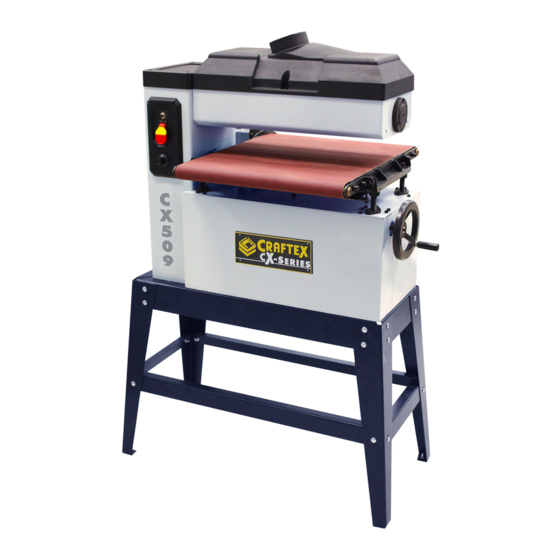
- Page 1 MODEL CX509 18" OPEN END DRUM SANDER USER MANUAL Version 1.0...
-
Page 2: Table Of Contents
TABLE OF CONTENTS General Safety Instructions ................3 Specific Safety Instructions................4 Features ....................... 5 Physical Features ..................6 Unpacking ....................7 Setup ......................7 Proper Grounding ..................7 Assembly ...................... 8 Test Run ....................... 9 Adjustments....................9 Work-piece Inspection ..................10 Depth of Cut ....................10 ON/OFF Switch ....................11 Variable Speed .....................11... -
Page 3: General Safety Instructions
GENERAL SAFETY INSTRUCTIONS Extreme caution should be used when operating all power tools. Know your power tool, be familiar with its operation, read through the owner’s manual and practice safe usage procedures at all times. ALWAYS read and understand the router bits, shaper heads, blades, knives user manual before operating the or making other adjustments or repairs. -
Page 4: Specific Safety Instructions
CX509 - 18" OPEN END DRUM SANDER SPECIFIC SAFETY INSTRUCTIONS MAKE SURE the sander is connected ALWAYS wear a dust mask and safety to the matched and specific power glasses while operating the sander. The source instructed in the manual. -
Page 5: Features
As part of the growing line of Craftex CX-Series woodworking equipment, we are proud to offer CX509 a 18" Open End Drum Sander. By following the instructions and procedures laid out in this user manual, you will receive years of excellent service and satisfaction. The CX509 is a professional tool and like all power tools, proper care and safety procedures should be adhered to. -
Page 6: Physical Features
CX509 – 18" OPEN END DRUM SANDER PHYSICAL FEATURES Upper Guard Dust Port Top Cover Feed Belt Circuit Breaker ON/OFF Switch with Removable Key Table Height Adjustment Hand Wheel Variable Speed Knob Stand... -
Page 7: Unpacking
It is strongly recommended not to use extension cords with your CX509. Always CX509 is for use on a normal 110 volt try to position your machine close to the circuit. Make sure that the machine is... -
Page 8: Assembly
Turn the stand upright and make sure all ASSEMBLY the legs are evenly positioned. Now, tighten It is recommended to assemble the stand all the nuts and bolts properly. upside down. Get the help of a friend or use a fork truck Mount the top and bottom long brackets to and lift the sander, align the mounting holes one of the legs as shown in figure-2 and... -
Page 9: Test Run
OFF position and the cord is disconnected from the power source. Failure to do so, could result in serious personal injury. TO TEST RUN THE CX509: 1. Make sure you have read the manual understood safety instructions given in it. -
Page 10: Work-Piece Inspection
WORK-PIECE INSPECTION DEPTH OF CUT Before cutting the work-piece, make sure to One full turn of the height adjustment hand inspect it for nails, staples, small pieces of wheel anti-clockwise, will give 1/64" depth stone or metal and any other object which of cut. -
Page 11: On/Off Switch
ON/OFF SWITCH VARIABLE SPEED The CX509 features an ON/OFF switch The CX509 features a variable speed knob with a removable key. The key can be which allows you to increase the feed rate removed to prevent the sander from from 2-12 FPM. The correct speed to use unauthorized use. -
Page 12: Sanding Belt Replacement
REPLACEMENT on the left side of the drum sander. Push the clamp forward and release its grip on The CX509 is designed for a 89-1/8" x 3" the sanding belt and remove the sanding sanding belt. belt. -
Page 13: Sanding Operation
Move the clamping device forward and slide SANDING OPERATION in the end of the sanding belt. Make sure Make sure the switch is OFF and sander is the belt is firmly secured. disconnected from the power source. Reinstall the chip deflector and close the Make sure the correct sandpaper grit is upper guard. -
Page 14: Feed Belt Tension And Tracking
Make sure to reduce the feed rate as the Loosen the lock nut and the tracking screw grit and desired finish change. on the side that the feed belt tracks towards. Turn the switch OFF when the operation is complete. WARNING! Do not push the work-piece while sanding. -
Page 15: Feed Belt Replacement
time until the feed belt does not slip on the Remove the cap screws shown in figure-13 rollers anymore. See figure-12. and loosen the corresponding cap screws on the inside edge. Once the feed belt is tensioned properly, tighten the feed roller lock screws and feed belt tensioning lock nuts. -
Page 16: V-Belt Replacement & Tensioning
Remove the old V-belt off the pulleys and V-BELT REPLACEMENT install the new belt. & TENSIONING TO TENSION THE V-BELT: The V-belt must be inspected once a month for any damages. If you find the belt is Push the motor pulley down with one hand damaged or cracked, stop operating the and retighten the cap screws to secure the sander and replace the V-belt. -
Page 17: Maintenance
When the sandpaper on the CX509 becomes loaded with built-up sawdust, run a sandpaper cleaner through the sander a couple of times until the sandpaper is clean. -
Page 18: Parts Diagram
PARTS DIAGRAM... -
Page 19: Parts List
PARTS LIST... -
Page 23: Warranty
This warranty shall not apply to consumable products such as blades, bits, belts, cutters, chisels, punches etceteras. Craftex shall in no event be liable for injuries, accidental or otherwise, death to persons or damage to property or for incidental contingent, special or consequential damages arising from the use of our products.


Need help?
Do you have a question about the CX509 and is the answer not in the manual?
Questions and answers
Is The bolt portion of the feed roller lock screws replaceable?