
Related Manuals for Kanguru KCLONE-7HDS-PRO

Summary of Contents for Kanguru KCLONE-7HDS-PRO
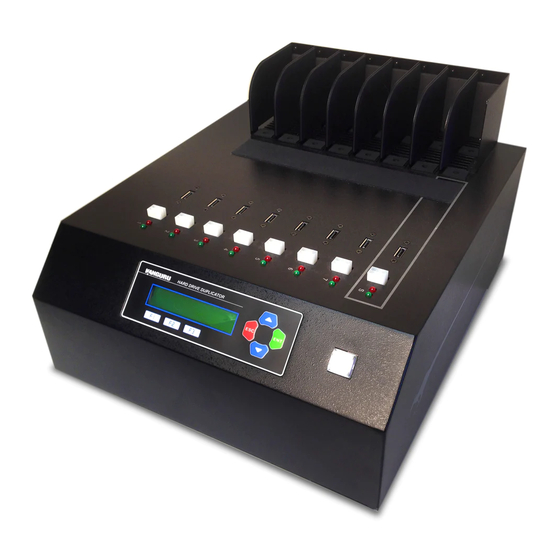
- Page 1 KanguruClone 7HDS, 15HDS & 23HDS Pro Duplicator User Manual Model no.: KCLONE-7HDS-PRO KCLONE-15HDS-PRO Copyright 2017, All Rights Reserved. KCLONE-23HDS-PRO...
- Page 2 Kanguru Solutions will not be held responsible for any illegal use of this product nor any losses incurred while using this product. The user himself is responsible for the copyright laws, and is fully responsible for any illegal actions taken.
-
Page 3: Table Of Contents
Table of Contents Table of Contents 1. INTroDUCTIoN ..................6 1.1 Package Contents ..................6 1.2 Specifications ..................7 1.3 Hardware Setup ..................8 1.4 Function Tree Diagram ................9 2. THE USEr INTErFaCE ................10 2.1 The LCD Display and Control Panel ............10 2.2 One Touch Operation ................11 2.3 Understanding the LCD Display ............11 2.4 The Menus ....................12 2.4.1 The Main Menu ................12... - Page 4 Table of Contents 6. THE SETUP MENUS ..................30 6.1 Main Setup....................31 6.1.1 HPA Check .................31 6.1.2 DCO Check ................31 6.1.3 Keep Capacity ................31 6.1.4 SATA Speed ................32 6.1.5 Show Checksum .................32 6.1.6 Verify Checksum ................32 6.1.7 SHA256 Check ................32 6.1.8 Source Power Off ...............33 6.1.9 Erase Source Port ...............33 6.1.10 Verify Source Check ..............33 6.1.11 Set SMART Check ..............34...
- Page 5 6.2.14 Set Ratio Erase Length .............45 6.2.15 Check DC Connect (15 and 23 target duplicators only) ..46 6.2.16 Set Max DC Count (15 and 23 target duplicators only) ..46 6.2.17 Set DC Connect Time (15 and 23 target duplicators only) ..46 6.2.18 Log Over Head .................47 6.2.19 Partition Full Copy ..............47 6.2.20 Partition Gap Copy..............47...
-
Page 6: Introduction
√ Load disk images to a Storage Center for convenient storage 1.1 Package Contents If any of the following items are missing, please call Kanguru Solutions’ Tech Support department at: (508) 376-4245, extension 2 and replacement parts will be shipped to you ASAP. -
Page 7: Specifications
Introduction 1.2 Specifications KanguruClone 7HDS - Pro LCD Screen 20 x 2 Characters back-lit LCD Input Device 7 Push Buttons Dimensions 15.5” x 13.5” x 9” Weight 16.5 lbs. Power Supply 400W 115V/230V 12A/6A Autoswitching Operating Temperature 41ºF ~ 122ºF Relative Humidity 15% ~ 90% KanguruClone 15HDS - Pro... -
Page 8: Hardware Setup
Parts and Functions 1.3 Hardware Setup 1. Place the KanguruClone where there is proper ventilation. Avoid using the KanguruClone in environments with high temperatures. 2. Make sure that sufficient power is supplied to the KanguruClone. Incorrect power will cause faulty operation. It is highly recommended that you use a UPS (uninterruptible power supply) with the KanguruClone. -
Page 9: Function Tree Diagram
Parts and Functions 1.4 Function Tree Diagram... -
Page 10: The User Interface
The User Interface 2. THE USEr INTErFaCE 2.1 The LCD Display and Control Panel HARD DRIVE DUPLICATOR : Up (Menu/Option Scroll Up) : Down (Menu/Option Scroll Down) : Enter, Forward, OK, Execute : Escape, Back, Cancel : Shortcut button to BRIEF COPY : Shortcut button to DISK ERASE : Shortcut button to DISK COPY... -
Page 11: One Touch Operation
• red - Operation completed, failed. Press the button to clear the job results and return to standby. 2.3 Understanding the LCD Display The LCD display allows you to easily navigate and operate the Kanguru Duplicator. After the Kanguru Duplicator boots up, you will see the following screen. -
Page 12: The Menus
The User Interface 2.4 The Menus There are three tiers to the duplicator user interface: Main menu, Setup Selection menu and the Setup menus. 2.4.1 The Main Menu The Main menu contains the main duplication operations (e.g. Copy, Compare, Erase, Load, etc.). The duplicator will boot into this menu by default. -
Page 13: General Operation
General Operation 3. GENEraL oPEraTIoN 3.1 Duplication Modes The KanguruClone can copy hard drives in one of five ways: SMART mode, BRIEF mode, RESIZE mode, DISK mode and RATIO mode. After the Copy operation has been completed, you can manually run a Compare operation to compare the data on the Source drive against the data on the Target drives to ensure that the all data was copied successfully. -
Page 14: Resize Copy
General Operation 3.1.3 resize Copy Resize mode is used to copy between Source and Target drives of different capacities. Resize copy supports the following file systems: FAT, FAT32, NTFS. If the Source is not formatted as a supported file system then the duplicator will automatically switch to Disk mode. When duplicating in Resize mode, Target drives should all be the same capacity. -
Page 15: Disk Copy
General Operation 3.1.4 Disk Copy Disk mode copies drives sector by sector from the Source to the Target(s), and supports all major OS formats (DOS/Windows/Mac/Linux). This mode is the slowest copy mode, but the safest. 3.1.5 ratio The Ratio Copy operation allows you to copy a defined percentage of the Master hard drive. The Master hard drive is divided in 1000 units. -
Page 16: Duplication
General Operation 3.2 Duplication The KanguruClone Duplicator can operate in either one of two duplication methods: • With a Master HDD as the source • With a Storage Center as the source Both methods are described in the following sections. 3.2.1 Duplicating From a Master HDD Using a Master HDD as the Source is the simplest and most convenient way to perform the duplication process. - Page 17 General Operation 3. Once all connected disks have been detected and initialized, the duplication process begins. During duplication the screen will display the following information: Number of target drives Current operation Total amount of data brIEF CoPy 250.0G 60.96G 109Mb/s Target drive indicator Transfer rate Data processed...
-
Page 18: Duplicating From A Storage Center
General Operation 3.2.2 Duplicating From a Storage Center The KanguruClone hard drive duplicator allows you to turn a standard hard drive into a Storage Center. You can load images of your Master HDDs directly to the Storage Center providing you with a convenient way to store common Source files as images. -
Page 19: Loading A Master Hdd Image To The Storage Center
General Operation 3.2.2.2 Loading a Master HDD image to the Storage Center Once you have formatted a hard drive to act as a Storage Center, you can use the duplicator to load images of your Master HDD’s to the Storage Center. To load a Master HDD image to the Storage Center: 1. -
Page 20: Duplicating An Image File Stored On A Storage Center
General Operation 3.2.2.3 Duplicating an image file stored on a Storage Center Now that you have loaded an image file on the Storage Center, you can begin the copy process: 1. Make sure the Storage Center is connected to the Source port. Connect your Target drives into any available target ports. -
Page 21: Kicking Slow Drives (15 And 23 Target Models Only)
General Operation 3.3 Kicking Slow Drives (15 and 23 target models only) Kanguru’s 15 Target and 23 Target HDD Duplicators have the ability to kick slow functioning drives from a copy/compare/erase operation. KanguruClone HDD Duplicators duplicate drives in a synchronous process. Because of this, any copy, compare or erase that you attempt will be limited by the speed of the slowest drive connected. -
Page 22: Automatically Kick Slow Drives
General Operation 3.3.2 automatically Kick Slow Drives You can configure some settings in the Advanced Settings menu that will allow the duplicator to automatically kick any drives that meet a specific, defined criteria. The options that need to be configured in the Advanced Setup menu are: Auto Kick Slow, Set Kick Time and Set Kick Speed. To configure your duplicator to automatically kick slow drives: 1. -
Page 23: Other Operations
Other Operations 4. oTHEr oPEraTIoNS Besides the Copy and Compare modes, the KanguruClone Hard Drive Duplicator has several additional operations that are incredibly useful, including: QUICK ERASE, DISK ERASE, DISK WIPE, SELF DIAGNOSTIC and LOAD IMAGE. The following chapter will cover these operations. 4.1 Quick Erase The Quick Erase operation will delete the partition table from any connected Target drives. -
Page 24: Secure Erase
Other Operations 4.4 Secure Erase Secure Erase is a set of firmware commands available on many ATA drives. These commands are used as a secure method of data sanitization by completely overwriting all data on a drive. When a Secure Erase command is issued against a SSD, all of its cells will be marked as empty, restoring it to factory default configuration. -
Page 25: Disk Diagnostic
The Self Diagnostic will generate a log file that can be saved to a USB flash drive. Providing this log file will help a Kanguru support technician diagnose any problems that could cause duplication failures. -
Page 26: Logging
Logging 5. LoGGING Logging capability is a useful function of the Kanguru HDD Duplicator. The logging feature can be used to keep track of duplication and/or disk wipe jobs when logs are required for auditing, and they are also provide useful information that can be used by Kanguru’s technical support staff to diagnose problems. -
Page 27: Logging Using A Usb Flash Drive
To generate a log file using a USB flash drive: 1. Format a USB flash drive using the FAT32 file system. 2. Before powering on the Kanguru Clone duplicator, insert the USB flash drive into the USB port located on the back of the duplicator. -
Page 28: Logging Using The Control Manager Software (Windows Only)
Duplicator to their PC for robust logging. The Control Manager software was provided on the CD that accompanied your duplicator. If you did not receive a CD, or the CD was lost, please visit Kanguru’s Support Site to download a copy of the Control Manager software: support.kanguru.com... - Page 29 Logging 2. The Configure window appears. a) Enter a prefix for the log’s filename. You can also choose to suffix the file name with a date or time stamp. b) Select the path where you want the log files saved to. It is recommended to save to a local hard drive and not a removable device.
-
Page 30: The Setup Menus
The Setup Menus 6. THE SETUP MENUS To make it easier to navigate to the desired setting the Setup menu has been broken out into 4 setup menus: Main Setup, Advanced Setup, Storage Center Setup and About You can open any of these setup menus from Setup Select menu. To open the Setup Select menu, simply tap the ‘ESC’... -
Page 31: Main Setup
The Setup Menus 6.1 Main Setup 6.1.1 HPa Check The Host Protected Area (HPA), sometimes referred to as the Hidden Protected Area, is a partition on the hard drive that is not normally visible to an operating system. Tap the ‘ENT’ button to change this option’s setting. • [ ] –... -
Page 32: Sata Speed
The Setup Menus 6.1.4 SaTa Speed The SATA Speed option allows you to Select the data transfer mode. Tap the ‘ENT’ button and then press the UP/DoWN buttons to change this option’s setting. • AUTO - The system auto-selects the SATA speed mode based on the connected drives (default). • 1.5G - Limit the data transfer mode to SATA I speeds (1.5Gbps) • 3G - Limit the data transfer mode to SATA II speeds (3Gbps) 6.1.5 Show Checksum... -
Page 33: Source Power Off
The Setup Menus 6.1.8 Source Power off The Source Power Off option allows you to configure whether the system turns off power to the Source drive after a process is completed. Tap the ‘ENT’ button to change this option’s setting. • [ ] –... -
Page 34: Set Smart Check
The Setup Menus 6.1.11 Set SMarT Check The Set SMART Check option allows you to configure whether the system runs a SMART check before starting a copy process. You can configure what level of SMART check is performed through the SMART Warning option. Tap the ‘ENT’... -
Page 35: Show Binary Base
The Setup Menus 6.1.14 Show binary base The SHOW BINARY BASE option allows you to change whether capacities are displayed in decimal form (e.g. 1KB=1000 bytes) or in binary form (e.g. 1KB = 1024 bytes) Tap the ‘ENT’ button to change this option’s setting. • [ ] –... -
Page 36: Set Write Pat
The Setup Menus 6.1.17 Set Write Pat. The Set Write Pattern setting is used to define the data that you want written to all sectors of your drives during a Disk Erase operation. The Write Pattern can be set to 00, RM (random), AA, A5, 5A, C9, FF, E5 or F6. The default setting is 00. -
Page 37: Brief + Ratio
The Setup Menus 6.1.20 brief + ratio The Brief+Ratio option allows you to enable Brief+Ratio copy. Tap the ‘ENT’ button to change this option’s setting. • [ ] – Brief+Ratio is disabled (default). When a Brief copy process is executed the system will execute the copy process as normal. -
Page 38: Advanced Brief Mode
The Setup Menus 6.1.23 advanced brief Mode The Brief copy mode is usually the fastest duplication method available. However Brief mode only supports a handful of file systems. The ADV. BRIEF MODE operation allows you to execute a Brief copy of unsupported file systems. The Advanced Brief copy mode requires loading a special Master drive image to a Storage Center drive. -
Page 39: Set Hdd Wipe
The Setup Menus 6.1.25 Set HDD Wipe The Set HDD Wipe option allows you to configure the number of wipe cycles that are executed when you run the Disk Wipe operation (see section 4.3 Disk Wipe on page 23) The Disk Wipe operation can be run once or consecutively up to 100 times. -
Page 40: Skip Read Error
The Setup Menus 6.1.28 Skip read Error The Skip Read Error option allows you to enable or disable error skipping during Disk, SMART, Brief and Resize modes. Tap the ‘ENT’ button to change this option. • [ ] – Disabled (default). When an error is detected while reading from the Source, the duplicator process will fail out. -
Page 41: Set Uart Control
The Setup Menus 6.1.31 Set UarT Control The Set UART Control option must be enabled in order to execute commands remotely via the Control Manager software. Tap the ‘ENT’ button to change this option. ٭ • [ ] – UART Controls are enabled. You can execute commands on the duplicator from the Control Manager software. -
Page 42: Advanced Setup
The Setup Menus 6.2 advanced Setup 6.2.1 Set Password The Set Password option allows you to enable a 4-digit password for the Setup menus, protecting the system against unauthorized setting changes. To set a password: 1. Tap the ‘ENT’ button. The digit furthest to the left will start blinking, indicating that it is currently selected. -
Page 43: Set Copy Retry Count
The Setup Menus 6.2.4 Set Copy retry Count The Set Copy Retry Count option allows you to configure the number of times that the duplicator retries sending ATA write commands to the SATA port before failing. The number of retries can be set from 0 to 9 times. The default setting is 1. Tap the ‘ENT’... -
Page 44: Auto Kick Slow (15 And 23 Target Duplicators Only)
The Setup Menus 6.2.8 auto Kick Slow (15 and 23 target duplicators only) Not all drives are equal, and some drives will be slower than others due to max performance, health and other factors. Since the duplicator operates in a synchronous mode, the duplicator can only operate as fast as the slowest drive attached. -
Page 45: Set Ratio Start
The Setup Menus 6.2.11 Set ratio Start Ratio Copy duplicates only a defined percentage of the Master drive. The Set Ratio Start option allows you to define the starting point. The percentage of the disk duplicated from the start point is defined by the Set Ratio Length option. -
Page 46: Check Dc Connect (15 And 23 Target Duplicators Only)
The Setup Menus 6.2.15 Check DC Connect (15 and 23 target duplicators only) The Check DC Connect option allows you to configure whether or not the duplicator checks for any other daisy chain connected duplicators during bootup. Tap the ‘ENT’ button to change this option. ٭... -
Page 47: Log Over Head
The Setup Menus 6.2.18 Log over Head Some Linux file systems uses a log-structure file system that allows for metadata to be written in between blocks of data. Normally this metadata isn’t critical and does not need to be copied. However, if you would like this information to be copied, you must define the gap size. -
Page 48: No Mbr Check
6.2.22 No Mbr Check The No MBR Check option will allow the duplicator to start a copy process without checking the MBR table. This is because some drives do not have a standard MBR table, however the data residing within are correct and the duplicator is able to copy them. Tap the ‘ENT’... -
Page 49: Resize Last Partition
6.2.26 resize Last Partition The Resize Last Partition setting is used to configure how Resize Copy functions when the Master drive has multiple partitions. Tap the ‘ENT’ button to change this option. ٭ • [ ] – Resize Last Partition is enabled. When you run a Resize Copy operation, the last partition on the Target drive will be expanded to use up any unallocated space. -
Page 50: Storage Center Setup
Troubleshooting 6.3 Storage Center Setup 6.3.1 Load Full Image The Load Full Image option allows you to control how image files are saved to a Storage Center during a Load operation (see section 4.8 Load Image on page 25). Tap the ‘ENT’ button to change this option. • [ ] –... -
Page 51: Select Image File
Warranty Information 6.3.4 Select Image File The Select Image File option is used to select an image file when the Skip Select Image option is enabled. If Skip Select Image is enabled, the image file selected here will be used as the default Source for any copy process. -
Page 52: The Diagnostic Setup Menu
6.4 The Diagnostic Setup Menu The Diagnostic Setup menu will allow you to choose which disk diagnostic tests are enabled to run when executing the Disk Diagnostic function (see section 4.6 Disk Diagnostic on page 25). Press the UP and DoWN buttons to navigate through the options available under the Diagnostic Setup menu. -
Page 53: The About Menu
About menu. 6.5.2 Update Firmware The Update Firmware option allows you to upgrade your Kanguru Hard Drive Duplicator to the latest firmware version. Warning! Do not attempt to update your duplicator’s firmware unless specifically instructed to do so by a Kanguru Technician. -
Page 54: Format Update Disk
6.5.3 Format Update Disk The Format Update Disk option allows you to format a connected SATA drive in a supported FAT32 file system. This drive can then be used to load firmware updates to the duplicator. 6.5.4 Format USb Drive The Format USB Drive option allows you to format a connected USB drive in a supported FAT32 file system. -
Page 55: Faq
7. FaQ Q: Do all Target hard drives have to be the same capacity? Same Brand? a: If you select Disk copy or Brief copy, the Target hard drives must have the same capacity as the Master hard drive. The hard drive brand is not important but capacity must be identical. Q: Can I clone a smaller capacity Master drive to larger capacity Target drives? a: Yes, use the “RESIZE COPY“... -
Page 56: Troubleshooting
Try to identify the faulty hard drive unstable or operates very that is affecting the other hard and replace as needed. slowly. drives, causing slow operation. Only use the cables provided The cables do not meet the by Kanguru Solutions with the UDMA standards. KanguruClone. -
Page 57: Warranty Information
This product carries a 1 year* limited warranty on the power supply, controller, and all internal components. The warranty does not cover any IDE, SATA, or Power cables. Kanguru Solutions is not responsible for any damages incurred in the shipping process. Any claims for loss or damage must be made to carrier directly. -
Page 58: Technical Support
“tracking” feature to verify “proof of delivery.” The customer is responsible for shipping charges when returning a product. Shipping back to the customer is covered by Kanguru Solutions during the first 90 days of purchase. After 90 days of purchase the customer is responsible for shipping both ways. -
Page 59: Appendix A: Daisy Chain Connection
Daisy Chain Connection aPPENDIx a: DaISy CHaIN CoNNECTIoN Kanguru Clone 15 target and 23 target HDD Duplicators can operate individually as standalone systems. They can also be linked together to create a system of separate HDD Duplicators working together in unison via a daisy chain connection. A maximum of four duplicators can be daisy chained at once, although it is not recommended to have more than two systems connected together. - Page 60 Daisy Chain Connection Duplicating in a Daisy Chain Configuration Once connected, making disks copies with duplicators in a Daisy Chain configuration is similar to making copies on independent, standalone systems. 1. Connect the Master disk to the Source port on Duplicator #1. 2.
- Page 61 Kanguru Solutions 1360 Main Street Millis, MA 02054 www.kanguru.com 07.19.17 v1.5 © 2017 Kanguru Solutions Legal terms and conditions available at www.kanguru.com. Please review and agree before use. Thank you.
Need help?
Do you have a question about the KCLONE-7HDS-PRO and is the answer not in the manual?
Questions and answers