Table of Contents
Advertisement
Advertisement
Table of Contents

Related Manuals for SMAR LD291


Summary of Contents for SMAR LD291
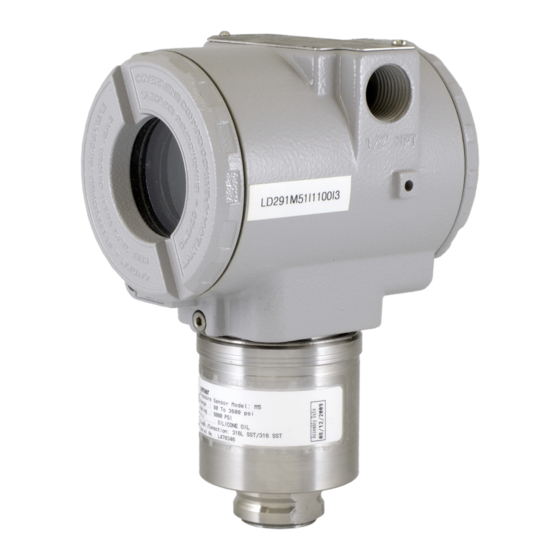
- Page 1 INTELLIGENT PRESSURE TRANSMITTER MAR / 12 LD291 Version 6 L D 2 9 1 M E...
- Page 2 Specifications and information are subject to change without notice. Up-to-date address information is available on our website. web: www.smar.com/contactus.asp...
- Page 3 Introduction INTRODUCTION The LD291 is a smart pressure transmitter for gauge and level measurement. It is based on a field-proven capacitive sensor that provides reliable operation and high performance. The digital technology used in the LD291 enables an easy interface between the field and the control room and several interesting features that considerably reduce the installation, operation and maintenance costs.
- Page 4 Smar provides specific training to instruct and qualify such professionals. However, each country must comply with the local safety procedures,...
-
Page 5: Table Of Contents
Table of Contents TABLE OF CONTENTS SECTION 1 - INSTALLATION ........................ 1.1 GENERAL ............................... 1.1 MOUNTING ..............................1.1 ELECTRONIC HOUSING ..........................1.8 WIRING ................................1.9 LOOP CONECTIONS ........................... 1.10 INSTALLATION IN HAZARDOUS AREAS ....................1.12 ... - Page 6 LD291 - Operation and Maintenance Instruction Manual OPTIONAL ITEMS ............................6.7 OPTIONAL ITEMS ............................6.9 OPTIONAL ITEMS ............................6.11 APPENDIX A - CERTIFICATIONS INFORMATIONS ................A.1 EUROPEAN DIRECTIVE INFORMATION ..................... A.1 OTHER APROVALS ............................A.1 FMEDA REPORT ............................... A.1 HAZARDOUS LOCATIONS CERTIFICATIONS ....................
- Page 7 Installation Flowchart Start Was the transmitter Install the transmitter on the field configured on the bench following the instructions below. to match the application? Install the transmitter preferably on weather- protected areas. Configure the transmitter (Section 1 and 3) Check the area classification and its practices Configure the engineering unit (Section 3 - Configuration)
- Page 8 LD291 - Operation and Maintenance Instruction Manual VIII...
-
Page 9: Section 1 - Installation
There are, however, ways of reducing the effects of temperature, humidity and vibration. The LD291 has a built-in temperature sensor to compensate for temperature variations. At the factory, each transmitter is submitted to a temperature cycle, and the characteristics under different temperatures are recorded in the transmitter memory. - Page 10 LD291 - Operation and Maintenance Instruction Manual Figure 1.1(a) – Dimensional Drawing and Mounting Position for LD291...
- Page 11 Installation Figure 1.1(b) – Dimensional Drawing and Mounting Position for LD291 - Sanitary...
- Page 12 LD291 - Operation and Maintenance Instruction Manual Figure 1.1(c) – Dimensional Drawing and Mounting Position for LD291 – Sanitary...
- Page 13 Installation Figure 1.1(d) – Dimensional Drawing and Mounting Position for LD291 – Level...
- Page 14 VIEW BY ‘’A’’ Mobile adjusting flange Diaphragm protection with screen PROBE LENGTH (OPTIONAL) O’RING VIEW BY ‘’C’’ - DIMENSIONS ARE IN mm (in) VIEW BY ‘’BB’’ Figure 1.1 (e) – Dimensional Drawing and Mounting Position for LD291 – Level (Insertion)
- Page 15 Process leaks could result in death or serious injury Do not attempt to loosen or remove flange bolts while the transmitter is in service. Replacement equipment or spare parts not approved by Smar could reduce the pressure retaining capabilities of the transmitter and may render the instrument dangerous.
-
Page 16: Electronic Housing
LD291 - Operation and Maintenance Instruction Manual STEAM LIQUID Figure 1.3 – Position of the Transmitter and Taps NOTE The transmitters are calibrated in the vertical position and a different mounting position displaces the zero point. Consequently, the indicator will indicate a different value from the applied pressure. -
Page 17: Wiring
TERMINAL TERMINAL Figure 1.5– Wiring Block The LD291 is protected against reverse polarity For convenience there are two ground terminals: one inside the cover and one external, located close to the conduit entries. Use of twisted pair (22 AWG or greater than) cables is recommended. Avoid routing signal wiring close to power cables or switching equipment. -
Page 18: Loop Conections
Figure 1.6 - Conduit Installation Loop Conections Connection of the LD291 should be done as in Figure 1.7. Connection in multi-drop configuration should be done as in Figure 1.8. Note that a maximum of 15 transmitters can be connected on the same line and that they should be connected in parallel. - Page 19 Installation NOTE Make sure that the transmitter is operating within the operating area as shown on the load curve (Figure 1.9). Communication requires a minimum load of 250 Ohm. Figure 1.9 – Load Curve 1.11...
-
Page 20: Installation In Hazardous Areas
Required” could be applied for Explosion Proof Version (CSA Certification). The standard plugs provided by Smar are certified according to the standards at FM, CSA and CEPEL. If the plug needs to be replaced, a certified plug must be used. -
Page 21: Section 2 - Operation
Section 2 OPERATION Functional Description - Sensor The LD291 Series Intelligent Pressure Transmitters uses capacitive sensors (capacitive cells) as pressure sensing elements, as shown in Figure 2.1. Figure 2.1 – Capacitive Cell Where, and P are the pressures in chambers H and L capacitance between the fixed plate on P side and the sensing diaphragm. -
Page 22: Functional Description - Hardware
ELECTRONIC DIGITAL CONVERTER DISPLAY Figure 2.2 – LD291 Block Diagram Hardware Oscillator This oscillator generates a frequency as a function of sensor capacitance. Signal Isolator The Control signals from the CPU are transferred through optical couplers, and the signal from the oscillator is transferred through a transformer. -
Page 23: Functional Description - Software
The LD291 shows failure indication at 3.6 mA, if configured for low signal failure. At 21 mA, it will show the indication when configured for high signal failure. In case of low saturation, it will indicate failure at 3.6 mA and for high saturation, 21 mA, and measurements, proportional to the applied pressure in the... - Page 24 * USER UNIT OFF ** USER UNIT ON 100% USER UNIT OUTPUT CONST USER UNIT ON/OFF OUTPUT PV** CURRENT 4 mA TRIM 20 mA PRIMARY INDICATION 4-20 mA DISPLAY SENDONDARY INDICATION INDICATOR Figure 2.3 – LD291 – Software Block Diagram...
-
Page 25: The Display
Monitoring During normal operation, the LD291 is in the monitoring mode. In this mode, indication alternates between the primary and secondary variable as configured by the user. See Figure. 2.5. The display indicates engineering units, values and parameters simultaneously with most status indicators. - Page 26 INIT The LD291 is in initializing after power on. CHAR The LD291 is characterization mode. See Section 3 – Trim. FAIL SENS Sensor failure. Refer to Section 5 - Maintenance. Current output saturated in 3.8 or 20.5 mA. See Section 5 –...
-
Page 27: Section 3 - Configuration
In the case of the LD291 the "0" address causes the LD291 to control its output current and addresses "1" through "15" place the LD291 in the multidrop mode with current control. - Page 28 LD291- Operation and Maintenance, Instruction manual Figure 3.1 – Smar’s Configurator Figure 3.2 – Screen of the Configurator...
-
Page 29: Configuration Features
4-20 mA signal, up to 2 km away from the transmitter. Manufacturing Data and Identification The following information about the LD291 manufacturing and identification data is available: TAG - 8 character alphanumeric field for identification of the transmitter;... -
Page 30: Primary Variable Current Trim
In most cases, characterization is not required, due to the efficiency of the fabrication procedure. The transmitter will display "CHAR", thus indicating that the characterization process is activated. The LD291 has a parameter to enable or disable the use of the Characterization Table. -
Page 31: Transmitter Adjustment To The Working Range
Transmitter Adjustment to the Working Range This function directly affects the transmitter's 4-20 mA output. It is used to define the transmitter's working range; in this document it is referred to as the transmitter's calibration. The LD291 transmitter includes two calibration features: ... -
Page 32: Engineering Unit Selection
100% - Desired readout when the pressure is equal to the Upper Value (PV% = 100%, or transmitter mode output equal to 20 mA). The user unit may be selected from a list of options included in the LD291. Table 3.2 makes it possible ®... -
Page 33: Table Points
Table 3.2 – Available User Units Should a special unit other than those presented on Table 3.2 be required, the LD291 allows the user to create a new unit by entering up to 5 alphanumeric digits. The LD291 includes an internal feature to enable and disable the User Unit. -
Page 34: Equipment Configuration
5 digit alphanumeric field for units and status information. The LD291 may work with up to two display configurations to be alternately displayed at 2 second intervals. Parameters that may be selected for visualization are those listed on Table 3.4, below. - Page 35 Circuit Number - This number is unique to every main circuit board and cannot be changed. Sensor Number - The serial number of the sensor connected to the LD291 and cannot be changed. This number is read from the sensor every time a new sensor is inserted in the main board.
- Page 36 LD291- Operation and Maintenance, Instruction manual 3.10...
-
Page 37: Section 4 - Programming Using Local Adjustment
ADJUSTMENT The Magnetic Tool Smar's magnetic tool is the second man machine interface. It comprises the advantage of the powerful HHT and the convenience of the magnetic tool. If the transmitter is fitted with a display, and configured for Complete Local Adjustment (using the internal jumper), the magnetic tool is almost as powerful as the HHT. -
Page 38: Simple Local Adjustment
Table 4.2 - Local Adjustment Description NOTE For LD291 versions prior to a V6.00, the digital display shall be number 214-0108 as per spare parts list for LD291 V6.XX. For LD291 versions V6.XX, the digital display shall be number 400-0559, as per the updated... -
Page 39: Complete Local Adjustment
The local adjustment uses a tree structure where, by placing the magnetic tool in (Z) it is possible to browse the options of a branch and by placing it in (S); details of the chosen option are shown. Figure 4.2 shows the LD291 available options. NORMAL... -
Page 40: Configuration Branch (Conf)
LD291 - Operation and Maintenance Instruction Manual Figure 4.3 shows branch CONF with the available options. Figure 4.3 - Local Adjustment Configuration Tree Configuration Branch (CONF) Z: Moves to the TRIM branch. S: Enters the CONFIGURATION branch, starting with function display (LCD_1). -
Page 41: Range (Range)
Programming Using Local adjustment Range (RANGE) Function Calibration (RANGE) presents the calibration options as a tree branch, as described on Figure 4.4. Figure 4.4 – Local Range Tree Range Branch (RANGE) Z: Moves to the FUNCT function from range branch. S: Enters the RANGE branch, starting with the function UNIT. - Page 42 LD291 - Operation and Maintenance Instruction Manual Lower Range Value Adjustment without Reference (LRV) Z: Moves to the LRV DECREASE function. S: Increases the Lower Value until the magnetic tool is removed or the maximum limit for the Lower Value is reached.
-
Page 43: Function (Funct)
Programming Using Local adjustment Z: Moves to the DAMPING function. S: Decreases the Output in transmitter mode, increases the Upper Pressure Value until the magnetic tool is removed or the minimum limit for the Upper Value is reached. Damping (DAMP) Z: Moves to the DAMPING DECREASE function. -
Page 44: Pressure Trim [Trim]
LD291 - Operation and Maintenance Instruction Manual The desired function is activated using (S). Escape leaves function unchanged. Z: Recycles for menu LCD – 1. S: Moves to the CONF function of the main menu. Pressure Trim [TRIM] This field of the tree is used to adjust the digital reading according to the applied pressure. The... - Page 45 Programming Using Local adjustment Lower Pressure Trim (LOWER) Z: Moves to option DECREASES THE LOWER PRESSURE VALUE. S: Adjusts the transmitter's internal reference, increasing the displayed value that will be interpreted as the Lower Pressure value corresponding to the applied pressure. Z: Moves on to function SAVE if the Lower Pressure Trim (LOWER) is running or to the Upper Pressure Trim (UPPER).
-
Page 46: Escape Local Adjustment [Esc]
LD291 - Operation and Maintenance Instruction Manual Escape Local Adjustment [ESC] This branch of the main tree is used to leave the Local Adjustment mode, placing the Transmitter or Controller in the monitoring mode. Z: Selects the OPERATION branch. S: Escapes to NORMAL DISPLAY mode. -
Page 47: Section 5 - Maintenance Procedures
Should the sensor eventually require maintenance, it may not be changed in the field. In this case, the possibly damaged sensor should be returned to SMAR for evaluation and, if necessary, repair. Refer to the item "Returning Materials" at the end of this Section. -
Page 48: Diagnostic With The Transmitter
LD291 - Operation and Maintenance Instruction Manual ERROR MESSAGES POTENTIAL SOURCE OF PROBLEM • COLD START Start-up or Reset due to power supplies failure. • Output in Constant Mode. OUTPUT FIXED • Transmitter in Multidrop mode. • OUTPUT SATURATED Pressure out of calibrated Span or in fail-safe state (Output current in 3.8 or 20.5 mA). - Page 49 Check if there is resistance in the 250 Ω line. • Power Supply • Check output of power supply. The voltage at the LD291 terminals must be between 12 and 45 Vdc, and ripple less than 500 mV. Electronic Circuit Failure •...
-
Page 50: Disassembly Procedure
Check the connection (flat cable, male and female connectors). Type of Sensor Connected to the Main Board Check if the sensor connected to the main board is the one specified for the LD291 model: sensor type shall be hyper - High Performance. Electronic Circuit Failure ... -
Page 51: Reassembly Procedure
Maintenance Procedure WARNING The board has CMOS components, which may be damaged by electrostatic discharges. Observe correct procedures for handling CMOS components. It is also recommended to store the circuit boards in electrostatic-proof cases. Pull the main board out of the housing and disconnect the power supply and the sensor connectors. Reassembly Procedure WARNING Do not assemble with power on. -
Page 52: Returning Materials
If it becomes necessary to return the transmitter and/or configurator to Smar, simply contact our office, informing the defective instrument's serial number, and return it to our factory. In order to speed up analysis and solution of the problem, the defective item should be returned with the Service Request Form (SRF –... - Page 53 Magnetic Tool for local adjustment. Palm 8 Mbytes Palm Handheld, including installation and initialization software for the HPC301. ® HART Interface HPI311-V for Palm, including the configuration package for Smar HPC301-SF1-V transmitters and for third parties transmitters. ® HPI311-V HART...
- Page 54 LD291 - Operation and Maintenance Instruction Manual SPARE PARTS LIST FOR TRANSMITTER DESCRIPTION OF PARTS POSITION CODE CATEGORY (NOTE 1) . 1/2 - 14 NPT 209-0240 HOUSING, Aluminum (NOTE 2) . M20 x 1.5 209-0241 . PG 13.5 DIN 209-0242 .
-
Page 55: Ordering Code For Sensor
Maintenance Procedure Ordering Code for Sensor 209-0241 SPARE PART NUMBER FOR PRESSURE GAGE SENSOR CODE Type Range Limits Range Limits Min. Max. Unit Min. Max. Unit Gage 12.5 mbar 5.02 201.09 Gage 62.5 2500 mbar 25.13 1005.45 Gage 0.625 157.1 10054.5 Gage 6.25... - Page 56 LD291 - Operation and Maintenance Instruction Manual 209-0241 SPARE PART NUMBER FOR SANITARY PRESSURE SENSOR CODE Type Range Limits Range Limits Min. Max. Unit Min. Max. Unit Sanitary 12.5 mbar 5.02 201.09 Sanitary 62.5 2500 mbar 25.13 1005,45 Sanitary 0.625 157.1...
- Page 57 Maintenance Procedure 209-0241 SPARE PART NUMBER FOR FLANGED PRESSURE SENSOR Range Limits Range Limits COD. Type Min. Span Unit Min. Span Unit Min. Max. Min. Max. Level 1,25 -200 Note: The range can be extended up to 0.75 LRL and 1.2 URL with small degradation of Level -250 2,08...
- Page 58 LD291 - Operation and Maintenance Instruction Manual 5.12...
-
Page 59: Section 6 - Technical Characteristics
CEPEL), explosion proof (FM, NEMKO and CEPEL) and dust ignition proof (FM). Authorized representative in European Community Smar Gmbh-Rheingaustrasse 9-55545 Bad Kreuzanach PED Directive (97/23/EC) – Pressure Equipment Directive This product is in compliance with the directive and it was designed and manufactured in accordance with sound engineering practice using several standards from ANSI, ASTM, DIN and JIS. - Page 60 Injected aluminum with polyester painting or 316 SST. According to NEMA Type 4X or Type 4, IP66, IP66W*. Nonwetted Parts *The IP66W sealing test (immersion) was performed at 1 bar for 24 hours. For any other situation, please consult Smar. IP66W tested for 200h to according NBR 8094 / ASTM B 117 standard.
- Page 61 Technical Characteristic Level Flange (LD290L) 316L SST, 304 SST and Plated Carbon Steel. Fill Fluid Silicone or Fluorolube Oil. Cover O-Rings Nonwetted Parts Buna N. Mounting Bracket Optional universal mounting bracket for surface or vertical/horizontal 2”-pipe (DN 50) carbon steel with polyester painting or 316 SST.
-
Page 62: Ordering Code
LD291 - Operation Maintenance Instruction Manual Ordering Code MODEL GAGE PRESSURE TRANSMITTERS ® 4-20 mA + HART LD291M CODE Type Range Limits Range Limits Min. Max. Unit Min. Max. Unit Gage 12.5 mbar 5.02 201.09 Gage 62.5 2500 mbar 25.13 1005.45... -
Page 63: Optional Items
Technical Characteristic MODEL GAGE PRESSURE TRANSMITTER (CONTINUATION) CODE Output Signal 4-20 mA CODE Housing Material (9) (10) Aluminium (IP/TYPE) 316 SST for Saline Atmosphere (IPW/TYPEX) (8) 316 SST (IP/TYPE) Copper Free Aluminium for Saline Atmosphere (IPW/TYPEX) (8) Aluminium for Saline Atmosphere (IPW/TYPEX) (8) CODE Identification Plate FM: XP, IS, NI, DI... - Page 64 LD291 - Operation Maintenance Instruction Manual MODEL SANITARY PRESSURE TRANSMITTERS ® LD291S 4-20 mA + HART CODE Type Range Limits Range Limits Min. Max. Unit Min. Max. Unit Sanitary 12.5 mbar 5.02 201.09 Sanitary 62.5 2500 mbar 25.13 1005,45 Sanitary 0.625...
-
Page 65: Optional Items
Technical Characteristic MODEL SANITARY PRESSURE TRANSMITTERS (CONTINUATION) COD. Output Signal 4-20 mA COD. Housing Material (7) (8) Aluminium (IP/TYPE) 316 SST (IP/TYPE) COD. Identification Plate FM: XP, IS, NI, DI EXAM (DMT): Ex-ia; NEMKO: Ex-d NEMKO: Ex-d, Ex-ia CEPEL: Ex-d, Ex-ia CSA: XP, IS, NI, DI Without Certification COD. - Page 66 LD291 - Operation Maintenance Instruction Manual MODEL LOW COST FLANGED PRESSURE TRANSMITTER ® LD291L 4-20 mA + HART Range Limits Range Limits COD. Type Unit Unit Min. Max. Min. Max. Level 12.5 mbar 5.02 201.09 Level 62.5 2500 mbar 25.13 1005.45...
-
Page 67: Optional Items
Technical Characteristic MODEL LOW COST FLANGED PRESSURE TRANSMITTER (CONTINUATION) COD. Output Signal 4-20 mA COD. Housing Material (11) (12) Aluminium (IP/TYPE) 316 SST for saline atmosphere (IPW/TYPEX) (10) 316 SST (IP/TYPE) Copper Free Aluminium for Saline Atmosphere (IPW/TYPEX) (10) Aluminium for saline atmosphere (IPW/TYPEX) (10) COD. - Page 68 LD291 - Operation Maintenance Instruction Manual MODEL PRESSURE TRANSMITTER WITH EXTENDED PROBE ® LD291I 4-20 mA + HART COD. Type Range Limits Min. Max. Unit Level 12.5 mbar COD. Diaphragm Material and Fill Fluid 316L SST – Silicon Oil (1) COD.
- Page 69 Technical Characteristic MODEL PRESSURE TRANSMITTER WITH EXTENDED PROBE (CONTINUATION) COD. Output Signal 10-50 mA 4-20 mA 0-20 mA COD. Housing Material (8) (9) Aluminium (IP/TYPE) 316 SST for saline atmosphere (IPW/TYPEX) (7) 316 SST (IP/TYPE) Copper Free Aluminium for Saline Atmosphere (IPW/TYPEX) (7) Aluminium for saline atmosphere (IPW/TYPEX) (7) COD.
- Page 70 LD291 - Operation Maintenance Instruction Manual 6.12...
-
Page 71: Appendix A - Certifications Informations
CERTIFICATIONS INFORMATIONS European Directive Information Authorized representative in European Community Smar Gmbh-Rheingaustrasse 9-55545 Bad Kreuzanach PED Directive (97/23/EC) – Pressure Equipment Directive This product is in compliance with the directive and it was designed and manufactured in accordance with sound engineering practice using several standards from ANSI, ASTM, DIN and JIS. -
Page 72: European Certifications
LD291 - Certifications Information Class 2258 03 Intrinsically Safe and Non-Incendive Systems for Class I, Division 1, Groups A, B, C e D, Class II, Division 1, Groups E, F e G, Class III, Division 1. Intrinsically Safe when connected , 300 Ω... -
Page 73: Asian Certifications
Appendix A Certificado No: CEPEL-Ex-039/96 Á Prova de Explosão - Ex-d IIC T6 Temperatura Ambiente: (-20 ºC < T <+40 ºC). Grau de proteção: IP66 ou IP66W. Asian Certifications Certificate No: Nepsi GYJ05602 Intrinsically safe - Ex ia, IIC T4/T5/T6 Ambient Temperature: -40 ºC <... - Page 74 LD291 - Certifications Information NEMKO and DMT CEPEL...
- Page 75 Appendix A NEPSI • Identification if Intrinsically Safe and Explosion Proof for saline atmospheres: NEMKO and DMT...
- Page 76 LD291 - Certifications Information CEPEL...
-
Page 77: Control Drawing
DRAWN CHECKED PROJECT APPROVAL MOACIR SINASTRE BASILIO EUGENIO MARCIAL MISSAWA ALT-DE NUMBER 0043/08 EQUIPMENT: LD290/LD291/LD301 - CONTROL DRAWING 102A0435 MOACIR EUGENIO ALT-DE FOR NON-INCENDIVE: CLASS I, DIV. 2 0012/99 SCALE SHEET FOR INTRINSICALLY SAFE: CLASS I, DIV. 1 APPROVAL 01/01... - Page 78 LD291 - Certifications Information...
- Page 79 Appendix A NEMKO...
- Page 80 LD291 - Certifications Information A.10...
-
Page 81: Appendix B - Srf - Service Request Form
(Please, describe the observed behavior, if it is repetitive, how it reproduces, etc.) OBSERVATIONS USER INFORMATION Company: Contact: Title: Section: Phone: Extension: E-mail: Date: Signature: For warranty or non-warranty repair, please contact your representative. Further information about address and contacts can be found on www.smar.com/contactus.asp. - Page 82 LD291 – Service Request Form...
-
Page 83: Appendix C - Smar Warranty Certificate
Appendix C SMAR WARRANTY CERTIFICATE SMAR guarantees its products for a period of 24 (twenty four) months, starting on the day of issuance of the invoice. The guarantee is valid regardless of the day that the product was installed. SMAR products are guaranteed against any defect originating from manufacturing, mounting,... - Page 84 13. It is the customer’s responsibility to clean and decontaminate products and accessories prior to shipping them for repair, and SMAR and its dealer reserve themselves the right to refuse the service in cases not compliant to those conditions. It is the customer’s responsibility to tell SMAR and its dealer when the product was utilized in applications that contaminate the equipment with harmful products during its handling and repair.
Need help?
Do you have a question about the LD291 and is the answer not in the manual?
Questions and answers