
Related Manuals for SMAR ld301


Summary of Contents for SMAR ld301
- Page 1 OPERATION AND MAINTENANCE INSTRUCTION / MANUAL Intelligent Pressure Transmitter With Control Capability SEP / 12 LD301 VERSION 6 L D 3 0 1 M E...
- Page 2 Specifications and information are subject to change without notice. Up-to-date address information is available on our website. web: www.smar.com/contactus.asp...
- Page 3 It is based on a field-proven capacitive sensor that provides reliable operation and high performance. The digital technology used in LD301 enables the choice of several types of transfer functions, an easy interface between the field and the control room and several interesting features that considerably reduce installation, operation and maintenance costs.
- Page 4 Smar provides specific training to instruct and qualify such professionals. However, each country must comply with the local safety procedures,...
-
Page 5: Table Of Contents
Table of Contents TABLE OF CONTENTS SECTION 1 - INSTALLATION ........................1.1 GENERAL .................................. 1.1 MOUNTING ................................1.1 ELECTRONIC HOUSING ............................1.9 WIRING ................................... 1.10 LOOP CONNECTIONS ............................1.11 INSTALLATION IN HAZARDOUS AREAS......................1.13 ... - Page 6 LD301 – Operation and Maintenance Instruction Manual SENSOR ....................................5.6 ELECTRONIC CIRCUIT ................................5.7 INTERCHANGEABILITY ............................5.8 RETURNING MATERIALS ............................5.8 SMAR INSULATOR KIT ............................5.10 SMAR INSULATOR KIT MOUNTING ........................5.10 APPLICATION WITH HALAR ..........................5.14 TECHNICAL SPECIFICATION .............................. 5.14 PERFORMANCE SPECIFICATION ............................
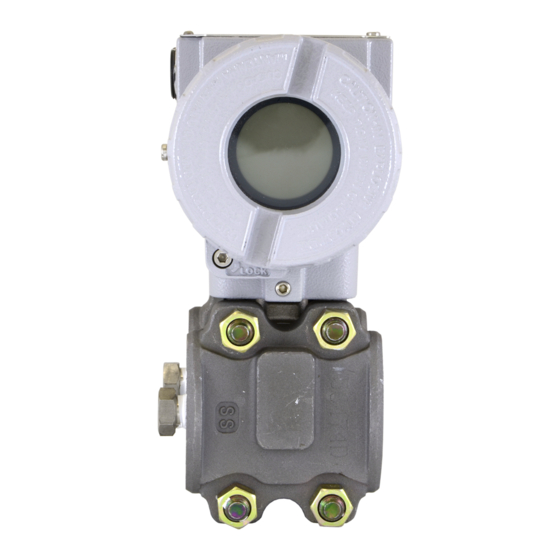
- Page 7 Transmitter General View TRANSMITTER GENERAL VIEW The LD301 uses a highly proven technique for pressure measuring by capacitance reading. The ® block diagram of the LD301 HART pressure transmitter is shown below. Zero/Span Local Adjustment Process Unit HT3012 - Range...
- Page 8 LD301 – Operation and Maintenance Instruction Manual Installation Flowchart Start Was the transmitter Install the transmitter on the field configured on the bench following the instructions below. to match the application? Install the transmitter preferably on weather- protected areas. Configure the transmitter...
-
Page 9: Section 1 - Installation
There are, however, ways of reducing the effects of temperature, humidity and vibration. The LD301 has a built-in temperature sensor to compensate for temperature variations. At the factory, each transmitter is submitted to a temperature cycle, and the characteristics under different temperatures are recorded in the transmitter memory. - Page 10 LD301 – Operation and Maintenance Instruction Manual Figure 1.1 (a) – Dimensional Drawing and Mounting Position - Differential, Flow, Gage, Absolute and High Static Pressure Transmitters with Mounting Bracket...
- Page 11 Installation Figure 1.1 (b) – Dimensional Drawing and Mounting Position - Flanged Pressure Transmitter with Integral Flange...
- Page 12 LD301 – Operation and Maintenance Instruction Manual Figure 1.1 (c) – Dimensional Drawing and Mounting Position - Flanged Pressure Transmitter with Slip-on Flange...
- Page 13 Installation Figure 1.1 (d) – Dimensional Drawing and Mounting Position - Flanged Pressure Transmitter with Housing...
- Page 14 LD301 – Operation and Maintenance Instruction Manual Figure 1.1 (e) – Dimensional Drawing and Mounting Position - Sanitary Transmitter without Extension...
- Page 15 Installation Figure 1.1 (f) – Dimensional Drawing and Mounting Position - Sanitary Transmitter with Extension...
- Page 16 WALL OR PANEL MOUNTING (See Section 5 – spare parts list for mounting brackets available) Figure 1.2 – Drawing of LD301 Mounted on the Panel or Wall Observe operating safety rules during wiring, draining or blow-down. WARNING Normal safety precautions must be taken to avoid the possibility of an accident occurring when operating in conditions of high pressure and/or temperature.
-
Page 17: Electronic Housing
Installation Figure 1.3 – Position of the Transmitter and Taps NOTE The transmitters are calibrated in the vertical position and a different mounting position displaces the zero point. Consequently, the indicator will indicate a different value from the applied pressure. In these conditions, it is recommended to do the zero pressure trim. -
Page 18: Wiring
LD301 – Operation and Maintenance Instruction Manual The electronic housing can be rotated to adjust the digital display on a better position. To rotate it, loose the Housing Rotation Set Screw, see Figure 1.4 (a). To prevent humidity entering, the electric housing and the sensor joint must have a minimum of 6 fully engaged threads. -
Page 19: Loop Connections
Figures 1.7 and 1.8 show LD301’s wiring diagrams to work as transmitter and controller, respectively. Figure 1.9 shows the LD301’s wiring diagrams to work in the multi-drop network. Note that a maximum of 15 transmitters can be connected on the same line and that they should be connected in parallel. - Page 20 LD301 – Operation and Maintenance Instruction Manual Figure 1.8 - Wiring Diagram for the LD301 Working as a Controller Figure 1.9 - Wiring Diagram for the LD301 in Multidrop Configuration NOTE Make sure that the transmitter is operating within the operating area as shown on the load curve (Figure 1.10).
-
Page 21: Installation In Hazardous Areas
As the transmitter is non-ignition capable under normal conditions, the statement “Seal not Required” could be applied for Explosion Proof Version. (CSA Certification). The standard plugs provided by Smar are certified according to the standards at FM, CSA and CEPEL. If the plug needs to be replaced, a certified plug must be used. - Page 22 LD301 – Operation and Maintenance Instruction Manual 1.14...
-
Page 23: Section 2 - Operation
Section 2 OPERATION Functional Description - Sensor The LD301 Series Intelligent Pressure Transmitters use capacitive sensors (capacitive cells) as pressure sensing elements, as shown in Figure 2.1. SENSOR DIAPHRAGM POSITION, WHEN P1=P2 SENSOR DIAPHRAGM FIXED PLATES OF THE CAPACITORS HIGH AND LOW Figure 2.1 –... -
Page 24: Functional Description - Hardware
LD301 – Operation and Maintenance Instruction Manual Thus it is possible to conclude that the capacitive cell is a pressure sensor formed by two capacitors whose capacitances vary according to the applied differential pressure. Functional Description - Hardware Refer to the block diagram Figure 2.2. The function of each block is described below. -
Page 25: Functional Description - Software
The LD301 in the transmitter mode shows failure indication at 3.6 mA if configured for low signal failure; at 21 mA, if configured for high signal failure; 3.8 mA in the case of low saturation; 20.5 mA in the case of high saturation and measurements proportional to the applied pressure in the range between 3.8 mA... - Page 26 LD301 – Operation and Maintenance Instruction Manual First, the error is calculated: PV-SP (DIRECT ACTION) or SP-PV (REVERSE ACTION), then the MV (manipulated value) is calculated, according to the algorithm of the PID. The PID output signal may follow a user-determined curve, in up to 16 configurable points. If the table is enabled, there will be a...
- Page 27 ** USER’S UNIT ENABLED FEEDBACK-MV PID - POINTS TABLE PID BLOCK (OPTIONAL) TABLE OP-MODE MV % CONST OUTPUT OUTPUT PRIMARY INDICATION CURRENT 4 mA DISPLAY TRIM 20 mA SECONDARY INDICATION 4-20mA INDICATOR 1 INDICATOR 2 Figure 2.3 – LD301 – Software Block Diagram...
-
Page 28: The Display
Monitoring During normal operation, the LD301 is in the monitoring mode. In this mode, indication alternates between the primary and the secondary variable as configured by the user. See Figure. 2.5. The display indicates engineering units, values and parameters simultaneously with most status indicators. - Page 29 Alphanumeric Version LD301 The LD301 is initialized after feeding. CHAR The LD301 is on characterization mode (see Section 3 – TRIM). Output current saturated on 3.8 or 20.5 mA. (see section 5 – Variable Value SAT / Unit Maintenance). CH / CL alternating SFAIL / Unit Failure on one sensor side or on both.
- Page 30 LD301 – Operation and Maintenance Instruction Manual...
-
Page 31: Section 3 - Configuration
In the case of the LD301, which can be configured both as Transmitter and as a Controller; the HART addressing is used as follows: TRANSMITTER MODE - The "0" address causes the LD301 to control its output current and addresses "1"... - Page 32 LD301 - Operation and Maintenance, Instruction Manual Figure 3.1 – Smar Hand Held Terminal Figure 3.2 – Smar Configuration Tool Figures 3.3 and 3.4 show the menu tree used for configuration based on version 4.02 DD and configuration with Smar Hand Held Tool, respectively.
- Page 33 Configuration Descriptor Date (MM/DD/YY) Message Flange Type Flange Material O_Ring Material Integral Meter Drain/Vent Mtrl Remote Seal Type INFO Remote Seal Fluid Remote Seal Diaphr Remote Seal Quant Sensor Fluid Sensor Iso Diaphr Sensor Type Sensor Range SENSOR RANGE Pres min span Press.
- Page 34 Change Passwords Ordering Code MAINT Flange Type Probe Mat. O-ring Mat. Inst. Type Sensor Info Probe Type Probe Fluid Dphrgm Mat. Elect. Connec. Range Multidrop Polling Address Figure 3.4 – Menu tree used for configuration with Smar Hand Held Tool...
-
Page 35: Configuration Features
4-20 mA signals, up to 2 km away from the transmitter. Manufacturing Data and Identification The following information about the LD301 manufacturing and identification data is available: TAG – 8 character alphanumeric field for transmitter identification DESCRIPTOR 16-character alphanumeric field for additional transmitter identification. -
Page 36: Primary Variable Trim - Pressure
In most cases, characterization is not required, due to the efficiency of the production process. The transmitter will display "CHAR", thus indicating that the characterization process has been activated. The LD301 is fitted with an internal feature to enable or disable the use of the Characterization Table. -
Page 37: Primary Variable Current Trim
Transmitter Adjustment to the Working Range This function directly affects the transmitter 4-20 mA output. It is used to define the transmitter working range; in this document it is referred to as the transmitter calibration. The LD301 transmitter includes two calibration features: ... -
Page 38: Engineering Unit Selection
Table 3.1. As the LD301 uses a 4 ½ digit display, the largest indication will be 19999. Therefore, when selecting a unit, make sure that it will not require readouts greater than this limit. For User reference, Table 3.1 presents a list of recommended sensor ranges for each available unit. -
Page 39: Transfer Function For Flow Measurement
Configuration The user unit may be selected from a list of options included in the LD301. Table 3.2 makes it possible to associate the new measurement to the new unit so that all supervisory systems fitted the HART protocol can access the special unit included in this table. The user will be responsible for the consistency of such information. - Page 40 TABLE - The output is a curve formed by 16 points. These points may be edited directly on the XY Table of the LD301. For example, it may be used as a camber table for tanks in applications where the tank volume is not linear in relation to the measured pressure;...
-
Page 41: Totalization Configuration
The LD301 includes an internal feature to enable and disable the Linearization Table. Totalization Configuration When the LD301 works in flow applications it is often desirable to totalize the flow in order to know the accumulated volume or mass that has flown through the pipe/channel. -
Page 42: Pid Controller Configuration
As a PID Controller, the LD301 may run a PID type control algorithm, where its 4 to 20 mA will represent the status of the Manipulated variable (MV). In such a mode, output is 4 mA when the MV = 0% and 20 mA when MV= 100%. -
Page 43: Equipment Configuration
For a better linearization, it is recommendable that the points are the closest possible, in the less linear regions of the curve. The LD301 has an internal variable to enable and disable the characterization table of the MV output of the PID. - Page 44 MDROP for addresses "1" to "15". NOTE The output current will be increased to 4 mA as the LD301 address, in the Transmitter mode, is altered to another value than "0" (this does not happen when the LD301 is configured in the Controller mode).
-
Page 45: Equipment Maintenance
Circuit Number - This number is unique to each main circuit board and cannot be changed. Sensor Number - The serial number of the sensor connected to the LD301 and cannot be changed. This number is read from the sensor every time a new sensor is inserted in the main board. - Page 46 LD301 - Operation and Maintenance, Instruction Manual VARIABLE DESCRIPTION Lower Value/Upper Value When any type of calibration is done. When any change in the transference function is done, e.g., linear, Function square root, const, table. Trim_4mA When the current trim is done at 4mA.
-
Page 47: Section 4 - Programming Using Local Adjustment
The Magnetic Tool The digital display enables the local adjustment function. The local adjustment function may be used only through the digital display. The LD301 on transmitter mode, without display and jumper-configured for simple mode, executes only the calibration function. -
Page 48: Simple Local Adjust
Table 4.2 - Local Adjustment Description NOTE For LD301 versions prior to a V6.00, the digital display shall be number 214 - 0108 as per spare parts list for LD301 V5.XX. For LD301 versions V6.XX, the digital display shall be number 400-0559, as per the updated spare parts list. -
Page 49: Zero And Span Reranging
Programming Using Local Adjustment Zero and Span Reranging The LD301 working in the transmitter mode can be very easily calibrated. It requires only Zero and Span adjustment in accordance with the working range. To make these adjustments, the instrument must be configured as "transmitter" (XMTR). -
Page 50: Operation [Oper]
ESCAPE (ESC) - Is the option used to go back to normal monitoring mode. Operation [OPER] This adjustment option is applicable to the LD301 configured in the Controller mode. It allows the control state to be changed from Automatic to Manual and vice versa, and also to adjust the Setpoint and Manipulated Variable values. - Page 51 Programming Using Local Adjustment OPERATION BRANCH (OPER) Z: Moves to the next branch (TUNE). S: Enters the OPERATION branch, starting with function AUTO/ MANUAL. Auto/Manual (A/M) Z: Moves to the SETPOINT INCREASE function. S: Toggles controller status, Automatic to Manual or Manual to Automatic. A and M indicate status.
-
Page 52: Tuning [Tune]
S: Escapes to the MAIN menu. Tuning [TUNE] This adjustment option is applicable to the LD301 configured in the Controller mode. It allows the control loop to be tuned, acting on the Proportional, Integral and Derivative terms, and also to alter the PID mode. - Page 53 Programming Using Local Adjustment Tr - Adjust (TR) Z: Moves to the INTEGRAL TIME DECREASE function. S: Increases the integral time until the magnetic tool is removed or 999 minutes are reached. Z: Moves to the TD_ADJUSTMENT function, derivative time increase option. S: Decreases the integral time until the magnetic tool is removed or 0 minutes is reached.
-
Page 54: Configuration [Conf]
Digital filter damping time configuration of the readout signal input. Selection of the transference function to be applied to the measured variable. Operational mode selection for the LD301: Transmitter or Controller. Figure 4.6 shows branch CONF with the available options. -
Page 55: Range (Range)
Programming Using Local Adjustment Display 2 (LCD_2) Z: Moves to the RANGE function. S: Starts selection of variable to be indicated as secondary display. The procedure for selection is the same as for LCD_1, above. Display: LCD_1/LCD_2 Description Analog Output Current in mA MV (%) Output in percentage Pressure in pressure unit... - Page 56 LD301 - Operation and Maintenance Instruction Manual UNIT DISPLAY DESCRIPTION inches water column at 20 InHg inches mercury column at 0 feet water column at 20 millimeter water column at 20 mmHg millimeter mercury column at 0 pounds per square inches...
- Page 57 Programming Using Local Adjustment Zero Adjust with Reference {ZERO} Z: Moves to the ZERO DECREASE function. S: Increases output in transmitter mode, decreases the Lower Pressure Value until the magnetic tool is removed or the minimum for the Lower Value is reached. The span is maintained.
-
Page 58: Function (Funct)
LD301 - Operation and Maintenance Instruction Manual Escape (ESC) Z: Moves to the UNIT function. S: Escapes to the FUNCT menu, of the MAIN menu. Function (FUNCT) Z: Moves to the MODE function. S: Starts selection of transfer function. After activating the switch in the hole (S), you can move around the available options in the table 4.5 by activating (Z). -
Page 59: Totalization [Total]
Programming Using Local Adjustment After entering the "password," you can move around the options listed in the table below using (Z). T o select the desired option, activate (S). See Table 4.6. OPERATION MODES DISPLAY DESCRIPTION XMTR Transmitter Controller escape Table 4.6 - Operation Modes Escape (ESC) Z: Recycles back to the function Display 1 (LCD_1). -
Page 60: Pressure Trim [Trim]
LD301 - Operation and Maintenance Instruction Manual Reset Totalization (RESET) Z: Moves to the ESCAPE from the totalization menu. S: Reset the totalization. Escape (ESC) Z: Moves to the TOTAL function. S: Escapes to the main menu. Pressure Trim [TRIM] This field of the tree is used to adjust the digital reading according to the applied pressure. -
Page 61: Escape Local Adjustment [Esc]
Programming Using Local Adjustment Z: Moves on to function SAVE if the Lower Pressure Trim (LOWER) is running or to the Upper Pressure Trim (UPPER). S: Adjusts the transmitter internal reference, decreasing the displayed value that will be interpreted as the Lower Pressure value corresponding to the applied pressure. - Page 62 LD301 - Operation and Maintenance Instruction Manual 4.16...
-
Page 63: Section 5 - Maintenance
Should the sensor eventually require maintenance, it may not be changed on the field. In this case, the possibly damaged sensor should be returned to SMAR for evaluation and, if necessary, repair. Refer to the "Returning Materials" item at the end of this Section. -
Page 64: Diagnostic Via Transmitter
LD301 - Operation and Maintenance Instruction Manual ERROR MESSAGES POTENTIAL SOURCE OF PROBLEM Output in Constant Mode. OUTPUT FIXED Transmitter in Multidrop mode. Pressure out of calibrated Span or in fail-safe state (Output current in 3.8 or 20.5 OUTPUT SATURATED mA). - Page 65 See load limitation in Section 1. Power Supply Check output of power supply. The voltage at the LD301 terminals must be between 12 and 45 Vdc, and ripple less than 500 mV. Electronic Circuit Failure ...
-
Page 66: Disassembly Procedure
Check the connection (flat cable, male and female connectors). Type of Sensor Connected to the Main Board Check if the sensor connected to the main board is the one specified for the LD301 model: Sensor type shall be hyper - High Performance. Electronic Circuit Failure Check if the sensor set is damaged, replacing it for a spare one. - Page 67 Maintenance Figure 5.1 – Exploded View...
-
Page 68: Reassembly Procedure
LD301 - Operation and Maintenance Instruction Manual Figure 5.2 – Sensor Safety Rotation Pull the main board out of the housing and disconnect the power supply and the sensor connectors. Reassembly Procedure WARNING Do not assemble with power on. Sensor When mounting the sensor (27), make use of a new set of gaskets (19 &... -
Page 69: Electronic Circuit
Maintenance Figure 5.3 – Backup Ring Mounting Tighten one nut till the flange seats; Tighten the nut diagonally across with a torque of approximately 2.75 ±0.25 Kgf.m; Tighten the first nut with the same torque; Verify the flanges alignment; ... -
Page 70: Interchangeability
If it becomes necessary to return the transmitter and/or configurator to Smar, simply contact our office, informing the defective instrument's serial number, and return it to our factory. In order to speed up analysis and solution of the problem, the defective item should be returned with the Service Request Form (SRF –... - Page 71 Maintenance SPARE PARTS LIST FOR TRANSMITTER POSITION CODE CATEGORY (NOTE 1) DESCRIPTION OF PARTS . 1/2 - 14 NPT 204-0130 HOUSING, Aluminum (NOTE 2) . M20 x 1.5 204-0131 . PG 13.5 DIN 204-0132 . 1/2 - 14 NPT 204-0133 HOUSING, 316 Stainless Steel (NOTE 2) .
-
Page 72: Smar Insulator Kit
( 3 ) O-rings and Backup Rings are packaged in packs of 12 units, except for spring loaded. Smar Insulator Kit The Insulator Kit Smar prevents the generation of galvanic current between metals when in contact. The difference of potential between the metals generates this current that flows from the metal with higher potential to the metal with lower potential. - Page 73 Maintenance INSULATOR KIT SPARE PARTS: LD300L MODELS WITHOUT EXTENSION MODELS WITH EXTENSION ØN GROUP NORM LD300L / SR301T LD300L / SR301E 400-0861-11X01 400-0861-11X11 1” 400-0861-12X01 400-0861-12X11 400-0861-13X01 400-0861-13X11 400-0861-21X01 400-0861-21X11 1.1/2” 400-0861-22X01 400-0861-22X11 400-0861-23X01 400-0861-23X11 400-0861-31X01 400-0861-31X11 2” 400-0861-32X01 400-0861-32X11 400-0861-33X01 400-0861-33X11 400-0861-41X01...
- Page 74 LD301 - Operation and Maintenance Instruction Manual SPARE PARTS: LD300L DRAIN GASKET VALVE ØN GROUP NORM STAINLESS TEFLON COPPER GRAFOIL STEEL 316L 1” 400-0425 400-0426 400-0427 400-0428 400-0429 400-0430 1.1/2” 400-0431 400-0432 400-0433 2” 400-0434 400-0435 400-0436 3” 400-0437 400-0438 400-0439 4”...
- Page 75 Maintenance RTJ SPARE PARTS: LD300L (without extension) DRAIN METALLIC RING VALVE ØN GROUP NORM RING STAINLESS STAINLESS STEEL 316L STEEL 316L 400-0887 400-0888 1” 400-0888 400-0888 1500 400-0889 2500 400-0890 400-0891 400-0891 1.1/2” 400-0891 1500 400-0893 2500 400-0792 400-0892 ANSI B 16.20 RTJ 400-0893 400-0893 2”...
-
Page 76: Application With Halar
LD301 - Operation and Maintenance Instruction Manual METALLIC RING ø CLASS NORM Ring 316L SST 1500 400-0899 3” 2500 400-0898 ANSI B 16.20 RTJ 1500 400-0903 4” 2500 400-0902 Table 5.5 - LD300L – Special models for Gasket in Steel – Without Extension... -
Page 77: Ordering Code For The Sensor
Maintenance Figure 5.8 – TPE Software Screen Ordering Code for the Sensor 204 – 0301 SENSOR FOR DIFFERENTIAL , FLOW, GAGE, ABSOLUTE AND HIGH STATIC PRESSURE TRANSMITTER Range Limits Range Limits Min. Min. COD Type Unit Unit Span Span Min. Max. - Page 78 LD301 - Operation and Maintenance Instruction Manual 204-0301 SENSOR FOR FLANGED PRESSURE TRANSMITTER Range Limits Range limits Min. Min. COD. Unit Unit Span Span Min. Max. Min. Max. Note: The range can be extended up to 0.75 LRL and 1.2 URL with small degradation of accuracy. The upper 1.25...
- Page 79 Maintenance 204-0301 SENSOR FOR FLANGED PRESSURE TRANSMITTER (CONTINUATION) CODE Flanges Bolts and Nuts Material Plated Carbon Steel (Default) (22) Hastelloy C276 316 SST Carbon Steel (ASTM A193 B7M) (1) (22) Flange thread for Fixing Accessories (Adapters, Manifolds, Mounting Brackets, etc) CODE 7/16”...
- Page 80 LD301 - Operation and Maintenance Instruction Manual 204-0301 SENSOR FOR SANITARY PRESSURE TRANSMITTER Range Range Limits Min. Min. COD. Unit Unit Li it Span Span Min. Max. Min. Max. Note: The range can be extended up to 0.75 LRL and 1.2 URL with small degradation of accuracy. The upper 1.25...
- Page 81 Maintenance 204-0301 SENSOR FOR SANITARY PRESSURE TRANSMITTER (CONTINUATION) CODE Flanges Bolts and Nuts Material Plated Carbon Steel (Default) 13) Hastelloy C276 316 SST Carbon Steel (ASTM A193 B7M) (1) (13) Flange Thread for Fixing Accessories (Adapters, Manifolds, Mounting Brackets, etc) CODE 7/16”...
-
Page 82: Hart® Special Units
Maintenance ® HART Special Units UNIT VARIABLE CODE DESCRIPTION UNIT O (68ºF) VARIABLE CODE DESCRIPTION inches of water at 68 degrees F ft/s feet per second inHg (0ºC) inches of mercury at 0 degrees C meters per second O (68ºF) feet of water at 68 degrees F in/s inches per second... - Page 83 Maintenance UNIT VARIABLE CODE DESCRIPTION centistokes UNIT VARIABLE CODE DESCRIPTION ISCOSITY centipoises º/s degrees per second newton meter NGULAR rev/s revolutions per second decatherm ELOCITY deka therm revolutions per minute ft-lb foot pound force kilo watt NERGY kilo watt hour INCLUDES horsepower Mcal...
- Page 84 LD301 - Operation and Maintenance Instruction Manual 5.22...
-
Page 85: Section 6 - Technical Characteristics
NEPSI), dust ignition proof (FM) and non-incendive (FM). Authorized representative in European Community Smar Gmbh-Rheingaustrasse 9-55545 Bad Kreuzanach PED Directive (97/23/EC) – Pressure Equipment Directive This product is in compliance with the directive and it was designed and manufactured in accordance with sound engineering practice using several standards from ANSI, ASTM, DIN and JIS. - Page 86 Configuration In order to keep the equipment configuration safe, the LD301 has two kinds of write protection in its memory. One is via software and the other a hardware mechanism selected by a key with priority over the software.
- Page 87 Technical Characteristics Functional Specifications DIN EN 1092-1 / DIN 2501 Flange Material: 316L Stainless Steel Temperature - 10 a 50 °C 50 °C 100 °C 150 °C Pressure Limit 1230 kPa 1180 kPa 1020 kPa 930 kPa (178.4 psi) (171.1 psi) (148 psi) (135 psi) 3060 kPa...
- Page 88 Complies with NEMA 4X/6P, IP66 or IP66W*, IP68 or IP68W*. *The IP66/68W sealing test (immersion) was performed at 1 bar for 24 hours. For any other situation, please consult Smar. IP66/68W tested for 200h to according NBR 8094 / ASTM B 117 standard. Blank Flange:...
- Page 89 Span error: Correctable to ± 0.2% of reading per 7 MPa (1000 psi). NOTES Smar Pressure Transmitters are protected by Hastelloy is a trademark of the Cabot Corp. Inert is a trademark of Hooker Chemical Corp. US patent number 6,433,791 Monel is a trademark of International Nickel Co.
-
Page 90: Ordering Code
LD301 – Operation and Maintenance Instruction Manual Ordering Code MODEL DIFFERENTIAL , FLOW, GAGE, ABSOLUTE AND HIGH STATIC PRESSURE TRANSMITTER Range Limits Range Limits Min. Min. COD. Type Unit Unit Span Span Min. Max. Min. Max. Differential and Flow 0.05 0,05 NOTE: The range can be extended up to 0.75 LRL* and... -
Page 91: Optional Items
Black Polyester Blue Safety Epoxy – Electrostatic Painting White Epoxy Blue Safety Polyesters – Electrostatic Painting Yellow Polyester LD301 - D21I - BU10 - TYPICAL MODEL NUMBER Optional Items Leave blank for no optional items BD – Down Scale (Accordance to NAMUR NE43 specification). - Page 92 LD301 – Operation and Maintenance Instruction Manual Notes (1) Meets NACE MR – 01 – 75/ISO 15156 recommendations. (7) IP66/68W tested for 200 hours according to NBR 8094 / ASTM B 117 standard. (2) Without explosion proof or intrinsic safety approvals.
- Page 93 LCD2: Current – I (mA) LCD2: Temperature (Engineering Unit) Identification Plate COD. FM: XP, IS, NI, DI CEPEL: Ex-d, Ex-ia 0 to 20 mA: LD301 (13) NEMKO: Ex-d, Ex-ia Without Certification CEPEL: Ex-d CSA: XP, IS, NI, DI EXAM (DMT): Group I, M1 Ex-ia...
- Page 94 LD301 – Operation and Maintenance Instruction Manual NOTES ( 1 ) Meets NACE MR – 01 – 75/ISO 15156 recommendations. DIN 2501 (DIN 2526): ( 2 ) Silicone Oils not recommendations for Oxygen (O ) or Chlorine service. - Smooth finishing “E” (PN 160 a PN250): Rz = 16 (3.2 µm Ra (125 µ” AA).
- Page 95 Technical Characteristics MODEL SANITARY PRESSURE TRANSMITTERS ® LD301 4-20 mA + HART CODE Range Limits Range Limits Min. Span Unit Min. Span Unit Min. Max. Min. Max. 1.25 -200 0,42 Note: The range can be extended up to 0.75 LRL and 1.2 URL with small -250 2.08...
-
Page 96: Optional Items
LD301 – Operation and Maintenance Instruction Manual SANITARY PRESSURE TRANSMITTER (CONTINUATION) LD301 CODE Flange Bolts and Nuts Material Plated Carbon Steel (Default) (17) Carbon Steel (ASTM A193 B7M) (1) (17) 316 SST Hastelloy C276 CODE Flange Thread for fixing accessories (adapters, manifolds, mounting brackets, etc) 7/16”... -
Page 97: Appendix A - Certifications Information
Sanitary Approval Certifier Body: 3A Sanitary Standards Model Designations: LD301 S-2” clamp; LD301 S-2” Thread IDF, RJT, SMS; SR301 A-2” Clamp; SR301 A-2” Thread IDF, RJT, SMS; SR301 S-2” Clamp; SR301 S-3” Clamp. Sensors and Sensor Fittings and Connections Used on Fluid Milk and Milk Products, Number: 74-03. -
Page 98: European Certifications
Groups A, B, C and D; Class II, Division 1, Groups E, F and G; Class III, Division 1 • Intrinsically safe with entity parameters: Vmax = 28 V Imax = 110 mA Ci = 5 nF Li = 0 µH, when connected through CSA Certified Safety Barriers as per Smar Installation Drawing 102A-0435. Maximum Ambient Temperature: 40ºC. -
Page 99: South America Certification
Appendix A Certificate No: DMT 00 ATEX E 009 ATEX Intrinsically Safe Group II 1/2 G, Ex ia, IIC T4/T5/T6 • Entity Parameters: Ui = 28 Vdc Ii = 93 mA Ci ≤ 5 nF Li = neg South America Certification INMETRO approvals Certificate No: CEPEL-Ex-049/95 Intrinsically safe - Ex-ia IIC T5... - Page 100 LD301 – Operation and Maintenance Instruction Manual NEMKO and DMT CEPEL NEPSI...
- Page 101 Appendix A WITHOUT APPROVAL • Identification of Intrinsically safe and Explosion Proof for saline atmospheres: NEMKO and DMT...
- Page 102 LD301 – Operation and Maintenance Instruction Manual CEPEL...
-
Page 103: Control Drawing
Appendix A Control Drawing... - Page 104 LD301 – Operation and Maintenance Instruction Manual...
- Page 105 Appendix A NEMKO...
- Page 106 LD301 – Operation and Maintenance Instruction Manual A.10...
-
Page 107: Appendix B - Srf - Service Request Form
E-mail: Date: Signature: For warranty or non-warranty repair, please contact your representative. Further information about address and contacts can be found on www.smar.com/contactus.asp. NOTE ® (1) This field should be filled out by the Smar. (3) Required for Wireless HART devices. - Page 108 LD301 – Operation and Maintenance Instruction Manual...
-
Page 109: Appendix C - Smar Warranty Certificate
Equipments and products excluded from the warranty clauses must be approved by the client prior to the service execution. 11. In cases of repairs, the client shall be responsible for the proper product packaging and SMAR will not cover any damage occurred in shipment. - Page 110 13. It is the customer’s responsibility to clean and decontaminate products and accessories prior to shipping them for repair, and SMAR and its dealer reserve themselves the right to refuse the service in cases not compliant to those conditions. It is the customer’s responsibility to tell SMAR and its dealer when the product was utilized in applications that contaminate the equipment with harmful products during its handling and repair.
Need help?
Do you have a question about the ld301 and is the answer not in the manual?
Questions and answers