SMAR TT302 Operation, Maintenance & Instruction Manual
Fieldbus temperature transmitters
Hide thumbs
Also See for TT302:
Table of Contents
Advertisement
Quick Links
Advertisement
Table of Contents

Related Manuals for SMAR TT302


Summary of Contents for SMAR TT302
- Page 1 T T 3 0 2 M E...
- Page 2 Specifications and information are subject to change without notice. Up-to-date address information is available on our website. web: www.smar.com/contactus.asp...
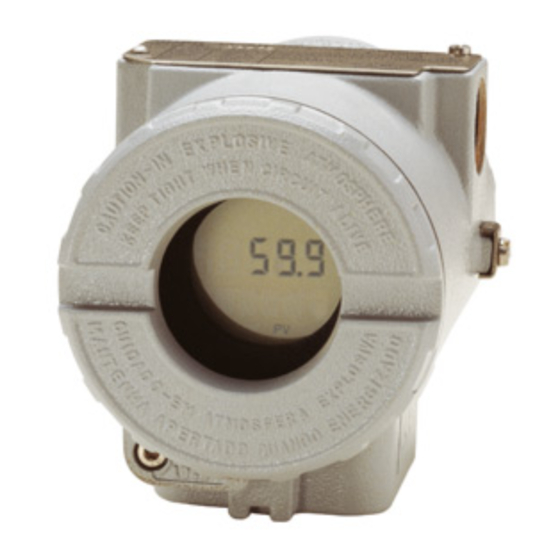
- Page 3 Introduction INTRODUCTION The TT302 is from the first generation of FIELDBUS devices. It is a transmitter mainly intended for measurement of temperature using RTDs or thermocouples, but can also accept other sensors with resistance or mV output such as: pyrometers, load cells, resistance position indicators, etc.
- Page 4 Smar provides specific training to instruct and qualify such professionals. However, each country must comply with the local safety procedures,...
-
Page 5: Table Of Contents
SENSOR TRANSDUCER NUMBER ..........................3.4 JUMPER CONFIGURATION ............................3.4 SENSOR CONFIGURATION............................3.4 HOW TO CONNECT TWO SENSORS TO TT302 ......................3.7 COMPENSATION OF LEAD RESISTANCE FOR DOUBLE SENSOR (RTD OR OHM) ..........3.7 COLD JUNCTION COMPENSATION ..........................3.8 CALIBRATION IN TT302 BY THE USER ......................... 3.8 CHANGING UNITS IN TEMPERATURE SENSORS ...................... - Page 6 TT302 – Fieldbus Temperature Transmitter...
- Page 7 Installation Flowchart Installation Flowchart Start Was the transmitter configured on the bench to match the application? Configure the sensor and its Check the area classification connections (Section 1 and and its practices. Section 3 - Configuration) Configure the measuring type Install the transmitter preferably (differantial, dual, backup, or single) on weather- protected areas.
- Page 8 TT302 – Fieldbus Temperature Transmitter VIII...
-
Page 9: Section 1 - Installation
Section1 INSTALLATION General The overall accuracy of temperature and other measurements depends on several variables. Although the transmitter has an outstanding performance, proper installation is essential in order to maximize its performance. Among all factors which may affect transmitter accuracy, environmental conditions are the most difficult to control. -
Page 10: Network Wiring
TT302 - Fieldbus Temperature Transmitter Network Wiring Access the terminal block by removing the Electrical Connection Cover. This cover can be locked closed by the cover locking screw (See Figure 1.1 - Cover Locking).To release the cover, rotate the locking screw clockwise. - Page 11 Figure 1.3 - Dimensional Drawing and Mounting Positions The TT302 uses the 31.25 kbit/s voltage mode option for the physical signaling. All other devices on the same bus must use the same signaling. All devices are connected in parallel along the same pair of wires.
-
Page 12: Bus Topology And Network Configuration
TT302 - Fieldbus Temperature Transmitter Bus Topology and Network Configuration Special requirements are applied to the terminator when used in a safety bus. Intrinsic Safety Barrier When intrinsic safety is required, a barrier should be inserted on the trunk between the power supply and the terminator. -
Page 13: Sensor Wiring
FAIL 4 Terminator smar smar Figure 1.6 - Bus Topology Sensor Wiring The TT302 accepts up to two sensors and may operate in one of four modes: Single channel single sensor measurement Dual channel dual sensor measurement ... - Page 14 TT302 - Fieldbus Temperature Transmitter 2 - WIRE RTD OR OHM INPUT 3 - WIRE RTD OR OHM INPUT 4 - WIRE RTD OR OHM INPUT THERMOCOUPLE MILLIVOLT INPUT INPUT M DUAL OR DIFFERENTIAL DUAL OR DIFFERENTIAL RTD OR OHM INPUT...
-
Page 15: Installation In Hazardous Areas
In Explosion-Proof installations the cable entries must be connected or closed using metal cable gland and metal blanking plug, both with at least IP66 and Ex-d certification. The standard plugs provided by Smar are certified according to CEPEL certificate. If the plug needs to be replaced, a certified plug must be used. - Page 16 TT302 - Fieldbus Temperature Transmitter...
-
Page 17: Section 2 - Operation
Section 2 OPERATION The TT302 accepts signals from mV generators such as thermocouples or resistive sensors such as RTDs. The criterion is that the signal is within the range of the input. For mV, the range is -50 to 500 mV and for resistance, 0-2000 Ohm. - Page 18 TT302 - Fieldbus Temperature Transmitter Communication Controller It monitors line activity, modulates and demodulates communication signals and inserts and deletes start and end delimiters. Power Supply Takes power of the loop-line to power the transmitter circuitry. Power Isolation Just like the signals to and from the input section, the power to the input section must be isolated.
-
Page 19: Temperature Sensors
This is called cold junction compensation, and is done automatically by the TT302, which has a temperature sensor at the sensor terminals for this purpose. Secondly, if the thermocouple wires are not used, all the way to the terminals of the transmitter (e.g., copper wire is used from sensor-head... - Page 20 TT302 - Fieldbus Temperature Transmitter The TT302 permits a 2-wire connection that may cause measuring errors, depending on the length of connection wires and on the temperature to which they are exposed. (See Figure 2.3 - Two-Wire Connection). In a 2-wire connection, the voltage V2 is proportional to the RTD resistance plus the resistance of the wires.
- Page 21 Operation In a 4-wire connection, terminals 2 and 3 are high impedance inputs. Thus, no current flows through those wires and no voltage drop is caused. The resistance of the other two wires is not of interest, since there is no measurement registered on them. Hence the voltage V2 is directly proportional to the RTD resistance.
- Page 22 TT302 - Fieldbus Temperature Transmitter...
-
Page 23: Section 3 - Configuration
CONFIGURATION One of the many advantages of Fieldbus is that device configuration is independent of the configurator. The TT302 may be configured by a third party terminal or console operator. Any particular configurator is therefore not addressed here. The TT302 contains two input transducer blocks, one resource block, one display transducer block and other function blocks. -
Page 24: Transducer Block Parameters Types
TT302 - Fieldbus Temperature Transmitter PARAMETER DESCRIPTION 180 – Ohm 400 104 – Ohm 2000 134 – TC B NBS 136 – TC E NBS 137 – TC J NBS 138 – TC K NBS 139 – TC N NBS 140 –... -
Page 25: How To Configure A Transducer Block
Configuration Parameter Data Type Storage Size Initial Value Class View BLOCK_ALM DS-72 TRANSDUCER_DIRECTORY Array of Unsigned16 Variable TRANSDUCER_TYPE Unsigned16 1,2,3,4 XD_ERROR Unsigned8 COLLECTION_DIRECTORY Array of Unsigned16 Variable PRIMARY_VALUE_TYPE Unsigned16 PRIMARY_VALUE DS-65 PRIMARY_VALUE_RANGE DS-68 -200/850/1001/1 CAL_POINT_HI Float 850.0 CAL_POINT_LO Float -250.0 CAL_MIN_SPAN Float 10.0... -
Page 26: Sensor Transducer Number
The Sensor Transducer Number associates the sensor to the transducer. It can be set from one up to two, in case of dual sensor. Jumper Configuration In order to work properly, the jumpers J1 and W1 located in the TT302 main board must be correctly configured. J1 is responsible to enable the AI block simulate mode. - Page 27 This parameter This list contains: selects the type of Thermocouples, sensor attached to RTDs, Ohm and the TT302 in order millivoltage. to measure temperature. Figure 3.2 – Sensor Type Configuration NOTE There are no 3 or 4 wire connections for millivoltage sensors.
- Page 28 TT302 - Fieldbus Temperature Transmitter This parameter This list contains selects the type of the number of sensor connection. wires available for The options here will each type of depend on Sensor sensor. Type chosen as described above. Figure 3.3 – Sensor Type Connection Configuration...
-
Page 29: How To Connect Two Sensors To Tt302
4 wire sensors are usually preferred. With TT302 is possible to connect two sensors to the terminal block. Due to space limitations in the terminal block, it is only possible to connect two 2-wire sensors. In order to optimize lead resistance... -
Page 30: Cold Junction Compensation
The electronics of TT302 is very stable in time, not requiring further calibrations after manufacturer’s calibration. However, if the client decides to use his reference to calibrate the TT302, this may be done through the parameters CAL_POINT_LO and CAL_POINT_HI. Always use two points as reference when trim is performed;... - Page 31 Upper trim should be done by writing the desired temperature in the CAL_POINT_HI parameter. The adjust trim results can be seen in the PRIMARY_VALUE parameter. Figure 3.8 – Calibration of the Upper Trim - TT302 Trim is not available for TT302 using two sensors in the backup or differential mode.
-
Page 32: Changing Units In Temperature Sensors
TT302 - Fieldbus Temperature Transmitter Changing Units in Temperature Sensors The following units are available for temperature sensors: Celsius, Rankine, Kelvin and Fahrenheit. The units values are shown in Table 3.3 - Unit Table. The unit can be changed in the AI block by the parameter XD_SCALE. -
Page 33: Display Transducer Block
Configuration Figure 3.10 – Creating Transducers and Function Blocks Display Transducer Block There are seven groups of parameters which may be pre-configured by the user in order to enable a possible configuration by means of the local adjustment. As an example, let’s suppose that you don’t want to show some parameters;... - Page 34 TT302 - Fieldbus Temperature Transmitter DataType Valid Range/ Default Parameter Units Store Description (length) Options Value The access allows the user to read, in the case of the “Monitoring” option, and to write when “action” option is selected, and ACCESS...
- Page 35 Configuration Figure 3.12 - Parameters for Local Adjustment Configuration Figure 3.13 - Parameters for Local Adjustment Configuration 3.13...
-
Page 36: Programming Using Local Adjustment
TT302 - Fieldbus Temperature Transmitter Figure 3.14 - Parameters for Local Adjustment Configuration This parameter The option "update" updates the local should be selected in adjustment order to execute the programming tree upgrade of local configured on each adjustment programming device. -
Page 37: J1 Jumper Connections
Magnetic Tool Span Hole Zero Hole Figure 3.16 - Local Adjustment Holes Table 3.4 shows the actions on the Z and S holes on the TT302 when Local Adjustment is enabled. HOLE ACTION Initializes and rotates through the available functions. -
Page 38: Local Programming Tree
5 place the magnetic seconds. tool in orifice Z and wait until letters MD are displayed. Figure 3.18 - Step 1 - TT302 Remove the Insert the magnetic tool magnetic tool in orifice S once from orifice S. - Page 39 In order to increment the value, keep the tool insert in S up to set the value desired. Figure 3.21 - Step 4 - TT302 In order to range the In order to upper value (upper), decrement the simply insert the...
- Page 40 () decrement the value. The number over TYPE is the value corresponding of the table 3.1. See it to do the correct choice of the connection value. Figure 3.24 - Step 7 - TT302 3.18...
-
Page 41: Section 4 - Maintenance Procedures
Check for intermittent short circuits, open circuits and grounding problems. Check if the sensor is correctly connected to the TT302 terminal block. Check if the sensor signal is reaching the TT302 terminal block by measuring it with a multimeter at the transmitter end. -
Page 42: Disassembly Procedure
TT302 - Fieldbus Temperature Transmitter NOTE The Factory Init should be tried as a last option to recover the equipment control when the equipment presents some problem related to the function blocks or the communication. This operation must only be carried out by authorized technical personnel and with the process offline, since the equipment will be configured with standard and factory data. -
Page 43: Interchangeability
EEPROM. In the case of one board being faulty, both must be replaced. Returning Materials Should it become necessary to return the transmitter to SMAR, simply contact your local agent or SMAR office, informing the defective instrument’s serial number, and return it to our factory. - Page 44 TT302 - Fieldbus Temperature Transmitter ACCESSORIES ORDERING CODE DESCRIPTION Magnetic Tool for Local Adjustment SYSCON System Configurator PS302 Power Supply BT302 Terminator DFI302 Fieldbus Universal Bridge Table 4.2 - Accessories of SYSTEM 302 SPARE PARTS LIST CATEGORY DESCRIPTION OF PARTS...
- Page 45 Maintenance Procedures SPARE PARTS LIST CATEGORY DESCRIPTION OF PARTS POSITION CODE (NOTA 1) . Housing in 316 Stainless Steel 214-0125 MOUNTING BRACKET FOR 2” PIPE MOUNTING (NOTE 4) . Carbon Steel 214-0801 . Stainless Steel 316 214-0802 . Carbon Steel bolts, nuts, washers and U-clamp in Stainless Steel 214-0803 LOCAL ADJUSTMENT PROTECTION CAP 204-0114...
- Page 46 TT302 - Fieldbus Temperature Transmitter...
-
Page 47: Section 5 - Technical Characteristic
Ignition Proof (FM), Non-incendive (FM), FISCO (FM, CSA, NEMKO, EXAM, CEPEL, NEPSI) and FNICO Certifications (FM, CSA, NEMKO, EXAM, CEPEL) Authorized representative in European Community Smar Gmbh-Rheingaustrasse 9-55545 Bad Kreuzanach ATEX Directive (94/9/EC) –Equipment and protective systems intended for use in potentially European explosive atmospheres Directive This product was certified according European Standards at NEMKO and EXAM (former DMT). - Page 48 TT302 – Operation and Maintenance Instruction Manual Performance Specifications 1/2 - 14 NPT M20 X 1.5 Electrical PG 13.5 DIN Note: Explosion proof approvals do not apply to 1/2 - 14 NPT X 3/4 NPT (AI 316) - with adapter Connection adapter, only to transmitter.
-
Page 49: Technical Characteristics
Technical Characteristics DIFFERENTIAL ° MINIMUM C DIGITAL ° ° SENSOR TYPE RANGE RANGE SPAN °C ACCURACY* Cu10 -270 -486 ± 2.0 Ni120 -320 -576 ± 0.5 Pt50 -1050 1050 -1890 1890 ± 1.0 Pt100 -1050 1050 -1890 1890 ± 1.0 Pt500 Pt1000 Pt50... -
Page 50: Ordering Code
TT302 – Operation and Maintenance Instruction Manual Ordering Code TEMPERATURE TRANSMITTER MODEL COD. Local Indicator Without Indicator With Digital Indicator COD. Mounting Bracket Without Bracket 316 SST Bracket Flat, 304 SST bracket and 316 SST accessories Carbon Steel Bracket Carbon Steel Bracket with 316 SST Fasteners Electrical Connections COD. - Page 51 Crrgpfkz"C" " CERTIFICATIONS INFORMATION Gwtqrgcp"Fktgevkxg"Kphqtocvkqp" Consult www.smar.com for the EC declarations of conformity for all applicable European directives and certificates. ATEX Directive (94/9/EC) – “Electrical equipment and protective system intended for use in potential explosive atmospheres” The EC-Type Examination Certificate had been released by Nemko AS (CE0470) and/or DEKRA EXAM GmbH (CE0158), according to European Standards.
- Page 52 Voc = 8.25V, Isc = 85.6 mA, Ca = 5.5 uF, La = 4,8 mH; when connected as per Smar Installation drawing 102A0553; T Code T3C @ Max Ambient 40 Deg C. Class 2258 04 – Process Control Equipment – Intrinsically Safe Entity – For Hazardous Locations (CSA1110996)
- Page 53 Voc = 8.25V, Isc = 85.6 mA, Ca = 5.5 uF, La = 4,8 mH; when connected as per SMAR Installation drawing 102A0553; T Code T3C @ Max Ambient 40 Deg C. Note: Only models with stainless steel external fittings are Certified as Type 4X.
- Page 54 Special conditions for safe use: The certificate number ends with the letter "X" to indicate that for the version of Temperature Transmitter model TT302 equipped with housing made of aluminum alloy, only can be installed in "Zone 0" if is excluded the risk of occurs impact or friction between the housing and iron/steel itens.
- Page 55 Egtvkhkecvkqpu"Kphqtocvkqp" " Kfgpvkhkecvkqp"Rncvg"" CSA (Canadian Standards Association) FM Approvals (Factory Mutual) NEMKO (Norges Elektriske MaterielKontroll) / EXAM (BBG Prüf - und Zertifizier GmbH) C07"...
- Page 56 VV524"⁄"Qrgtcvkqp"cpf"Ockpvgpcpeg"Kpuvtwevkqp"Ocpwcn" " CEPEL (Centro de Pesquisa de Energia Elétrica) C08"...
- Page 57 Egtvkhkecvkqpu"Kphqtocvkqp" " Eqpvtqn"Ftcykpi" Canadian Standards Association (CSA) C09"...
- Page 58 VV524"⁄"Qrgtcvkqp"cpf"Ockpvgpcpeg"Kpuvtwevkqp"Ocpwcn" " C0:"...
- Page 59 Egtvkhkecvkqpu"Kphqtocvkqp" " Factory Mutual (FM) C0;"...
- Page 60 VV524"⁄"Qrgtcvkqp"cpf"Ockpvgpcpeg"Kpuvtwevkqp"Ocpwcn" " C032"...
-
Page 61: Appendix B - Srf - Service Request Form
(Please, describe the observed behavior, if it is repetitive, how it reproduces, etc.) OBSERVATIONS USER INFORMATION Company: Contact: Title: Section: Phone: Extension: E-mail: Date: Signature: For warranty or non-warranty repair, please contact your representative. Further information about address and contacts can be found on www.smar.com/contactus.asp. - Page 62 SRF – Service Request Form...
Need help?
Do you have a question about the TT302 and is the answer not in the manual?
Questions and answers