SMAR LD302 Operation, Maintenance & Instruction Manual
Fieldbus pressure transmitter
Hide thumbs
Also See for LD302:
- Instruction manual (84 pages) ,
- Operation, maintenance & instruction manual (52 pages) ,
- Installation, operation and maintanance manual (66 pages)
Table of Contents
Advertisement
Quick Links
Advertisement
Table of Contents

Related Manuals for SMAR LD302


Summary of Contents for SMAR LD302
- Page 2 BRAZIL CHINA FRANCE GERMANY MEXICO Smar Equipamentos Ind. Ltda. Smar China Corp. Smar France S. A. R. L. Smar GmbH Smar Mexico Av. Dr. Antonio Furlan Jr., 1028 3 Baishiqiao Road, Suite 30233 1, bld de l'Oise Robert-Koch-Strasse 35 11, Poniente, No. 1314-1 PB Sertãozinho SP 14160-000...
-
Page 4: Table Of Contents
CONFIGURATION..................3.1 TRANSDUCER BLOCK ......................3.1 HOW CONFIGURE A TRANSDUCER BLOCK ..............3.1 LOWER AND UPPER TRIM ....................3.2 PRESSURE TRIM – LD302 ....................3.3 VIA LOCAL ADJUSTMENT ....................3.5 CHARACTERIZATION TRIM....................3.6 SENSPOR INFORMATION ....................3.8 TEMPERATURE TRIM ......................3.8 SENSOR DATA READING ..................... - Page 5 LD302 – Operation and Maintenance Instruction Manual Index of Figures FIGURE 1.1 – DIMENSIONAL DRAWING AND MOUNTING POSITION FOR LD302 ....1.3 FIGURE 1.2 – POSITION OF THE TRANSMITTER AND TAPS ..........1.4 FIGURE 1.3 – HOUSING ROTATION SET SCREW ..............1.5 FIGURE 1.4 –...
-
Page 6: Introduction
The LD302 is available as a product on its own, but also replaces the circuit board for the LD301. They use the same sensor board. Refer to the maintenance section of this manual for instructions on upgrading. - Page 7 LD302 – Operation and Maintenance Instruction Manual NOTE This Manual is compatible with version 3.XX, where 3 denotes software version and XX software release. The indication 3.XX means that this manual is compatible with any release of software version 3.
-
Page 8: Installation
General The LD302 has a built-in temperature sensor to compensate for temperature variations. At the factory, each transmitter is submitted to a temperature cycle process, and the characteristics under different pressures and temperatures are recorded in the transmitter memory. -
Page 9: Table 1.1 - Location Of Pressure Taps
LD302 – Operation and Maintenance Instruction Manual Should the process fluid contain solids in suspension, install valves or rod-out fittings at regular intervals to clean out the pipes. The pipes should be internally cleaned by using steam or compressed air, or by draining the line with the process fluid, before such lines are connected to the transmitter (blow- down). -
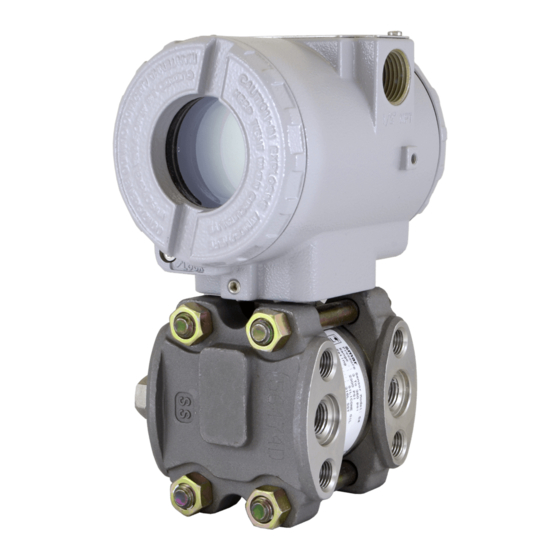
Page 10: Figure 1.1 - Dimensional Drawing And Mounting Position For Ld302
Installation LD2EM101.CDR Figure 1.1 - Dimensional Drawing and Mounting Position for LD302... -
Page 11: Figure 1.2 - Position Of The Transmitter And Taps
LD302 – Operation and Maintenance Instruction Manual LD2EM102.CDR Figure 1.2 - Position of the Transmitter and Taps NOTE Except for dry gases, all impulse lines should slope at the ratio 1:10, in order to avoid trapping bubbles in the case of liquids, or condensation from steam or wet gases. -
Page 12: Housing Rotation
Installation Housing Rotation The housing can be rotated in order to get the digital display in better position. To rotate it, releases the Housing Rotation Set Screw. (See Figure 4.3 - Four Possible Positions of the Display). WARNING EXPLOSION PROOF INSTALLATIONS The electronic housing and the sensor assembly in potentially explosive atmospheres must have a minimum of 6 threads fully engaged. -
Page 13: Bus Topology And Network Configuration
Various types of Fieldbus devices may be connected on the same bus. The LD302 is powered via the bus. The limit for such devices is 16 for one bus for non- intrinsically safe requirement. -
Page 14: Figure 1.5 - Bus Topology
Installation LD2EM105.CDR Figure 1.5 - Bus Topology LD2EM106.CDR Figure 1.6 - Tree Topology... - Page 15 LD302 – Operation and Maintenance Instruction Manual...
-
Page 16: Operation
Section 2 Operation The LD302 Series Pressure Transmitters use capacitive sensors (capacitive cells) as pressure sensing elements, as shown in Figure 2.1 - Capacitive Cell. This is exactly the same sensor as the LD301 series uses, the sensor modules are therefore interchangeable. -
Page 17: Functional Description - Eletronics
Thus it is possible to conclude that the capacitive cell is a pressure sensor formed by two capacitors whose capacitance vary according to the applied differential pressure. Functional Description – Electronics Refer to the block diagram Figure 2.2 - LD302 Block Diagram Hardware. The function of each block is described below. LD2EM202.CDR Figure 2.2 - LD302 Block Diagram Hardware... -
Page 18: Figure 2.3 - Lcd Indicator
Operation Central Processing Unit (CPU), RAM, FLASH and EEPROM The CPU is the intelligent portion of the transmitter, being responsible for the management and operation of measurement, block execution, self-diagnostics and communication. The program is stored in a FLASH memory for easy upgrade and saving data on power-down event occurrence. - Page 19 LD302 – Operation and Maintenance Instruction Manual...
-
Page 20: Configuration
Configuration One of the many advantages of Fieldbus is that device configuration is independent of the configurator. The LD302 may be configured by a third party terminal or operator console. Any particular configurator is therefore not addressed here. This section describes the characteristics of the blocks in the LD302. They follow the Fieldbus specifications, but in terms of transducer blocks, the input transducer block and display, they have some special features on top of this. -
Page 21: Lower And Upper Trim
Upper Trim: It is used to trim the reading at the upper range. The operator informs the correct reading to LD302 for the applied pressure. For best accuracy, trim should be done at the operating range. The Figure 3.2 - LD302 SYSCON – Transducer Configuration Screen, Figure 3.3 - LD302 SYSCON - Transducer Configuration Screen and Figure 3.4 - LD302 SYSCON - Transducer Configuration... -
Page 22: Pressure Trim - Ld302
LD2EM302.CDR Figure 3.2 - LD302 SYSCON – Transducer Configuration Screen The following engineering unit's codes are defined for pressure according to Foundation Fieldbus standard: InH2O a 68 °F: 1148 InHg a 0 °C:... - Page 23 200 inH2O. each type of sensor. LD2EM303.CDR Figure 3.3 - LD302 SYSCON - Transducer Configuration Screen Let’s take the upper value as an example: Apply to the input as the upper value a pressure of 5,000mmH O and wait until the readout of parameter PRIMARY_VALUE stabilizes.
-
Page 24: Via Local Adjustment
Configuration WARNING It is recommendable that a convenient engineering unit be chosen by means of parameter XD_SCALE of the Analog Input Block, considering that the range limits of the sensor must be respected, these being 100% and 0%. It is also recommendable, for every new calibration, to save existing trim data in parameters CAL_POINT_LO_BACKUP and CAL_POINT_HI_BACKUP, by means of parameter BACKUP_RESTORE, using option LAST_TRIM_BACKUP. -
Page 25: Characterization Trim
LD302 – Operation and Maintenance Instruction Manual Characterization Trim It is used to correct the sensor reading in several points. Use an accurate and stable pressure source, preferably a dead-weight tester, to guarantee the accuracy must be at least three times better than the transmitter accuracy. - Page 26 Configuration To configure the points of the curve, the option "Disable or Allows to enter the points " must be choosen. Apply the desired pressure and wait that the same one stabilizes. When stabilizing to read the pressure normalized through parameter PRESS_NORMAL and then to write in CURVE_X and CURVE_Y, the normalized pressure and the applied pressure, respectively.
-
Page 27: Temperature Trim
LD302 – Operation and Maintenance Instruction Manual Sensor Information The main information about the transmitter can be accessed selecting the Transducer block icon option as shown on the Figure 3.10 – Creating Transducers and Function Blocks. The sensor information will be displayed as shown below. -
Page 28: Sensor Data Reading
Configuration Sensor Data Reading All time that transmitter LD302 is on, is verified if the serial number of the sensor in the sensor board is the same that the recorded serial number in E2PROM in the main board. When these numbers are different (a swap of sensor set or main board was carried through) the data stored in the E2PROM of sensor board is copied to the E2PROM of the main board. -
Page 29: Transducer Display - Configuration
LD302 – Operation and Maintenance Instruction Manual Transducer Display – Configuration Using the SYSCON is possible to configure the Display Transducer block. As the name described it is a transducer due the interfacing of its block with the LCD hardware. -
Page 30: Definition Of Parameters And Values
"Programming Using Local Adjustment". It is significantly the resources on this transducer display, also all the Series 302 field devices from SMAR has the same methodology to handle with it. So, since the user has learned once, he is capable to handle all kind of field devices from SMAR. -
Page 31: Figure 3.11 - Parameters For Local Adjustment Configuration
LD302 – Operation and Maintenance Instruction Manual Alpha_Num These parameters include two options: value and mnemonic. In option value, it is possible to display data both in the alphanumeric and in the numeric fields; this way, in the case of a data higher than 10000, it will be shown in the alphanumeric field. -
Page 32: Figure 3.13 - Parameters For Local Adjustment Configuration
Configuration LD2EM313.CDR Figure 3.13 - Parameters for Local Adjustment Configuration LD2EM314.CDR Figure 3.14 - Parameters for Local Adjustment Configuration 3-13... -
Page 33: Programing Using Local Adjustment
Series 302 field devices from SMAR has the same methodology to handle with it. So, since the user has learned once, he is capable to handle all kind of field devices from SMAR. -
Page 34: Figure 3.16 - Step 1 - Ld302
5 magnetic tool in orifice Z seconds. and wait until letters MD are displayed. LD2EM316.CDR Figure 3.16 - Step 1 - LD302 Remove the Insert the magnetic tool magnetic tool in from orifice S. orifice S once... -
Page 35: Figure 3.19 - Step 4 - Ld302
LD302 – Operation and Maintenance Instruction Manual In order to range the In order to decrement lower value(lower), the lower value, place simply insert the the magnetic tool in magnetic tool in orifice S orifice Z to shift the as soon as LOWER is arrow to the downward shown on the display. -
Page 36: Maintenance Procedures
Section 4 Maintenance Procedures Disassembly Procedure WARNING Do not disassemble with power on. The Figure 4.4 - Exploded View shows an exploded view of the transmitter and will help to visualize the following: Sensor Cleaning In order to have access to the sensor (19) for cleaning purposes, the transmitter should be removed from its process connections. -
Page 37: Electronic Circuit
LD302 – Operation and Maintenance Instruction Manual NOTE The transmitters have a stopper that can be released to allow the sensor to rotate more than one turn. (See Figure 4.1 - Sensor Rotation Stopper). WARNING Do not rotate the electronic housing more than 180° without disconnecting the electronic circuit from the sensor and from the power supply. -
Page 38: Figure 4.2 - Backup Ring Mounting
Maintenance Procedures Gaskets should be lightly lubricated with silicone oil before they are fitted into their recesses. Use halogen grease for inert fill applications. The flanges should then be positioned in order to press them in place. With the flanges holding the O-Rings in place, insert the four bolts (16) and tighten the nuts (23) finger tight, making sure the flanges remain parallel all the time. -
Page 39: Electronic Circuit
Electronic Circuit Plug sensor connector and power supply connector to main board. Attach the display to the main board. Observe the four possible mounting positions. (Figure 4.3 - Four Possible Positions of the Display). The SMAR mark indicates up position. LD2EM403.CDR Figure 4.3 - Four Possible Positions of the Display... -
Page 40: Upgrading Ld301 To Ld302
Maintenance Procedures Upgrading LD301 to LD302 The sensor and casing of the LD301 is exactly the same as the LD302. By changing the circuit board of the LD301 it becomes a LD302. The display on LD301 version 5.XX, is the same as on LD302 and can therefore be used with the LD302 upgrade circuit board. -
Page 41: Figure 4.4 - Exploded View
LD302 – Operation and Maintenance Instruction Manual LD2EM404.CDR Figure 4.4 - Exploded View... - Page 42 Maintenance Procedures SPARE PARTS LIST DESCRIPTION OF PARTS POSITION CODE HOUSING, Aluminum (NOTE 2) ½ - 14 NPT 304-0130 M20 x 1.5 304-0131 PG 13.5 DIN 304-0132 HOUSING, 316 SS (NOTE 2) ½ - 14 NPT 304-0133 M20 x 1.5 304-0134 PG 13.5 DIN 304-0135...
-
Page 43: Table 4.1 - Spare Part List
LD302 – Operation and Maintenance Instruction Manual SPARE PARTS LIST DESCRIPTION OF PARTS POSITION CODE O’RINGS (NOTE 3) Flange, BUNA-N 203-0401 Flange, VITON 203-0402 Flange, TEFLON 203-0403 Flange, ETHYLENE/PROPYLENE 203-0404 Flange, TEFLON with spring LOADED 203-0405 Adapter, BUNA-N 203-0701 Adapter, VITON... - Page 44 Silicone Oil Tantalum Fluorolube Oil Others – Specify LD302 H1/A1 Tantalum and Monel diaphragm are not availablefor Range 1. Absolute Models are not available with Tantalum diaphragms or Fluorolube Oil. Tantalum.sensors wil be sent with backup ring. They must be used when Viton or Buna_N O_Rings are used. Do not use the backup ring with Teflon rings or Kynar insert in the...
- Page 45 LD302 – Operation and Maintenance Instruction Manual 204-0301 SPARE PART NUMBER FOR LEVEL SENSORS CODE Range Level 1.25 50 kPa 200 inH Level 6.25 250 kPa 1000 inH Level 62.5 2500 kPa 360 psi CODE Diaphragm (s) Material and Fill Fluid (1)
-
Page 46: Technical Characteristics
Section 5 Technical Characteristics Functional Specifications Process Fluid Liquid, gas or vapor. Output Signal Digital only. Fieldbus, 31.25 kbit/s voltage mode with bus power. Power Supply Bus power 9 - 32 VDC. Current consumption quiescent 12 mA. Output impedance: nonintrinsic safety from 7.8 kHz - 39 kHz should be greater or equal to 3 kOhm. -
Page 47: Performance Specifications
LD302 – Operation and Maintenance Instruction Manual Flange Test Pressure: 60 MPa (8570 psi). Humidity Limits 0 to 100% RH. Performance Specifications Reference conditions: range starting at zero, temperature 25 ºC (77 ºF), atmospheric pressure, power supply of 24 Vdc, silicone oil fill fluid, isolating diaphragms in 316L SS and digital trim equal to lower and upper range values. -
Page 48: Physical Specifications
Plated carbon steel, 316 SST, Hastelloy C276 or Monel. Wetted O-Rings (For Flanges and Adapters) Buna N, Viton™ or PTFE. Ethylene-Propylene on request. The LD302 is available in materials conforming to NACE MR-01-75. Nonwetted Parts Electronic Housing Injected aluminum with polyester painting or 316 SST (NEMA 4X, IP67). - Page 49 LD302 – Operation and Maintenance Instruction Manual Approximate Weights 3.15 kg (7 lb) : all models, except level transmitters. 5.85 to 9.0 kg (13 lb. to 20 lb): level transmitter depending on the flanges, extension and materials. Hastelloy is a trademark of the Cabot Corp.
- Page 50 Technical Characteristics MODEL DIFFERENTIAL, GAGE, ABSOLUTE AND HIGH STATIC PRESSURE TRANSMITTERS LD302 CODE Type and Range Differential 0.125 Differential 1.25 Differential 6.25 1000 Differential 62.5 2500 Gage 0.125 Gage 1.25 Gage 6.25 1000 Gage 62.5 2500 Gage 0.625 3600 Gage...
- Page 51 LD302 – Operation and Maintenance Instruction Manual MODEL LEVEL TRANSMITTERS LD302 CODE Range Level 1.25 50 kPa 200 inH Level 6.25 250 kPa 1000 inH Level 62.5 2500 kPa 360 psi CODE Diaphragm Material and Fill Fluid (Low Side) 316L SST...
- Page 52 Technical Characteristics LD2EM501.CDR...
- Page 53 LD302 – Operation and Maintenance Instruction Manual...
Need help?
Do you have a question about the LD302 and is the answer not in the manual?
Questions and answers