
Subscribe to Our Youtube Channel
Related Manuals for SMAR LD400


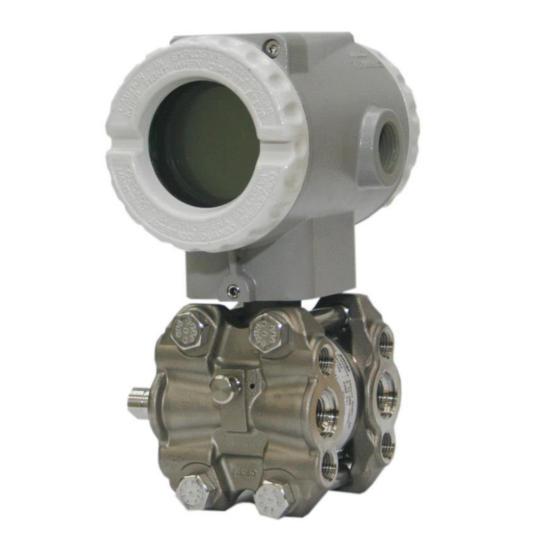
Summary of Contents for SMAR LD400
- Page 1 OPERATION AND MAINTENANCE INSTRUCTION / MANUAL Smart Pressure Transmitter LD400 L D 4 0 0 M E...
- Page 2 Specifications and information are subject to change without notice. Up-to-date address information is available on our website. web: www.smar.com/contactus.asp...
- Page 3 This instruments can be configured through Smar configuration softwares or others supplier. The local adjustment is enable for all the LD400 series. With magnetic tools is possible to configure the zero and the span, to alter the measurement range, to alter the unit of measured pressure, to select the square root function, to operate the totaled value or in a control loop.
- Page 4 Smar provides specific training to instruct and qualify such professionals. However, each country must comply with the local safety procedures,...
- Page 5 The process variable, as well as the diagnostic monitoring and information, are supplied by the ® digital communication protocol. The LD400 is available in the HART communication protocol. ® Read carefully these instructions for better use of the LD400 HART . Smar pressure transmitters are protected by American patents n. 6,433,791 and 6,621,443.
- Page 6 LD400 - Operation and Maintenance Instruction Manual Acronyms and Abbreviations Acronym / Designation Description Abbreviation Hardware Fault Tolerance The hardware fault tolerance of the device. This is the capability of a functional unit to continue the execution of the demanded function in case of faults or deviations.
-
Page 7: Table Of Contents
INTRINSICALLY SAFE ............................1.15 SECTION 2 - FUNCTIONAL DESCRIPTION .................... 2.1 FUNCIONAL DESCRIPTION – HARDWARE ......................2.2 ® FUNCTIONAL DESCRIPTION – LD400 HART SOFTWARE .................. 2.4 FUNCTIONAL DESCRIPTION - DISPLAY (LCD) ...................... 2.7 SECTION 3 - TECHNICAL CHARACTERISTICS ..................3.1 ORDERING CODE .............................. - Page 8 LD400 - Operation and Maintenance Instruction Manual INTERCHANGEABILITY ............................6.8 RETURNING MATERIALS ............................6.8 LIFETIME TRANSMITTER ............................6.8 ACESSORIES ................................6.9 SPARE PARTS LIST ..............................6.9 ORDERING CODE ..............................6.11 ® HART SPECIAL UNITS ............................6.16 SECTION 7 - SAFETY INSTRUMENTED SYSTEMS ................7.1 INTRODUCTION ................................
- Page 9 Installation Flowchart Installation Flowchart Start Was the transmitter Install the transmitter on the field configured on the bench following the instructions below. to match the application? Install the transmitter preferably on weather- protected areas. Configure the transmitter (Section 1 and 3) Check the area classification and its practices Configure the measuring range...
- Page 10 LD400 - Operation and Maintenance Instruction Manual VIII...
-
Page 11: Section 1 - Installation
There are, however, ways of reducing the effects of temperature, humidity and vibration. ® The LD400 HART has a built-in temperature sensor to compensate for temperature variations. At the factory, each transmitter is submitted to a temperature cycle, and the characteristics under different temperatures are recorded in the transmitter memory. - Page 12 (blow-down). Shu the valves tightly after each drain or discharge operation. ® Figure 1.1 (a) – Dimensional Drawing and Mounting Position for the LD400 HART – Differential Pressure, Flow, Gage, Absolute and High Static Pressure Transmitter with Mounting Bracket...
- Page 13 Installation ® Figure 1.1 (b) – Dimensional Drawing and Mounting Position for the LD400 HART – Flanged Pressure Transmitter (Integral Flange)
- Page 14 ® LD400 HART – Operation and Maintenance Instruction Manual ® Figure 1.1 (c) – Dimensional Drawing and Mounting Position for the LD400 HART – Flanged Pressure Transmitter (Slip-on Flange)
- Page 15 Installation ® Figure 1.1 (d) – Dimensional Drawing and Mounting Position for the LD400 HART – Flanged Pressure Transmitter with Housing...
- Page 16 ® LD400 HART – Operation and Maintenance Instruction Manual ® Figure 1.1 (d) – Dimensional Drawing and Mounting Position for the LD400 HART – Sanitary Transmitter with Extension...
- Page 17 Installation ® Figure 1.1 (e) – Dimensional Drawing and Mounting Position for the LD400 HART – Sanitary Transmitter without Extension...
- Page 18 MOUNTING ON THE PANEL OR WALL (See Section 6 –spare parts for mounting brackets available) ® Figure 1.2 – Drawing of LD400 HART Mounted on the Panel or Wall Some examples of installation, illustrating the transmitter position in relation to the taps, are shown in Figure 1.3.
- Page 19 Installation ® For fiscal measuring and custody transference, use a safety seal on the LD400 HART , as shown below. Figure 1.4 – Safety Seal and Custody Transference When the sensor is in the horizontal position, the fluid weight pushes the diaphragm down and then the lower pressure trim must be applied.
-
Page 20: Electronic Housing
® LD400 HART – Operation and Maintenance Instruction Manual Electronic Housing The electronic housing can be rotated to adjust the digital display on a better position. To rotate it, loose the Housing Rotation Set Screw, see Figure 1.6. COVER LOCKING... - Page 21 TEST COMUNICATIONS TERMINALS TERMINALS GROUND TERMINAL ® Figura 1.8 – LD400 HART Terminal Block NOTE The external ground was designed to accept wiring up to 10 mm² section (S=12 mm²). Use a heavy duty conductor, at least Ø 1,6mm²/15 AWG.
-
Page 22: Typical Installation For Hart Protocol
The ungrounded end must be carefully isolated. On multidrop connections, the circuit loop integrity must be assured, with special care to prevent short-circuit between the circuit loop and the housing. ® Figure 1.10 – Wiring Diagram for the LD400 HART Working as a Transmitter 1.12... - Page 23 Installation ® Figure 1.11 – Wiring Diagram for the LD400 HART Working as a Controller ® Figure 1.12 – Wiring Diagram for the LD400 HART in Multidrop Configuration NOTE Make sure that the transmitter is operating within the operating area as shown on the load curve (Figure 1.13).
-
Page 24: Installation In Hazardous Locations
In Explosion-Proof installations the cable entries must be connected or closed using metal cable gland and metal blanking plug, both with at least IP66 and Ex-d certification. The standard plugs provided by Smar are certified according to CEPEL certificate. If the plug needs to be replaced, a certified plug must be used. -
Page 25: Section 2 - Functional Description
Section 2 FUNCTIONAL DESCRIPTION Functional Description – Sensor ® The LD400 HART Smart Pressure Transmitters use capacitive sensors (capacitive cells) as pressure sensing elements, as shown in Figure 2.1 Figure 2.1 – Capacitive Cell Where: and P are the pressures in chambers H and L. -
Page 26: Funcional Description - Hardware
ELECTRONIC CONVERTER DIGITAL DISPLAY ® Figure 2.2 – LD400 HART Block Diagram Hardware Oscillator This oscillator generates a frequency as a function of sensor capacitance. Signal Isolator The Control signals from the CPU are transferred through optical couplers, and the signal from the oscillator is transferred through a transformer. - Page 27 3.6 mA; during operation, consumption may be as high as 21 ® mA, depending on the measurement and sensor status. The LD400 HART in the transmitter mode shows failure indication at 3.6 mA if configured for low signal failure; at 21 mA, if configured for high signal failure;...
-
Page 28: Functional Description - Ld400 Hart Software
LD400 HART – Operation and Maintenance Instruction Manual ® Functional Description – LD400 HART Software Refer to the block diagram Figure 2.3. The function of each block is described below. Factory Characterization The actual pressure from the capacitance and temperature readouts obtained from the sensor can be calculated by using the factory characterization data stored in the sensor EEPROM. - Page 29 Functional Description Block PID: Bumpless A/M On the Manual mode, the PID algoritm uses the output values as a compensation to its proportional action so that the Manual to Automatic transition do not occur abruptly . Therefore, even if the transition occurs in the presence of a percent ERROR., the proportional action is nullified and the output is adjusted softly according to the integral action.
- Page 30 ® LD400 HART – Operation and Maintenance Instruction Manual ® Figure 2.4 – LD400 HART – Software Block Diagram LD400 HART...
-
Page 31: Functional Description - Display (Lcd)
INDICATES THAT UNIT AND FUNCTION FIELD THE SETPOINT VARIABLE IS NOW DISPLAYED IS NOW DISPLAYED ® Figure 2.4 – Display for LD400 HART ® Figure 2.5 – Display for LD400 HART Monitoring ® During normal operation, the LD400 HART is in the monitoring mode. In this mode, indication alternates between the three variables (LCD_1, LCD_2, LCD_3) as configured by the user. - Page 32 Table 2.1. For a complete list, see Section 6 – Maintenance. INDICATOR DESCRIPTION Numeric Alphanumeric ® Version LD400 HART and Version The LD400 HART is initialized after feeding. Output current saturated on 3.8 or 20.5 mA. (see section 5 – Variable Value SAT / Unit Maintenance)
-
Page 33: Section 3 - Technical Characteristics
Certifications Explosion proof, intrinsically safe and dust ignition proof (FM) (Pending) Authorized representative in European Community Smar Gmbh-Rheingaustrasse 9-55545 Bad Kreuzanach ATEX Directive 94/9/EC - “Electrical equipment and protective system intended for use in potential explosive atmospheres” The EC-Type Examination Certificate had been released by Nemko AS (CE0470) and/or DEKRA EXAM GmbH (CE0158), according to European Standards. - Page 34 Configuration ® In order to keep the equipment configuration safe, the LD400 HART has two kinds of write protection in its memory. One is via software and the other a hardware mechanism selected by a key with priority over the software.
- Page 35 Technical Characteristics Functional Specifications PRESSURES TABLE FOR SEAL AND LEVEL FLANGES DIN EN 1092-1 2008 STANDARD Maximum Temperature Allowed Material Pressure Group Class Maximum Pressure Allowed (bar) PN 16 13.7 12.3 11.2 10.4 PN 25 21.5 19.2 17.5 16.3 15.1 14.4 PN 40 34.4...
- Page 36 ® – Operation and Maintenance Instruction Manual LD400 HART Functional Specifications Maximum Temperature Allowed Material Pressure -29 to Group Class Maximum Pressure Allowed (bar) 15.9 15.3 13.3 11.2 10.5 41.4 34.8 31.4 29.2 27.5 26.1 25.5 25.1 Overpressure and 55.2 53.4...
- Page 37 Technical Characteristics 0.05 URL ≤ span < 0.16 URL: ± [0.0482 + 0.0051 URL/span] % span For range 3 or 4 and absolute model: 0.16 URL ≤ span ≤ URL: ± 0.065 % span 0.025 URL ≤ span < 0.16 URL: ± [0.0326 + 0.0052 URL/span] % span 0.0083 URL ≤...
- Page 38 Plated Carbon Steel, 316 SST-CF8M (ASTM - A351), Hastelloy C276 - CW-12MW, (ASTM - A494) or Monel 400 O-Rings (For Flanges and Adapters): Buna-N, Viton™ PTFE or Ethylene-Propylene. The LD400 HART is available in NACE MR-01-75/ISO 15156 compliant materials. Electronic Housing: Injected aluminum with polyester painting, epoxy painting or 316 SST - CF8M (ASTM - A351) housing.
- Page 39 Technical Characteristics Identification Plate: 316 SST a) Flange mounted for Level models. b) Optional universal mounting bracket for surface or vertical/horizontal 2"- pipe (DN 50). Mounting c) Manifold Valve integrated to the transmitter. d) Directly on piping for closely coupled transmitter/orifice flange combinations. 3.15 kg (7 lb): all models, except L models.
-
Page 40: Ordering Code
® – Operation and Maintenance Instruction Manual LD400 HART Ordering Code MODEL DIFERENTIAL PRESSURE, FLOW, GAGE, ABSOLUTE AND HIGH STATIC PRESSURE TRANSMITTER LD400 Smart Pressure Transmitter Turn Down RANGE LIMITS Type Min. Max. Unid. Min. Max. Unid. Max. Diferential (23) - Page 41 Technical Characteristics LD400-D210-H0-IBD11 DIFERENTIAL PRESSURE, FLOW, GAGE, ABSOLUTE AND HIGH STATIC PRESSURE TRANSMITTER (CONTINUATION) Flanges Bolts and Nuts Material Plated Carbon Steel (Default) (20) 316 SST Carbon Steel (ASTM A193 B7M) (1) (20) Hastelloy C276 Super Duplex Stainless Steel Nace MR0175 / MR0103 Compliant...
- Page 42 ® – Operation and Maintenance Instruction Manual LD400 HART MODEL FLANGED PRESSURE TRANSMITTER LD400 Smart Pressure Transmitter RANGE LIMIT Turn Down TYPE Unidd Min Max Unit Level -500 mbar The range can be extended up to 0.75 LRL and 1.2 URL with small...
- Page 43 Technical Characteristics LD400-L210-H0-PBD00-P0 FLANGED PRESSURE TRANSMITTER (CONTINUATION) COD. Process Connection (High Side) 1" 150 # (ANSI B16.5) (28) 1" 300 # (ANSI B16.5) (28) 1" 600 # (ANSI B16.5) (28) 1 1/2" 150 # (ANSI B16.5) 1 1/2" 300 # (ANSI B16.5) 1 1/2"...
- Page 44 (13) Only available for ANSI B16.5 flange. Product CEPEL NEMKO / EXAM (14) Don´t available for JIS 2202 flange. LD400 IP66/68W IP66/68W Type4X/6P (15) For this option consult Smar. (16) Don´t available for aluminium housing. (28) Not available for integral flange. 3.12...
- Page 45 Technical Characteristics MODEL SANITARY PRESSURE TRANSMITTER LD400 Smart Pressure Transmitter RANGE LIMIT Turn Down TYPE Unid. Max Unid. Sanitary -500 mbar Note: The range can be extended up to 0.75 LRL and 1.2 URL with Sanitary -250 -2500 2500 mbar small degradation of accuracy.
- Page 46 ® – Operation and Maintenance Instruction Manual LD400 HART LD400-S210-H0-HBDU0-P0 SANITARY PRESSURE TRANSMITTER (CONTINUATION) COD. Process Connection (High Side) DN25 DIN 11851 – WITH EXTENSION/316 SST DN40 DIN 11851 - WITH EXTENSION/316 SST DN40 DIN 11851 – 316 SST THREAD DN50 DIN 11851 - WITH EXTENSION/316 SST...
- Page 47 NEMKO (ATEX) COD TAG Plate With TAG, when specified Blanket According to user notes COD HART Configuration LD400-S210-H0-HBDU0-P04-B10-I110I - TYPICAL MODEL NUMBER ® ** Fill out with HART Optional Configuration (see page 3.14) Notes: Meets NACE MR – 01 – 75/ISO 15156 recommendations.
- Page 48 TABLE - The output is a curve formed by 16 points. These points may be edited directly on the XY Table of the LD400. For example, it may be used as a camber table for tanks in applications where the tank volume is not linear in relation to the measured pressure.
-
Page 49: Section 4 - Configuration
Command Specification – LD400 Intelligent Pressure Transmitter. Smar developed the CONF401 and HPC401 software (See figure 4.2), the first one works in Windows platform (95, 98, 2000, XP and NT) and UNIX. The second one, HPC401, works in the most recent technology in PDA. (See figure 4.1). They provide easy configuration and monitoring of field devices, capability to analyze data and to modify the action of these devices. - Page 50 ® Operation and Maintenance Instruction Manual LD400 HART – Figure 4.1 – Smar Hand Held Terminal Figure 4.2 – Smar Configuration Tool Figure 3.3 show the menu tree used for configuration based on version 4.02 DD.
- Page 51 Configuration DESCRIPTOR MESSAGE DATE SENSOR MODEL SENSOR TYPE SENSOR RANGE NOMINAL RANGE SENSOR SERIAL # FILL FLUID DIAPHRAGM MAT. NUM of REM.SEAL SENSOR INFO TYPE MATERIAL FLANGE INFORMATION O'RING DRAIN/VENT TYPE REMOTE SEAL FILL FLUID DIAPHRAGM MANUFACTURER DEVICE TYPE DEVICE ID NUMBER MAIN BOARD SERIAL SOFTWARE VERSION DEVICE INFO...
-
Page 52: Configuration Features
® Operation and Maintenance Instruction Manual LD400 HART – Configuration Features ® By means of the HART configuration tool, the LD400 HART firmware allows the following configuration features to be accessed: Transmitter Identification and Manufacturing Data; Primary Variable Trim – Pressure;... -
Page 53: Primary Variable Trim - Pressure
Configuration REMOTE SEAL QUANTITY - One, Two, None, Unknown and Special. SENSOR FLUID* - Silicone, Inert, Special, Unknown and None. SENSOR ISOLATING DIAPHRAGM* - 316 SST, Hastelloy C, Monel, Tantalum and Special. SENSOR TYPE* - It shows the sensor type. ... -
Page 54: Primary Variable Current Trim
4 mA output. If the signal is 100%, the output should be 20 There might be differences between the Smar current standards and your current plant Standard. In this case, the Current Trim adjustment shall be done with a precision ammeter as measurement reference. -
Page 55: Engineering Unit Selection
® For pressure measurements, the LD400 HART includes an option list with the most common units. The internal reference unit is inH O @ 20 ºC; should the desired unit be other than this one, it will be automatically converted using conversion factors included in Table 4.1. - Page 56 Should a special unit other than those presented on Table 4.2 be required, the LD400 HART ® allows the user to create a new unit by entering up to 5 alphanumeric digits. The LD400 HART includes an internal feature to enable and disable the User Unit.
-
Page 57: Transfer Function For Flow Measurement
This gives a more stable reading at low flows. ® In order to find the square root, the LD400 HART configurable parameters are: cutoff point defined at a certain pressure expressed as % and the cutoff mode, hard or bumpless. -
Page 58: Totalization Configuration
For example, in tank maneuvering there are several pipes where the ® direction of the fluid may vary. In this case, LD400 HART has the bidirectional flow measurement function. This function treats the flow, no matter what its direction is, as if it were positive. Thus, it is possible to extract the square root and measure the bidirectional flow. - Page 59 Configuration The method uses such totalization and, through three parameters (MAXIMUM FLOWRATE, TOTAL INCREMENT and TOTAL UNIT), converts it to the user-defined totalizing unit: MAXIMUM FLOW RATE - this is the maximum flow rate expressed in volume or mass units per second, corresponding to the measurement (PV%=100%).
-
Page 60: Pid Controller Configuration
For a better linearization, it is recommendable that the points are the closest ® possible, in the less linear regions of the curve. The LD400 HART has an internal variable to enable and disable the characterization table of the MV output of the PID. -
Page 61: Equipment Configuration
The output current will be increased to 4 mA as the LD400 HART address, in the Transmitter ® mode, is altered to another value than "0" (this does not happen when the LD400 HART configured in the Controller mode). ®... -
Page 62: Equipment Maintenance
Circuit Number - This number is unique to each main circuit board and cannot be changed. ® Sensor Number - The serial number of the sensor connected to the LD400 HART and cannot be changed. This number is read from the sensor every time a new sensor is inserted in the main board. - Page 63 Configuration VARIABLE DESCRIPTION Lower Value/Upper Value When any type of calibration is done. When any change in the transference function is done, e.g., linear, Function square root, const, table. Trim_4mA When the current trim is done at 4mA. Trim_20mA When the current trim is done at 20mA. Trim_Zero/Lower When pressure trim is done at Zero or Lower Pressure.
- Page 64 ® Operation and Maintenance Instruction Manual LD400 HART – 4.16...
-
Page 65: Section 5 - Programming Using Local Adjustment
PROGRAMMING USING LOCAL ADJUSTMENT The Magnetic Tool ® With the Magnetic Tool it is possible to configure locally the LD400 HART and eliminate the need for additional configurators in many basic applications. ® There are two ways to adjust the LD400 HART locally according to the jumper configuration (see Table 5.1):... - Page 66 ® LD400 HART – Operation and Maintenance Instruction Manual Local Adjustment Simple Mode Enable Disable Complete Mode Enable Writing Protection Enable Writing Disable Writing Table 5.1– Local Adjustment Selection Notes: 1 - If the writing protection (WP ON) is selected, the writing in EEPROM will be protected.
-
Page 67: Local Adjustment
The transmitter software automatically starts to display the available functions in a cyclic routine. The group of functions ® displayed depends on the mode selected for the LD400 HART , either Transmitter or Controller. -
Page 68: Complete Local Adjustment
® LD400 HART – Operation and Maintenance Instruction Manual NOTE For adequate calibration, notice the minimum span for each measuring range and types as defined on the Technical Specification (Section 3). Zero calibration with reference shall be done as follows: Apply the Lower Value pressure;... - Page 69 Programming Using Local Adjustment DISPLAY SIMUL RANGE TRIM CONF OPER QUIT 4 mA Zero Reference PSWRD Damp Reset Total Quit PASSWORD Span Reference 8 mA DAMP Trim 12 mA DAMP Lower 16 mA Save Lower 20 mA Lower ESC SIMUL Save Function Save...
-
Page 70: Simulation [Simul]
® LD400 HART – Operation and Maintenance Instruction Manual WARNING When programming using local adjustment, the transmitter will not prompt "Control loop should be in ® manual!" as it does when using the HART configurator for programming. Therefore it is a good idea, before configuration, to switch the loop to manual. -
Page 71: Range [Range]
S: Escapes to the Simulation Branch [SIMUL]. SIMUL NOTE ® After entering a simulation current value, the LD400 HART automatically quits the simulation mode in around 2 minutes. Other configuration branches are also abandoned in fairly less time, around 8 seconds. Range [RANGE] This option makes zero and span calibration, also called calibration with reference, or define lower and upper operation values, while performing calibration without reference. - Page 72 ® LD400 HART – Operation and Maintenance Instruction Manual RANGE TRIM ZERO SPAN UNIT RANGE inH2O inHg ftH2O Save Save mmH2O mmHg mBar gf/cm2 kgf/cm2 mH2O Figure 5.5 – Range Calibration Branch of Complete Local Adjustment Tree RANGE BRANCH [RANGE] Z: Moves enter main branch options of complete local adjustment tree.
- Page 73 Programming Using Local Adjustment Z: Moves enter LRV DECREASE function. S: Increases the Lower Value until the magnetic tool is removed or the maximum Lower Value is reached. Z: Moves enter options Lower Range Value Adjustment Branch. [LRV]. S: Decreases the Lower Value until the magnetic tool is removed or the minimum Lower Value is reached.
- Page 74 ® LD400 HART – Operation and Maintenance Instruction Manual Z: Moves enter options Upper Range Value Adjustment Branch. [URV]. S: Escapes to the Upper Range Value menu. Z: Moves enter options Range Adjustment Branch S: Enter in the Engineering Units adjustment branch [UNIT].
- Page 75 Programming Using Local Adjustment Z: Moves enter the options Engineering Units Branch [UNIT]. S: Select bar and comes back to the options tree main branch of complete local adjustment. Z: Moves enter the options Engineering Units Branch [UNIT]. S: Select mbar and comes back to the options tree main branch of complete local adjustment.
-
Page 76: Pressure Trim [Trim]
® LD400 HART – Operation and Maintenance Instruction Manual Z: Moves enter options Engineering Units Branch [UNIT]. S: Select MPa and comes back to the options tree main branch of complete local adjustment. Z: Moves enter options Engineering Units Branch [UNIT]. - Page 77 Programming Using Local Adjustment PRESSURE TRIM BRANCH [TRIM] Z: Moves enter 0 PSWRD and ESC PSWRD. S: This function is protected by a "password," when prompted 0 PSWD, enter the password. The password code is entered by inserting and removing the magnetic tool twice in (S). The password value is changed from 0 to 1.
-
Page 78: Configuration [Conf]
® LD400 HART – Operation and Maintenance Instruction Manual Z: Moves enter TRIM Branch. S: Enters in the configuration’s branch Upper Pressure Trim. Upper Z: Moves enter Upper Pressure TRIM Branch (UPPER). S: Sets the transmitter internal reference increasing to... - Page 79 Programming Using Local Adjustment CONF OPER DAMP Funct Address CONF DAMP Addr Linear LCD1 Sqrt DAMP Addr Save Save Esc Funct Esc DAMP Esc INC Press LCD2 Press LCD3 Press ESC LCD Figure 5.7 – Local Adjustment Configuration Tree CONFIGURATION BRANCH [CONF] Z: Moves enter main branch options of complete local adjustment tree.
- Page 80 ® LD400 HART – Operation and Maintenance Instruction Manual Z: Moves enter Damping Time Branch options. S: Increases the damping time constant until the magnetic tool is removed or DAMP 128 seconds are reached. Z: Moves enter Damping Time Branch options.
- Page 81 Programming Using Local Adjustment Z: Moves enter Configuration Branch options [CONF]. S: Enter the Display Branch [LCD]. Z: Moves enter options: LCD1, LCD2, LCD3 e ESC LCD. S: Enter the Display 1 Branch [LCD1]. LCD1 Z: Moves enter variable to be indicated as primary display.
- Page 82 ® LD400 HART – Operation and Maintenance Instruction Manual Z: Moves enter options: LCD1, LCD2, LCD3 e ESC LCD. S: Enter the Display 2 Branch [LCD2]. LCD2 Z: Moves enter variable to be indicated in the Display 2. S: Select the current in mA [ImA].
- Page 83 Programming Using Local Adjustment Z: Moves enter options: LCD1, LCD2, LCD3 e ESC LCD. S: Enter the Display 3 Branch [LCD3]. LCD3 Z: Moves enter variable to be indicated in the Display 3. S: Select the output in mA [ImA]. Z: Moves enter variable to be indicated in the Display 3.
- Page 84 ® LD400 HART – Operation and Maintenance Instruction Manual Z: Moves enter options: LCD1, LCD2, LCD3 e ESC LCD. S: Escapes LCD branch and comes back Configuration branch [CONF]. Z: Moves enter Configuration Branch options [CONF]. S: Enter in Address Branch.
-
Page 85: Operation [Oper]
Programming Using Local Adjustment Operation [OPER] ® This adjustment option is applicable to the LD400 HART configured in the Controller mode. It allows the control state to be changed from Automatic to Manual and vice versa, and also to adjust the Setpoint and Manipulated Variable values. -
Page 86: Equipment Configured On Controller Mode
® LD400 HART – Operation and Maintenance Instruction Manual Z: Moves enter 0 PSWRD and ESC PSWRD. PSWRD S: Escapes the PSWRD Branch and comes back the Operation Tree [OPER]. Z: Moves enter Operation Branch options. S: Escapes Operation Tree Branch [OPER]. - Page 87 Programming Using Local Adjustment Z: Moves enter 0 PSWRD and ESC PSWRD. S: This function is protected by a "password," when prompted 0 PSWD, enter the password. The password code is entered by inserting and removing the magnetic tool twice in (S). The password value is changed from 0 to 1. After entering the "password," PSWRD you can move around the options Trim Branch using (Z).
-
Page 88: Quit [Quit]
® LD400 HART – Operation and Maintenance Instruction Manual Z: Moves enter Operation Branch options [OPER]. S: Enter in the Manipulated Variable adjustment branch [MV]. Z: Moves enter increase or decrease Setpoint value, save or escape. S: Increases the control output until the magnetic tool is removed or the upper output limit is reached. -
Page 89: Section 6 - Maintenance
Should the sensor eventually require maintenance, it may not be changed on the field. In this case, the possibly damaged sensor should be returned to SMAR for evaluation and, if necessary, repair. Refer to the "Returning Materials" item at the end of this Section. -
Page 90: Diagnostic Via Transmitter
® LD400 HART – Operation and Maintenance Instruction Manual ERROR MESSAGES POTENTIAL SOURCE OF PROBLEM • Temperature out of operating limits. SV OUT OF LIMITS • Temperature sensor damaged. • Pressure out of operation limits; • PV OUT OF LIMITS Sensor damaged or sensor module not connected;... - Page 91 Maintenance Power Supply • ® Check output of power supply. The voltage at the LD400 HART terminals must be between 12 and 50 Vdc, and ripple less than 500 mV. Electronic Circuit Failure • Locate the failure by alternately testing the transmitter circuit and the interface with spare parts.
-
Page 92: Sensor
Check the connection (flat cable, male and female connectors). Type of Sensor Connected to the Main Board ® Check if the sensor connected to the main board is the one specified for the LD400 HART model: Sensor type shall be hyper - High Performance. ... - Page 93 Maintenance replaced. The oscillating circuit is a part of the sensor and the replacement of one implies replacing the other. To remove the sensor from the electronic housing, the electrical connections (in the field terminal side) and the main board connector must be disconnected. Loosen the hex screw (7) and carefully unscrew the electronic housing from the sensor, observing if the flat cable is not excessively twisted.
- Page 94 ® LD400 HART – Operation and Maintenance Instruction Manual Figure 6.1 – Exploded View...
-
Page 95: Electronic Circuit
Maintenance Figure 6.2– Sensor Rotation Stopper Electronic Circuit To remove the circuit board (6), loosen the two screws (5). WARNING The board has CMOS components, which may be damaged by electrostatic discharges. Make sure that these components will be handled by trained people that know the right handling procedures. -
Page 96: Electronic Circuit
® LD400 HART – Operation and Maintenance Instruction Manual Figure 6.3 – Backup Ring Mounting Procedure for tightening the flange screws Tighten one nut till the flange seats; Tighten the nut diagonally across with a torque of 2.5 to 3 Kgfm;... -
Page 97: Interchangeability
If it becomes necessary to return the transmitter and/or configurator to Smar, simply contact our office, informing the defective instrument's serial number, and return it to our factory. In order to speed up analysis and solution of the problem, the defective item should be returned with the Service Request Form (SRF –... -
Page 98: Acessories
400-0831 FIXATION MAIN BOARD Screws - Stainless Steel Housing 400-0832 FIXATION MAIN BOARD Screws - Aluminium Housing 400-0905 IDENTIFICATION PLATE FOR LD400 IDENTIFICATION PLATE FIXATION SCREW, STAINLESS STEEL . Plated CS 204 0501 FLANGE (WITH HOLE FOR . 316 SST... - Page 99 Maintenance SPARE PARTS LIST FOR TRANSMITTER CATEGORY DESCRIPTION OF PARTS POSITION CODE (NOTE 1) . Hastelloy C276 203 0553 . Monel 400 203 0554 REDUCTION SLEEVE . 316 SST ¾ NPT Female Ex d 400 0812 . 1/2” NPT Internal Hexagon Plug in Plated CS (Ex d) 400 0808 .
-
Page 100: Ordering Code
® LD400 HART – Operation and Maintenance Instruction Manual Ordering Code MODEL DIFFERENTIAL , FLOW, GAGE, ABSOLUTE AND HIGH STATIC PRESSURE SENSOR 400-0837 Sensor Module Range LIMITS Turn Down Type Unit Unit3 Diferential (10) mbar Diferential and Flow mbar Diferential and Flow... - Page 101 Maintenance MODEL LEVEL SENSOR 400-0837 Smart Pressure Transmitter RANGE LIMITS Turn Down TYPE Unit Min Max Unit Level -500 mbar Note: The range can be extended up to 0.75 LRL and 1.2 URL with Level -250 -2500 2500 mbar small degradation of accuracy. The upper range value must be limited to Level -2500 2500...
- Page 102 (12) Only enable for flange ANSI B16.5. Not applicable for vacuum service. (13) Not available for flange JIS 2202. Drain/Vent not applicable. (14) For this option consult Smar. O’Ring should be Viton or Kalrez. (15) Effective for hydrogen migration processes Maximum pressure 24 bar.
- Page 103 Maintenance MODEL SENSOR FOR SANITARY PRESSURE TRANSMITTER 400-0837 Sensor Module Range Limits Turn Down COD. TYPE Unit Unit Sanitary -500 mbar Note: The range can be extended up to 0.75 LRL and 1.2 URL with Sanitary -250 -2500 2500 mbar small degradation of accuracy.
- Page 104 ® LD400 HART – Operation and Maintenance Instruction Manual 400-0837 Continued from sanitary sensor main code COD. Process Connections DN25 DIN 11851 – WITH EXTENSION/316 SST DN40 DIN 11851 - WITH EXTENSION/316 SST DN40 DIN 11851 – 316 SST THREAD DN50 DIN 11851 - WITH EXTENSION/316 SST...
-
Page 105: Hart Special Units
Maintenance ® HART Special Units UNIT VARIABLE CODE DESCRIPTION O (68ºF) inches of water at 68 degrees F inHg (0ºC) inches of mercury at 0 degrees C O (68ºF) feet of water at 68 degrees F millimeters of water at 68 degrees F (68ºF) mmHg (0ºC) millimeters of mercury at 0 degrees C... - Page 106 ® LD400 HART – Operation and Maintenance Instruction Manual UNIT VARIABLE CODE DESCRIPTION ft/s feet per second meters per second in/s inches per second ELOCITY in/min inches per minute ft/min feet per minute meters per hour ºC degrees Celsius ºF...
- Page 107 Maintenance UNIT VARIABLE CODE DESCRIPTION centistokes ISCOSITY centipoises newton meter decatherm deka therm ft-lb foot pound force NERGY kilo watt hour INCLUDES Mcal mega calorie mega joule british thermal unit grams per second g/min grams per minute grams per hour kg/s kilograms per second kg/min...
- Page 108 ® LD400 HART – Operation and Maintenance Instruction Manual UNIT VARIABLE CODE DESCRIPTION º/s degrees per second NGULAR rev/s revolutions per second ELOCITY revolutions per minute kilo watt horsepower Mcal/h mega calorie per hour OWER MJ/h mega joule per hour...
-
Page 109: Section 7 - Safety Instrumented Systems
Ugevkqp"9" SAFETY INSTRUMENTED SYSTEMS Kpvtqfwevkqp" WARNING LD400 HART ® SIS has the housing cover in red to distinguish them from the standard model. ® LD400 HART SIS is an intelligent pressure transmitter used for differential, absolute, gauge, ® level and flow measurements in safety applications. LD400 HART SIS outputs a 4 to 20 mA DC signal corresponding to the pressure applied. - Page 110 " Uchgv{"Hwpevkqp" ® The LD400 HART SIS transmitter measures the pressure within the safety accuracy and converts it in a 4-20 mA analog output using the selected output transfer function and the output current is treated according to NAMUR NE-43 specification. In case of sensor or circuit failure, the implemented self-diagnoses (software or hardware) drive the output to below 3.6 or above...
- Page 111 21.0 mA 3.8 mA 20.5 mA low saturation high saturation Hkiwtg"903"⁄"Cncto"Ngxgnu" Hwpevkqpcn"Uchgv{"Rtqrgtvkgu" ® The Table 7.4 shows the Functional Safety Values obtained for LD400 HART SIS. OPERATION MODE LOW DEMAND TYPE LAMBDA SD (FITS) LAMBDA SU (FITS) LAMBDA DD (FITS) 72.5...
- Page 112 SIS Mode ® In the SIS Mode the LD400 HART SIS is enabled to work only as measurement equipment. In this mode no changes on configuration are allowed. Not even the hardware jumpers can be able to change transmitter parameters and only the Hart read commands are permitted in SIS Mode the following applies: ...
- Page 113 Uchgv{"Kpuvtwogpvgf"U{uvgou" Functional Specifications MODEL TURN DOWN MODEL TURN DOWN 10:1 20:1 10:1 20:1 20:1 20:1 20:1 20:1 10:1 20:1 20:1 20:1 20:1 20:1 20:1 Turn Down Limits 20:1 10:1 10:1 20:1 10:1 20:1 20:1 20:1 20:1 20:1 20:1 20:1 20:1 20:1 20:1 20:1...
- Page 114 Less than 30 seconds for cold start up; Ockpvgpcpeg" ® The maintenance of LD400 HART SIS must be done according to the specifications described in the Section 6. All maintenance services must be done by qualified personnel. Parts replacements must be supplied by Smar.
-
Page 115: Appendix A - Certifications Information
Use shielded, twisted-pair cable for powering the instrument and signal wiring. Keep the shield insulated at the instrument side, connecting the other one to the ground. The EC declarations of conformity for all applicable European directives for this product can be found at www.smar.com. Hazardous Locations Certifications NOTE The IP68 sealing test (immersion) was performed at 1 bar for 24 hours. -
Page 116: European Certifications
For maintaining the explosion protection, the manual that accompany the products shall be considered. Type Designation: LD400-***-X1*-*****-***-X2**-X3X4D2*/* X1 = Communication Protocol (H - HART® & 4 to 20 mA) X2 = Electrical connection (0 = ½ - 14NPT; A = M20x1,5) - Page 117 For maintaining the explosion protection, the manual that accompany the products shall be considered. Type Designation: LD400-***-X1*-*****-***-**-****X2*-X3X4D2***/* X1 = Communication Protocol (H - HART® & 4 to 20 mA) X2 = Electrical connection (0 = ½ - 14NPT; A = M20x1,5)
- Page 118 For maintaining the explosion protection, the manual that accompany the products shall be considered. Type Designation: LD400-***X1*-*****-**-****-***X2*-X3X4D2/* X1 = Communication Protocol (H - HART® & 4 to 20 mA) X2 = Electrical connection (0 = ½ - 14NPT; A = M20x1,5)
-
Page 119: Identification Plate
For maintaining the explosion protection, the manual that accompany the products shall be considered. Type Designation: LD400-***-X1*-****-X2**-X3X4D2*/********* X1 = Communication Protocol (H - HART® & 4 to 20 mA) X2 = Electrical connection (0 = ½ - 14NPT; A = M20x1,5) - Page 120 ® – Operation and Maintenance Instruction Manual LD400 HART Identification of Intrinsically Safe and Explosion Proof for saline atmospheres:...
- Page 121 Certification Information Identification of Intrinsically Safe and Explosion Proof for gas and steam:...
- Page 122 ® – Operation and Maintenance Instruction Manual LD400 HART Identification of ATEX approval:...
- Page 123 Certification Information...
- Page 124 ® – Operation and Maintenance Instruction Manual LD400 HART A.10...
- Page 125 Certification Information A.11...
- Page 126 ® – Operation and Maintenance Instruction Manual LD400 HART A.12...
-
Page 127: Appendix B - Srf - Service Request Form
(Please, describe the observed behavior, if it is repetitive, how it reproduces, etc.) OBSERVATIONS USER INFORMATION Company: Contact: Title: Section: Phone: Extension: E-mail: Date: Signature: For warranty or non-warranty repair, please contact your representative. Further information about address and contacts can be found on www.smar.com/contactus.asp. - Page 128 ® – Operation and Maintenance Instruction Manual LD400 HART...
Need help?
Do you have a question about the LD400 and is the answer not in the manual?
Questions and answers