
Related Manuals for CYP CSC-6012TX


Summary of Contents for CYP CSC-6012TX
-
Page 1: Operation Manual
CSC-6012TX & CSC-6012RX 4K UHD+ HDMI over HDBaseT Scaling Transmitter and Receiver Operation Manual Operation Manual... -
Page 3: Copyright Notice
DISCLAIMERS The information in this manual has been carefully checked and is believed to be accurate. Cypress Technology assumes no responsibility for any infringements of patents or other rights of third parties which may result from its use. Cypress Technology assumes no responsibility for any inaccuracies that may be contained in this document. -
Page 4: Revision History
SAFETY PRECAUTIONS Please read all instructions before attempting to unpack, install or operate this equipment and before connecting the power supply. Please keep the following in mind as you unpack and install this equipment: • Always follow basic safety precautions to reduce the risk of fire, electrical shock and injury to persons. -
Page 5: Table Of Contents
CONTENTS 1. Introduction ............1 2. Applications .............2 3. Package Contents ..........2 4. System Requirements ........3 5. Features ............4 6. Operation Controls and Functions ....5 6.1 Transmitter's Front Panel ......5 6.2 Transmitter's Rear Panel ......5 6.3 Receiver's Front Panel....... 7 6.4 Receiver's Rear Panel ....... -
Page 6: Introduction
1. INTRODUCTION Transmitter This HDMI to HDMI/HDBaseT Scaling Transmitter can send uncompressed audio/video along with control, Ethernet, and extra audio data over a single run of Cat.5e/6/7 cable up to 100m. Both the HDMI input and local HDMI output support video signals up to 4K@60Hz (4:4:4, 8-bit). -
Page 7: Applications
2. APPLICATIONS • Live events needing dual output formats and signal extension • Hotel ballroom with extension and audio breakout • Long distance extension with no local power available at the Rx side • On-site equipment testing 3. PACKAGE CONTENTS Transmitter •... -
Page 8: System Requirements
4. SYSTEM REQUIREMENTS • HDMI source equipment such as media players, video game consoles or set-top boxes. • HDMI receiving equipment such as HDTVs, monitors or audio amplifiers. • Transmitter requires a compatible HDBaseT™ receiver with 48V PoH support. An HDBaseT™ receiver equipped with Optical Audio Return (OAR) channel support are strongly recommended. -
Page 9: Features
5. FEATURES • Supports the HDBaseT 1.0 specification • HDBaseT 5Play™ convergence: High-Definition (HD) Video and Audio, 100BaseT Ethernet, 48V PoH, and Control (Bi-directional IR/ RS-232 pass-through) • Supports UHD resolutions up to 3840×2160@50/60Hz (YUV 4:4:4) & 4096×2160@50/60Hz (YUV 4:4:4) •... -
Page 10: Operation Controls And Functions
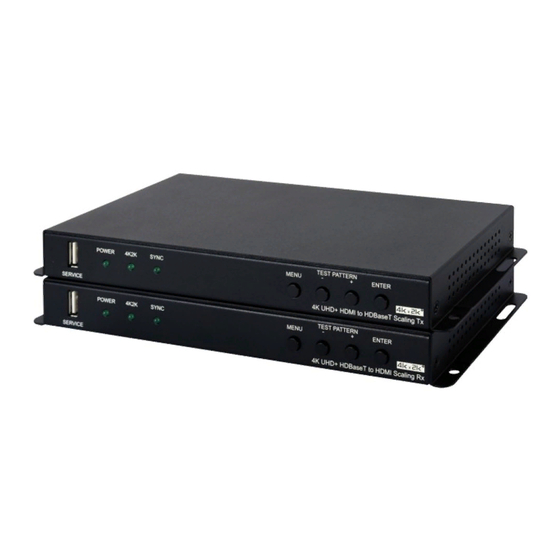
6. OPERATION CONTROLS AND FUNCTIONS 6.1 Transmitter's Front Panel TEST PATTERN POWER 4K2K SYNC MENU ENTER SERVICE 4K UHD+ HDMI to HDBaseT Scaling Tx SERVICE: This slot is reserved for firmware update use only. POWER: This LED will illuminate to indicate the unit is on and receiving power. - Page 11 speed is 100Mbit/s. IR IN: Connect to the provided IR Extender to extend the IR control range of remotely located devices. Ensure that the remote being used is within direct line-of-sight of the IR Extender. IR OUT: Connect to the provided IR Blaster to transmit IR signals to devices within direct line-of-sight of the IR Blaster.
-
Page 12: Receiver's Front Panel
6.3 Receiver's Front Panel TEST PATTERN POWER 4K2K SYNC MENU ENTER 4K UHD+ HDBaseT to HDMI Scaling Rx SERVICE SERVICE: This slot is reserved for firmware update use only. POWER: This LED will illuminate to indicate the unit is on and receiving power. - Page 13 range of remotely located devices. Ensure that the remote being used is within direct line-of-sight of the IR Extender. IR OUT: Connect to the provided IR Blaster to transmit IR signals to devices within direct line-of-sight of the IR Blaster. RS-232: Connect to the device you wish to control via a 3-pin adapter cable to receive RS-232 commands from the Transmitter.
-
Page 14: Ir Cable Pin Assignment
6.5 IR Cable Pin Assignment IR Blaster Power IR Signal IR Extender IR Signal Power Ground... -
Page 15: Osd Menu
6.6 OSD Menu 6.6.1 Transmitter's OSD Menu LEVEL 1 LEVEL 2 LEVEL 3 LEVEL 4 OUTPUT OUTPUT HDBaseT INPUT 4K2K DOWN 1080P FIX 4K2K AUTO PASS THROUGH OUTPUT HDMI INPUT 1080P UP 4K2K UP 4K2K (YUV420) PASS THROUGH INPUT 4K2K FIX 4K2K (YUV420) FIX 8 BITS HDMI... - Page 16 LEVEL 1 LEVEL 2 LEVEL 3 LEVEL 4 REFER TO DISPLAY HDCP (cont.) DISPLAY INFO. OSD TIME OUT 5 SEC. 10 SEC. 15 SEC. 20 SEC. 25 SEC. 30 SEC. 35 SEC. 40 SEC. TEST PATTERN MODE HDBaseT AUTO PATTERN AUTO TIMING WHITE COLOR PATTERN...
- Page 17 LEVEL 1 LEVEL 2 LEVEL 3 LEVEL 4 1280×720P@60 TEST PATTERN RESOLUTION HDBaseT (cont.) 1920×1080P@50 1920×1080P@60 3840×2160P@24 3840×2160P@25 3840×2160P@30 4096×2160P@24 4096×2160P@25 4096×2160P@30 DISABLE HDCP ENABLE SWITCH TIME 10 SEC. 20 SEC. 30 SEC. 40 SEC. 50 SEC. 1 MIN. 2 MIN. 3 MIN.
- Page 18 LEVEL 1 LEVEL 2 LEVEL 3 LEVEL 4 TEST PATTERN AUTO TIMING 4096×2160P@25 HDBaseT (cont.) SELECT 4096×2160P@30 TEST PATTERN MODE HDMI AUTO PATTERN AUTO TIMING WHITE COLOR PATTERN RED COLOR GREEN COLOR BLUE COLOR MAGENTA COLOR YELLOW COLOR CYAN COLOR COLOR BAR RAMP TOGGLE...
- Page 19 LEVEL 1 LEVEL 2 LEVEL 3 LEVEL 4 TEST PATTERN RESOLUTION 3840×2160P@60 HDMI (cont.) 4096×2160P@50 4096×2160P@60 DISABLE HDCP ENABLE 10 SEC. SWITCH TIME 20 SEC. 30 SEC. 40 SEC. 50 SEC. 1 MIN. 2 MIN. 3 MIN. 5 MIN. AUTO TIMING 720×480P@60 SELECT 720×576P@50...
- Page 20 LEVEL 1 LEVEL 2 LEVEL 3 LEVEL 4 INFORMATION RESOLUTION INPUT HDBaseT OUTPUT HDMI OUTPUT HDCP HDBaseT OUTPUT HDMI OUTPUT FIRMWARE SYSTEM VERSION VALENS VERSION FIRMWARE UPDATE FACTORY SETTING Note: • Values in Bold are factory default settings. • W hen input timing is non-VESA compliant the OSD may be disabled. To get into the OSD menu in this case, press the hot key combination to enter into test pattern mode and operate the OSD menu while the test pattern is displaying.
-
Page 21: Receiver's Osd Menu
6.6.2 Receiver's OSD Menu LEVEL 1 LEVEL 2 LEVEL 3 LEVEL 4 PASS THROUGH OUTPUT OUTPUT A INPUT 4K2K DOWN 1080P FIX 4K2K (RGB444) FIX 4K2K (YUV444) AUTO PASS THROUGH OUTPUT B INPUT 1080P UP 4K2K UP 4K2K (YUV420) PASS THROUGH INPUT 4K2K FIX 4K2K (RGB444) FIX 4K2K (YUV444) - Page 22 LEVEL 1 LEVEL 2 LEVEL 3 LEVEL 4 OSD (cont.) DISPLAY INFO. OSD TIME OUT 5 SEC. 10 SEC. 15 SEC. 20 SEC. 25 SEC. 30 SEC. 35 SEC. 40 SEC. TEST PATTERN A MODE AUTO PATTERN AUTO TIMING WHITE COLOR PATTERN RED COLOR GREEN COLOR...
- Page 23 LEVEL 1 LEVEL 2 LEVEL 3 LEVEL 4 TEST PATTERN A RESOLUTION 1920×1080P@60 (cont.) 3840×2160P@24 3840×2160P@25 3840×2160P@30 4096×2160P@24 4096×2160P@25 4096×2160P@30 DISABLE HDCP ENABLE 10 SEC. SWITCH TIME 20 SEC. 30 SEC. 40 SEC. 50 SEC. 1 MIN. 2 MIN. 3 MIN. 5 MIN.
- Page 24 LEVEL 1 LEVEL 2 LEVEL 3 LEVEL 4 TEST PATTERN B MODE (cont.) AUTO PATTERN AUTO TIMING WHITE COLOR PATTERN RED COLOR GREEN COLOR BLUE COLOR MAGENTA COLOR YELLOW COLOR CYAN COLOR COLOR BAR RAMP TOGGLE RESOLUTION 720×480P@60 720×576P@50 1280×720P@50 1280×720P@60 1920×1080P@50 1920×1080P@60...
- Page 25 LEVEL 1 LEVEL 2 LEVEL 3 LEVEL 4 TEST PATTERN B RESOLUTION 4096×2160P@60 (cont.) DISABLE HDCP ENABLE 10 SEC. SWITCH TIME 20 SEC. 30 SEC. 40 SEC. 50 SEC. 1 MIN. 2 MIN. 3 MIN. 5 MIN. AUTO TIMING 720×480P@60 SELECT 720×576P@50 1280×720P@50...
- Page 26 LEVEL 1 LEVEL 2 LEVEL 3 LEVEL 4 INFORMATION RESOLUTION OUTPUT B (cont.) HDCP OUTPUT A OUTPUT B FIRMWARE SYSTEM VERSION VALENS VERSION FIRMWARE UPDATE FACTORY SETTING Note: • Values in Bold are factory default settings. • W hen input timing is non-VESA compliant the OSD may be disabled. To get into the OSD menu in this case, press the hot key combination to enter into test pattern mode and operate the OSD menu while the test pattern is displaying.
-
Page 27: Common Conversion Rules
6.6.3 Common Conversion Rules • DOWN 1080P Input Resolution (Hz) Output Resolution (Hz) 3840×2160p@24 → 1920×1080p@24 3840×2160p@25 → 1920×1080p@25 3840×2160p@30 → 1920×1080p@30 3840×2160p@50 → 1920×1080p@50 3840×2160p@60 → 1920×1080p@60 4096×2160p@24 → 1920×1080p@24 4096×2160p@25 → 1920×1080p@25 4096×2160p@30 → 1920×1080p@30 4096×2160p@50 → 1920×1080p@50 4096×2160p@60 →... -
Page 28: Transmitter's Conversion Rules
6.6.4 Transmitter's Conversion Rules • FIX 4K2K Input Resolution (Hz) Output Resolution (Hz) RGB 4:4:4 & YCbCr 4:4:4/4:2:2, RGB 4:4:4 & YCbCr 4:4:4/4:2:2, 8/10/12/16-bit 8-bit 3840×2160p@24 → 3840×2160p@24 3840×2160p@25 → 3840×2160p@25 3840×2160p@30 → 3840×2160p@30 4096×2160p@24 → 4096×2160p@24 4096×2160p@25 → 4096×2160p@25 4096×2160p@30 →... - Page 29 • FIX 8 BITS Input Resolution (Hz) Output Resolution (Hz) RGB 4:4:4 & YCbCr 4:4:4/4:2:2, RGB 4:4:4 & YCbCr 4:4:4/4:2:2, 10/12/16-bit 8-bit 3840×2160p@24 → 3840×2160p@24 3840×2160p@25 → 3840×2160p@25 3840×2160p@30 → 3840×2160p@30 4096×2160p@24 → 4096×2160p@24 4096×2160p@25 → 4096×2160p@25 4096×2160p@30 → 4096×2160p@30 YCbCr 4:2:0, 10/12/16-bit YCbCr 4:2:0, 8-bit 3840×2160p@50...
-
Page 30: Receiver's Conversion Rules
6.6.5 Receiver's Conversion Rules • FIX 4K2K (RGB444) Input Resolution (Hz) Output Resolution (Hz) RGB 4:4:4 & YCbCr 4:4:4/4:2:2 RGB 4:4:4 3840×2160p@24 → 3840×2160p@24 3840×2160p@25 → 3840×2160p@25 3840×2160p@30 → 3840×2160p@30 4096×2160p@24 → 4096×2160p@24 4096×2160p@25 → 4096×2160p@25 4096×2160p@30 → 4096×2160p@30 RGB 4:4:4 & YCbCr 4:4:4/4:2:2/4:2:0 RGB 4:4:4 3840×2160p@50... - Page 31 • AUTO If the input is RGB and the output supports RGB. Input Resolution (Hz) Output Resolution (Hz) RGB 4:4:4 RGB 4:4:4 3840×2160p@24 → 3840×2160p@24 3840×2160p@25 → 3840×2160p@25 3840×2160p@30 → 3840×2160p@30 3840×2160p@50 → 3840×2160p@50 3840×2160p@60 → 3840×2160p@60 4096×2160p@24 → 4096×2160p@24 4096×2160p@25 →...
- Page 32 If the input is YUV 4:2:2, and the output can support it, then the output will be YUV 4:2:2. If the output does not support YUV 4:2:2 but does support YUV 4:4:4, then the output will be YUV 4:4:4. If the output does not support YUV 4:2:2 or 4:4:4, then the output will be RGB.
-
Page 33: Connection Diagram
7. CONNECTION DIAGRAM 4K/UHD TV Powered Speakers (Analog Input) 4K/UHD Source (Blu-ray Player) Balanced Analog HDMI HDMI 1.5m Stereo Input Output Input Output Output 60° 60° PC or RS-232 RS-232 Control System Power Supply Connection IR IN IR OUT + − + −... -
Page 34: Specifications
8. SPECIFICATIONS 8.1 Technical Specifications Transmitter Video Bandwidth HDMI: 600MHz/18Gbps HDBaseT: 340MHz/10.2Gbps Input Ports 1×HDMI Output Ports 1×HDMI, 1×Cat.5e/6/7 1×Balanced Stereo Audio (5-pin Terminal Block) Control Interfaces 1×IR Blaster (3.5mm) 1×IR Extender (3.5mm) 1×RS-232 (3-pin Terminal Block) 1×LAN (RJ45) HDMI Cable Length 10m (1080p@60Hz, 12-bit) 5m (4K@60Hz, 4:4:4, 8-bit) IR Frequency... - Page 35 Operating Temperature 0˚C - 40˚C/32˚F - 104˚F Storage Temperature −20˚C - 60˚C/−4˚F - 140˚F Relative Humidity 20 - 90% RH (Non-condensing) Power Consumption 20.28W Receiver Video Bandwidth HDMI: 600MHz/18Gbps HDBaseT: 340MHz/10.2Gbps Input Ports 1×Cat.5e/6/7 1×S/PDIF Audio (TOSLINK) Output Ports 2×HDMI 1×Balanced Stereo Audio (5-pin Terminal Block) Control Interfaces...
-
Page 36: Video Specifications
Chassis Material Metal Silkscreen Color Black Operating Temperature 0˚C - 40˚C/32˚F - 104˚F Storage Temperature −20˚C - 60˚C/−4˚F - 140˚F Relative Humidity 20 - 90% RH (Non-condensing) Power Consumption 13.86W 8.2 Video Specifications Supported Resolutions (Hz) HDMI Input HDMI Output 640×480@60 ... -
Page 37: Audio Specifications
Supported Resolutions (Hz) HDMI Input HDMI Output 1920×1080p@24/25/30/50/60 3840×2160p@24/25/30/50/60 4096×2160p@24/25/30/50/60 8.3 Audio Specifications Input Output Output Frequency Level/Freq. Terminal Level THD+N Response Crosstalk HDMI Balanced L/R 4Vrms±10% < 0.1% ±3dB > 70dB < −60dB 0dBFS, 1kHz Optical Balanced L/R... -
Page 38: Hdbaset Features
8.5 HDBaseT Features Features Transmitter Receiver Audio/Video Control (IR & RS-232) Power Source Equipment (PSE) Powered Device (PD) ... -
Page 39: Acronyms
9. ACRONYMS ACRONYM COMPLETE TERM Cat.5e Category 5 (enhanced) Cable Cat.6 Category 6 Cable Cat.7 Category 7 Cable Digital Visual Interface EDID Extended Display Identification Data High-Definition HDCP High-bandwidth Digital Content Protection HDMI High-Definition Multimedia Interface High Dynamic Range Infrared Local Area Network LPCM Linear Pulse-Code Modulation... - Page 40 CYPRESS TECHNOLOGY CO., LTD. www.cypress.com.tw...
Need help?
Do you have a question about the CSC-6012TX and is the answer not in the manual?
Questions and answers