Brita WD3030 Manual
Hide thumbs
Also See for WD3030:
- Instructions for use manual (38 pages) ,
- Instructions for use manual (17 pages)

Related Manuals for Brita WD3030


Summary of Contents for Brita WD3030
- Page 1 BRITA Tap Instructions for use WD3020, WD3030, WD3040 1014663-001_GA_BRITA_Tap_AU.indb 1 1014663-001_GA_BRITA_Tap_AU.indb 1 28.04.15 15:25 28.04.15 15:25...
-
Page 2: Table Of Contents
Index I. Congratulations Page ENGLISH II. Ensuring you get the best from your system Page 4 – 12 III. Important notes Page IV. BRITA, quality and satisfaction guaranteed Page Installation Video 1014663-001_GA_BRITA_Tap_AU.indb 2 1014663-001_GA_BRITA_Tap_AU.indb 2 28.04.15 15:25 28.04.15 15:25... -
Page 3: I. Congratulations
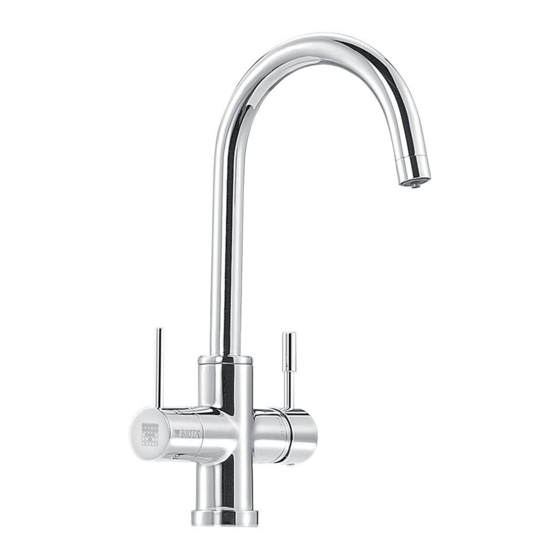
• It is economical, convenient and easy to use • Allows for fi ltered and unfi ltered water The BRITA Tap has two levers. One for BRITA fi ltered water and the other for your regular unfi ltered hot/cold water. -
Page 4: Ii. Ensuring You Get The Best From Your System
Phone: Aus: 1300 557 762, NZ: 08004 BRITA Contents of the BRITATap Water Filter Kit To ensure you get the best result from your BRITA Tap Water Filter Kit, please follow these instructions carefully. Your BRITA Tap Water Filter Kit includes the following (see fi... - Page 5 fi lter cartridge A 1000, push the button, until one yellow LED fl ashes. be installed with a low pressure boiler. Note: In Australia and New Zealand BRITA Tap is not compatible with fi lter cartridges P 1000 and P 3000.
- Page 6 The Cartridge Status Indicator in the BRITA lever tells you when to change the fi lter cartridge. D Signals The three lights in the BRITA lever are only activated in the fi ltering (fi g. 3) position. They indicate: - Green light: The BRITA Tap fi...
- Page 7 Pull out both your kitchen tap and the hoses. B You’re now ready to install the BRITA Tap (see fi g. 5 and fi g. 6). First of all, screw the shank (4) into the Brita Tap (1).
- Page 8 E Make sure all connections are tightened properly. Avoid over tightening. tightening. Then put the base or O-Ring (3) over the hole and fi x the BRITA Tap (1) in place using the supplied joint (5), the fl at gasket (6), fl ange (7) and the brass nut (8).
- Page 9 Step 5: Inserting the fi lter cartridge (see fi g. 9) Step 6 (optional): Space-saving wall mount to install the cartridge under the sink A Remove the protective strap (1). (see fi g. 10) B Insert the fi lter cartridge (4) vertically into the fi lter head (5). C Turn the locking handle (3) until it clicks.
-
Page 10: Troubleshooting
A Turn on the cold and hot water supplies and check the system B The timer starts automatically. carefully for any leaks. B Open the BRITA Tap and allow water to run until the fi ltered water runs clear and without any bubbles (at least 1 litre). Maintenance Regularly check the fi... - Page 11 0.02–0.14 Mpa These models have an aerator with two integrated outlets. The Bed Volume 0.23 L Inner one is for BRITA fi ltered water, the outer area for hot and cold water. Weight (dry/wet) 0.4 kg/0.9 kg Chlorine reduction NSF 42...
- Page 12 Cartridge life is dependent on the water quality * Based on JIS S 3201 Test results (Japanese Industrial Standards) Technical data of the BRITA Tap Operating pressure 0.05 MPa to max. 0.36 MPa cold water connection 4°C to 40°C warm water connection max.
-
Page 13: Iii. Important Notes
Important Notice: Read this data sheet and compare the capabilities to your actual water treatment needs before purchasing. PERFORMANCE DATA SHEET FOR FILTER CARTRIDGE A 1000 Manufacturer Seller BRITA GmbH BRITA Water Filter Systems Heinrich-Hertz-Str. 4 Distributors Pty Ltd 65232 Taunusstein Level 9, 123 Epping Road... - Page 14 SUBSTANCE REDUCTION LEGEND: √ = pass The above listed Water Filter Cartridge has been tested and certifi ed under NSF/ANSI 42 for reduction of chlorine, taste and N/A = Not Applicable odour. The performance of this product has been verifi ed and substantiated as the test data summarised below indicates.
- Page 15 • BRITA recommends that the fi lter system not be decommis- mechanical damage. sioned for a long period. If the BRITA Tap with A 1000 fi lter is not used for several days (2–3 days), we recommend that the Do not assemble near sources of heat and open fl ames. A stop fi...
-
Page 16: Iv. Brita, Quality And Satisfaction Guaranteed
Want to make the most of one of BRITA’s service offers? ments. Please contact your BRITA Customer Give us a call! You can fi nd the contact details for your BRITA Service team if your Cartridge Status Indicator is Customer Service team next to your country code on the back of at the end of the useful life. - Page 17 ENGLISH 1014663-001_GA_BRITA_Tap_AU.indb 17 1014663-001_GA_BRITA_Tap_AU.indb 17 28.04.15 15:25 28.04.15 15:25...
- Page 18 ENGLISH 1014663-001_GA_BRITA_Tap_AU.indb 18 1014663-001_GA_BRITA_Tap_AU.indb 18 28.04.15 15:25 28.04.15 15:25...
- Page 19 1014663-001_GA_BRITA_Tap_AU.indb 19 1014663-001_GA_BRITA_Tap_AU.indb 19 28.04.15 15:25 28.04.15 15:25...
- Page 20 BRITA Water Filter Systems Distributors Pty Ltd., Level 9, 123 Epping Road, North Ryde, NSW 2113, Australia Tel. - AUS: 1300 557 762 Tel. - NZ: 0800 4 BRITA / 0800 427 482 www.brita.com.au www.brita.co.nz 1014663-001_GA_BRITA_Tap_AU.indb 20 1014663-001_GA_BRITA_Tap_AU.indb 20 28.04.15 15:25...
Need help?
Do you have a question about the WD3030 and is the answer not in the manual?
Questions and answers