Table of Contents
Advertisement
Available languages
Available languages
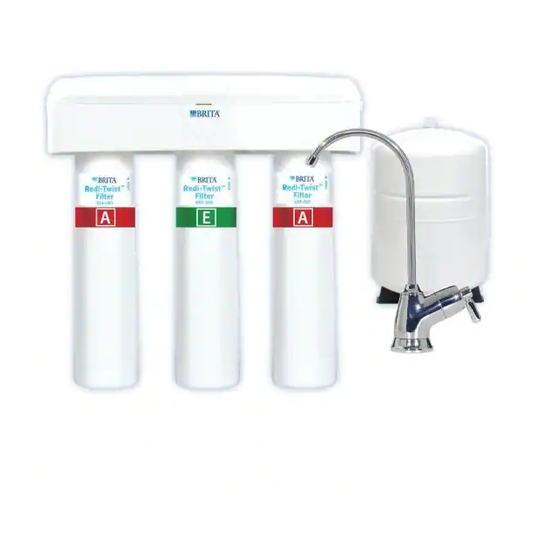
Reverse Osmosis
Filtration System
USF-201 post filter is tested and certified by NSF International in
USS-335 system against NSF/ANSI Standard 42 for the reduction of
Aesthetic Chlorine Taste and Odor and Particulate Class III. USS-335
system is tested and certified by NSF International against NSF/
ANSI Standard 58 for the reduction of Cysts, Pentavalent Arsenic,
CONNECT TO
Barium, Cadmium, Copper, Hexavalent Chromium, Lead, Nitrates/
AUXILIARY FAUCET
Nitrites, Radium 226/228, Selenium, Trivalent Chromium, Turbidity
and Total Dissolved Solids (TDS). System Tested and Certified by NSF
International against NSF/ANSI Standard 372 for low lead content
and compliance.
Please refer to Performance Data Sheet for complete reduction data.
Redi-Twist™ Reverse Osmosis Filtration System Model USS-335
USS-335
Installation
Instructions
Step 1
Step 2
Step 3
Step 4
Step 5
Step 6
Step 7
Step 8
1/4 turn
Advertisement
Table of Contents

Related Manuals for Brita Redi-Twist USS-335


Summary of Contents for Brita Redi-Twist USS-335
-
Page 1: Installation Instructions
USS-335 Installation Reverse Osmosis Instructions Filtration System Step 1 Step 2 Step 3 Step 4 Step 5 Step 6 USF-201 post filter is tested and certified by NSF International in USS-335 system against NSF/ANSI Standard 42 for the reduction of Aesthetic Chlorine Taste and Odor and Particulate Class III. - Page 2 Tools & Materials Required main components secondary tools needed for components installation filter system head phillips adjustable screwdriver wrench mounting screws kitchen faucet adapter 1/8” drill bit utility knife white tubing red tubing (3/8" and 1/4") (3/8" and 1/4") drill tape measure USF-201 USF-205...
-
Page 3: Step
1/4 turn 866.709.2086 Internet & Mobile Free Installation Video Manufactured for: Protect Plus, LLC 420 3rd Avenue NW, Hickory, NC 28601 USA My Brita Redi-Twist™ Filter System ® (Replace system every 5 years) System Cartridge Model No(s). Date Purchased / Date to Replace... - Page 4 Before You Begin Please read all instructions, specifications, and precautions before installing and using your water filter system. NOTICE Precautions: for cold water use only. Consult your local plumbing codes and install accordingly. This filter must be protected from freezing, which can cause cracking of the filter and water leakage. Because of the product’s limited service life and to prevent costly repairs or possible water damage, we strongly recommend that the system be replaced every five years.
- Page 5 Plan Your Installation NOTE: DO NOT CONNECT 3/8" RED DRAIN TUBING TO DRAIN WITH A GARBAGE DISPOSAL. 3/8" white tubing to faucet 1/4” line to Faucet Kitchen 3/8" red tubing Packaged Items 3/8” line to Drain Faucet to drain Adapter Shown in White Drain 3/8"...
- Page 6 Introduction Thank you for your recent purchase of the Brita® Reverse Osmosis (RO) Filtration System. You have purchased a filtration system with a technology that has proven itself effective for filtering ultra-fine water contaminants. This method of filtration is the most common water treatment technology used by premium bottled water companies.
- Page 7 connect to auxiliary faucet Step 1 Install Kitchen Faucet Adapter materials and tools needed Note: If rigid plumbing pipe (metal or plastic) is used, you may need to shorten supply pipe using a hacksaw or pipe cutter to accomodate the Kitchen Faucet Adapter.
- Page 8 connect to auxiliary faucet Install RO Drain Step 2 Connector materials and tools needed CAUTION WARNING safety glasses drill DRAIN CONNECTOR INSTALLATION FOAM SEAL Note: Extra care should be taken when entering drains near dishwashers or food waste disposals, as backflow may occur through the air gap and cause flooding.
- Page 9 connect to auxiliary faucet Step 3 Install RO Filter System Assembly materials and tools needed WARNING phillips safety glasses drill screwdriver Mount to cabinet in vertical position 4-6" FROM BOTTOM Mount the Reverse Osmosis Filter System Assembly Head using the two mounting screws. The mounting screws allow you to lift the RO Filter System Assembly without any hardware removal.
- Page 10 connect to auxiliary faucet Install Water Storage Step 4 Tank materials and tools needed Note: The Tank Ball Valve fitting on the Water 000.00 Storage Tank may need to be tightened 3-4 turns to get a good seal. DO NOT OVERTIGHTEN. digital air pressure gauge •...
- Page 11 connect to auxiliary faucet Step 5 Install RO Faucet materials and tools needed WARNING safety glasses drill Select Location of Reverse Osmosis Faucet Mounting Hole. You will need to select the location of the Reverse 3/8" white tubing to faucet Osmosis Faucet.
- Page 12 connect to auxiliary faucet Install RO Faucet Step 5 << Step continued from previous page materials and tools needed • Locate and organize your RO Faucet install parts. See list on page 2. WARNING • Attach 3/8" white tube to RO Faucet Body. mounting surface •...
- Page 13 connect to auxiliary faucet Step 6 Connect Water Lines materials and tools needed Install 1/4" Plastic Tubing for Water Supply Line from Kitchen Faucet Adapter to System Head Inlet • Determine lengths of 1/4" plastic safety glasses tubing needed to connect to both outlet port of Kitchen Faucet Adapter CAUTION and inlet port of system head.
- Page 14 connect to auxiliary faucet Step 6 Connect Water Lines << Step continued from previous page *Note: System will NOT operate without Restrictor. Note: Tubing lengths should allow for the removal of the assembly from the mouting screws for servicing. If tubing lengths are shortened for neater appearance, it may be necessary to keep the assembly on the mounting screws for service.
- Page 15 connect to auxiliary faucet Step 6 Connect Water Lines << Step continued from previous page materials and tools needed CAUTION WARNING utility knife 1/4” line to Faucet 3/8" white tubing to faucet Kitchen 3/8" red tubing Packaged Items 3/8” line to Drain Faucet to drain Adapter...
- Page 16 connect to auxiliary faucet Step 7 Sanitize, Test and Purge System materials and tools needed Note: The bleach must be completely removed WARNING from system before drinking RO water. See purging instructions below. Sanitize the System Sanitizing is recommended immediately after installation of the RO Filter System Assembly.
- Page 17 connect to auxiliary faucet Sanitize, Test and Step 7 Purge System << Step continued from previous page Pressure Test the System (IMPORTANT: Complete sanitizing procedures on Page 16 before pressure testing.) • Open cold water supply valve to RO Filter System Assembly. Leave the auxiliary closed until pressure will start to build in RO Filter System Assembly in about 2 hours.
- Page 18 connect to auxiliary faucet Install Redi-Twist Filters ™ Step 8 and Test for Leaks • Remove the 1st Stage filter cartridge first from the system to relieve pressure on the RO filter. • Remove the 3rd Stage filter cartridge. • Discard all of the Redi-Twist™...
- Page 19 connect to auxiliary faucet connect to auxiliary faucet Filter Replacement Filter Replacement (every 6 months) (every 12 months) 1st Stage and 3rd Stage Filter Replacement: Membrane Filter Replacement: 1/4 turn 1/4 turn For FREE Filter Replacement Reminder, go to www.protectplus.com Note: Place paper towels or rag under the filter system to catch any water drips.
- Page 20 Install System/Drain in Remote Location 1/4” line to Faucet 3/8" white tubing to faucet Kitchen 3/8" red tubing Packaged Items 3/8” line to Drain Faucet to drain Adapter Shown in White Drain 3/8" white tubing Connector 1/4” line to Tank to tank materials and tools needed Storage Tank...
- Page 21 12 months, or more often based on your local water. Only replace the reverse osmosis membrane with a part approved for use in your Brita Reverse Osmosis system.
- Page 22 Prefilter/Postfilter Maintenance The pre-filter and post-filters are replaceable activated carbon cartridges, Brita Redi-Twist™ USF-201. They ® are located in the 1st and 3rd positions of the 3-stage system. It is recommended to replace the pre-filter and post-filter cartridges at least every 6 months of product water use. The pre-filter and post-filter ARE BOTH Brita Redi-Twist™...
- Page 23 You may need to install a Booster Pump if your pressure is below 40 PSI. Open valve or unclog. Feed water valve is plugged or closed. model number USF-201. Replace filter with Brita Carbon pre-filter is clogged. ® Make sure incoming water pressure is within operating limits. Make sure drain line is not clogged.
- Page 24 Product Water is High in Total Dissolved Solids (TDS) POSSIBLE CAUSE SOLUTION Clogged pre-filter. Replace pre-filter with Brita Redi-Twist™ USF-201. ® Low incoming water pressure. Incoming water pressure must be above 40 psi. Install a Booster Pump or Permeate Pump.
- Page 25 Guide Tastes and Odors in Product Water POSSIBLE CAUSE SOLUTION Carbon post-filter is exhausted. Replace filter with Brita Redi-Twist™ USF-201. ® There is foreign matter in holding tank. Follow the clean, flush, and sanitize procedures. Replace all filters. Product water and drain water lines are Correct plumbing according to installation instructions.
- Page 26 Use and Care Brita Reverse Osmosis Filtration System USS-335 ® Usage and quality of water in your incoming water line affect the life of filter cartridges. Cartridges should be replaced sooner if water pressure at the faucet begins to drop noticeably or if the filter fails to perform satisfactorily.
- Page 27 Version 2.1I...
- Page 29 Instrucciones de instalación Reverse Osmosis Filtration System del USS-335 Paso 1 Paso 2 Paso 3 Paso 4 Paso 5 Paso 6 El postfiltro USF-201 ha sido probado y certificado por NSF international en el sistema USS-335 según la norma NSF/ANSI 42 para la reducción de cloro estético sabor y olor y partículas clase III.
- Page 30 Implementos y materiales necesarios implementos Componentes Componentes principales necesarios para la secundarios instalación Cabezal del sistema de filtración Destornillador Llave ajustable de estrella Adaptador de grifo Tornillos de montaje de cocina Broca para Cuchilla multiuso taladro de 1/8” Tubería blanca Tubería roja (3/8"...
- Page 31 Información del producto y servicio www.protectplus.com Fabricado por: Protect Plus, LLC 420 3rd Avenue NW, Hickory, NC 28601 USA Sistema de filtración My Brita® Redi-Twist™ (Reemplazo del sistema [cada 5 años]) Número de modelo del cartucho Fecha de compra / Fecha de cambio...
- Page 32 Antes de comenzar Lea todas las instrucciones, especificaciones y precauciones antes de instalar o utilizar su sistema de filtración de agua. AVISO Precauciones: para uso con agua fría únicamente. Consulte la normativa local de plomería e instale de acuerdo con ella. Este filtro deberá...
- Page 33 Planifique su instalación NOTA: No conecte la tubería de drenaje roja de 3/8" a un triturador de desperdicios. Tubería blanca de 3/8" hacia el grifo 1/4” line to Faucet 3/8" white tubing to faucet 3/8" white tubing to faucet Los artículos del Kitchen Adaptador Tubería roja de 3/8"...
- Page 34 Introducción Gracias por su reciente compra del sistema de filtración por ósmosis inversa (RO) Brita®. Usted ha adquirido un sistema de filtración con una tecnología cuya efectividad ha sido probada para la filtración de contaminantes extremadamente finos presentes en el agua. Este método de filtración es la tecnología de tratamiento de agua más común que utilizan las empresas de agua embotellada de...
- Page 35 Conecte al grifo auxiliar Paso 1 Instale el adaptador del grifo de cocina Materiales e implementos necesarios Nota: Si se utiliza tubería rígida de plomería (metal o plástico), es posible que necesite acortar el tubo de suministro utilizando una segueta o cortador de tubos para acomodar el adaptador del grifo de Gafas de seguridad...
- Page 36 Conecte al grifo auxiliar Instale el conector de Paso 2 desagüe de ósmosis inversa Materiales e implementos necesarios PRECAUCIÓN ADVERTENCIA Gafas de Taladro seguridad INSTALACIÓN DEL CONECTOR DE DRENAJE SELLO DE ESPUMA CALIENTE FRÍA VÁLVULA VÁLVULA AGUA AGUA CALIENTE FRÍA Nota: Se debe tener mucho cuidado al ingresar a los desagües que estén cerca de las máquinas lavaplatos o de los trituradores de desperdicios ya que puede ocurrir flujo de retorno a través del espacio de aire y ocasionar inundación.
- Page 37 Conecte al grifo auxiliar Paso 3 Instale el ensamble del filtro RO Materiales e implementos necesarios ADVERTENCIA Gafas de Destornillador Taladro seguridad Phillips Monte al gabinete en posición vertical (4 a 6" [10.2 cm a 15.2 cm] de la parte inferior) Monte el cabezal del ensamble del sistema de filtración por ósmosis inversa utilizando los dos tornillos de montaje.
- Page 38 Conecte al grifo auxiliar Instale el tanque de Paso 4 almacenaje Materiales e implementos necesarios Nota: Es posible que el acople del tanque de 000.00 suministro deba apretarse 3-4 vueltas para lograr un buen sello. No apriete demasiado. Indicador digital de presión de aire •...
- Page 39 Conecte al grifo auxiliar Paso 5 Instale el grifo de RO Materiales e implementos necesarios ADVERTENCIA Gafas de Taladro seguridad Elija la ubicación del agujero de montaje del grifo llave de agua del grifo de ósmosis inversa. Deberá elegir la ubicación del grifo de ósmosis inversa.
- Page 40 Conecte al grifo auxiliar Instale el grifo de RO Paso 5 << Continuación de la página anterior Materiales e implementos necesarios • Ubique y organice las partes para la instalación de su grifo de RO. Refiérase ADVERTENCIA a la lista de empaque de la página 30. superficie de •...
- Page 41 Conecte al grifo auxiliar Paso 6 Conecte las tuberías de agua Coloque una tubería plástica de 1/4" para suministro de Materiales e implementos necesarios agua desde el adaptador del grifo de la cocina hasta la entrada del cabezal del sistema •...
- Page 42 Conecte al grifo auxiliar Paso 6 Conecte las tuberías de agua << Continuación de la página anterior *Nota: El sistema NO funcionará sin un reductor. Nota: Las longitudes de la tubería deben permitir la remoción del ensamble desde los tornillos de montaje para prestarle servicio.
- Page 43 Conecte al grifo auxiliar Paso 6 Conecte las tuberías << Continuación de la página anterior de agua Materiales e implementos necesarios PRECAUCIÓN ADVERTENCIA Cuchilla multiuso Tubería blanca de 3/8" 1/4” line to Faucet 3/8" white tubing to faucet hacia el grifo Los artículos del Tubería roja de 3/8"...
- Page 44 Conecte al grifo auxiliar Paso 7 Desinfecte, pruebe y purgue el sistema Materiales e implementos necesarios Nota: El blanqueador deberá eliminarse ADVERTENCIA completamente del sistema antes de beber el agua RO. Refiérase a las instrucciones de purga que se indican. Disinfecte el sistema Se recomienda desinfectar inmediatamente después de la instalación del sistema de...
- Page 45 Conecte al grifo auxiliar Desinfecte, pruebe y Paso 7 purgue el sistema << Continuación de la página anterior Haga una prueba de presión del sistema (IMPORTANTE: Lleve a cabo los procedimientos de desinfección de la página 44 antes de hacer la prueba de la presión). •...
- Page 46 Conecte al grifo auxiliar Instale los filtros Redi-Twist Paso 8 ™ y pruebe si hay fugas. • Retire primero el cartucho del filtro de la 1ª etapa del sistema para aliviar la presión del filtro de RO. • Retire el cartucho del filtro de la 3ª etapa. •...
- Page 47 Conecte al grifo auxiliar Conecte al grifo auxiliar Reemplazo del filtro Reemplazo del filtro (cada 6 meses) (cada 12 meses) Reemplazo del filtro de la 1ª y 3ª etapa: Reemplazo de la membrana del filtro: 1/4 de vuelta 1/4 de vuelta Para recordatorios GRATIS de cambio del filtro, ingrese a www.protectplus.com Nota: Coloque toallas de papel o un paño debajo del sistema de filtración para recoger un posible goteo.
- Page 48 Instale el sistema del RO/ 3/8" white tubing to faucet 1/4” line to Faucet drenaje en la posición remota Kitchen 3/8" red tubing Packaged Items 3/8” line to Drain Faucet to drain Adapter Shown in White Drain 3/8" white tubing Connector 1/4”...
- Page 49 Esta membrana deberá reemplazarse cada 12 meses o más a menudo en función del agua de su localidad. Sólo reemplace la membrana de RO con un repuesto aprobado para ser usado en su sistema de de ósmosis inversa Brita ®...
- Page 50 Conecte al grifo auxiliar Mantenimiento del prefiltro/postfiltro El prefiltro y el postfiltro son cartuchos reemplazables de carbono activado, Brita Redi-Twist™ USF-201. Están ® ubicados en la primera y tercera posición del sistema de 3 etapas. Se recomienda reemplazar los cartuchos de prefiltro y postfiltro al menos cada 6 meses de uso para el tratamiento del agua.
- Page 51 La válvula de alimentación de agua está obstruida o cerrada El prefiltro de carbono está obstruido Reemplace el filtro Brita® Redi-Twist™ USF-201. La membrana de RO está sucia Cerciórese de que la presión del agua entrante esté dentro de los límites de funcionamiento.
- Page 52 El agua tratada es alta en sólidos totales disueltos (TDS) Causa posible Solución Prefiltro obstruido Reemplace el filtro Brita® Redi-Twist™ USF-201. La presión de agua entrante deberá ser superior a 40 psi. Instale una bomba auxiliar o una bomba Baja presión de agua entrante de permeado.
- Page 53 Sabor y olor en el agua tratada Causa posible Solución El postfiltro de carbono está desgastado Reemplace el filtro Brita® Redi-Twist™ USF-201. Hay una materia extraña en el tanque de Siga los procedimientos para limpieza, enjuague y desinfección. Reemplace todos los filtros. almacenaje El agua tratada y las tuberías de desagüe...
- Page 54 Conecte al grifo auxiliar Uso y cuidado Sistema de filtración por ósmosis inversa (RO) Brita® USS-335 El uso y la calidad del agua de su tubería de alimentación de agua afectan la vida de los cartuchos del filtro. Los cartuchos deben cambiarse con mayor frecuencia si la presión del agua del filtro comienza a disminuir notablemente o si el filtro no funciona...
- Page 55 USS-335 installation instructions Version 2.1I...
- Page 56 3 Se puede ahorrar dinero en comparación con el agua embotellada. conocer cómo hacer un impacto positivo en el medio ambiente © 2014 Protect Plus. The BRITA trademark and logo are registered trademarks of Brita LP and are used under license by Protect Plus, LLC. All rights reserved.
Need help?
Do you have a question about the Redi-Twist USS-335 and is the answer not in the manual?
Questions and answers