Table of Contents
Advertisement
Advertisement
Table of Contents

Related Manuals for SIG Edgetra ARF


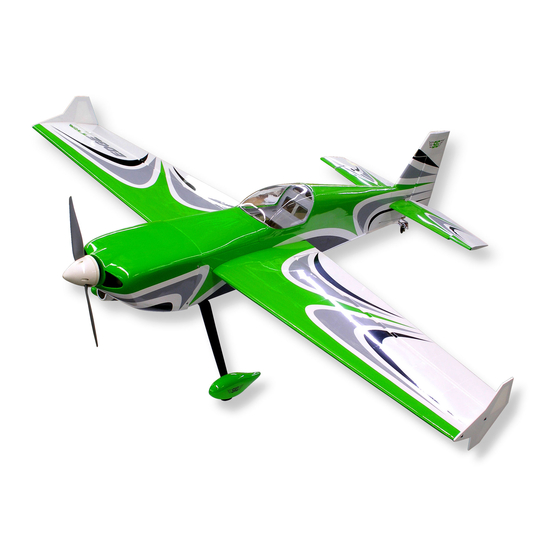
Summary of Contents for SIG Edgetra ARF
-
Page 2: Radio System
MXACC4220770 INTRODUCTION Castle Creations Phoenix Edge Lite 75 Amp ESC Congratulations on your purchase of the EDGEtra ARF. We hope you (SIG Part# CSE010011200) will enjoy this R/C sport aerobatic/3D model. We recommend purchasing the above combo for the EDGEtra –... -
Page 3: Required Tools
❑ (3) M4 x 20mm Mounting Bolts, for landing gear mounting How to Tighten Loose Covering After you open your EDGEtra ARF and take all the covered parts out of ❑ (3) M4 Flat Metal Washers, for landing gear mounting their plastic bags, the covering may begin to wrinkle. -
Page 4: Wing Assembly
critical for achieving a good result! The iron should be set to about WING ASSEMBLY F - 250 F (104 C - 121 C) as measured on the bottom of the iron The wing is designed as a 2-piece system, with separate right and left using a thermometer. - Page 5 Fit the servo into the servo mount in the wing panel, (note that quickly wicked into the slot as it penetrates both the wood and the servo is positioned so that the servo arm is at the forward the hinge. We suggest using a fine tipped applicator on the glue bottle to better control the flow of glue.
-
Page 6: Fuselage Assembly
❑ 4) Assemble and install the aileron pushrods. FUSELAGE ASSEMBLY TAIL INSTALLATION Turn an M3 nut and Ball Link onto each end of the 70 mm aileron For the following steps you will need: pushrod, and adjust the center-to-center length of the pushrod to (1) Fuselage approximately 3-1/2”. - Page 7 Glue the elevator joiner into both halves of the elevator. Use a stiff straight edge and the marks previously made to assure a straight assembly. We recommend SIG 1-1/2 Hour Epoxy for this step, The horizontal stabilizer can now be glued permanently onto the which will allow plenty of working time for a correct alignment.
- Page 8 ❑ 7) Now it's time to install the rudder. Using a hobby knife, carefully cut through the covering on the tail to expose the lowest hinge pocket, then carefully insert one side of the three CA hinges into the hinge slots in the rudder.
- Page 9 Attach an 18” servo extension wire to the elevator servo, and secure it as you did for the aileron servo extension wires.. Pull the elevator servo wire through the fuselage, and install the servo using the same techniques as the aileron servos in step 1.
-
Page 10: Install The Landing Gear
NOTE: We suggest you use blue thread locking liquid (like Locktite®) on all bolts and nuts used in the assembly of the landing gear. ❑ 11) Assemble and install the main landing gear. Slide the threaded portion of the axle into the large hole of the landing gear leg and secure it with an M4 nut on each side. - Page 11 Using a 5/64” drill bit, drill a hole at each location you marked, making sure to keep the drill bit straight to the rudder - you do not want the drill bit to come out the side of the rudder. Attach the landing gear and landing gear cover to the bottom of the fuselage using three M4 x 20mm machine screws and three M4 Split-Ring lock washers .
-
Page 12: Install The Power System
Attach the steering springs to the three armed steering horn Subtract the measurement taken in the previous step b) from 8-5/8”. The result is the distance you need to locate the front of and the tailwheel horn. Make sure you keep the over-all the firewall from the front of the adjustable motor mount. - Page 13 The most common arming switches are a simple external plug that puts a break in the positive battery lead to the motor, such as the A rming S witch (SIG Part# M XACC6972) shown below. There are also arming switches built into some of If you have not already re-attached the X mount plate to the the advanced ESCs now on the market.
- Page 14 ❑ 15) Install the Cowl, Propeller, and Spinner Install the battery hatch and test fit the cowling , propeller, and spinner on the fuselage. As you pass the cowl over the motor, make sure all the wires are out of the way. Carefully adjust the exact position of the cowling.
- Page 15 ❑ 16) COOLING IS IMPORTANT! side of the firewall, lower the rear end of the hatch onto the fuselage, and allow the hooks to catch. Now slide the hatch toward the rear of the fuselage, and the magnets will latch in With a fully-cowled motor, it is very important to make sure place.
-
Page 16: Control Surface Travel
“spinner weights” available for tail heavy models. Wherever you put the balancing weight, make sure it cannot come loose in flight! Your EDGEtra ARF is completely assembled. However, it is NOT ready for flight! There are a few very critical pre-flight tasks we must perform before flying. -
Page 17: Customer Service
CUSTOMER SERVICE FLYING SIG MFG. CO., INC. is committed to your success in both assembling When it comes to test flying a new model, we always advise modelers and flying the EDGEtra ARF. Should you encounter any problem to choose a calm day with little or no wind. These conditions allow you... - Page 18 The first test flights should only be made by an experienced R/C flyer, familiar with high performance R/C aircraft. SIG Manufacturing highly recommends that you visit the informational website www.knowbeforeyoufly.org to learn about flying safely and responsibly, and following the new regulations put in place by the Federal Aviation Administration (FAA).
Need help?
Do you have a question about the Edgetra ARF and is the answer not in the manual?
Questions and answers