Table of Contents
Advertisement
Quick Links
RASCAL ARF ASSEMBLY MANUAL
INTRODUCTION:
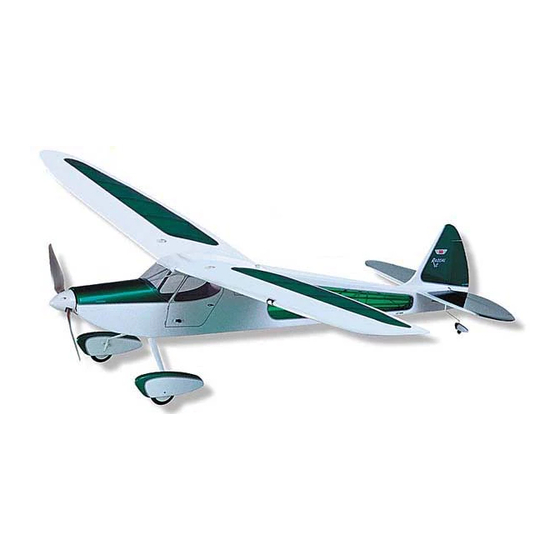
Congratulations on your purchase of the SIG Rascal ARF kit! The
R/C Rascal kit quickly became very popular with modelers
because of its great looks and truly classic flying characteristics.
SIG is pleased to now be able to offer this fine design in an Almost
Ready to Fly format! The ARF version not only retains all of the
same great characteristics of the original but also offers superb
workmanship in its construction and a beautifully unique covering
job. The covering material used on your Rascal ARF is Oracover®.
This means that it is easily repairable and easy to work with.
Assembly is quick and simple when following the detailed
instructions contained in this manual.
The Rascal ARF is very light and therefore well matched to the
included geared electric Speed 400 power system. This motor and
gear drive system allows you to swing the recommended APC
8 x 6E propeller - a very efficient and powerful combination!
Also included with your Rascal ARF is the new SIG 20 Amp
proportional electronic speed controller (ESC). Read on for further
information on this unit.
We suggest using a 7-cell battery pack for this model. We have
used the Sanyo KR-600AE 1.2 volt Nickel-Cadmium (Ni-Cad) cells
for our battery packs, with good results. These cells deliver great
power and are both small enough and light enough to work well
with the Rascal design.
certainly fit in the model and will provide good power. However, be
aware 8-cell flight packs provide more power than the motor is
rated for. Because of this, 8-cell packs will likely burn out the
motors' brushes within 15 to 30 flights. To get the most out of your
flight packs, we suggest using a good quality AC/DC "Peak Delta"
charger, such as the Astro Flight #115D charger.
The assembly and flying of this model will only be successful if you
follow these instructions carefully.
instructions has the potential to cause problems later in the
assembly process or during flight. The successful assembly and
flying of this model is your responsibility so take your time and
enjoy the process.
RADIO EQUIPMENT:
The Rascal ARF derives its performance from several factors. Two
of these are its light weight and generous wing area.
R
8-cell battery packs (9.6 volts) will
Deviating from these
combination makes for a very favorable wing loading that allows
the airplane to perform nicely with Speed 400 power. Since the
Rascal ARF is factory built, you can only control the final ready to
fly weight by choosing the most appropriate airborne radio
equipment. In short, the performance of this model will be great
with the right equipment but will be less so by choosing
inappropriate, oversize and/or unnecessarily heavy airborne radio
equipment. This is a simple reality that has to be addressed.
Fortunately, after-market receivers and servos, appropriate for this
model, are not only readily available and of very good quality,
they're now very reasonably priced.
In flight testing our Rascal ARF models, we've used a wide variety
of airborne radio equipment. For servos, we have used and can
highly recommend Hitec #HS-55 servos and the Maxx Products
MX-50 units. Similar servos are also usable, provided they are the
right dimensions and can deliver between 14 to 18 in/oz of torque.
One of the most appropriate receivers for this model would be the
great little Hitec Micro 555 unit.
certainly usable but make sure they are small enough and light
enough! For best performance, avoid excess weight.
The Electronic Speed Controller (ESC), included with your Rascal
ARF kit (SIG Part Number SIGESC20), has been specifically
designed for use in Speed 400 powered electric models. This unit
is quite sophisticated for its small size and light weight of only 12
grams. Its solid state integrated circuitry is capable of supplying up
to 20 amps of continuous current to the motor.
proportional and features a Battery Elimination Circuit (BEC) and
an effective propeller brake. In addition, the SIG ESC features
automatic temperature shut-off and an integrated safety feature
that prevents accidental motor start-ups when initially powering up
the airborne system.
receiver connector that is compatible with Hitec, Airtronics
(Z-connector only), Futaba, and JR equipment. Specifications are
as follows:
WORKING VOLTAGE:
CONTINOUS LOAD CURRENT:
SURGE CURRENT:
WEIGHT:
BEC:
LOW BATTERY CUT-OFF:
DIMENSIONS:
COVERING MATERIAL:
Your Rascal ARF has been professionally covered using
Oracover®.
This material is world famous for its ease of
application, light weight, and consistency of color. If you live in a
dry climate, you may notice that some wrinkles might develop after
removing the covered parts from their plastic bags.
perfectly normal in low humidity climates. The model was covered
in a part of the world with relatively high humidity and therefore the
balsawood was carrying a fair amount of moisture. When exposed
to drier air, the wood typically loses this moisture, dimensionally
"shrinking" in the process. This is what may cause some wrinkles.
However, wrinkles are easy to correct by simply using a heat iron.
We suggest covering the shoe of the iron with thin cotton cloth,
such as an old T-shirt, to prevent scratching. The iron should be
set to about 280° - 300° F. Use the heated iron over the wrinkle to
lightly shrink the material - do not press on it. Then lightly iron the
This
material back down to the wood. You can also use a hobby-type
1
Again, other receivers are
Note that this ESC is supplied with a
5-10 1.2V NiCad Cells
20 Amps
200 Amps
12 Grams
5V/1Amp
5V
1" x 5/8" x 1/4"
It is fully
This is
Advertisement
Table of Contents

Related Manuals for SIG RASCAL ARF


Summary of Contents for SIG RASCAL ARF
- Page 1 12 SIG is pleased to now be able to offer this fine design in an Almost grams. Its solid state integrated circuitry is capable of supplying up Ready to Fly format! The ARF version not only retains all of the to 20 amps of continuous current to the motor.
-
Page 2: Required Tools
- top and bottom. Allow the epoxy to set and glue the A selection of glues - SIG Thin and Thick CA and SIG remaining wing panel in place. Kwik-Set 5-Minute Epoxy Threadlock compound, such as Loctite®... - Page 3 FUSELAGE: 3) The rudder and elevator servos are now installed into fuselage. Position the servos in place and pre-drill small guide 1) Using a hobby knife and a sharp #11 blade, clear-out and holes for the servo screws. Mount the servos into the servo tray open up the various required holes in the fuselage covering;...
- Page 4 Run the cables through the tubes until they exit the fuselage at the rear. Position the servo arms squarely to the servos and reinstall them back onto the servos. 6) The main landing gear is now glued in place in the fuselage using 5-minute epoxy.
- Page 5 #2 x 3/8" sheet metal screws provided. Do not over-tighten the mark the clip's two bolthole centers onto the wheel pant. After screws, just snug them in place. making these marks, remove the wheel pants from their axles. Use a pin vise and a .046" dia. drill bit (#56 numbered drill) to drill guide holes through the wheel pants and the inside plywood pads, at the marks just made.
- Page 6 CA hinges from the slots. 4) With the elevators in place, the horizontal stabilizer is now glued in place to the top rear of the fuselage. Use SIG 5-minute 2) Before hinging the elevators to the horizontal stabilizer, glue epoxy for this operation.
- Page 7 SIG 5-minute epoxy. Begin by first test fitting the vertical fin in place into the slot in the top of the stabilizer, without using any glue.
- Page 8 "nest" in place between the pant halves. The pant halves are now hinges. glued in place, sandwiching the tailskid wire between them. Use SIG thick CA or 5-minute epoxy for this step. OPTIONAL LANDING GEAR FAIRINGS: Included with your kit is a card sheet measuring 2-1/2" x 4-1/4".
- Page 9 The battery pack can now be charged. 2) The SIG Electronic Speed Controller (ESC) has been 4) With the battery pack charged, the motor and ESC can be factory soldered to the motor for your convenience. NOTE: The tested using your radio system.
- Page 10 With the system now working, next check the direction of rotation of the propeller shaft at the front of the gearbox. Viewed from the rear, as if you were sitting in the cockpit of the airplane, the shaft should turn in a clockwise direction. If the shaft turns in the opposite direction, it means that the two "motor"...
- Page 11 mounting plate to the inside of the fuselage, aligning its slot with the slot in the fuselage. The plywood plate provides a hardpoint for the switch. Using the screws provided, mount the switch in place into the fuselage. Do not over-tighten the switch mounting screws. 8) Connect the rudder and elevator servo leads to their appropriate receptacles in the receiver.
-
Page 12: Decal Application
DECAL APPLICATION: The decals supplied with the Rascal ARF kit are high quality Mylar with an extremely aggressive adhesive. These are not die-cut and must be cut from the sheet with a hobby knife and sharp #11 blade or with sharp scissors. - Page 13 With just a little have qualified instructors who can teach you how to fly and experience, you'll be landing the Rascal ARF right in front of you perhaps even test fly your model for you. If you are already an R/C...
- Page 14 R AS CA L A R F N OT E S...
-
Page 15: Troubleshooting Chart
T R O U B L E S H O OT I N G C H A R T PROBLEM POSSIBLE CAUSE REMEDIES LACK OF POWER 1) BATTERY PACK NOT FULLY 1) DISCHARGE & RECHARGE CHARGED BATTERY PACK 2) BAD CELL IN BATTERY PACK 2) REPLACE CELL OR PACK 3) GEARS TOO TIGHT 3) RE-SET GEAR LASH... - Page 16 Speed 400 Motor, 7.2 V 1 each Speed 400 Promax Gearbox, With 1 Propeller Shaft Adapter, 2 Mounting Bolts and Pinion Gear Set With 2:1, 2.5:1 & 3:1 Ratios 1 each SIG 20Amp Electronic Speed Controller (ESC) Pre-Soldered to Motor...
-
Page 17: Academy Of Model Aeronautics
Muncie, IN 47302 Telephone: (765) 287-1256 CUSTOMER SERVICE SIG MANUFACTURING COMPANY, INC. is totally committed to your success in both assembling and flying the R/C RASCAL ARF kit. Should you encounter any problem building this kit or discover any missing or damaged parts, please feel free to contact us by mail or telephone.
Need help?
Do you have a question about the RASCAL ARF and is the answer not in the manual?
Questions and answers