Table of Contents
Advertisement
Quick Links
Advertisement
Table of Contents

Related Manuals for TPI 1010


Summary of Contents for TPI 1010
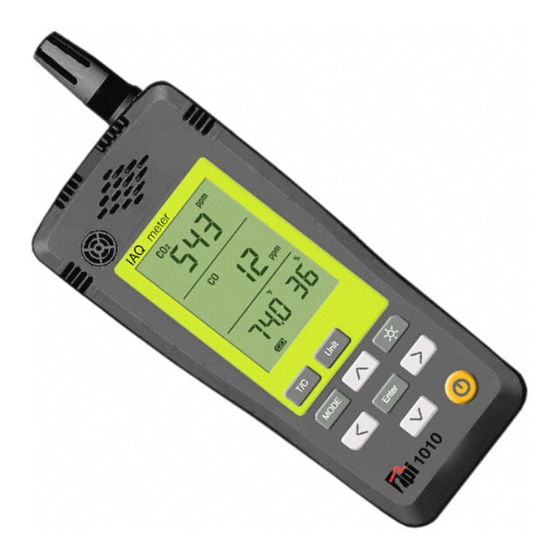
- Page 1 Indoor Air Quality Meter 1010 Rev. 2.x / 3.x Meters The Value Leader...
-
Page 2: Table Of Contents
Contents Introduction General Overview Familiarization Front View Soft Keys Back View Operation Turning On & Off / Performing a Test / Main Display Selecting Temperature Units Ambient / Dew Point / Wet Bulb Temperature Display Temperature / Clock Display Modes Activating the Backlight Setting Date and Time Setting CO Alarm Level... -
Page 3: General Overview
3 Year unit and 2 Year sensor Guarantee. 2. General Overview The 1010 IAQ meter uses state of the art sensors to measure humidity, carbon monoxide (CO), carbon dioxide (CO2), and temperature. The CO and CO2 sensors in your meter will need to be replaced periodically and calibration is recommended once every year. - Page 4 General Overview (Continued) This manual will guide you through the functions of the TPI 1010 which will give you many years of reliable service. Your TPI 1010 Indoor Air Quality meter comes complete with the following standard accessories: • TPI 1010 Instrument •...
-
Page 5: Familiarization
3. Familiarization 3.1 Front View Humidity & Temperature CO2 Sensor Location Sensor Location CO Sensor Location Display Protective Rubber Boot Keypad Power Adapter USB Port Sensor Locations: Places where the CO, CO2, and Humidity sensors are located and protected. Display : Large 4 Parameter Backlit LCD Display. -
Page 6: Soft Keys
3.2 Soft Keys On / Off key - Used to turn the IAQ meter on or off. Press to turn on, press and hold to turn off. Up Arrow key - Used to select and change parameters. Also used to cycle through dew point and wet bulb temperatures from the main display. -
Page 7: Back View
3.3 Back View Hanger Hole Tilt Stand Battery Cover Screw Hanger Hole: Use to hang instrument for hands free operation. Can be used with A127 magnetic strap kit or A103 hook. Tilt Stand: Use to stand instrument on a table. Batter Cover Loosen this screw and open cover to access batteries. -
Page 8: Operation
4.1 Turning On & Off / Performing a Test / Main Display Always: - Turn the 1010 on outside of the area to be tested. Make sure the unit is in fresh air (no carbon monoxide present) prior to turning on. This will allow the CO sensor to set to zero properly. -
Page 9: Selecting Temperature Units
4.2 Selecting Temperature Units Pressing the key switches the temperature display between °F and °C. 4.3 Ambient / Dew Point / Wet Bulb Temperature Display Repeatedly pressing the key from the main display cycles through dew point temperature, wet bulb temperature, and ambient temperature displays. Dew Point Temperature Wet Bulb Temperature Ambient Temperature... -
Page 10: Setting Date And Time
4.6 Setting Date and Time key then 1) Starting with the 1010 turned off, press and hold down the press and hold down the key until two beeps are heard and the time / date screen is displayed. Year Month / Day... -
Page 11: Setting Co Alarm Level
4.7 Setting CO Alarm Level The 1010 is equipped with an audible and visual alarm for carbon monoxide. The alarm level is factory set at 30ppm. When CO above this level is measured, the 1010 will beep and the display will flash red. -
Page 12: Calculating % Outside Air
To activate % outside air mode, press the key about 2 seconds until “t-0” is displayed in the middle display area. 1) Place the sensor of the 1010 perpendicular to the “Return” air flow. When the reading stabilizes press the key and capture the return air temperature, "t-1"... -
Page 13: Outside Air (Carbon Dioxide)
Press and hold the key until “C-0” is displayed. 1) Place the sensor of the 1010 perpendicular to the “Return” air flow. When the reading stabilizes press the key and capture the return air temperature, "C-1"... -
Page 14: Data Logging
Once the logging function is activated all preciously logged data is written over. 1) INT is displayed at the top to indicate the 1010 is waiting for the logging interval to be set. The logging interval tells the 1010 how often to sample. For example, a logging interval of 10 seconds (00:10) means the 1010 will log a reading every 10 seconds. -
Page 15: Retrieving Logged Data
Install the PC software on your PC and open it. Connect the 1010 to the PC using the USB cable. Click on the connect to PC button in the software window. The software can be used to retrieve logged data and for real time monitoring. -
Page 16: Technical Specifications
8. Technical Specifications Function Range Accuracy 0 to 5000ppm 50°F~104°F: ±3% of rdg+75ppm <50°F, >104°F: ±5% of rdg+75ppm Temperature -5°F to 140°F ±2°F -20°C to 60°C ±1°C Dew Point Temperature -47°F to 135°F Calculation -44°C to 57°C Wet Bulb Temperature 3°F to 135°F Calculation -16°C to 57°C Relative Humidity... -
Page 17: Maintenance
- Include with the product your name, address, phone number, writ- ten description of the problem and proof of purchase date. Carefully package and return to: TPI / Attn. Repair 9615 SW Allen Blvd. Suite 104 Beaverton, OR 97005... -
Page 18: Technical Information
% Outside Air - HVAC systems use a combination of outside air, supply air, and return air to maintain consistent and comfortable air quality. The 1010 can calcu- late outside air either by measuring temperature or by measuring CO2. The for-... - Page 19 TPI. See section 9.2 for instructions on returning your meter. CO Sensor Error If the CO sensor fails to initialize or is faulty the 1010 will display an error code. Try turning the 1010 off and on again. If it displays the error code again the 1010 is in need of service.
Need help?
Do you have a question about the 1010 and is the answer not in the manual?
Questions and answers