
Related Manuals for TPI 712


Summary of Contents for TPI 712
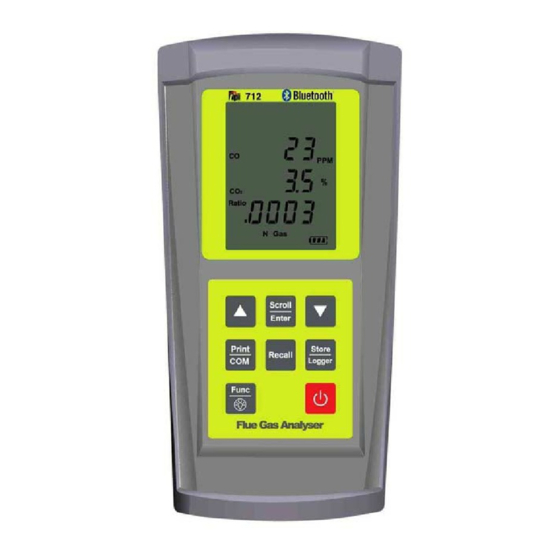
- Page 1 Flue Gas Analyzer Rev. 6.x Analyzers The Value Leader www.tpi-thevalueleader.com...
-
Page 2: Table Of Contents
Recalling Data............ 27 Printing Data............28 ~ 29 You should keep the battery of your 712 charged so power is constant- Logging Data............30 ~ 31 ly being supplied to your sensors. Communicating to a PC..........32 ~ 34 Specifications............. -
Page 3: General Overview
Always keep the A762 water trap / filter assembly clean and replace the filter as necessary. Replacement filter part number is A762F. Rubber This manual will guide you through the functions of the TPI 712 which Boot will give you many years of reliable service. -
Page 4: Back View
Keypad Back View Connections for Connection for Pressure Tubing Mini Pump Scrolls through selectable fuels (see page 8) Protection Filter Switches between Gross and Net Efficiency (see page 17) Switches between ºC and ºF (see pages 18 & 20) Scrolls through mbar, kPa and inH2O (see page 21) Moves up through the Stored Data Addresses Sample and Calibration and... -
Page 5: Side Views
Top View Side Views Charger Socket Exhaust Port P (+) P (-) Gas Sampling Port Infrared Window Charger Socket Connection for 220V/115V charger (see page 8) T1 Socket Connection for thermocouple plug on flue probe Rubber (see page 11) Connection for any 'K' type thermocouple probe Boot (see page 20) T2 Socket... -
Page 6: Basic Analyzer Functions
The instrument should be charged overnight for a period of 10 to 12 hours Press and hold down the Power Key and the TPI 712 will start its 30 second and will give over 6 hours Operating Time. If a beeping noise is heard during countdown 'PURGE' will be displayed. -
Page 7: Turning The Analyzer Off
15ppm. Should the CO be above 15ppm then the 10 minute auto shut off easy with the TPI flue probe because the temperature sensor is an integral countdown will not begin till the CO has gone below 15ppm. The auto power part of the probe. -
Page 8: Combustion Analyzer Mode
20.9%. This may take more than an hour depending on how saturated the 1. Turn the 712 on in fresh air as outlined on page 8. After the initial purge sensors are. cycle the 712 will default to combustion analyzer mode and combustion dis- play 1 will be seen. -
Page 9: Typical Test Locations
TYPICAL TEST LOCATIONS TYPICAL TEST LOCATIONS Atmospheric Gas Fired Fan Assist Boiler / Furnace Condensing Boiler / Furnace Typical Test Locations Typical Test Locations Figure 2 Figure 1 It is important to use manufacturers recommended test locations It is important to use manufacturers recommended test locations whenever possible. - Page 10 TYPICAL TEST LOCATIONS 4. Insert the flue probe into the sample hole of the device under test. The probe tip should be in the middle of the flue pipe or exhaust stream. Ensure the In-Line Filter / Water Trap hangs below the analyzer in the proper vertical position when readings are being taken.
- Page 11 CO air free. If it is used on a system that is not specified in CO air free the displayed reading may appear abnormally high as compared to the • Displays calculated CO/CO2 (Ratio) figure. The 712 calculates manufacturer specification.
-
Page 12: Typical Test Results
Thermometer Mode With the analyzer running, press the Func Key to access the thermometer function. In this mode the 712 functions like a K-Type thermocouple ther- Actual test results vary depending on the equipment under mometer. The pump will stop running when in this function. -
Page 13: Manometer / Tightness Test Mode
Manometer & Tightness Test Mode (Continued) With the analyzer running, press the Func Key repeatedly to access the The tightness test function enables the 712 to check for pressure leaks in manometer function. The pump automatically turns off during this function. -
Page 14: Combustible Gas Leak Detector Mode
5. Repeat steps 2 to 4 to change the Hour, the Day, the Month and the Year. ALL TIMES IN THIS FUNCTION 2. Locate combustible gas leaks by putting the inlet of the 712 near fittings 6. The unit will return to normal after the desired Year has been confirmed and valves. -
Page 15: Storing Data
STORING DATA RECALLING DATA The recall feature allows you to display stored data or retrieve the results of a During testing data can be stored for later retrieval. The store function can be tightness test. activated in any mode except leak detection. The store key also activates Stor Recall Mode - Allows data stored during tests to be recalled from tightness test mode. -
Page 16: Printing Data
PRINTING DATA PRINTING DATA (Continued) WARNING: - To operate correctly there must be a clear line of sight between Printout Interpretation the Infrared Window on the instrument (see page 6) and the Infrared Window on the IR Printer (see Printer instructions). Place the printer so it is no closer than approximately 6 inches from the analyzer. -
Page 17: Logging Data
Microsoft Hyper Terminal or the optional PC software part num- ber A772. A. The 712 will display S-t and a sample time will blink. This sets the sample rate for the logging function. The 712 has two log modes available. -
Page 18: Communicating To A Pc
4. Press and hold the Recall key until a beep is heard. The 712 will dis- 5. Requests for stored, real time, and tightness test data can be made play ‘Real’, ‘Stor’, ‘Titn’, “S-Lg”, and “Logg” (Use the Down Arrow Key from the PC through Hyper Terminal to the 712. -
Page 19: Specifications
2. From your computer type QTL# (All Caps) (#=page number) and Pressure Ranges mbar, kPa & inH2O press ENTER. 3. The 712 will send the logged page of data and return to normal Display 3 Line Backlit LCD w/ annunciators operation. -
Page 20: Calibration & Service
WARRANTY Accuracy +/- 0.5% fsd Your TPI 712 Flue Gas Analyzer is guaranteed free from defects in materials Temperature Measurement and workmanship for 3 Years from the date of purchase. The sensors carry a 2 Year warranty. This guarantee does not affect your statuary rights. For addi-... - Page 21 Pump Operation Check TPI analyzers use three filters to protect the pump and sensors. The first filter to 1. Turn the analyzer on as outlined on page 8. Do not connect anything to the check is the A763 mini pump protection filter. (see picture below) inlet.
-
Page 22: Appendix B A773 Sulfur Filter Installation & Maintenance
Appendix A: General Maintenance (continued) Appendix B: A773 SULFUR FILTER INSTALLATION & MAINTENANCE When performing combustion tests on oil fired equipment it is important to Flue Probe Integrity Check use the optional A773 sulfur filter. Failure to do so can result in incorrect and readings. -
Page 23: Appendix C Error Codes And Troubleshooting
Replace filter(s). See Appendix A. fur filter. (See picture below) Worn pump. Return to TPI for service. Oxygen sensor failed to ini- Flue probe connected to 712 Disconnect probe and InIt tialize restart. prior to power up. 712 did not purge completely Purge for 20 minutes and from last sample. - Page 24 Battery will not charge or hold a Defective charger or battery. Replace the charger or battery. 9. 712 Display: ‘2000’, ‘A-r’, ‘SEt’. Action : If you are not changing the CO alarm charge. Send to TPI for service. point press the Func Key. Otherwise press the Up and Down Keys to set the ppm level the alarm will sound at.
-
Page 25: Appendix E Manually Initializing Sensors
10. 712 Display: ‘Auto’, ‘oFF’, ‘En’. Action : Press the Func Key to bypass. 15. 712 Display: ‘CAL’, ‘StoP’, ‘go’. Action : Press the Up Arrow Key to select 11. 712 Display: ‘CAL’, ‘StoP’, ‘go’. Action : Press the Up Arrow Key to select ‘StoP’... -
Page 26: Appendix G Technical Notes
Appendix G: Technical Notes Appendix H: Testing for Carbon Monoxide in Ambient Air The 712 can be used to test for carbon monoxide in ambient air. For example Note 1: When performing a pressure or draft test during a combustion test, the tests can be performed in work spaces and living areas like offices and houses pump can be turned on to provide a continuous sample to the sensors. -
Page 27: Appendix I Carbon Monoxide Limits In Ambient Air Chart
Appendix I: Carbon Monoxide in Ambient Air Chart Appendix J: CARBON MONOXIDE FACTS This chart contains maximum exposure levels and times for carbon monoxide. Carbon Monoxide (CO) is invisible, odorless, and tasteless. It is the byproduct of This is a general guideline only. It is recommended you check with your local combustion and levels are elevated when there is incomplete combustion. -
Page 28: Appendix K Battery Replacement
For best results use a TPI replacement battery part number A007. The battery in your analyzer is 3.6V NiMH 1600mAh rated. Never replace the battery with any other type of battery or damage to the charge circuit will result. - Page 29 Test Products International, Inc. 9615 SW Allen Blvd., Ste. 104 Beaverton, OR 97005 Tel: 503-520-9197 Fax: 503-520-1225 www.tpi-thevalueleader.com Test Products International, Ltd. 342 Bronte Road South, Unit #9 Milton Ontario Canada L9T5B7 Tel: 905-693-8558 Fax: 905-693-0888...
Need help?
Do you have a question about the 712 and is the answer not in the manual?
Questions and answers