Table of Contents
Advertisement
This product is eligible for the P2HD
5 Year Warranty Repair Program. For
details, see page 5.
Before operating this product, please read the instructions carefully and save this
manual for future use.
F0808T0 -P
D
Printed in Japan
Operating Instructions
Memory Card Camera-Recorder
AG-HPX170P
Model No.
ENGLISH
VQT1U92
Advertisement
Table of Contents

Related Manuals for Panasonic AG-HPX170P


Summary of Contents for Panasonic AG-HPX170P
-
Page 1: Operating Instructions
This product is eligible for the P2HD 5 Year Warranty Repair Program. For Operating Instructions details, see page 5. Memory Card Camera-Recorder AG-HPX170P Model No. Before operating this product, please read the instructions carefully and save this manual for future use. ENGLISH... -
Page 2: Adjusting The Backlight
indicates safety information. CAUTION: CAUTION RISK OF ELECTRIC SHOCK mistreated. DO NOT OPEN For Battery Pack CAUTION: TO REDUCE THE RISK OF ELECTRIC SHOCK, DO NOT REMOVE COVER (OR BACK). NO USER-SERVICEABLE PARTS INSIDE. • Do not store in temperatures over 60°C (140°F). REFER TO SERVICING TO QUALIFIED SERVICE •... -
Page 3: Declaration Of Conformity
AG-HPX170P Trade Name: PANASONIC Responsible Party: Panasonic Corporation of North America One Panasonic Way, Secaucus, NJ 07094 Support contact: Panasonic Broadcast & Television Systems Company 1-800-524-1448 (1) This device may not cause harmful interference, and (2) this device must accept any interference received, including interference that may cause undesired operation. -
Page 4: Important Safety Instructions
If any of these battery packs of inferior quality is used, it could lead to an accident or failure the use of a genuine Panasonic battery pack for any Panasonic product that is to use a battery pack. imitation battery pack. -
Page 5: Software Information For This Product
Please note, this is a site that is not maintained by Panasonic Canada Inc. The Panasonic Canada Inc. privacy policy does not apply and is not applicable in relation to any information submitted. This link is provided to you for convenience. -
Page 6: Table Of Contents
IMPORTANT SAFETY INSTRUCTIONS ....4 Protecting against a possible erasure ..... 26 Recommendation for Use of Genuine Formatting P2 cards ........26 Panasonic Battery Pack Recording times ..........27 (Rechargeable Battery) ........4 Remove the P2 card ........28 Software information for this product ....5 ...... -
Page 7: Adjusting The Gain
Synchro scan ........... 50 Hard disk drive (data copying) ......78 Switching Audio Input ........51 ....79 Using the built-in microphone ......51 Video deck (Dubbing) ........80 Using another microphone and TV/Monitor (playback/dubbing) ......80 .......... 51 Nonlinear editing with P2 card (PC mode) ..81 Copying from P2 cards to the hard disk drive Adjusting the recording level ...... -
Page 8: Outline Of Operations
Outline of operations P2 mode shooting and Video Memory card recorder playback (Pages 25 and 63) Monitor P2 card The contents can be transferred as a data stream (digital dubbing). • • Multi format recording • Variable frame rates • IEEE1394 BNC cable digital audio recording... -
Page 9: Precaution For Use
Precaution for use Always take some trial shots before actual shooting. • sound and images have been recorded properly before actual shooting. • Panasonic makes no guarantees for your recordings. • Respect copyrights • it is intended for private use. -
Page 10: Accessories
Accessories Battery *1 AC Adapter Wireless remote control DC cord and battery (CR2025) Eye cup Microphone holder Microphone holder holder adapter Shoulder belt Component video cable PIN-BNC conversion CD-ROM camera-recorder. Lens hood INPUT terminal cover (2) both ends of the cable. (Page 77) Optional units •... -
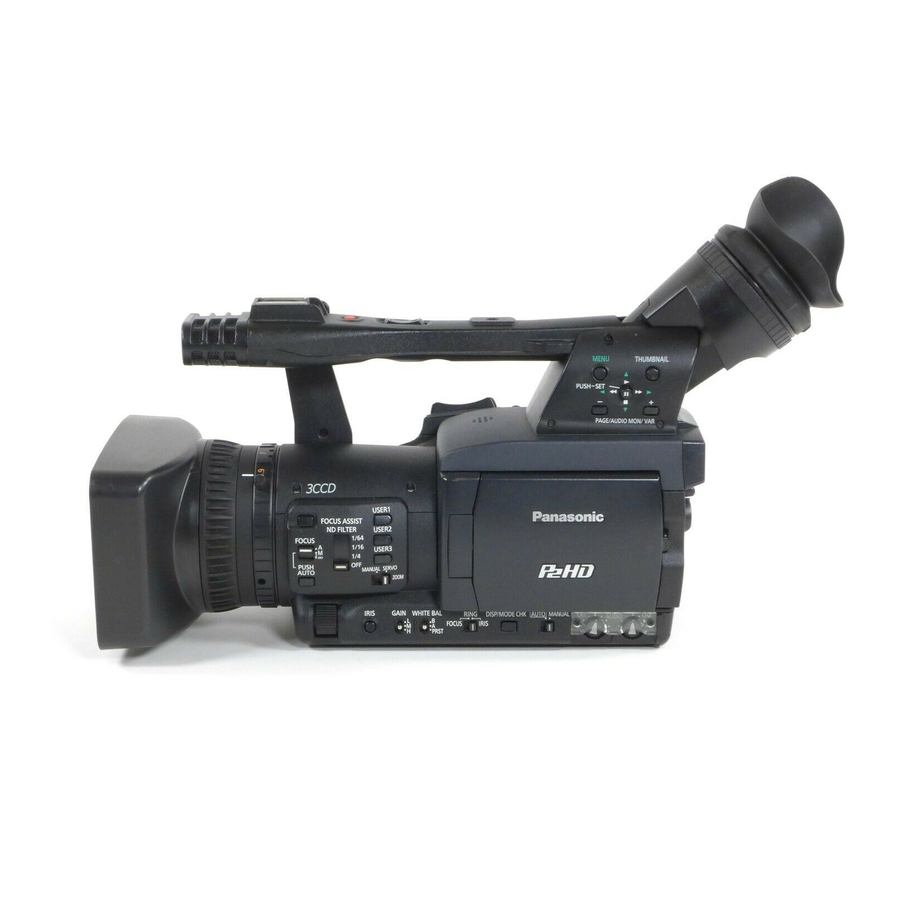
Page 11: Description Of Parts
Description of parts Right side and rear side 9 10 11 12 POWER 18 20 POWER switch (Page 19) (Page 51) (Page 25) 14 Zoom ring pin hole (Page 0) REC CHECK button (Page 25) (Page 26) Zoom button (Page 0) (Page 20) HANDLE ZOOM switch (Page 0) (Pages 25 and 29) -
Page 12: Left Side
Description of parts (continued) Left side MENU THUMBNAIL PUSH-SET PAGE/AUDIO MON/VAR BARS SHUTTER SPEES SELECT CH1 SELECT CH2 SELECT INPUT1 INPUT2 INT(L) INT(R) INPUT1 INPUT2 INPUT2 MIC POWER+48V AUDIO COUNTER RESET/TC SET ZEBRA EVF DTL 14 16 17 18 19 Focus ring (Page 5) (Page 25) Zoom ring (Page 0) -
Page 13: Terminals And Mounting Parts
Terminals and mounting parts 1394 CAM REMOTE FOCUS IRIS ZOOM S/S COMPONENT USB terminal (Mini-B) (Page 77) 13 Security Lock opening Use this opening to attach a security cable. Light shoe Microphone shoe (Page 76) P2 card slots (Page 25) The security lock and security cable are SD memory card slot (Page 29) not accept any liability for damages resulting... -
Page 14: Remote Control
Description of parts (continued) Remote control (Page 75) OSD button (Page 75) cannot be executed on the camera-recorder. • PHOTO SHOT • TITLE • A.DUB COUNTER button (Page 58) • MULTI/P-IN-P • SELECT Same function as the COUNTER button on the •... -
Page 15: The Battery
The battery Charging Recording time of included battery adapter. Recharging Continuous Capacity time recording time Align the battery with the marking on 5400 mAh min. min. the direction shown below. • • You cannot charge the battery if the DC cord is connected to the DC OUT connector, so not using the LCD monitor. -
Page 16: Installing And Removing The Power Supply
Voltages other than 120 V are not intended for U.S.A. and Canada. Operation at a voltage other than 120 V AC may contact either a local or foreign Panasonic Removal selecting an alternate AC plug. Set the POWER switch to OFF, and check... -
Page 17: Attaching The Shoulder Strap
Adjust the hand strap to suit your hand. Close the cover. • Make sure the cover is fully closed. Attaching the shoulder strap Attach the shoulder strap and use it as a precaution against dropping the camera. 20 mm or more 20 mm or more Detaching and attaching the lens hood Detaching the lens hood... -
Page 18: The Remote Control
The remote control Insert the battery Remote control setup Push the catch in the direction shown by set this camera-recorder and the remote control arrow A to remove the holder. to either “operation mode 1” or “operation mode 2” camera-recorder by mistake. Setting •... -
Page 19: Tally Lamp
While pressing the lock release, turn the POWER Turn on the camera: The mode lamp (CAM) lights red (CAM mode) and Turn off the camera: The mode lamp (CAM) goes out. • When the camera is left idle in pause mode have been made in the setting menu OTHER FUNCTIONS screen (Page 112). - Page 20 Fitting the eye cup Attach the eye cup by aligning the projections them together. and shooting conditions. • Turning the eye cup after attaching it may • cause the eye cup holder to come off. If the eyecup holder does come off, see “Cleaning monitor and those displayed on a TV monitor.
-
Page 21: Using The Lcd
Using the LCD Set the POWER switch to ON. focus. Hold down the OPEN button to open the LCD monitor. images you shoot. • It can open out to 120 degrees. Do not try In CAM mode, press EVF DTL. camera. -
Page 22: Adjusting The Screen Display
Push the Operation lever in the w or q Set the POWER switch to ON. (Page 19) EVF SET EVF COLOR LEVEL Press the MENU button. [–] –––– ––––+ –––– –––– [ + ] • For menu operation (Page 94) EVF BRIGHTNESS •... -
Page 23: Underscan
Switching between overscan and underscan the LCD monitor to one of three possible levels. Use this function to underscan or overscan the Select LCD BL under LCD on the setting monitor. menu SW MODE screen. This assigns LCD BL to the LCD button. Select OVERSCAN under LCD on the setting menu SW MODE screen. -
Page 24: Setting The Calendar
Setting the calendar The CLOCK SET value is recorded in the contents Push the Operation lever in the r direction to move to the MONTH setting. thumbnails. Before carrying out recording, be sure CLOCK SET to check and set CLOCK SET and TIME ZONE. YEAR 2008 MONTH... -
Page 25: Basic Shooting Operations
Basic shooting operations Preparing to shoot POWER switch to start shooting. Set the POWER switch to ON. (Page 19) • Press again to return to the camera to the shooting standby mode. • Use the handle START/STOP button to make card slot cover (A), and slide the cover (B) to open it. -
Page 26: Checking Photos Taken (Rec Check)
Basic shooting operations (continued) Checking photos taken (REC CHECK) PC mode (1394 HOST) Lights green: In the shooting pause mode, press the REC Access standby. CHECK button. Blinks orange: This plays back about 2 seconds of the video and audio of the most recently recorded clip before Off: returning to pause mode. -
Page 27: Recording Times
Press the MENU button. On the menu, select OPERATION and then • For menu operation (Page 94) FORMAT. (Page 68) • Operation lever appears. Select the number of the slot MENU PUSH-SET be formatted. Select EXIT to cancel the formatting. •... -
Page 28: Remove The P2 Card
Basic shooting operations (continued) Remove the P2 card • During playback, a P2 card inserted into the card slot cover (A), and slide the cover (B) • You can use ACCESS LED on the OTHER to open it. FUNCTIONS screen to set the P2 card access Check that the P2 card access lamp is not blinking orange. -
Page 29: Installing And Removing The Sd Memory Card
Cautions in using SD memory cards • should conform to SD or SDHC standards. Be Access lamp sure to format cards using the AG-HPX170P. be used for the AG-HPX170P. SD (from 8 MB to 2 GB): Close the card slot cover. - Page 30 On the remote control • Zoom button START/ DATE/ PHOTO STOP TIME SHOT Zoom in COUNTER RESET TITLE ZOOM Zoom out MULTI/ P-IN-P A.DUB /REW PLAY STILL ADV PAUSE STILL ADV INDEX STOP INDEX SELECT VAR. SEARCH ZOOM STORE MENU to the setup menus, SW MODE screen HANDLE OFF/ON ZOOM (Page 101).
-
Page 31: Variable Frame Rates (Vfr)
Variable frame rates (VFR) By taking full advantage of the special characteristics of P2 cards, this unit provides frame skipping Since the camera-recorder records only the effective frames (native recording), recording is possible for recording). 24PN mode: The camera-recorder shoots in the 24 fps native mode. The video signals delivering images at a rate of 24 fps are recorded in 24 frames. -
Page 32: Native Recording
Variable frame rates (VFR) (continued) Native recording Standard recording Using the REC FORMAT function Using the REC FORMAT function (Page 104) on the RECORDING SETUP (Page 104) on the RECORDING SETUP the recording format. SCENE FILE dial. SCENE FILE dial. If necessary, before doing this, perform the If necessary, before doing this, perform the camera settings from the setting menu, and... -
Page 33: Using Variable Frame Rates (Vfr)
Using variable frame rates (VFR) Undercrank shooting Standard speed shooting for movie production used to present such scenes as the movement of and moves made by martial artists. If, for instance, you have shot scenes using the 24P recording format for specifying the playback frames, you can setting the VFR recording frame rate to 12 fps. - Page 34 FORMAT option (Page 104) of the setting menu RECORDING SETUP screen enables shooting in progressive mode. [BoCe] and [FoGe] are cut out, leading to a 30P mode: mode. mode. second interlace. • If you are not going to do your editing on such a system, use the normal 24P method for shooting.
-
Page 35: Shooting In Manual Mode
Shooting in manual mode to change the function assigned to the focus ring. Switching to manual mode FOCUS: Adjusts focus. IRIS: Adjusts iris (aperture). • and LCD go out). FOCUS. Temporarily switching to auto focus Switching to manual focus assist mode To change from the manual focus mode to the Manual focusing manual focus assist mode, set MF ASSIST to ON... -
Page 36: Using Focus Assist
Shooting in manual mode (continued) Using focus assist the center portion of the image or brings up a image to assist during manual focusing. You can use the FOCUS ASSIST setting on FOCUS ASSIST button is pressed. (Page 10 ) IRIS dial IRIS button FOCUS ASSIST button... - Page 37 When the display is dark, increase the gain to brighten the display. OFF: Cuts light intensity by up to about 1/4. Cuts light intensity by up to about 1/16. Cuts light intensity by up to about 1/64. ND FILTER switch GAIN switch If the camera is in auto mode, use the mode.
- Page 38 Shooting in manual mode (continued) Press the AWB button. • screen.) AWB Ach ACTIVE When you are shooting in manual mode, readjust change. AWB Ach OK You can save adjustments and reselect them by You can also use the preset values. Use the settings to suit the shooting conditions.
-
Page 39: Auto Tracking White (Atw)
Using presets • are shooting. ABB ACTIVE If the camera is in auto mode, use the ABB END mode ( out). • Set the WHITE BAL switch to PRST. is used). • Auto Tracking White (ATW) preset in the PRST position. Guide to the preset values You can allocate the ATW feature to one of the P5.6K (5600 K): outdoors... -
Page 40: Shooting Techniques For Different Targets
Shooting techniques for different targets Low-angle shooting Zebra pattern and use the START/STOP button on the handle to check the brightness of the subject. • to prevent inadvertent use of the START/STOP • Very bright needed. • You can remove most overexposed parts by adjusting the iris and shutter speed in the manual press the ZEBRA button. -
Page 41: Checking And Displaying Shooting Status
Checking and displaying shooting status When recording in 480i mode, you can change the Select the aspect ratio in the setup menus, CAMERA SETUP screen, ASPECT CONV. (Page 100) • For menu operation (Page 94) SIDE CROP: The left and right edges of the image are cut. button during recording standby or recording, all the information including the setting status of the shooting functions and a list of functions allocated... -
Page 42: Adding Effects To Images
Shooting techniques for different targets (continued) Using the USER buttons You can allocate one of sixteen features to each of the three USER buttons. hand. Use these buttons to change shooting settings Press the OIS button to turn the function on and off. -
Page 43: Waveform Monitor Function
After backup recording, check the menu item settings before you operate the camera- recorder. • • If you use another AG-HPX170P as the display. external unit for backup recording, select • assist function is used. unit and set it to MCR mode. -
Page 44: 2-Slot Continuous Recording
Shooting techniques for different targets (continued) 2-slot continuous recording This function adds text memos at the video points You can also record continuously on three or TEXT MEMO function has been allocated, the text On the thumbnail screen you can select only those inserted into an empty slot (immediately after pre- then either display those clips or play them back. -
Page 45: Last Clip Delete Function
LAST CLIP DELETE function last recorded clip. dialog on the screen. Select YES, and the last recorded clip is deleted and “LAST CLIP DELETE OK” is displayed. • Select NO to cancel clip deletion. • made to the MCR or PC mode or the recording format has been changed after completing a back on. -
Page 46: Using The Special Recording Functions
Using the special recording functions Making the settings in the RECORDING SETUP screen (Page 104) enables special recording functions such as Pre-recording, Interval Recording, One Shot Recording, and Loop Recording. These special recording functions can be used only when the settings below are established. •... -
Page 47: One-Shot Recording (One-Shot Rec)
• Operation is not possible even if only one of • When continuous one-shot recording the inserted cards is DIR ENTRY NG CARD. is performed, there may be delays in (Page 91) • After interval recording has started, a • After one-shot recording has started, a recordable P2 card cannot be used even if it recordable P2 card cannot be used even if it... - Page 48 Using the special recording functions (continued) • input recording. • • Operation is not possible even if only one of the inserted cards is DIR ENTRY NG CARD. (Page 91) • Stopping may take some time. • lamps change from blinking to fully lit up. •...
- Page 49 • SHUTTER button SPEED SELECT button reduce focal depth. • BARS SHUTTER SPEES SELECT shutter speed has been reduced so it is CH1 SELECT CH2 SELECT INPUT1 INPUT2 INT(L) INT(R) recommended that the unit be secured to a INPUT1 INPUT2 INPUT2 MIC POWER+48V AUDIO...
- Page 50 Synchro scan lights and mercury-vapor lamps, the luminance Set the shutter speed of the synchro scan (used the setup menus, SCENE FILE screen, SYNCRO SCAN. (Page 98) • periodically. such subjects. • shoot PAL system television screens. • When the OPERATION TYPE option in the SCENE FILE screen (page 98) is set to FILM Progressive Shutter speed...
-
Page 51: Switching Audio Input
Switching Audio Input Using the built-in microphone During shooting, you can record up to four sound to be recorded on each of the channels to Switch the CH1 SELECT switch to INT (L). the built-in microphones, external microphones or • Audio from the built-in microphone Lch is recorded to audio channel 1. - Page 52 Switching Audio Input (continued) Use the CH1 SELECT switch to select the input signal to be recorded to audio channel 1. INT (L): Audio from the built-in microphone Lch is recorded to audio channel 1. INPUT 1: Audio from a device connected to INPUT 1 terminal is recorded to channel 1.
- Page 53 The settings according to the variety of shooting circumstances are stored in each position of scene Set the POWER switch to ON. In the setup menus, select the SCENE FILE screen. • For menu operation (Page 94) • You can also use the menu buttons on the remote control.
- Page 54 When the screen shown below appears, Press the Operation lever to select YES use the Operation lever to enter a 6- when the screen shown below appears. (To return to the menu level above, press the Set the same as user information. (Page 61) MENU button.) •...
-
Page 55: Sd Memory Cards
Push the Operation lever in the e or r direction to select WRITE and press it can also load them from the card. again. • SCENE FILE (SD CARD) FILE SELECT • Insert the SD memory card into the unit. READ ––––... - Page 56 Press the MENU button four times to cancel the menu mode. and push the Operation lever . When reading is completed, READ OK appears. 1) Perform steps 1 to 4. 2) Push the Operation lever in the e or r direction to select a character, then push it in the q direction to move to the next character.
-
Page 57: Clip Metadata
Clip metadata SHOOT: You can add the video and audio systems, name of the videographer, shooting location, text memos This indicates the SHOOTER (name of the and other information to the video data you have videographer), START DATE (date and time at recorded on the P2 card. -
Page 58: Using The Counter
Using the Counter Counter display 1394TC preset mode When shooting using a multi-camera, you can time has elapsed during shooting or playback. synchronously set the initial values of TC. Press the COUNTER button. Each time you press the button, the display the SLAVE. -
Page 59: Recharging The Built-In Battery
Recharging the built-in battery Specifying the time code (TC PRESET) Set TC PRESET so you can record a value of your time. “ choice as the initial setting for the time code to be used at the start of recording. charge. - Page 60 Push the Operation lever in the q direction to move to the next digit, then push it in the e or MENU r direction to select a value. TC PRESET MONTH h 0 0 m 0 0 s 0 0 f With this unit, the time code value is adjusted in +/–...
-
Page 61: Setting User Information
Setting user information Set the user information. Push the Operation lever in the e or r memo (information such as the date and time) in direction to select user information characters. the hexagonal format on the sub code track area. •... - Page 62 Push the Operation lever in the e direction to move to YES and press it again. UB PRESET PRESET OK? YES – –– PUSH STILL MENU...
Need help?
Do you have a question about the AG-HPX170P and is the answer not in the manual?
Questions and answers