Table of Contents
Advertisement
Installation, Operation,
and Maintenance
Wireless Comm
Only qualified personnel should install and service the equipment. The installation, starting up, and
servicing of heating, ventilating, and air-conditioning equipment can be hazardous and requires specific
knowledge and training. Improperly installed, adjusted or altered equipment by an unqualified person could
result in death or serious injury. When working on the equipment, observe all precautions in the literature
and on the tags, stickers, and labels that are attached to the equipment.
November 2012
WCI
WCI
WCI
WCI
WCI
WCI
SAFETY WARNING
WCI
WCI
WCI
WCI
WCI
WCI
BAS-SVX40A-EN
WCI
WCI
Advertisement
Table of Contents

Subscribe to Our Youtube Channel
Related Manuals for Trane Wireless Comm


Summary of Contents for Trane Wireless Comm
- Page 1 Installation, Operation, and Maintenance Wireless Comm SAFETY WARNING Only qualified personnel should install and service the equipment. The installation, starting up, and servicing of heating, ventilating, and air-conditioning equipment can be hazardous and requires specific knowledge and training. Improperly installed, adjusted or altered equipment by an unqualified person could result in death or serious injury.
-
Page 2: Introduction
This document and the information in it are the property of conditioning industry. All technicians who handle Trane and may not be used or reproduced in whole or in refrigerants must be certified. The Federal Clean Air Act part, without the written permission of Trane. Trane... -
Page 3: Table Of Contents
Table of Contents Introduction ............2 Warnings, Cautions, and Notices . - Page 4 Slow communication ......... 25 Replacing a Failed WCI .
-
Page 5: General Information
Wireless zone sensors Quantity of WCIs per Network Each Trane wireless network can have a total of 31 WCIs (30 member WCIs plus 1 coordinator WCI). Each network requires one WCI to function as network coordinator. Quantity of Networks per Tracer SC A Tracer SC can support up to 8 wireless networks. -
Page 6: Dimensions
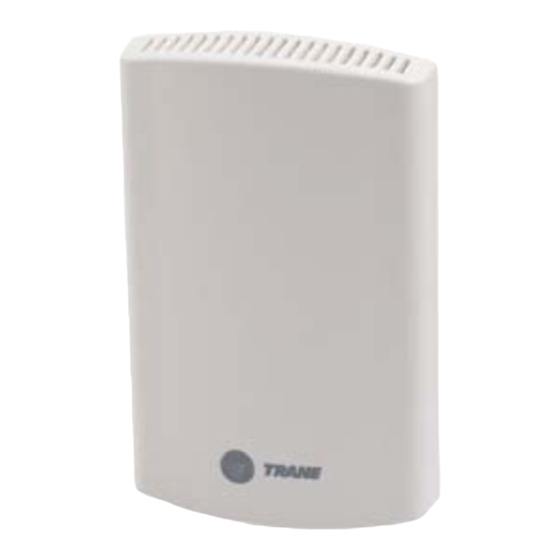
General Information Part number Description Bulk version of X13790901, no wiring harness, no installation instructions. For factory ordering X13790903 in bulk. Bulk version of X13790902, no wiring harness, no installation instructions. For factory ordering X13790904 in bulk. X13641194 Outdoor enclosure to protect WCI from harsh environments or wet indoor environments. Dimensions The dimensions of the WCI enclosure are as follows: 2.896 in. -
Page 7: Specifications And Agency Compliance
General Information Specifications and Agency Compliance Specifications Operating temperature -40 to 158ºF (-40 to 70ºC) Storage temperature -40 to 185ºF (-40 to 85°C) Storage and operating humidity range 5% to 95% relative humidity (RH), non-condensing 24 Vac/Vdc nominal ± 10% Voltage If using 24 Vac, polarity must be maintained. - Page 8 Signal quality is more greatly affected by walls, barriers, and general clutter. Note that sheetrock walls and ceiling tiles offer little restriction to the propagation of the radio signal throughout the building as opposed to concrete or metal barriers. More details information, including wiring schematics, are available at http://www.trane.com. BAS-SVX40A-EN...
-
Page 9: Location Considerations
WCIs so that the number of metal and concrete barriers between pairs of devices is minimal. In general, sheetrock walls and ceiling tiles are not of concern. For more detailed information about WCI placement, see the Wireless Comm Network Design Best Practices Guide (BAS-SVX55). -
Page 10: Wci Addressing
UC/BCI UC/BCI UC/BCI UC/BCI UC/BCI UC/BCI UC/BCI UC/BCI Network Network Network Network Tracer SC Group Tracer SC Group Note: The Wireless Comm Network Design Best Practices Guide (BAS-SVX55) provides an example of network addressing from a floor plan perspective. BAS-SVX40A-EN... -
Page 11: Setting Wireless Zone Sensor Receiver Addressing
2. Choose unit controller and wireless zone sensor addresses so that no two wireless zone sensors sharing the same address are within radio range of each other. (Addresses above 127 may be used for Wireless Comm systems; see Wireless Comm Network Design Best Practices Guide (BAS-SVX55) for more information.) 3. -
Page 12: Mounting And Wiring The Wci
Mounting and Wiring the WCI Follow these instructions: WARNING Hazardous Service Procedures! Disconnect all electric power, including remote disconnects before servicing. Follow proper lockout/tagout procedures to ensure the power can not be inadvertently energized. Failure to disconnect power before servicing could result in death or serious injury. Controller Applications 1. - Page 13 Note: Wiring between a WCI and a controller cannot exceed 656 ft (200 m). If the wiring harness does not provide enough length, use 18 AWG (24 pF/ft max.) communication wire (Trane purple wire). • To wire the WCI to a Tracer SC, see Figure 6, p.
- Page 14 Mounting and Wiring the WCI Figure 6. Wiring the WCI to a Tracer SC Connect both 2-connector screw terminal blocks to WCI wiring either of the IMC terminals Gray = LINK - on the PM014. Blue = LINK + Black = Ground Red = 24 Vdc Tracer SC PM014...
- Page 15 Mounting and Wiring the WCI Figure 8. Wiring the WCI to a UC400 or a UC600 Gray = LINK - Blue = LINK+ Black = Ground Red = 24 Vdc IM C + 24 LINK Figure 9. Wiring the WCI to a BCI-I Attach jumper at BI1 to enable wireless communication.
-
Page 16: Repeater Applications
Mounting and Wiring the WCI Repeater Applications Note: For more information about the use of repeaters with Wireless Comm, see the Wireless Comm Network Design Best Practices (BAS-SVX55). To install a WCI to function as a repeater: 1. Remove power from the controller that is to have the WCI wired to it. -
Page 17: Establishing The Network
Establishing the Network When all aspects of hardware installation are complete, you are ready to power up the system and establish the network. Before you perform these tasks, ensure that all work described in the “WCI Addressing, ” p. 10 “Mounting and Wiring the WCI, ”... - Page 18 Establishing the Network On power-up, the WCI goes through a check list and updates LED activity according to the type of device associated with the WCI and the status of the WCI in the network. The LED flash patterns vary depending on current conditions. LED behavior is described in Table Table 2.
-
Page 19: Three Ways To Establish A Wireless Network
Establishing the Network Three Ways to Establish a Wireless Network A wireless network can established: • After a Tracer SC has been installed. • Prior to Tracer SC installation. • On a network that will not have a Tracer SC installed on it. Establishing the Network After Tracer SC Installation If a Tracer SC is installed prior to establishing the wireless network, the WCI that is installed on a Tracer SC automatically becomes the network coordinator after power is applied to the Tracer SC. -
Page 20: Wcis As Zone Sensor Receivers
Establishing the Network 3. Observe the yellow OPEN_NET LED illuminate on the coordinator WCI. This LED remains lit for 1 hour, indicating that the network is open to allow WCIs with matching addresses to join the network for that duration. After each WCI joins, the 1 hour timer starts over. Notes: If the network closes because the timer has expired, you can open the network for an additional hour by pressing the OPEN_NET button. - Page 21 Establishing the Network Note: To set up the addressing for this function, see “Setting Wireless Zone Sensor Receiver Addressing, ” p. Figure 13. Wireless zone sensor/receiver association SNSR OPEN NET RX LINK Notes: To observe the radio signal strength between the sensor and receiver, press the Test button on the sensor.
-
Page 22: Modifying The Network
Modifying the Network This section describes how to modify an established wireless network. Most modifications can be made by using either the Tracer TU service tool or the WCI. To use Tracer TU, you must establish communication with a wireless network and attach to a wireless device. -
Page 23: Removing A Wci From A Network
Modifying the Network Removing a WCI from a Network If a coordinator WCI fails, the network ceases to exist. If the other WCIs that were members of the disbanded network find an open network within radio range, they will try to join that network. To prevent that from occurring, you can remove WCIs from the network until the coordinator WCI is replaced. -
Page 24: Troubleshooting
Troubleshooting WCI does not join network Possible cause Explanation/Resolution Give the WCI more time to join. If the network closes before the WCI has joined, re- Not enough time allowed for joining. open if necessary by pressing the OPEN NET button. For factory addressed WCIs, verify addresses with equipment report. -
Page 25: No Communication
Troubleshooting No communication Possible cause Explanation/Resolution If power loss causes communication to be lost, the coordinator WCI will re-initiate the Power loss network as soon as power is returned. If an obstruction causes communication to be lost, the coordinator WCI will re-initiate Signal obstruction the network as soon as communication is regained. - Page 26 Troubleshooting 8. Attach the terminal block on the wiring harness to the receptacle on the new WCI and route the wires as before (through either the back plate or the bottom exit port). 9. If a Tracer SC is present on the network, restore power to the Tracer SC. The network will re- form itself.
-
Page 27: Appendix: Using The Tracer™ Tu Service Tool With Wireless Networks
Appendix: Using the Tracer TU Service Tool with ™ Wireless Networks To monitor, troubleshoot, or make modifications to devices on a wireless network, the Tracer TU service tool must join the network and connect to a device. This appendix describes that process and how to access wireless network management information and functions. - Page 28 Appendix: Using the Tracer™ TU Service Tool with Wireless Networks 3. On the right side of the Startup Task Panel, select TU Adapter - Wireless and then click the Connect button. The Wireless Network Utilities screen appears (Figure 15) showing the group and subnetwork numbers (which correspond to WCI address settings;...
-
Page 29: Managing A Wireless Network And Devices
Appendix: Using the Tracer™ TU Service Tool with Wireless Networks Managing a Wireless Network and Devices After communication has been established between Tracer TU and a wireless network, you can manage the network and the devices on it by connecting to a device on the network. Connecting to a Device To connect to a device: 1. -
Page 30: Wireless Menu
Appendix: Using the Tracer™ TU Service Tool with Wireless Networks Wireless Menu After connecting to a device, a Wireless menu becomes available for wireless network management. To access the menu, select Wireless from the Tools menu. Note: The Wireless menu selections vary depending on how TU is connected to the network (wired or wireless) and what functions are available to the connected device. - Page 31 Appendix: Using the Tracer™ TU Service Tool with Wireless Networks • Open Network: Select to allow a new member to join. Any WCI with a correct rotary address setting that is located within radio range of the open network will join the network. (Similar to OPEN_NET button on WCI.) •...
-
Page 32: Wireless Zone Sensor Enable/Disable
Appendix: Using the Tracer™ TU Service Tool with Wireless Networks Figure 22. Advanced tab Wireless Zone Sensor Enable/Disable If a unit controller’s WCI is a zone sensor receiver, the zone sensor is detected and the necessary references are created automatically. The wireless sensor enable/disable setting in the Setup Parameters screen is enabled (checked) by default. - Page 36 HVAC systems, comprehensive building services, and parts. For more information, visit www.Trane.com. Trane has a policy of continuous product and product data improvement and reserves the right to change design and specifications without notice. © 2012 Trane All rights reserved...
Need help?
Do you have a question about the Wireless Comm and is the answer not in the manual?
Questions and answers