CARDIOSTRONG CST-BX90 Assembly And Operating Instructions Manual
For more information, please visit cardiostrong.com, sport-tiedje.com

Related Manuals for CARDIOSTRONG CST-BX90


Summary of Contents for CARDIOSTRONG CST-BX90
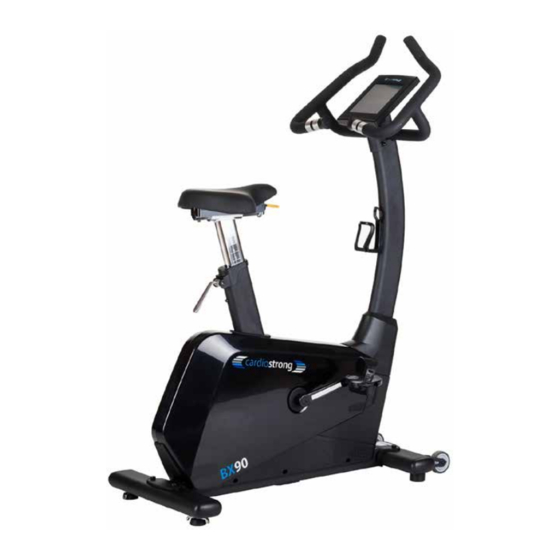
- Page 1 Assembly and Operating Instructions CSTBX90.01.02 Art. No. CST-BX90 Ergometer BX90...
- Page 2 BX90...
- Page 3 Dear Customer, Thank you for deciding for a high-quality training equipment of the brand cardiostrong®, the brand that makes athlete‘s hearts beat faster. cardiostrong® offers a wide range of home fitness equipment like elliptical cross trainers, ergometers, treadmills and rowing machines. cardiostrong® equipment is the optimal equipment for all those who want to train at home independent of goals and fitness level.
-
Page 4: Table Of Contents
CONTENTS GENERAL INFORMATION 1.1 Technical data 1.2 Personal safety 1.3 Electrical safety 1.4 Set-up place ASSEMBLY INSTRUCTIONS, MAINTENANCE AND CARE 2.1 General instructions 2.2 Faults and Troubleshooting 2.3 Maintenance and service calendar 2.4. Battery Pack Care & Maintenance ASSEMBLY 3.1 Package contents 3.2 Assembly instructions OPERATING INSTRUCTIONS 4.1 Console display... - Page 5 WARRANTY INFORMATION DISPOSAL ORDERING ACCESSORIES ORDERING SPARE PARTS 9.1 Service hotline 9.2 Serial number and model name 9.3 Parts list 9.4 Exploded drawing...
-
Page 6: General Information
GENERAL INFORMATION Technical data LCD display of speed in km/h training time in min training distance in km cadence (rotations per minute) calories burnt heart rate (when using the hand sensors or a chest strap) watt resistance level Resistance system: electronic magnetic brake system Resistance level: Watt:... -
Page 7: Personal Safety
Personal safety Before you start using the equipment, you should consult your physician that this type of exercise is suitable for you from a health perspective. Particularly affected are persons who: have a hereditary disposition to high blood pressure or heart disease, are over the age of 45, smoke, have high cholesterol values, are overweight and/or have not exercised regularly in the past year. -
Page 8: Electrical Safety
Electrical safety The equipment requires a 220 - 230V / 50 Hertz mains power supply. The equipment should be connected directly to a grounded plug socket only by means of the power cable supplied. The use of multi-socket adapters or similar is not recommended. -
Page 9: Assembly Instructions, Maintenance And Care
You should therefore immediately replace damaged or worn components. Please contact your contract partner in such a case. The equipment should no longer be used until it has been repaired. When needed, only use original cardiostrong® spare parts. -
Page 10: Faults And Troubleshooting
Check the tightness of all screw connections once a month. In order to be able to guarantee the constructively defined safety level of this equipment, we recommend having the equipment regularly maintained (at least once a year) by specialists (service technicians of your contract partner). The equipment may be cleaned of dust, dirt and sweat using a damp cloth. -
Page 11: Maintenance And Service Calendar
Maintenance and service calendar The following routine work must be done in the specified time intervals: Part Weekly Monthly 2x annually Display console Tighten the pedals Plastic covers Seat rail Legends: C = cleaning; I = inspect Battery Pack Care & Maintenance ADAPTOR: DC 9 V 1000mA AC Adaptor The provided AC Adaptor is the only AC Adaptor you should use to recharge the battery pack. - Page 12 KEEP THE BATTERY PACK CHARGED 40%~80% Lithium-ion (Li-ion) batteries don‘t suffer the memory effect like the old nickel cadmium and nickel–metal hydride rechargeable batteries, so it is best to keep a charge in the batteries at all times. It is best to not let the battery pack charge drop to zero and do not recharge the battery pack to 100% all the time as it will shorten the battery pack‘s lifespan.
- Page 13 BATTERY NO-NO‘s TOO LOW: A 0% charge for a long period of time. If you let the battery pack discharge completely and leave it uncharged for a long period of time the battery pack will eventually become incapable of holding a charge. TOO COLD: 0°C (32°F) The Lithium-ion (Li-ion) battery pack will not charge below freezing.
-
Page 14: Assembly
ASSEMBLY Package contents The package contains the parts represented in the illustration, including a power cable with mains plug. If one of the illustrated parts is missing, please contact your contract partner. T OOL 221A 391A BX90... -
Page 15: Assembly Instructions
Assembly instructions Before starting assembly, look carefully through the individual assembly steps shown and assemble the equipment in the order indicated. Step 1 a) Use a sharp knife, open the carton and lay it flat on the floor. b) Remove all loose components. c) Refer to the checklist and check that everything is present. - Page 16 Step 3 a) Assemble the STABILIZER-BACK [004] with 2 x BOLT [300] tighten firmly. b) Remove the polystyrene block and place it under the front end of the machine. Step 4 a) With the front end now raised off the floor remove packing material.
- Page 17 Step 6 a) Warning: Do NOT force the pedals into their sockets, if they do not screw in easily you may be trying to fit the wrong pedal or you are rotating the pedal in the wrong direction. b) Thread the pedals onto the crank arms.
- Page 18 Step 8 a) Connect the HANDLE BAR HAND PULSE CABLE [707] to HANDLEBAR and HAND PULSE CABLE [704] to COMPUTER. b) Slide the HANDLE BAR - RIGHT [013] and the HANDLE BAR - LEFT [014] into HANDLE BAR POST [002] and secure with 221A 4 x BOLT [391A] + 4 x NUT [221A] + 4 x WASHER [414].
- Page 19 Step 10 a) Plug the AC ADAPTOR [715] into the mains power socket. b) Connect the ADAPTOR [715] into the ADAPTOR SOCKET at the front of the machine. c) The COMPUTER [718] should now be working. If not the re-plug all the COMPUTER CABLE as shown in steps 8 &...
- Page 20 Resistance and Generator System This exercise machine is equipped with: Eddy Current Brake Motorized Resistance System: The Flywheel is lined with an Aluminum Strip and a Bank of Magnets are moved by a Geared Electric Motor. The closer the Magnets are to the moving Aluminum Strip the more „Eddy Currents“ are created causing drag.
-
Page 21: Operating Instructions
OPERATING INSTRUCTIONS Console display Training time displayed during training. TIME Minutes and seconds The STOP MODE Indicator will be lit when you Pause or STOP MODE Stop your workout. RPM: Revolutions Per Minute SPEED: kilometers per hour (km/h) or miles per hour (mph) Units of measurements (either metric or imperial) depends RPM and SPEED on your countries standard measurement system. - Page 22 Select one of four Users U1 U2 U3 U4. NOTE: U0 = Guest User. All input data will not be retained. SEX: Male or Female AGE: in Years only HEIGHT: in centimeters or inches (cm or in) WEIGHT: in kilograms or pounds (kg or lbs) USER SELECT Units of measurements (either metric or imperial) depends on your countries standard measurement system.
-
Page 23: Button Functions
Button functions To activate the RECOVERY PROGRAM that will automatically evaluate your heart rate recovery for one minute immediately after your workout. F1 = Super Fit RECOVERY F6 = Very Unfit NOTE: Be sure to provide the computer with a pulse signal either via the Hand Pulse Sensors or a Chest Band. - Page 24 Three functions: 1. QUICK START the Manual Program: You can bypass all the input selection process by pressing the START Key to begin the Manual Program. 2. Before your workout(i.e. Workout Mode): After inputting your Program Selection Data press the START Key to begin START/STOP your workout.
-
Page 25: User Settings
User settings When the computer powers up the LCD Display will be flashing and requesting data input for the following: USER SELECT U0 or U1~U4 The computer can store four sets of personal user data. This stored information will be used in conjunction with the % Heart Rate Programs and to more accurately calculate Calories (kcal). -
Page 26: Manual Program
From the MAIN MENU press any one of the six PROGRAM Keys at the top of the LCD, or press one of the twelve PROFILE PROGRAM QUICK Keys, or press the START Key to immediately start the MANUAL PROGRAM. If at anytime you wish to return to the Main Menu then simply press the RESET Key. To return to the Main Menu during a workout, you must first press the STOP Key. -
Page 27: Watt Program
There are 12 x PROFILE PROGRAMS to choose from as shown in the diagrams below: 1) QUICK SELECT: Press one of the 12 x PROFILE PROGRAM QUICK Keys. NOTE: To immediately start your workout press the START Key. NOTE: To return to the Main Menu press the RESET Key. 2) To select a Target Value, press the ENTER Key then press the UP and DOWN Keys to select your Target Value/Values. -
Page 28: User Profile Programs
4) Press the START Key when you are ready to begin your workout. During your workout you can adjust the WATT Target Value by pressing the UP and DOWN Keys. WATT ALARM The WATT PROGRAM has an alarm that will sound, and flash three dashes (i.e. ) when you exceed the limitations of the 24 x Resistance Levels versus the WATT Target Value you have chosen reminding you to either PEDAL FASTER or SLOW DOWN accordingly, or change the WATT Target Value by pressing the Up and DOWN Keys. -
Page 29: Random Profile Programs
4.4.5 Random Profile Programs The computer will automatically adjust the Resistance Levels according to the RANDOM PROFILE PROGRAM you select. During your workout if you adjust the Resistance Levels by pressing the UP and DOWN Keys. 1) From the Main Menu, press and keep pressing the RANDOM Key to scroll through an infinite number of RANDOM PROFILE PROGRAMS. -
Page 30: Target Heart Rate Program
2) Press the UP and DOWN Keys to scroll and select either the 55% 75% 90% HEART RATE PROGRAM. Press the ENTER Key to confirm your selection. The computer will automatically calculate your target heart rate based on your selected User and input User Data. -
Page 31: Recovery Program
4.4.8 Recovery Program The RECOVERY PROGRAM is a good way of checking your cardiovascular fitness level as your fitness improves. The RECOVERY PROGRAM will evaluate your cardiovascular fitness level by measuring how quickly your heart rate recovers over a period of one minute immediately at the end of your workout. - Page 32 ENTER Key and Target Values The ENTER Key has multiply functions. To access Target Values use the ENTER Key. 1) From the MAIN MENU choose a workout Program. 2) Then keep pressing the ENTER Key to access the workout Programs Target Values. 3) Press the START Key to begin your workout.
-
Page 33: Workout Instructions
WORKOUT INSTRUCTIONS Heart-rate measuring Pulse measuring via hand sensors The hand sensors integrated in the handles beside the seat allow you to determine your heart rate. You can measure your heart rate by lightly grasping the sensors with both hands at the same time. Blood pressure changes occur due to the heartbeat. The sensors measure the changes to the electric skin resistance caused by it. - Page 34 while exercising. The transmitter turns on automatically once it is put on. In order to allow for a precise measuring, you should moisten the rubber electrodes. This is best done with a special chest strap contact gel, which is also used for ultrasound scans. Note: If you have not been active in doing sports for a longer period of time, you should first go to your physician in order to discuss your training with them.
- Page 35 Example: For a 45-year-old man or woman, the maximum heart rate is 175 (220 - 45 = 175). • The fat burning target zone (55%) is at approximately 96 beats/min. = (220 - age) x 0.55. • The cardio target zone (75%) is at approximately 131 beats/min. = (220 - age) x 0.75.
-
Page 36: 10 Tips For Effective Ergometer Training
10 tips for effective ergometer training 1. Set goals What would you like to achieve with your training? Weight regulation, improved stamina, prevent risk of disease, more mobility, cardiovascular training, etc. In order to achieve your long-term training goal, set individual partial goals, e. g., weekly or monthly goals. -
Page 37: Designing A Workout
9. Workout journal Keep a record of your training sessions. Note the date, resting pulse, active pulse, recovery pulse, resistance level, time, distance, calories burnt and fitness level. 10. Reward yourself Do something good for you and your body after training or after achieving a partial goal. Go to the sauna or a swimming pool. - Page 38 WEEK 5 + 6 Beginner Advanced Days Duration Intensity Duration Intensity 30 min. Moderate speed, keep 40 min. Vary speed, keep resistance low resistance low 30 min. Moderate speed, keep 40 min. Vary speed, keep resistance low resistance low 30 min. Moderate speed, keep 40 min.
-
Page 39: Stretching Exercises For Leg And Chest Muscles
Stretching exercises for leg & chest muscles Trapezius Splenius capitis Sternocleidomastoideus Trapezius Deltoid muscle Pectoralis major Deltoid muscle Elevator scapolae M. Teres major Triceps Rhomboid muscle Dentatus anterior Arm-radius muscle Biceps Major back muscle Obliquus externus Straight abdominal muscle Anconaeus Extensor Sartorius muscle digitorum... - Page 40 3. Exercise: Stretching the calf muscles (gastrocnemius) • Place feet parallel to each other pointing forward, the heels touch the floor • Support yourself on a chair coming from a lunge • Move your body weight to the front leg, press your heel from the rear leg towards the floor and hold the contact •...
-
Page 41: Workout Journal
Workout journal Date Time (min.) Training weight Calories burnt Body weight Ø Pulse Distance Resistance level I feel ... -
Page 42: Warranty Information
WARRANTY INFORMATION cardiostrong‘s fitness equipment is subject to strict quality controls. However, if a fitness equipment purchased from us does not work perfectly, we take it very seriously and ask you to contact our customer service as indicated. We are happy to help you by phone via our service hotline. - Page 43 The terms of use are defined as follows: • Home use: solely for private use in private households up to 3 hours per day • Semi-professional use: up to 6 hours per day (e. g. rehabilitation centers, hotels, clubs, company gyms) •...
-
Page 44: Disposal
Service outside of the warranty period We are also happy to issue an individual cost estimate if there is a problem with your fitness equipment after the warranty has expired, or in cases which do not fall under the terms of the warranty, e. g. normal wear and tear. Please contact our customer service team to find a quick and cost-effective solution to your problem. -
Page 45: Ordering Accessories
ORDERING ACCESSORIES Sport-Tiedje floor mat, size L Art. no. ST-FM-L Polar Transmitter Chest Strap T34 uncoded Art. no. T34 Chest-strap contact gel 250ml Art. no. BK-250 Fitness equipment care kit Art. no. HF-500... -
Page 46: Ordering Spare Parts
9:00 - 18:00 10:00 - 17:00 Serial number and model name Before assembling your equipment, find the serial number on the white sticker and enter it in the appropriate space. Serial number: Brand / category: Model name: cardiostrong ergometer BX90 BX90... -
Page 47: Parts List
Parts list Description Qty. Description Qty. MAIN FRAME PEDAL ‐ RIGHT HANDLE BAR POST FLYWHEEL STABILIZER ‐ FRONT J - BOLT STABILIZER ‐ BACK PLUG HORIZONTAL SEAT ADJUSTER DRIVE PULLEY SEAT POST SEAT POST ADJUSTER‐ SLIDERPLUG SEAT HOLDER SEAT CRANK ‐ LEFT POLY V DRVE BELT J2 CRANK ‐... - Page 48 Description Qty. Description Qty. 212A 423A WASHER 433A WASHER WASHER SCREW 221A SCREW SCREW SCREW SCREW BOLT SCREW BOLT TENSION WHEEL‐ SPRING BOLT TENSION CABLE BOLT MOTOR WITH CABLE 334C BOLT COMPUTER CABLE WITH SENSOR 341A BOLT HAND PULSE CABLE 342A BOLT COMPUTER CABLE...
-
Page 49: Exploded Drawing
Exploded drawing... - Page 50 DISCLAIMER ©2010 cardiostrong® is a registered brand of the company Sport- Tiedje GmbH. All rights reserved. Any use of this trademark without the explicit written permission of Sport-Tiedje is prohibited. Product and manual are subject to change. Technical data can be changed without advance notice.
- Page 52 Ergometer BX90...
Need help?
Do you have a question about the CST-BX90 and is the answer not in the manual?
Questions and answers