Avery Dennison Monarch 9419 Manual
Hide thumbs
Also See for Monarch 9419:
- Reference manual (150 pages) ,
- Administrator's manual (57 pages) ,
- Installation manual (2 pages)

Subscribe to Our Youtube Channel
Related Manuals for Avery Dennison Monarch 9419


Summary of Contents for Avery Dennison Monarch 9419
- Page 1 EQUIPMENT MANUAL Avery Dennison ® Monarch ® 9419 Printer TC9419EM Rev. AA 9/16 © 2016 Avery Dennison Corp. All rights reserved.
- Page 2 Each product and program carries a respective written warranty, the only warranty on which the customer can rely. Avery Dennison Corp. reserves the right to make changes in the product, the programs, and their availability at any time and without notice. Although Avery Dennison Corp.
-
Page 3: Table Of Contents
T A B L E O F C O N T E N T S GETTING STARTED ........................1-1 Audience ........................... 1-1 Printer Overview ........................1-2 Connecting the Power Cable ....................... 1-4 Establishing Communications...................... 1-5 Using the Control Panel ......................1-5 Printing a Test Label ........................ - Page 4 ii Equipment Manual...
-
Page 5: Getting Started
G E T T I N G S T A R T E D The Avery Dennison® Monarch® 9419 Printer prints on thermal transfer (ribbon) and thermal direct labels or tags. The printer prints labels continuously (in one strip) or on- demand (one label at a time). -
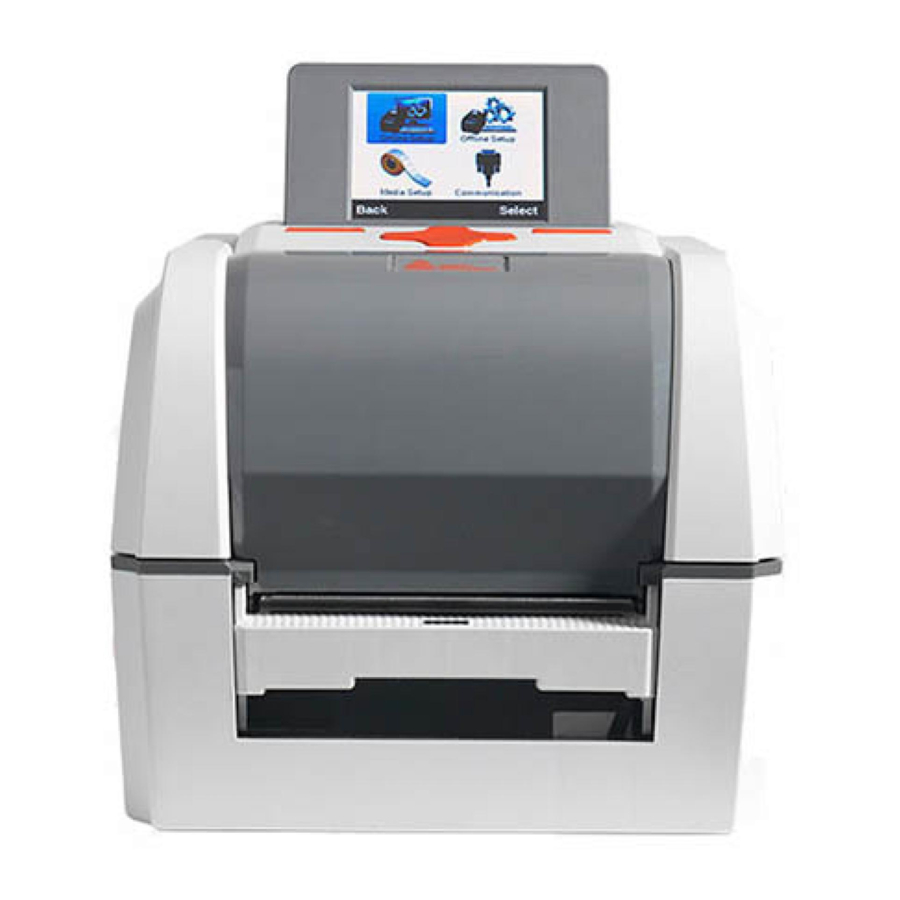
Page 6: Printer Overview
P r i n t e r O v e r v i e w Display Navigation Button Function Button Cover Latch Function Button Power Button MicroSD Slot Fan-Fold Slot Ethernet Device USB Serial Port Host USB Power Socket 1-2 Equipment Manual... - Page 7 Ribbon Take-up Cover Die Cut Sensor Ribbon Take-up Gear Supply Guides Ribbon Cover Supply Guide Button Supply Holder Black Mark Sensor Supply Holder Lock Platen Roller Ribbon Take-up Reel Peel Bar Printhead Getting Started 1-3...
-
Page 8: Connecting The Power Cable
Ribbon Reel Ribbon Cover C o n n e c t i n g t h e P o w e r C a b l e The power supply automatically switches between 115V or 230V. No operator settings are required. To connect the power supply: Place the printer in a location that allows easy access to the front of the... -
Page 9: Establishing Communications
E s t a b l i s h i n g C o m m u n i c a t i o n s The printer can establish communications using the serial port, USB port, Ethernet port, or wirelessly (if installed). Establishing communications is required for online mode. Before the printer can accept print jobs from the host, you must: ♦... -
Page 10: Printing A Test Label
Menu Item Description Online Setup Configuring the printer for use while connected to a host. Refer to the Online Mode System Administrator’s Guide. Offline Setup Configuring the printer for use in offline mode (stand-alone mode) when the printer receives data from a keyboard or scanner. The printer is not connected to a host. -
Page 11: Loading Supplies
L O A D I N G S U P P L I E S This chapter describes how to load: ♦ a roll of labels or tags ♦ peel mode supplies ♦ fan-fold supply. Ask your System Administrator which type of supply to use: Thermal Direct heat activated supplies that do not use a ribbon for printing. -
Page 12: Loading Rolled Supply
L o a d i n g R o l l e d S u p p l y Adjust the platen roller based on supply thickness if necessary. See “Adjusting the Platen Roller” for more information. Turn the cover latches and lift the cover. Use your thumb to separate the supply holders. - Page 13 Push the supply guide button to move the supply guides until they barely touch the supply. Lay the supply over the platen roller. Close the cover until you hear it click into place. Press Feed to position the supply under the printhead. Note: If this is the initial printer setup or if you change the supply type (from die cut to black mark, for example), see...
-
Page 14: Loading Labels For Peel Mode
L o a d i n g L a b e l s f o r P e e l M o d e In peel mode, the printer separates the liner from the label. ♦ minimum feed length is 1.0 inches. ♦... - Page 15 Feed the supply into the supply path. Push the supply guide button to move the supply guides until they barely touch the supply. Lay the supply over the platen roller. Remove the labels from the first 8 inches of the liner. Press down and completely open the peel door.
- Page 16 12. Press Feed to position the supply under the printhead. Note: If this is the initial printer setup or if you change the supply type (from die cut to black mark, for example), see “Setting the Printer’s Supply Type/Calibrating Supply.” 2-6 Equipment Manual...
-
Page 17: Loading Tag Supply With The Optional Cutter
L o a d i n g T a g S u p p l y w i t h t h e O p t i o n a l C u t t e r Follow these steps to load supply through the optional cutter. If using online mode, the cutter is enabled with the job. - Page 18 Feed the supply into the supply path. Push the supply guide button to move the supply guides until they barely touch the supply. Feed the supply over the platen roller and through the cutter’s opening. Close the cover until you hear it click into place. Press Feed to position the supply under the printhead.
-
Page 19: Loading Fan-Fold Supply
L o a d i n g F a n - F o l d S u p p l y Place the fan-fold supply stack behind the printer, label side up. Adjust the platen roller based on supply thickness if necessary. See “Adjusting the Platen Roller”... - Page 20 Push the supply guide button to move the supply guides until they barely touch the supply. Lay the supply over the platen roller. Close the cover until you hear it click into place. Press Feed to position the supply under the printhead. Note: If this is the initial printer setup or if you change the supply type (from die cut to black mark, for example), see...
-
Page 21: Setting The Printer's Supply Type/Calibrating Supply
S e t t i n g t h e P r i n t e r ’ s S u p p l y T y p e / C a l i b r a t i n g S u p p l y Calibrating supply must be done on the initial printer setup, any time the printer has been reset, or whenever the supply type is changed (from die cut to black mark for example) or from tags to labels. -
Page 22: Setting The Feed Mode In Online Mode
S e t t i n g t h e F e e d M o d e i n O n l i n e M o d e The printer prints in either continuous or on-demand mode. In continuous mode, the printer prints all the labels in a batch (print job) in one strip. -
Page 23: Loading Ribbon
L O A D I N G R I B B O N This chapter describes how to load ribbon. If you are using thermal direct supplies, do not load a ribbon. Your System Administrator must set the printer to use a ribbon. About Ribbons ♦... - Page 24 Open the ribbon take-up cover and the ribbon cover. Completely insert the ribbon reel into the full ribbon as shown. 3-2 Equipment Manual...
- Page 25 Press the open end of the ribbon core into the spring and guide the core until it locks in place. Match the yellow end of the core to the yellow end of the reel. Insert the take-up reel into the core. Note: Use your empty ribbon core as the take-up core.
- Page 26 Press the open end of the take-up core into the spring and guide the core until it locks in place. Match the yellow end of the core to the yellow end of the reel. Unwind a few inches of ribbon from the full roll with the ink side out. 3-4 Equipment Manual...
- Page 27 Use the adhesive on the ribbon leader to attach it to the take-up core. Turn the ribbon take-up gear until the leader is past the printhead. 10. Close the ribbon take-up cover and the ribbon cover. 11. Close the cover until you hear it click into place. Loading Ribbon 3-5...
- Page 28 3-6 Equipment Manual...
-
Page 29: Printing
P R I N T I N G The printer operates in either online or offline mode to print labels in one strip continuously or on-demand (prints one label, once that label is removed, the next label prints). O n l i n e P r i n t i n g When the printer receives print data, jobs begin printing automatically. -
Page 30: Pausing While Printing
P a u s i n g W h i l e P r i n t i n g Press Pause to interrupt printing. Press Pause again to resume printing. C a n c e l i n g P r i n t i n g Press Pause to interrupt printing. -
Page 31: Care & Maintenance
C A R E & M A I N T E N A N C E This chapter tells you how to ♦ clear label jams ♦ clean the printer. CAUTION: Do not use sharp objects to clean the printhead or touch the printhead with your fingers. -
Page 32: Replacing The Printhead
Use a cotton swab moistened with 100% isopropyl alcohol to clean the printhead, peel bar, and platen roller when you see adhesive build-up or after clearing a jammed label. Clean Printhead Sensor Peel Bar Platen Roller Turn the platen roller with your finger to make sure it is clean all the way around. Once the printer is dry, reload the supply and ribbon. - Page 33 Remove the ribbon and supply. Use your thumb to open the printhead tabs. Tabs are located on either side of the printhead. Once both sides are released, the printhead drops down. Carefully unplug the orange printhead cable and the green grounding wire. Connect the green grounding wire and the orange printhead cable to the new printhead.
-
Page 34: Replacing The Platen Roller
R e p l a c i n g t h e P l a t e n R o l l e r Turn off the printer. Turn the cover latches and lift the cover. Remove supply. Press down and completely open the peel door. Then, remove the peel bar. Press against the left side (with the spring) of the peel bar and lift up to remove. -
Page 35: Troubleshooting
T R O U B L E S H O O T I N G This chapter explains how to adjust print quality and contains basic troubleshooting information. If you need to call Technical Support, print a test label first. See “Printing a Test Label”... -
Page 36: Setting The Print Contrast In Offline (Stand-Alone) Mode
Setting the Print Contrast in Offline (Stand-alone) Mode Having the correct print contrast/density setting is important because it affects bar code scan ability and printhead life. To change the print contrast: From the Main Menu, select Menu. Press the navigation button until Offline Setup is highlighted. Press Select. Press Select when Contrast is highlighted. - Page 37 Problem Action Ribbon is wrinkled. Check ribbon. Check supply loading. Make sure the supply guides touch the edges of the supply. Check printhead density/contrast setting. See “Setting the Print Contrast.” Partially printed data. Clean the printhead. Resend the batch (print job). A gray line prints on a Clean the printhead and platen roller.
- Page 38 6-4 Equipment Manual...
-
Page 39: Specifications
S P E C I F I C A T I O N S P r i n t e r Height: 7.8 inches (198 mm) with display down 10.0 inches (254 mm) with display upright Width: 8.8 inches (223 mm) Depth: 13.1 inches (333 mm) Weight:... -
Page 40: Supplies
S u p p l i e s Supply Type: Labels and tags, perforated or continuous Supply Widths: 0.75 inches (19mm) minimum 4.4 inches (112mm) maximum Supply Lengths: 0.12 inch (3mm) minimum for non-peel mode 1.0 inch (25.4mm) minimum for peel mode 6.0 inches (152.4mm) maximum for peel mode 10 inches (254mm) recommended for non-peel mode longer lengths are supported up to 1000 inches (25,400mm) - Page 42 AMERICAS 170 Monarch Lane Miamisburg, OH 45342 937 865 2123 (direct) Tel +800 543 6650 (8:00 a.m. – 6:30 p.m., EDT) Fax +937 865 6663 ASIA No. 7 Chun Ying Street Tseung Kwan O Industrial Estate New Territories, Hong Kong Tel +852 2372 3169 Fax +852 2995 0014 WESTERN EUROPE...
Need help?
Do you have a question about the Monarch 9419 and is the answer not in the manual?
Questions and answers