Avery Dennison Monarch 9416 XL User Manual
Printer custom kit
Hide thumbs
Also See for Monarch 9416 XL:
- Reference manual (174 pages) ,
- Equipment manual (42 pages) ,
- Addendum (6 pages)
Table of Contents
Advertisement
Advertisement
Table of Contents

Related Manuals for Avery Dennison Monarch 9416 XL


Summary of Contents for Avery Dennison Monarch 9416 XL
- Page 2 Each product and program carries a respective written warranty, the only warranty on which the customer can rely. Avery Dennison Corp. reserves the right to make changes in the product, the programs, and their availability at any time and without notice. Although Avery Dennison Corp. has made every effort to provide complete and accurate information in this manual, Avery Dennison Corp.
-
Page 3: Table Of Contents
T A B L E O F C O N T E N T S INTRODUCTION ...................1-1 Overview ....................1-1 Unpacking the Kit Components ..............1-2 Connecting the Cable................1-2 Using the Keyboard .................1-3 SETTING UP THE PRINTER ................2-1 Setting the Supply Type ................2-2 Setting the Feed Mode ................2-3 Setting the Ribbon ...................2-4 Sending the Configuration ................2-5... -
Page 5: Introduction
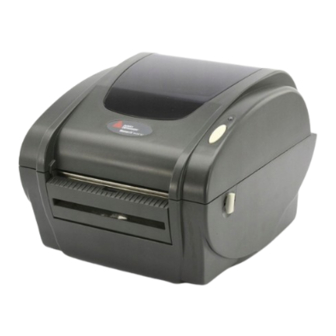
I N T R O D U C T I O N This User Manual contains information about using the KU008 Keyboard with your Monarch 9416 or 9416 XL printer. For information about supply loading or care and maintenance, refer to the printer’s Equipment Manual on our Web site. - Page 6 U n p a c k i n g t h e K i t C o m p o n e n t s After you unpack the kit, you should have the keyboard (part number 126364), the printer with a power supply, power cord, and external supply holder (part number 126894).
- Page 7 U s i n g t h e K e y b o a r d The keyboard has full alphabetic keys with numeric keys, function keys, four arrow keys, and several special keys. Introduction 1-3...
- Page 8 Control Keys Description Returns the display to the next higher Exit menu. Selects the displayed menu item or Enter accepts entered data. Form Displays the list of available formats. or Displays the next menu item. Right Arrow Down Arrow ...
-
Page 9: Setting Up The Printer
S E T T I N G U P T H E P R I N T E R This chapter describes how to set the supply type set the feed mode set the ribbon save the configuration. Main Menu Format 1-5 Prin ter... -
Page 10: Setting The Supply Type
Press Enter. You see PRINTER MENU SUPPLY TYPE Press or to move through the Printer Setup menu. S e t t i n g t h e S u p p l y T y p e The printer has a black mark/die cut sensor, which it uses to properly calibrate supplies. -
Page 11: Setting The Feed Mode
S e t t i n g t h e F e e d M o d e There are two feed modes: peel and no peel (continuous). Peel mode separates the backing paper from the label. No peel (continuous) mode prints labels in a continuous strip. -
Page 12: Setting The Ribbon
S e t t i n g t h e R i b b o n Thermal direct supplies do not require a ribbon. Thermal Transfer supplies do require a ribbon. From the Printer Setup menu, press or until you see RIBBON Press Enter. -
Page 13: Sending The Configuration
S e n d i n g t h e C o n f i g u r a t i o n When you change the printer’s configuration, you must send the new settings to the printer or it uses the default settings of Black Mark, No Peel, and No Ribbon. - Page 14 2-6 User Manual...
-
Page 15: Printing Labels
P R I N T I N G L A B E L S This chapter describes printer setup and the data entry procedures for each format. Note: If you make a mistake entering data, press to backspace one character, or press Clear to erase all entered data. -
Page 16: Format 1
F o r m a t 1 Load 1.2” width x 1.1” length supply. Enter the data as prompted: Line 1 Line 2 Line 3 Line 4 Prompt What You Do LINE 1 Enter up to ten characters. Press Enter. LINE 2 Enter up to ten characters. - Page 17 F o r m a t 3 Load 1.2” width x 1.1” length supply. Enter the data as prompted: Line 1 UPC A Barcode Line 2 Prompt What You Do LINE 1 Enter up to 12 characters. Press Enter. UPCA Barcode Enter up to 12 numeric digits.
- Page 18 F o r m a t 4 Load 1.5” width x 2.7” length supply. Enter the data as prompted: Line 1 Line 2 Line 3 Line 4 UPC Barcode Line 5 Prompt What You Do LINE 1 Enter up to 15 characters. Press Enter. LINE 2 Enter up to 15 characters.
- Page 19 F o r m a t 5 Load 1.5” width x 2.7” length supply. Enter the data as prompted: Line 1 Line 2 Line 3 Line 4 Line 5 Line 6 Prompt What You Do LINE 1 Enter up to 15 characters. Press Enter. LINE 2 Enter up to 15 characters.
-
Page 20: Using The About Menu
U s i n g t h e A b o u t M e n u To display version or copyright information, press Form. Press or until you see “About.” Press Enter. You can also display version or copyright information by pressing Exit when you see the first prompt in any format. -
Page 21: Troubleshooting
T R O U B L E S H O O T I N G This chapter helps you correct some problems that may occur. Problem Action The keyboard display Make sure the printer is on and the is blank. keyboard cable is securely attached to the printer. - Page 22 4-2 User Manual...
Need help?
Do you have a question about the Monarch 9416 XL and is the answer not in the manual?
Questions and answers