
Related Manuals for Avery Dennison Monarch FreshMarx 9417


Summary of Contents for Avery Dennison Monarch FreshMarx 9417
- Page 1 System Administrator’s Guide Monarch ® FreshMarx ® 28028 9417 Printer ©2013 Avery Dennison Corp. All rights reserved. TC9417SA Rev. AA 7/13...
- Page 2 Avery Dennison reserves the right to make changes in the product, the programs, and their availability at any time and without notice. Although Avery Dennison has made every effort to provide complete and accurate information in this manual, Avery Dennison shall not be liable for any omissions or inaccuracies.
-
Page 3: Table Of Contents
T A B L E O F C O N T E N T S INTRODUCTION ............................ 1-1 Using This Manual ..........................1-1 Audience ............................1-1 About the Printer ..........................1-2 SETTING THE TIME AND DATE ...................... - Page 4 UPDATING THE PRINTER WITH USB ..................... 6-1 Updating Your Product Data File via USB ................... 6-1 Updating Your Application Software via USB ..................6-3 PERFORMING MAINTENANCE ....................... 7-1 Printing Diagnostic Labels ......................... 7-1 Version Information ........................
-
Page 5: Introduction
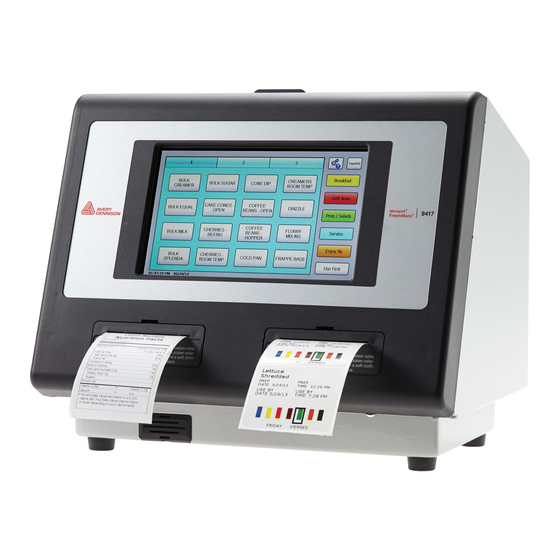
I N T R O D U C T I O N Use the Monarch® FreshMarx® 9417 Food Freshness System for product freshness and to label inventory. The printer is available as a single printer (left printer only) or dual printer (left and right printer). -
Page 6: About The Printer
A b o u t t h e P r i n t e r The printer has a touch screen and a built-in FreshMarx application. The printer is available as a single printer (left printer only) or dual printer (left and right printer). You may have a custom application that differs slightly from the examples in this manual. -
Page 7: Setting The Time And Date
S E T T I N G T H E T I M E A N D D A T E This chapter tells you how to set the time and date. format the time and date. Note: You may have a custom application that differs slightly from the examples in this manual. - Page 8 4. Press Set Time / Date. Use and to set the time and date. Touch AM/PM to toggle the setting between AM and PM. 5. Press OK when you are finished. 2-2 System Administrator’s Guide...
-
Page 9: Formatting The Time And Date
F o r m a t t i n g t h e T i m e a n d D a t e To change the way the time/date appears on printed labels: 1. From the Admin Tools screen, press System Settings. 2. - Page 10 4. Use the drop down menu to select the date format. 5. Use the and buttons to select your Time Zone. 6. Select the checkbox if you want the printer to automatically adjust the time for Daylight Saving Time. 7.
-
Page 11: Setting Up The Printer
S E T T I N G U P T H E P R I N T E R This chapter tells you how to adjust where data prints on the label. adjust the backlight. change the Administrator’s Password. ... - Page 12 3. Enter the Admin password and press Enter. The default password is 1234. 4. Press System Settings. 3-2 System Administrator’s Guide...
- Page 13 5. Press Print Settings. Adjust the print settings for the Left and Right Printer: 6. Use the and buttons to adjust the X Print Position. Increasing the value moves the printed text to the right. Decreasing the value moves the printed text to the left. The range is -100 to 100 and the default is 0.
-
Page 14: Adjusting The Backlight
A d j u s t i n g t h e B a c k l i g h t You can adjust the brightness of the screen. The range is 0 to 100 percent. 1. From the Admin Tools screen, press System Settings. 2. -
Page 15: Setting The Options
S e t t i n g t h e O p t i o n s The options allow users to recreate an old label, use “end of day” expiration, or print “use first” labels on the Right printer. Recreate Label Users may need to reprint a freshness label if a label is torn or missing from a product. - Page 16 1. From the Admin Tools screen, press System Settings. 2. Press Options. 3. Select the options you need. 4. Press OK when you are finished. 3-6 System Administrator’s Guide...
-
Page 17: Adjusting The Network Settings
A d j u s t i n g t h e N e t w o r k S e t t i n g s Use the Network Settings menu to view the network settings or set an IP Address. The printer’s current network settings are displayed. -
Page 18: To Automatically Obtain An Ip Address
5. Press Network Settings. The current network settings appear. To automatically obtain an IP Address: You can use DHCP to automatically obtain the printer’s IP Address. 1. From the Network Settings screen, select Use DHCP to obtain IP Add automatically. 2. -
Page 19: To Enter An Ip Address
To enter an IP Address: You can assign the printer a static IP Address. 1. From the Network Settings screen, select Use a Static IP Address. 2. Touch the text box next to each field to enter the information as needed on the keypad. 3. -
Page 20: Selecting Your Network Time Server
Selecting your Network Time Server If your printer is connected to a network with Internet access or to a network time server, use this screen to adjust the settings. 1. From the Network Settings screen, press Network Time Settings. 2. Select the check box if you want to automatically synchronize your clock with a Network Time Server. -
Page 21: Using Edit Mode
U S I N G E D I T M O D E This chapter tells you how to enter and exit Edit Mode. add or remove product buttons. edit product descriptions. Note: Edit Mode is only for Managers and Supervisors. E n t e r i n g E d i t M o d e You can make changes to the product buttons. - Page 22 4. Press Edit Mode. You return to the product screen. The background color of the screen changes and “EDIT MODE” appears at the bottom right of the screen. After five minutes of inactivity, Edit Mode closes. The countdown is shown at the bottom right of the screen. 4-2 System Administrator’s Guide...
-
Page 23: Adding And Removing Products
A d d i n g a n d R e m o v i n g P r o d u c t s You must be in Edit Mode to add or remove product buttons. To add a product button: 1. - Page 24 4. Touch the text box next to the Use By Description field to open the keypad. The default “MUST USE BY” appears. 5. Press Clear Field to clear the field and enter the new data, for example, BEST BEFORE. Press Enter. When this item is printed, the new Use By description prints.
-
Page 25: To Remove A Product Button
6. Touch the text box next to the Use By Duration field. 7. Use the and buttons to set the product’s expiration time in Days, Hours, and Minutes. Press OK. 8. Press Save when you are finished. The new product appears on the selected button. To remove a product button: 1. -
Page 26: Editing Product Descriptions
E d i t i n g P r o d u c t D e s c r i p t i o n s You must be in Edit Mode to change button information. 1. Press the product button to edit. 2. -
Page 27: Editing The Use First Button
E d i t i n g t h e U s e F i r s t B u t t o n You must be in Edit Mode to change the Use First button. Use First Button 1. Press Use First. 2. -
Page 28: Editing Category Buttons
E d i t i n g C a t e g o r y B u t t o n s You can change the names of the category buttons and tabs. You can also select which format and printer (left or right) prints for each category. Note: All products in the same category must use the same format. -
Page 29: Exiting Edit Mode
E x i t i n g E d i t M o d e To exit Edit Mode: 1. Press the Tools button. 2. Press Exit Edit Mode. Or, press Continue Editing to remain in Edit Mode and make additional changes. You return to the Product screen. - Page 30 4-10 System Administrator’s Guide...
-
Page 31: Using The Edit Utility
U S I N G T H E E D I T U T I L I T Y This chapter tells you how to install the Edit Utility. configure the network settings. upload printer data files to your computer. ... -
Page 32: Creating A New Product Data File
C r e a t i n g a N e w P r o d u c t D a t a F i l e You can use the Edit Utility to create a new data file. 1. Start the Edit Utility. The Main screen appears. 2. -
Page 33: Uploading The Product Data File
U p l o a d i n g t h e P r o d u c t D a t a F i l e You can use an Ethernet connection to retrieve an existing product data file from the printer and save it to your computer. -
Page 34: Editing Category Buttons
Editing Category Buttons You can change the names of the category buttons, select which format prints for each category, select which printer to use, and name tabs. Printer selection is only necessary with dual printer versions. See Appendix A, “Label Formats” for the size and content of each format. Note: All products in the same category must use the same format. -
Page 35: Editing The Use First Button
Editing the Use First Button The Use First button is customizable. 1. Click the Use First button. 2. Enter the Button Name. FIRST 3. Enter the Label Data. This field is printed on labels when the Use First button is pressed. If this field is left blank, the default text 07/01 /13 2:20 PM “Use First”... - Page 36 The Button Properties screen appears. This screen varies depending on the format selected for each category. See “Editing Category Buttons” for more information. 3. Enter the Button Name. 4. Enter the Label Data – Description 1, Description 2, and Description 3. This information prints on the label when the product button is pressed.
-
Page 37: Updating The Product Data File
U p d a t i n g t h e P r o d u c t D a t a F i l e You can use an Ethernet connection to transfer your data file from the computer to your printer. To perform updates using Ethernet, the Edit Utility’s IP address must match the printer’s IP address. -
Page 38: Updating The Application's Software
U p d a t i n g t h e A p p l i c a t i o n ’ s S o f t w a r e You can use an Ethernet connection to update the Application’s software. To perform updates using Ethernet, the Edit Utility’s IP address must match the printer’s IP address. -
Page 39: Updating The Printer With Usb
U P D A T I N G T H E P R I N T E R W I T H U S B This chapter tells you how to update the product data file. update the application software. U p d a t i n g Y o u r P r o d u c t D a t a F i l e v i a U S B You can use a USB Flash Drive to transfer your updated product data file from your PC to your printer. - Page 40 5. Press USB Update. 6. Press Update Product Data to update the data files. If you have more than one Product Data file stored on your USB Flash Drive, select the file you want to install then press OK. 7. A message appears when the file is loaded. Press OK to continue. 8.
-
Page 41: Updating Your Application Software Via Usb
U p d a t i n g Y o u r A p p l i c a t i o n S o f t w a r e v i a U S B You can use a USB Flash Drive to transfer updated Application Software from your PC to your printer. - Page 42 7. Press Update Application Software. If you have more than one Application Software file stored on your USB Flash Drive, select the file you want to install then press OK. This may take several minutes. When the update is complete, the printer restarts. 8.
-
Page 43: Performing Maintenance
P E R F O R M I N G M A I N T E N A N C E This chapter tells you how to print diagnostic labels. copy a product data file to USB. calibrate the touch screen. -
Page 44: Version Information
Version Information The Version Information label shows the model number and application part number along with version numbers for the application, core, print engine and main board. Press The following label prints: Version Information Network Information The Network Information labels shows the method for obtaining an IP address, the IP address, Subnet mask, Gateway address, and MAC address. -
Page 45: Checkerboard
Checkerboard Prints a label to verify that the printhead strobes are working. If the printed sample has fewer ts a label to verify that the printhead strobes are working. If the printed sample has fewer lines or no lines, keep the sample and call Service. lines or no lines, keep the sample and call Service. -
Page 46: Calibrating The Touch Screen
C a l i b r a t i n g t h e T o u c h S c r e e n Calibrate the touch screen so the buttons respond correctly when pressed. You are prompted to do this the first time you turn the printer on after receiving it and after you update the printer’s Application Software. -
Page 47: Performing A Factory Reset
P e r f o r m i n g a F a c t o r y R e s e t Use Factory Reset to delete all data files from the printer. Data files include the product button information, password, and printer configuration settings. - Page 48 5. Press Factory Reset. A warning message appears. 6. Press Yes to delete all data files or press No to cancel. The printer deletes all data files and loads the default data files. The printer restarts. Note: All data files are deleted when you press Factory Reset and they cannot be recovered. You cannot select a specific file to delete.
- Page 49 L A B E L F O R M A T S This appendix shows a sample of each label format. Note: If an asterisk (*) prints after the time or date, the label was reprinted using the original expiration time or date. See “Setting the Manager Options” for more information.
- Page 50 F o r m a t 3 Prints 2.2” wide x 1.5” long labels. Enter the following information for each field: Field Description Description 1 Prints up to 25 characters. Description 2 Prints up to 25 characters. Must Use By Numbers only.
-
Page 51: Label Formats
F o r m a t 4 Prints 2.2” wide x 2.0” long labels. Note: Arrows point to the block that corresponds to the day-of-week expiration date while diagonal lines print through the color-coded boxes that do not apply. Indicates the da y-of-w eek expiration Enter the following information for each field: Field... - Page 52 F o r m a t 5 Prints 2.2” wide by 3.0” long labels. Enter the following information for each field: Field Description Prints up to 16 characters. Description Shelf Life Prints up to 13 characters. Numbers only. Days 0-365, hours 0-23, Must Use By minutes 0-59.
- Page 53 F o r m a t 6 Prints 2.2” wide x 4.0” long labels. Enter the following information for each field: Field Description Store Name Prints up to 17 characters. Description 1 Prints up to 23 characters. Description 2 Prints up to 23 characters. Description 3 Prints up to 23 characters.
- Page 54 F o r m a t 7 Prints 2.2” wide x 3.0” long labels. Enter the following information for each field: Field Description Description 1 Prints up to 23 characters. Serving Size Prints up to 25 characters. Servings Per Container Prints up to 10 characters.
- Page 55 F o r m a t 8 Prints 1.2” wide x 1.1” long labels. Note: Arrows point to the block that corresponds to the day-of-week expiration date while diagonal lines print through the color-coded boxes that do not apply. Indicates the da y-of-w eek expiration Enter the following information for each field: Field...
- Page 56 28028 Avery Dennison 170 Monarch Lane Miamisburg, OH 45342 1-800-543-6650 (In the U.S.A.) 1-800-387-4740 (In Canada) www.monarch.com...
Need help?
Do you have a question about the Monarch FreshMarx 9417 and is the answer not in the manual?
Questions and answers