Table of Contents
Advertisement
Advertisement
Table of Contents

Related Manuals for Eldes PITBULL ALARM PRO


Summary of Contents for Eldes PITBULL ALARM PRO
- Page 1 PITBULL ALARM PRO GSM Alarm System...
-
Page 2: Table Of Contents
2.10. How to check the detector is working ......................... 15 2.11. About the back-up battery and how to replace it ..................... 15 2.12. How to program PITBULL ALARM PRO system ....................17 2.13. How to arm and disarm the system ........................20 2.14. - Page 3 It is strictly forbidden to copy and distribute the information contained in this document or to pass thereof to a third party without an a priori written authorization obtained from ELDES, UAB. ELDES, UAB reserves the right to update or modify this document and/or related prod- ucts without an a priori warning.
-
Page 4: Technical Specifications
Please read the user manual before operating the system. The user manual will show you how to install and operate the PITBULL ALARM PRO alarm security system safely and easily. You’ll find a quick start guide in section 1 and 2. To learn how to take advantage of additional functions, see sections 3, 4, 5 and 7. -
Page 5: Components Of The Pitbull Alarm Pro Security System
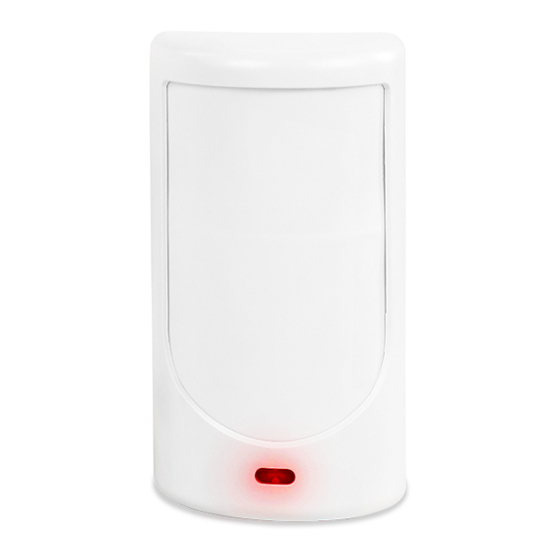
Components of the PITBULL ALARM PRO security system BELL+ Z2 BELL-/COM BELL+ Z2 BELL-/COM INSIDE VIEW BACK SIDE PITBULL ALARM PRO holder for fixing on the wall failure 2. Lens for movement detector 12. Motion detector to sense possible intruders 3. Power supply socket 13. -
Page 6: Step Start Guide
1. 7-STEP START GUIDE OVERVIEW This section tells you how to install the PITBULL ALARM PRO system quickly by following the very basic instructions consisting of only 7 steps. For step-by-step device programming using software, please refer to section 2. QUICK START GUIDE. - Page 7 The result should look something like this: 2583 1234. Now send this SMS text message to your device’s phone number and wait for a reply confirming that the SMS password has been successfully changed. PITBULL ALARM PRO Installation and Configuration Manual v1.0...
- Page 8 Again in both cases the user will receive a short SMS OPEN text message each time the system is successfully armed or disarmed. 1 RING PITBULL ALARM PRO Installation and Configuration Manual v1.0...
-
Page 9: Quick Start Guide
OVERVIEW This section tells you how to install the PITBULL ALARM PRO system quickly and easily and covers all the proce- dures required for full system operation. The alarm system functions via the GSM network, so you will first need to purchase a SIM card so you can ‘talk’... - Page 10 - 10º height 2,5m 2,5m (8.20ft) (8.20ft) (32.81ft) 2,3m 2,5m (7.55ft) (8.20ft) (26.25ft) 2,1m 1,5m (6.89ft) (4.92ft) (26.25ft) Blind area, X1 Secured area 1,5m 4,5m (4.92ft) (0ft) (14.76ft) Maximum detection distance, X2 PITBULL ALARM PRO Installation and Configuration Manual v1.0...
- Page 11 2,5m (8.20ft) (6.56ft) (16.4ft) 2,3m 1,5m 4.5m (7.55ft) (4.92ft) (14.76ft) 2,1m 4.5m (6.89ft) (3.28ft) (14.76ft) Blind area, X1 Secured area 1,5m Maximum detection distance, X2 (4.92ft) (0ft) (9.84ft) 1 1 1 PITBULL ALARM PRO Installation and Configuration Manual v1.0...
-
Page 12: Prepare The Sim Card
The system is NOT compatible with pure 3G SIM cards. Only 2G/GSM SIM cards and 3G SIM cards with 2G/GSM profile enabled are supported. For more details, please contact your GSM operator. PITBULL ALARM PRO Installation and Configuration Manual v1.0... -
Page 13: How To Insert The Sim Card
Insert SIM card so that gold contacts are face down when SIM card cover is flipped back down. For more information see the diagram of the PITBULL ALARM PRO and the description of components on page <5>. 3 1 3... -
Page 14: Plug The Power Supply Connector Into The Device
2.5. Place the holder into the 2.6. Slide it up to fix it until you connector into the device device hear a “click!” sound 2.7. Fix the holder firmly to the wall, using the supplied screws PITBULL ALARM PRO Installation and Configuration Manual v1.0... -
Page 15: After Positioning The Device, Secure The Position Using The Supplied Screws And Nuts
The back-up battery should last for at least two years. Its lifespan will largely depend on the surrounding tem- perature and the frequency of disruptions to the mains power. During mains failure the battery should power the 5 1 5 PITBULL ALARM PRO Installation and Configuration Manual v1.0... - Page 16 2. Slide the PITBULL ALARM PRO 3. Remove the PITBULL ALARM the mains electricity socket. PRO from its holder. OPEN OPEN 4. Remove the front cover of the device (containing the detector lens) PITBULL ALARM PRO Installation and Configuration Manual v1.0...
-
Page 17: How To Program Pitbull Alarm Pro System
SMS text message management. NOTE If you wish to program the PITBULL ALARM PRO system by SMS text message, please refer to section 4. HOW TO PROGRAM THE SYSTEM USING YOUR MOBILE PHONE. If not, please proceed to section 2.10.1 Download ELDES Configuration software. - Page 18 2.12.2. Install ELDES Configuration software. NOTE: You do not have to repeat the installation process the next time when you want to run ELDES Config- uration software again. 2.12.3. Connect PITBULL ALARM PRO to your PC via the USB cable...
- Page 19 Run the software anytime you want by double left-clicking on the ELDES Configuration software shortcut located on the desktop. Upon successful first-time connection, you will get to the main window of ELDES Configuration software. 9 1 9 PITBULL ALARM PRO Installation and Configuration Manual v1.0...
-
Page 20: How To Arm And Disarm The System
Dialling the SIM card is free of charge as the system drops your call in both cases. IMPORTANT: If the system is not armed due to violated tampers or zones a user will receive sms notification about it. PITBULL ALARM PRO Installation and Configuration Manual v1.0... -
Page 21: A 15 Second Delay Allows You To Leave The Premises
When you arm the system via your phone, a keyfob or a keypad, the system will give you a 15 second delay before it activates, giving you time to leaving the premises. You can change the time delay at any time (see ELDES Con- figuration software’s documentation). -
Page 22: In Case Of Mains Power Failure
You can also program the system to send an SMS text message to all users (see ELDES Configuration software’s documentation). 2.16. In case of mains power failure The system will automatically switch to the back–up battery supply in case of mains power failure. At this time you will receive an SMS text message warning message after 30 seconds. -
Page 23: How To Manage The Wireless Devices
8. Radio system installation and signal penetration. OVERVIEW Your PITBULL ALARM PRO has a built-in wireless module. This section tells you how to pair and remove a wireless device using your PC and ELDES Configuration Software as well as briefly describing every available wireless de- vice which can operate together with your PITBULL ALARM PRO system. - Page 24 Test Time period, indicated below. Once the wireless device is paired, it will attempt to exchange data with PITBULL ALARM PRO system. Due to battery saving reasons, all ELDES wireless devices operate in sleep mode. The data exchange will occur instantly...
-
Page 25: How To Pair A Wireless Device With The System
3. Next, select Peripheral Devices section and click on the Enable button in order to activate the system’s wireless transmitter-receiver (Wireless Mode). By default, this section uses a list view to show ELDES wireless devices visible to PITBULL ALARM PRO within its wireless signal range. - Page 26 4. List view: Left-click on the Add to system button located next to the unpaired wireless device icon ( filled in with a grey colour). PITBULL ALARM PRO Installation and Configuration Manual v1.0...
- Page 27 (icon filled in colour). with a grey colour). All those paired wireless devices are randomly arranged (i.e. NOT according to the strength of their wireless sig- nal, expressed in percentage terms). 7 2 7 PITBULL ALARM PRO Installation and Configuration Manual v1.0...
- Page 28 (once) and select Configure device option - there you will be able to change the default Test Time value. For more details regarding Test Time, please refer to section 3. HOW TO MANAGE THE WIRELESS DEVICES. PITBULL ALARM PRO Installation and Configuration Manual v1.0...
-
Page 29: How To Remove A Wireless Device From The System
OTG type USB cable into your PITBULL ALARM PRO device and you mobile device), wait until you will be addressed to the device’s main con- figuration section, named Dashboard. - Page 30 After remove from the system, wireless device needs to be reset in order to add it again to another/same system. Please seal off the battery of wireless device after removing it in order for it not to be drained out of power. PITBULL ALARM PRO Installation and Configuration Manual v1.0...
-
Page 31: Ekb3W/Ewkb4 Wireless Keypad Overview
PITBULL ALARM PRO system. For complete configuration and control using EKB3W/EWKB4, please refer to section 4.HOW TO PROGRAM THE SYSTEM USING EKB3W/EWKB4 WIRELESS KEYPAD. EKB3W/EWKB4 is a wireless LED keypad intended for using with PITBULL ALARM PRO alarm system. LED Functionality... -
Page 32: Keys Functionality
(by default) if the violated zone or tamper is of the associated EKB3W/EWKB4 keypad. For battery power saving reasons the back-light and LED light lasts for 10 seconds after the last key-stroke. However, this duration is configurable. PITBULL ALARM PRO Installation and Configuration Manual v1.0... - Page 33 (by default – every 240 seconds) transmits the supervision signal, identified as Test Time, to the PITBULL ALARM PRO system. When the keypad operates in the sleep mode, only the transmitter remains operational, while the receiver as well as the LED indicators and the back-light are switched OFF. However, when the keypad transmits the supervision signal to the system, it will NOT activate its buzzer and/or the LED indicators.
- Page 34 2. To disarm the system or turn off the alarm, enter any out of 10 available 4-digit user codes using the number keys: Enter user code: uuuu Value: uuuu – 4-digit user code Example: 1111 PITBULL ALARM PRO Installation and Configuration Manual v1.0...
- Page 35 Arm the system in Stay mode manually by entering the following combination using and number keys: Press the key and enter user code: uuuu Value: uuuu - 4-digit user code Example: 1111 5 3 5 PITBULL ALARM PRO Installation and Configuration Manual v1.0...
- Page 36 Due to battery saving reasons the buzzer will beep during entry delay and in case of alarm only if the violated zone is of the associated EKB3W/EWKB4 keypad. PITBULL ALARM PRO Installation and Configuration Manual v1.0...
- Page 37 The alternative way to activate all bypassed zones at once is to disarm the system. NOTE: Zones can only be bypassed when the system is not armed. The Configuration mode must be deactivated, while bypassing and activating a bypassed zone. 7 3 7 PITBULL ALARM PRO Installation and Configuration Manual v1.0...
- Page 38 4. In order to find out which particular tamper is violated, please enter the following command. In case there is a combination of flashing and illuminated red indicators on the keypad, please refer to the table below in order to find out the violated high-numbered tamper (Tamper 13 - 34). PITBULL ALARM PRO Installation and Configuration Manual v1.0...
-
Page 39: Ewk1 And Ewk2 Wireless Keyfob Overview
LED #6 3.4. EWK1 and EWK2 wireless keyfob overview EWK1/EWK2 is a wireless keyfob intended for using with PITBULL ALARM PRO alarm system. EWK1/EWK2 keyfob features four configurable buttons intended to operate according to individual needs. After the button is pressed, EWK1/EWK2 internal buzzer’s sound signal (and red indicator;... - Page 40 Entry delay countdown is intended for user to disarm the system before the alarm is caused. 2. To disarm the system, press 1 of 4 keyfob buttons set to disarm the system (by default, EWK1 - ; EWK2 PITBULL ALARM PRO Installation and Configuration Manual v1.0...
- Page 41 Disarm system 3. After the system is successfully disarmed, it will reply with confirmation by SMS message to User 1 phone number (by default). User PITBULL ALARM 1 4 1 PITBULL ALARM PRO Installation and Configuration Manual v1.0...
-
Page 42: Ewm1 - Wireless Power Socket
For safety and protection purposes EWM1 will prevent from powering up the electrical appliance if certain fault conditions are present. In order to start using EWM1, it has to be paired with ELDES alarm system using ELDES Configuration software or by sending a corresponding SMS text message to ELDES alarm system. - Page 43 SMS text message content: ssss_EWM1INFO View power consumption reports Value: ssss - 4-digit SMS password. Example: 1111_EWM1INFO This operation may be carried out from the PC using the ELDES Con- Eldes Configuration figuration software. software SMS text message content: Reset power...
-
Page 44: Ewf1/Ewf1Co - Wireless Smoke/Co Detector
For more details on technical specifications and installation, please refer to the latest user manual of the device located at www.eldesalarms.com SIREN FRONT SIDE BACK SIDE TEST button TAMPER RESET button switch BATTERY LED indicator PITBULL ALARM PRO Installation and Configuration Manual v1.0... -
Page 45: Ewkb5 Wireless Touchpad Overview
5,6kΩ nominal must be connected across Z1 and COM connectors. It is possible to connect up to 4 EWKB5 devices to the alarm system PITBULL ALARM PRO. The maximum wireless connection range is 1000m (~3280ft) (in open areas). - Page 46 (by default – every 30 seconds) transmits the supervision signal, identified as Test Time, to the PITBULL ALARM PRO system. When the touchpad operates in the sleep mode, the LCD display is switched OFF, but the touchpad permanently stays alert in case of alarm event. However, when the touchpad transmits the supervi- sion signal to the system, it will NOT activate the LCD display.
- Page 47 Alternatively, the user can touch and hold the Quick Arm button in order to arm the system without en- tering the user code. However, both methods require the user/master code in order to disarm the system. 7 4 7 PITBULL ALARM PRO Installation and Configuration Manual v1.0...
- Page 48 Settings 3. Once the system is successfully armed, the touchpad will display icon on the Partition button followed by SMS text message confirmation delivered to the listed user phone number (by default). PITBULL ALARM PRO Installation and Configuration Manual v1.0...
- Page 49 DISARMED HOME: 27 01:19 HOME Quick Arm Panic Fire Settings 3. Once the system is successfully disarmed, the icon displayed on the Partition button will turn to followed by 9 4 9 PITBULL ALARM PRO Installation and Configuration Manual v1.0...
- Page 50 To view the list of violated zones and/or violated tampers associated with certain zones, please open Zones sec- tion by navigating through the menu as follows. Please, note that Master code is required for this action. PITBULL ALARM PRO Installation and Configuration Manual v1.0...
- Page 51 1. To bypass a certain zone and the tamper associated with the zone, please slide the appropriate switch to the right. 2. To activate a bypassed zone, navigate through the aforementioned menu path and slide the bypassed zone’s switch to the left. 1 5 1 PITBULL ALARM PRO Installation and Configuration Manual v1.0...
- Page 52 To trigger fire or panic alarm, please touch and hold the Fire or Panic button respectively. This action will be follo- wed by a voice message “Fire signal has been sent” and “Alarm signal has been sent” respectively. No user/master code is required for this action. PITBULL ALARM PRO Installation and Configuration Manual v1.0...
- Page 53 PGM output in order to control it directly from the main menu. The button title reflects the PGM output name that can be changed using ELDES Configuration software. A. To turn a PGM output ON, touch the Controls button (path: Master menu -> Advanced ->Quick menu) in order to access the list of available PGM outputs and slide the switch of a certain PGM output to the right.
- Page 54 Events from 1 - 16 Disarmed over KEYBOARD: HOME User1 2016.09.06 10:40 Zone Alarm: HOME, Alarm Zone1 2016.09.06 10:39 Stay Armed over KEYBOARD: HOME User1 Bypass Events Zones Outputs Faults 2016.09.06 09:47 PITBULL ALARM PRO Installation and Configuration Manual v1.0 Disarmed over KEYBOARD: HOME...
- Page 55 Please, note that this action requires Master PIN code (only for the entrance to Settings menu). User con gurtion Master ADD NEW USER Zones Outputs Faults Users Advanced PIN: Pin must be 4 digits Home Garage Basment 5 5 5 PITBULL ALARM PRO Installation and Configuration Manual v1.0...
- Page 56 Using EWKB5 , it is possible to: edit Master settings, change Master name and Master PIN code; manage Partiti- ons; delete selected users. User con gurtion Master ADD NEW USER Zones Outputs Faults Users Advanced Master| Master| PIN: Home Garage Basment space enter 1111| space enter PITBULL ALARM PRO Installation and Configuration Manual v1.0...
- Page 57 RF JAMMER DETECTED Wireless signal is blocked by jammer TAMPER VIOLATED One or more tampers are violated DATE/TIME NOT SET Date/time not set GSM FAILURE GSM connection is lost 7 5 7 PITBULL ALARM PRO Installation and Configuration Manual v1.0...
- Page 58 About - section of additional information about the touchpad model, alarm system model, hardware and firmware. Temperature Zones Outputs Faults Users Advanced Sound Settings LCD Stteings Speech volume 30 % Brightness 75 % PITBULL ALARM PRO Installation and Configuration Manual v1.0 Sound volume 30 % Wake up time 10 s...
- Page 59 Wake up time 10 s Speech on re Quick Menu Service mode Quick arm Service mode Panic Fire About Model: EWKB5 Connected to: ESIM384, FW: V1.0.17 Firmware version: V0.0 9 5 9 PITBULL ALARM PRO Installation and Configuration Manual v1.0...
-
Page 60: How To Program The System Using Your Mobile Phone
The system supports a flexible SMS text message management replies. In order to configure and control the PITBULL ALARM PRO system using SMS text message, send the text com- mand to the phone number of PITBULL ALARM PRO from one of the pre-programmed user numbers. - Page 61 A combination of different phone number formats is allowed to use. NOTE: The underscore symbol ‘_’ in these instructions represents a space. So when typing an SMS text mes- sage, replace the underscore symbol with a single space. 1 6 1 PITBULL ALARM PRO Installation and Configuration Manual v1.0...
- Page 62 XXXX_EXITDELAY:0 1111_EXITDELAY:0 exit delay timer NOTE: The underscore symbol ‘_’ in these instructions represents a space. So when typing an SMS text mes- sage, replace the underscore symbol with a single space. PITBULL ALARM PRO Installation and Configuration Manual v1.0...
- Page 63 ON NOTE: The underscore symbol ‘_’ in these instructions represents a space. So when typing an SMS text mes- sage, replace the underscore symbol with a single space. 3 6 3 PITBULL ALARM PRO Installation and Configuration Manual v1.0...
- Page 64 MM = minutes, [00... 59]; SS = seconds, [00... 59] **- The PITBULL ALARM PRO system supports wireless PGM outputs allowing connection and control of various electrical appliances: water pumps, heating, lighting, blinds etc. The maximum number of PGM wireless outputs which can be connected to the PITBULL ALARM PRO system is 32.
- Page 65 NOTE: The underscore symbol ‘_’ in these instructions represents a space. So when typing an SMS text mes- sage, replace the underscore symbol with a single space. 5 6 5 PITBULL ALARM PRO Installation and Configuration Manual v1.0...
- Page 66 (if more than 2,5Ω resistance is detected), the system sends an SMS message to User 1. You may wish to configure the system to ignore these changes. PITBULL ALARM PRO Installation and Configuration Manual v1.0...
- Page 67 Function Command Value Range / Comment Example Unblock unknown XXXX_STR:ON By default, the PITBULL ALARM PRO alarm system can 1111_STR:ON incoming num- only be accessed from each of up to ten mobile phones bers that you program into it. To allow access from any phone number you need to enable the current feature, which will allow all pass- word holders to access the system.
- Page 68 The system will make a phone call to you and enable the mi- crophone in PITBULL ALARM PRO. You must answer the call within 20 seconds to listen in to what is happening in your property. If you do not pick up, the system will stop trying and will return to its previous state.
- Page 69 NOTE: The underscore symbol ‘_’ in these instructions represents a space. So when typing an SMS text mes- sage, replace the underscore symbol with a single space. 9 6 9 PITBULL ALARM PRO Installation and Configuration Manual v1.0...
- Page 70 GPRS settings. NOTE: The underscore symbol ‘_’ in these instructions represents a space. So when typing an SMS text mes- sage, replace the underscore symbol with a single space. PITBULL ALARM PRO Installation and Configuration Manual v1.0...
- Page 71 GSM operator. NOTE: The underscore symbol ‘_’ in these instructions represents a space. So when typing an SMS text mes- sage, replace the underscore symbol with a single space. 1 7 1 PITBULL ALARM PRO Installation and Configuration Manual v1.0...
- Page 72 XXXX_ 1111_SERVICEMODE:OFF Service SERVICEMODE:OFF mode NOTE: The underscore symbol ‘_’ in these instructions represents a space. So when typing an SMS text mes- sage, replace the underscore symbol with a single space. PITBULL ALARM PRO Installation and Configuration Manual v1.0...
-
Page 73: How To Program The System Using Ekb3W/Ewkb4 Wireless Keypad
5. HOW TO PROGRAM THE SYSTEM USING EKB3W/EWKB4 WIRELESS KEYPAD In order to configure and control the PITBULL ALARM PRO system using EKB3W/EWKB4 wireless keypad, please refer to the following information first. ESSENTIAL INFORMATION FOR PROGRAMMING VIA EKB3W/EWKB4 WIRELESS KEYPAD • Before configuring the system using EKB3W/EWKB4 wireless keypad, the Configuration mode must be... - Page 74 Set user phone 17xxyyyyyyyyyyyyyyy# 01 -10 number yyyyyyyyyyyyyyy Set system date 66YYYYMMDDhrmn# YYYY and time 01 - 12 01 -31 00 - 23 00- 59 Disable control 120# from any phone number PITBULL ALARM PRO Installation and Configuration Manual v1.0...
- Page 75 170044170911YYYY1# user phone number, 15 digits max.; supported format: • international (with 00) – example for UK: 00441709111YYYY. • local – example for UK: 01709111YYYY. year 66201408231625# month hours minutes arming/disarming and configuration by a non-listed phone number is denied 120# 5 7 5 PITBULL ALARM PRO Installation and Configuration Manual v1.0...
- Page 76 (must be entered without activa- ting Configuration mode in advance) Activate byppa- 01 - 34 xxyyyy# sed zone yyyy 0000 - 9999 (must be entered without activa- ting Configuration mode in advance) PITBULL ALARM PRO Installation and Configuration Manual v1.0...
- Page 77 540245# entry delay in seconds exit delay in seconds 7258# zone number 52380# zone number 52121# zone number 093281# 4-digit user code zone number 093281# 4-digit user code 7 7 7 PITBULL ALARM PRO Installation and Configuration Manual v1.0...
- Page 78 Disable STAY 56xx0# 01 - 34 attribute for individual zone Manual system xxxx xxxx arming in STAY mode (must be entered without activa- ting Configuration mode in advance) PGM Output Settings PITBULL ALARM PRO Installation and Configuration Manual v1.0...
- Page 79 Interior Follower 53053# Instant 24-Hour Delay Fire Panic/Silent Report Instant Silent zone number STAY Mode Settings zone number 56031# zone number 56270# 4-digit user code 3281# PGM Output Settings 9 7 9 PITBULL ALARM PRO Installation and Configuration Manual v1.0...
- Page 80 Disable siren 760# activation in case of wireless signal loss with wireless device Enable siren 761# activation in case of wireless signal loss with wireless device Notification Settings Disable periodic 110000# INFO SMS PITBULL ALARM PRO Installation and Configuration Manual v1.0...
- Page 81 760# system will activate siren if it loses wireless signal with a wireless device 761# Notification Settings disable INFO SMS 1 8 1 PITBULL ALARM PRO Installation and Configuration Manual v1.0...
- Page 82 Enable call in 28xx1# 1 - 10 case of alarm for individual user phone number Disable simul- 210# taneous SMS delivery in case of alarm PITBULL ALARM PRO Installation and Configuration Manual v1.0...
- Page 83 28030# user phone number slot 28041# system will not send SMS text messages to all listed user phone numbers simul- 210# taneously in case of zone/tamper alarm 3 8 3 PITBULL ALARM PRO Installation and Configuration Manual v1.0...
- Page 84 221# neous SMS deli- very regarding arm/disarm Disable SMS 130# regarding mains power supply loss/restore Enable SMS 131# regarding mains power supply loss/restore Disable SMS in 190# case of back-up battery fault PITBULL ALARM PRO Installation and Configuration Manual v1.0...
- Page 85 SMS text message is delivered system will not send SMS text message to any listed user phone number in case 190# of back-up battery fault 5 8 5 PITBULL ALARM PRO Installation and Configuration Manual v1.0...
- Page 86 00 - 15 gain for remote listening Set speaker 71xxx# 00 - 100 level Monitoring Station Settings Enable MS mode 231# Disable MS 230# mode Set Account 27cccc# cccc 0000 - 9999 number PITBULL ALARM PRO Installation and Configuration Manual v1.0...
- Page 87 231# disallow data message delivery to the monitoring station 230# 4-digit number required to identify the alarm system unit by the monitoring 275614# station 7 8 7 PITBULL ALARM PRO Installation and Configuration Manual v1.0...
- Page 88 Value Range Activate/deacti- aaaa# vate Configura- tion mode Disable data 24010# message 24020# 24030# 24040# 24050# 24060# 24070# 24080# 24090# 24100# 24110# 24120# 24130# 24140# 24150# 24160# 24170# 24180# 24190# 24250# 24260# PITBULL ALARM PRO Installation and Configuration Manual v1.0...
- Page 89 STAY mode system shut down armed/disarmed automatically Arm In STAY Mode Zone Bypassed/Activated Jammer Detected Critical CO level 9 8 9 PITBULL ALARM PRO Installation and Configuration Manual v1.0...
- Page 90 Value Range Activate/deacti- aaaa# vate Configura- tion mode Enable data 24011# message 24021# 24031# 24041# 24051# 24061# 24071# 24081# 24091# 24101# 24111# 24121# 24131# 24141# 24151# 24161# 24171# 24181# 24191# 24251# 24261# PITBULL ALARM PRO Installation and Configuration Manual v1.0...
- Page 91 STAY mode system shut down armed/disarmed automatically armed/disarmed by user test event Arm In STAY Mode Zone Bypassed/Activated Jammer Detected Critical CO level 1 9 1 PITBULL ALARM PRO Installation and Configuration Manual v1.0...
- Page 92 Set DNS2 42xxxxxxxxxxxx# xxxxxxxxxxxx Select protocol 430# 431# Set number of 68xxx# 01 - 255 GPRS attempts Set test period 46xxxxx# xxxxx 0 - 65535 Set Unit ID 47xxxx# xxxx 0000 - 9999 PITBULL ALARM PRO Installation and Configuration Manual v1.0...
- Page 93 GPRS network in seconds 46260# 4-digit number required to identify the alarm system unit by EGR100 mid- 475563# dle-ware/ESR100 digital receiver (communication via GPRS network) 3 9 3 PITBULL ALARM PRO Installation and Configuration Manual v1.0...
- Page 94 Set monitoring 26 xx 01 - 03 station phone yyyyyyyyyyyyyyy# yyyyyyyyyyyyyyy number Set number 37xx# 01 - 10 of Voice Calls attempts Service Mode Activate Service 671# mode Deactivate Ser- 670# vice mode PITBULL ALARM PRO Installation and Configuration Manual v1.0...
- Page 95 15 digits max.; supported format: • international (with 00) – example for UK: 0044170911YYYY1. • local – example for UK: 0170911YYYY1. number of data transmission attempts via Voice Calls in case the initial attempt 3706# was unsuccessful Service Mode see 7.17. Service Mode 671# 670# 5 9 5 PITBULL ALARM PRO Installation and Configuration Manual v1.0...
-
Page 96: Troubleshooting
If you cannot find the answer to your problem above, please contact your local distributor. More up to date information about your device and other ELDES products can be found at www.eldesalarms.com PITBULL ALARM PRO Installation and Configuration Manual v1.0... -
Page 97: Additional Information For Advanced Users
• SIM PIN Enabled - PIN code left enabled. The LED indicator will flash with pauses if the PIN code is not disabled on the SIM card that is inserted in the PITBULL ALARM PRO. • GSM Operator Error - GSM connection error. The LED indicator will flash with pauses in case of this error. - Page 98 BELL - / COM terminal. The wired siren/bell, connected to the wired output, must be piezo type and powered from +7... +11V. The current BELL-/COM consumption must not exceed 150mA. BELL BELL+ PITBULL ALARM PRO Installation and Configuration Manual v1.0...
- Page 99 4. Screw in the terminals. 5. Insert back the terminal block. 6. Set the Output Mode as Siren under Management section in the ELDES Configuration software. NOTE: No additional power supply is required for the siren/bell. NOTE: For a more convenient installation, we recommend using EWS2 and EWS3 wireless sirens.
- Page 100 3. Connect LED indicator’s anode lead (longer) to any of 1kΩ nominal resistor lead and the remaining 1kΩ nominal resistor lead to the BELL+ terminal, while the cathode lead (shorter) to BELL - / COM terminal. BELL- / COM resistor 1 k BELL+ 4. Screw in the terminals. PITBULL ALARM PRO Installation and Configuration Manual v1.0...
-
Page 101: How To Connect A Sensor To The Wired Zone
System Armed check-box. NOTE: The resistor and the LED indicator are NOT supplied with the PITBULL ALARM PRO system and are NOT mandatory to use. Please, obtain these components from your local store if desired. 7.2. How to connect a sensor to the wired zone PITBULL ALARM PRO system comes equipped with the wired zone, therefore you may wish to connect a wired sensor to your system. - Page 102 2. Loosen the screws of the terminals using a flathead screwdriver. 3. Connect the 5.6kΩ nominal resistor, supplied with your PITBULL ALARM PRO system, across BELL- / COM and Z2 terminal in parallel to the connected wires of the detection device.
- Page 103 Magnet 5. Screw in the terminals. 6. Insert back the terminal block. 7. Set Zone Status of Z2 to Enabled under Zones/On Board section in ELDES Configuration software. 3 1 03 PITBULL ALARM PRO Installation and Configuration Manual v1.0...
- Page 104 3. Connect the COM (usually - green) wire to BELL - / COM terminal. 4. Connect the Z wire (usually – yellow) of the wired detection device to any terminal of the 5.6kΩ nominal resistor (supplied with your PITBULL ALARM PRO system), while the other resistor terminal - to Z2 terminal. Magnet...
- Page 105 5. Screw in the terminals. 6. Insert back the terminal block. 7. Set Zone Status of Z2 to Enabled under Zones/On Board section in ELDES Configuration software. 5 1 05 PITBULL ALARM PRO Installation and Configuration Manual v1.0...
-
Page 106: Automatic System Arming/Disarming
Detection devices such as motion detectors and door contacts are connected to the alarm system’s zone terminals. Once connected, the associated zone’s parameters must be configured. PITBULL ALARM PRO comes equipped with 1 wireless zone and 1 on-board zone. For more details regarding zone expansion, please refer to section 7.4.2. Zone expansion. -
Page 107: Zone Expansion
For additional detection device connection, the number of zones can be expanded by: • Pairing wireless devices (see section 3. HOW TO MANAGE THE WIRELESS DEVICES). • Creating virtual zones (see ELDES Configuration software’s documentation). The maximum supported number of zones is 34. -
Page 108: Zone Attributes
By default, the zone names are: Z1 – Zone1, Z2 – Zone2, Z3 – Zone3, Z4 – Zone4 etc. ATTENTION: Space, colon, semi-colon characters, parameter names and/or values, such as PSW, STA- TUS, ON, OFF etc. are NOT allowed in zone names. PITBULL ALARM PRO Installation and Configuration Manual v1.0... -
Page 109: Tampers
• If the enclosure of the PITBULL ALARM PRO system or wireless device is opened, the physical tamper switch will be triggered. By default, indicated as Tamper x in the SMS text message (x = tamper number). - Page 110 • Output – Operates as normal PGM output that can be controlled by the user. Normally, this type is used for any device or relay. • Siren – Operates as siren output that automatically activates during alarm. Typically, this type is used for bell/siren connected to EW2 wireless device. PITBULL ALARM PRO Installation and Configuration Manual v1.0...
-
Page 111: Siren
24-hour or tamper alarm, EWS3 will flash the blue LED indicators, while in case of a fire alarm, the device can flash the red LED indicator. 1 1 11 PITBULL ALARM PRO Installation and Configuration Manual v1.0... - Page 112 If a wireless device loses its wireless signal for 240 minutes or longer, the system will send notification by SMS text message to user phone number and activate the siren. By default, the siren will NOT be activated when wireless signal is lost. PITBULL ALARM PRO Installation and Configuration Manual v1.0...
-
Page 113: Alarm Indications And Notifications
By default, the system will dial the next listed user phone number, if the previous user was unavailable due to the following reasons: • Mobile phone was switched off. • Mobile phone was out of GSM signal coverage. • Provided “busy” signal. 3 1 13 PITBULL ALARM PRO Installation and Configuration Manual v1.0... -
Page 114: System Notifications
NOTE: Phone calls to the listed user phone number in case of alarm are disabled by force when MS mode and/or ELDES Cloud Services feature is enabled (see section 7.11. Monitoring station). NOTE: If one or more zones/tampers are violated during the alarm, the system will attempt to send as many SMS text message and dial the user phone number as many times as the zone/tamper was violated. - Page 115 8V. System shutdown When the system is running on backup battery power, it transmits the SMS text message before the back-up battery power is fully depleted. 5 1 15 PITBULL ALARM PRO Installation and Configuration Manual v1.0...
- Page 116 SMS text message sent to the user in case of a fault wireless connection fault. Incoming SMS SMS text message sent to the administrator or forwarding** selected user phone number to be aware of all SMS messages, received by device’s SIM card. PITBULL ALARM PRO Installation and Configuration Manual v1.0...
-
Page 117: Back-Up Battery, Mains Power Supply Status Monitoring And Memory
The configuration settings are stored in a built-in memory, therefore even if the system is fully shut down, the configuration remains. For more details on how to manage back-up battery and power supply notifications, please refer to section 7.9. System notifications. 7 1 17 PITBULL ALARM PRO Installation and Configuration Manual v1.0... -
Page 118: Sms Text Message Delivery Restrictions
Example: 1111_REMOVEBAN 7.12. SMS Forward PITBULL ALARM PRO comes up with a feature, called SMS forward. The system allows user to forward any re- ceived message from device’s SIM card to the administrator’s mobile phone number. Using ELDES Configuration software, open System section, where you’ll be able to configure and choose further options. There are 4 basic SMS forwarding options: •... - Page 119 Enable/disable SMS This operation may be carried out from the PC using the ELDES Con- Eldes Configuration forward figuration software. software ATTENTION: If a single forwarded SMS message size exceeds 160 characters, it will be split into segments. ATTENTION: User is able to add the administrator phone number as a specified phone number (by enabling the...
-
Page 120: Monitoring Station
SMS text message to the listed user phone number. For more details on system notifications by SMS text message, please refer to section 7.9. System notifications. PITBULL ALARM PRO Installation and Configuration Manual v1.0... - Page 121 Wireless signal loss Transmitted in case the connection with any wireless device is lost. 3381 Wireless signal restore Transmitted in case the connection with any wireless device is restored. 1 1 21 PITBULL ALARM PRO Installation and Configuration Manual v1.0...
- Page 122 1150 Report/Control zone Alarm Transmitted in case of zone of 24-Hour type is violated. 3150 Report/Control zone Transmitted in case of zone of 24-Hour type is Restore restored. PITBULL ALARM PRO Installation and Configuration Manual v1.0...
- Page 123 User Code 6 User Code 7 User Code 8 User Code 9 User Code 10 Keyfob 1 Keyfob 2 Keyfob 3 Keyfob 4 Keyfob 5 Scheduler Remote Code (EGR100) 3 1 23 PITBULL ALARM PRO Installation and Configuration Manual v1.0...
- Page 124 If a new data message, except Test Event (ping), is generated during Delay after last communication attempt time, the system will immediately attempt to transmit it to the monitoring station, regardless of Delay after last communication attempt being in progress. PITBULL ALARM PRO Installation and Configuration Manual v1.0...
- Page 125 Delay after last communica- tion attempt Returns to PRIMARY Returns to PRIMARY NOTE: The number of attempts, indicated in the diagram, are default and depends on the determined com- munication method. 5 1 25 PITBULL ALARM PRO Installation and Configuration Manual v1.0...
- Page 126 2 additional attempts. If all attempts are unsuccessful, the system will switch to next backup connection that follows in the sequence and will attempt to transmit data until it is successfully delivered to the monitoring station. PITBULL ALARM PRO Installation and Configuration Manual v1.0...
- Page 127 • International (with plus) – The phone numbers must be entered starting with plus and an international country code in the following format: +[international code][area code][local number], example for UK: +441709111YYYY . This format can be used when setting up the phone number by ELDES Configuration software.
- Page 128 Due to the individual configuration of each monitoring station, the system may fail to deliver the data message via Voice Calls communication method. In such cases it is recommended to adjust the microphone gain until the optimal value, leading to successful data message delivery, is discovered. PITBULL ALARM PRO Installation and Configuration Manual v1.0...
-
Page 129: Event Log
7.16. DUAL SIM MANAGEMENT The Dual-SIM feature allows the PITBULL ALARM PRO system to operate with one of the two inserted SIM cards identified as Primary SIM and Secondary SIM respectively. The Primary SIM card works as the main default card, while the Secondary SIM card is intended for backup purposes or addition to the Primary SIM card - SMS text mes- sage sending/calling to the listed user phone number and/or communication with the monitoring station. - Page 130 Manage Dual -SIM This operation may be carried out from the PC using the ELDES Con- Eldes Configuration feature figuration software. software NOTE: Regardless of the selected mode, only one of the two SIM cards can operate at the same time.
- Page 131 In order to start using the remote configuration feature, please run the step-by-step wizard and follow the steps provided in the start page of ELDES Configuration software. Please, note that it will be necessary to send an SMS text message to the system’s phone number in order to initiate the remote connection. By following the steps you will be instructed on what text must be sent to the system’s phone number in such case.
-
Page 132: How To Reset The System To Default Settings
Delete the .bin file located in this drive. 8. Copy and paste in the very same window. 9. After the copying is done, close the Boot Disk drive folder. 10. Firmware upgraded. PITBULL ALARM PRO Installation and Configuration Manual v1.0... - Page 133 3 1 33 PITBULL ALARM PRO Installation and Configuration Manual v1.0...
-
Page 134: How To Upgrade The Firmware Remotely Via Gprs Connection
• At least User 1 phone number is set up. • APN, user name and password are set up - please, contact your GSM operator to find out these parameters. PITBULL ALARM PRO alarm system supports FOTA (firmware-over-the-air) feature. This allows to upgrade the firmware remotely via GPRS connection. Once the upgrade process is initiated, the system connects to the specified FTP server address where the firmware file is hosted and begins downloading and re-flashing the firmware. -
Page 135: Service Mode
Services account and add a device by following the step-by-step instructions provided in ELDES Cloud Services website. When adding the device to your account, you will be prompted for ELDES Cloud Services ID, which can be obtained using ELDES Configuration software or by sending the following SMS text message to the system’s phone number. -
Page 136: About Stay Mode And How To Activate It By Eldes Cloud Services
Stay mode. When arming the system in Stay mode under this condition, one of the available arming methods must be used that provide exit delay. • Manual - The system will skip exit delay countdown and instantly arm in Stay mode when using ELDES Cloud Services platform via web browser or smart-phone application. -
Page 137: Radio System Installation And Signal Penetration
• Furniture and movement can increase or decrease signal level by approximately up to 20%. So, that means the sensor’s signal level can decrease up to about 37% or even increase slightly, depending on individual environmental factors. 7 1 37 PITBULL ALARM PRO Installation and Configuration Manual v1.0... - Page 138 If the signal level between the system and your wireless device is equal or lower than 30%, then you must additionally use wireless signal repeater (EWR2). PITBULL ALARM PRO Installation and Configuration Manual v1.0...
- Page 139 Near a wall, the radio waves are likely to be subject to interfering dispersions or reflec- tions. Consequently, the position of the antenna has to be on the opposite or connecting wall. 9 1 39 PITBULL ALARM PRO Installation and Configuration Manual v1.0...
- Page 140 Where possible the antenna should be at least 10 – 15 cm away from the wall corner or concrete ceiling. Ceiling Min. 0,5 m Intermediate ceiling Antenna holding Min. 0,1 m Antenna • Wrong antenna mounting by the ceiling: Ceiling Ceiling PITBULL ALARM PRO Installation and Configuration Manual v1.0...
- Page 141 • Keep the distance of at least 20cm (7.87in) or more between your wireless device/Alarm System and the metal box/metal sheet or any object of this material: >20 cm Metal box or PITBULL any metal ALARM PRO 1 1 41 PITBULL ALARM PRO Installation and Configuration Manual v1.0...
- Page 142 This happens through reflections: Walls made of metal or concrete reflect the electromagnetic waves. The radio waves reach the next room or floor via a non metallic opening. Wall Alarm Metal System sheet Wireless device Wall PITBULL ALARM PRO Installation and Configuration Manual v1.0...
-
Page 143: Related Products
EWF1 – wireless smoke detector EWS2 - wireless outdoor siren EWF1CO - wireless smoke and CO detector EW2 - wireless zone and PGM EWKB4 – wireless LED keypad output expansion module 3 1 43 PITBULL ALARM PRO Installation and Configuration Manual v1.0... - Page 144 EWD2 - wireless magnetic door con- EWK2 - wireless keyfob tact/shock sensor/flood sensor EWD3 - wireless magnetic door con- EWS3 - wireless indoor siren tact/shock sensor/flood sensor PITBULL ALARM PRO Installation and Configuration Manual v1.0...
- Page 145 EWP2/EWP3 - wireless PIR sensor EWR2 - wireless signal repeater (motion detector) EWK2A - wireless keyfob ESR100 - digital receiver 5 1 45 PITBULL ALARM PRO Installation and Configuration Manual v1.0...
- Page 146 • DO NOT attempt to repair the system yourself - any repairs must be carried out by fully qualified personnel only The PITBULL ALARM PRO comes with its own power supply unit so you can plug it in straight away.
- Page 147 ELDES or its authorized distributor or retailer and only in case of defective workmanship and materials under normal use of the system for a period of twenty four (24) months from the date of shipment by the ELDES, UAB (Warranty Period).
- Page 148 In any case, the liability of ELDES, UAB, as much as it is allowed by the laws in force, shall not exceed the price of acquisition of the product.
- Page 149 9 1 49 PITBULL ALARM PRO Installation and Configuration Manual v1.0...
- Page 150 Made in the European Union www.eldesalarms.com...
Need help?
Do you have a question about the PITBULL ALARM PRO and is the answer not in the manual?
Questions and answers