Table of Contents
Advertisement
Advertisement
Table of Contents

Related Manuals for Fuji Xerox DocuCentre S2110


Summary of Contents for Fuji Xerox DocuCentre S2110
- Page 1 DocuCentre S2110 User Guide...
- Page 2 The data saved in the hard disk of the machine may be lost if there is any problem in the hard disk. Fuji Xerox is not responsible for any direct and indirect damages arising from or caused by such data loss. Fuji Xerox is not responsible for any breakdown of machines due to infection of computer virus or computer hacking.
-
Page 3: Table Of Contents
Table of Contents Table of Contents Before Using the Machine ..............9 Preface.............................. 10 Types of Manuals.......................... 11 Using This Guide ........................... 12 Organization of This Guide............................12 Conventions ..................................13 About License..........................14 Libcurl ....................................14 FreeBSD ....................................14 MD5....................................... 15 Environment Settings ................. - Page 4 Duplex Automatic Document Feeder........................45 Power Source...........................46 Switching the Power On..............................46 Switching the Power Off ..............................47 Power Saver Mode.........................48 Entering Power Saver Mode ............................48 Exiting Power Saver Mode ............................49 Control Panel...........................50 Machine Status ..........................54 Icons ......................................55 Account Mode..........................57 Types of Account Modes ...............................57 Setting the Options Configuration..................63 Loading Paper ..................
- Page 5 Table of Contents Original Size ..................................102 Paper Supply..................................103 Sharpness..................................104 Background Suppression.............................104 Edge Erase ..................................104 Auto Rotation..................................104 Managing the Copy Paper with Accounting ..............105 Operations when using the Copy Feature ......................105 Scan......................107 Scanning Procedure ........................108 Placing the Document ..............................108 Using the Scan Feature ...............................112 Loading Scan Data Using the PC-Based Application.............113 Operations during Scanning ....................115 Canceling the Current Scan Job..........................115...
- Page 6 Replacing the Toner Cartridge ..........................149 Replacing the Drum Cartridge ..........................153 Cleaning the Machine....................... 160 Cleaning the Exterior..............................160 Cleaning the Document Cover and the Document Glass ................161 Cleaning the Document Presser and the Constant Velocity Transport Glass........162 Cleaning Document Feeder Rollers ........................163 11 Problem Solving..................165 Troubleshooting..........................
- Page 7 Table of Contents Optional Components .......................219 Notes and Restrictions......................220 Notes and Restrictions on the Use of the Machine ..................220 Notes and Restrictions on the Use of the Copy Feature................221 Notes and Restrictions on the Use of the Print Feature ................221 Notes and Restrictions on the Use of the Scan Feature ................222 Notes and Restrictions when Connecting to Internet or Intranet.............222 Notes and Restrictions when Operating from Computers ................223...
-
Page 9: Before Using The Machine
Before Using the Machine... -
Page 10: Preface
Before Using the Machine Preface Thank you for selecting the DocuCentre S2110 (hereafter referred to as "the machine"). This guide describes how to operate the machine and the precautions you should follow during operation. To get the most out of the machine and to use it effectively, be sure to read this guide before use. -
Page 11: Types Of Manuals
Types of Manuals Types of Manuals The following guides are provided with the machine. Accompanying Manuals Basic Operation Guide (Booklet) The guide describes a quick reference for the basic operations, daily maintenance, and problem solving for this machine. Software/Product Manual (Disc) This media contains User Guide. -
Page 12: Using This Guide
Before Using the Machine Using This Guide This guide is intended for first time users of the machine. It describes the basic operations for the copy, print, and scan features. Organization of This Guide This guide consists of the following chapters: 1 Before Using the Machine Describes how to use this guide and provides license information. -
Page 13: Conventions
Using This Guide Conventions The screen shots and illustrations used in this guide vary depending on the machine configuration and optional components installed. Some of the items in the screen shots may not be displayed or available depending on your machine configuration. The procedures in this guide may vary depending on the driver and utility software being used due to the upgrades. -
Page 14: About License
Before Using the Machine About License This section describes information about licenses. Be sure to read through it. Libcurl COPYRIGHT AND PERMISSION NOTICE Copyright (c) 1996 - 2006, Daniel Stenberg, <daniel@haxx.se>. All rights reserved. Permission to use, copy, modify, and distribute this software for any purpose with or without fee is hereby granted, provided that the above copyright notice and this permission notice appear in all copies. -
Page 15: Md5
About License Copyright (C) 1991-2, RSA Data Security, Inc. Created 1991. All rights reserved. License to copy and use this software is granted provided that it is identified as the "RSA Data Security, Inc. MD5 Message-Digest Algorithm" in all material mentioning or referencing this software or this function. - Page 16 Before Using the Machine...
-
Page 17: Environment Settings
Environment Settings... -
Page 18: Supported Environment
Environment Settings Supported Environment This section describes the environment settings needed to use the machine's print and scan features. Print Feature The machine can be connected directly to a computer for use as a local printer, or can be connected to a network for use as a network printer. Local connection USB Network Connection LPD/Port9100... -
Page 19: Scan Feature
Supported Environment Scan Feature The machine supports the following Scan functions: Using the USB connection Scan with PC application ® Uses the USB connection to import scan data in a computer with a TWAIN or Windows Image Acquisition (WIA) compatible application. To use this function, you must install the scan driver from the Media (Software/Product Manual). -
Page 20: Interface Cables
Environment Settings Interface Cables When connecting the machine directly to a computer, use a USB interface. When connecting the machine to a network, use an Ethernet interface. Using the USB Interface The machine supports the USB 2.0 interface. Note You can use a cable up to 5 m in length according to the USB 2.0 standard. To connect the USB interface: Press the power switch to the [ ] position to turn the power OFF. -
Page 21: Using The Ethernet Interface
Interface Cables Press the power switch to the [ | ] position to turn the power ON. Using the Ethernet Interface The machine supports 100BASE-TX Ethernet interface. To connect the Ethernet interface: Press the power switch to the [ ] position to turn the power OFF. Note Check that the display of the status machine diagram is turned off. - Page 22 Environment Settings Press the power switch to the [ | ] position to turn the power ON.
-
Page 23: Setting The Network Environment
Setting the Network Environment Setting the Network Environment This section describes how to make the settings needed to use the TCP/IP protocol. Note The machine supports IPv6 addresses in an IPv6 network environment. For more information, refer to "Setting the Machine's IP Address (IPv6)" (P.23). Setting the Machine's IP Address (IPv4) To use the TCP/IP protocol, you must set the machine's IP address. -
Page 24: Setting The Machine's Ip Address With The Support Tool
Environment Settings Setting the Machine's IP Address with the Support Tool This section describes how to set the IP address using the Support Tool included in the Media (Software/Product Manual). Note You can change any settings on the Support Tool, when the machine is in standby status or Power Saver mode and has no running job. -
Page 25: Activating The Communication Port To Use
Activating the Communication Port To Use Activating the Communication Port To Use Use CentreWare Internet Services to activate the communication port you want to use. You can activate the following ports: Port Description SNMP Activate this port to use the SNMP protocol (used for operations such as loading the machine's information to the print driver). - Page 26 Environment Settings Click [Port Settings], and check the checkbox of the desired port. Click [Apply]. Note Restart the machine to enable the new settings.
-
Page 27: Using Centreware Internet Services
Using CentreWare Internet Services Using CentreWare Internet Services CentreWare Internet Services CentreWare Internet Services provides services such as changing settings using a web browser on a computer connected to a TCP/IP network environment. Note The IP address of the machine also needs to be set. For information on how to set the IP address, refer to "Setting the Network Environment"... -
Page 28: Starting Centreware Internet Services
Environment Settings Web Browser Settings Specifying the machine's address in the web browser is recommended. Note If you specify the machine's address using a proxy server, the service response time may be slow or the screens may not appear. If these problems occur, you will need to set the machine's IP address in the web browser and choose not to use a proxy server. -
Page 29: Setting Items On Centreware Internet Services
Using CentreWare Internet Services When specifying a port number, add ":" and the port number after the IP address or the Internet address. The IPv6 address cannot be entered manually in some cases depending on the web browser that you use. HTTPS is not supported. -
Page 30: [Properties] Tab
Environment Settings [Properties] Tab Description Machine Model The product name is displayed. Serial Number The product serial number is displayed. Machine Name You can enter the printer name (between 1 and 32 ASCII code characters excluding colons (:), equal signs (=), at symbols (@), or asterisks (*), which are not valid). Location You can enter the machine's location (up to 255 ASCII code characters). - Page 31 Using CentreWare Internet Services [Apply] button You can apply changes by pressing this button. Note Reboot the machine to enable new settings. Ethernet (Connectivity > Physical Connections) Rated Speed You can set the Ethernet port speed. You can select from Auto, 10 Mbps Half-Duplex, 10 Mbps Full-Duplex, 100 Mbps Half-Duplex, or 100 Mbps Full-Duplex.
- Page 32 Environment Settings IP Address: You can enter the IP address when the [Enable Manual Address] checkbox is checked. Automatically Configured Address 1: The automatically assigned IPv6 address is displayed. Link-Local Address: The automatically assigned link-local address is displayed. Gateway Address: You can enter the gateway address when the [Enable Manual Address] checkbox is checked.
- Page 33 Using CentreWare Internet Services IP Address: You can enter the IP address for entry. UDP Port Number: You can set the UDP port No. for entry (a value between 1 and 65535). SNMP Version: You can specify the SNMP version for entry as [v1] or [v2c]. (Default: v1) Trap Community Name: You can enter the trap community name for entry (between 1 and 32 ASCII code characters).
- Page 34 Environment Settings Port Number You can set the LPD port No. (a value between 1 and 65535). You must set a unique number for each port. (Default: 515) Connection Time-Out You can set the timeout period that the machine waits before terminating the connection when incoming data stops (between 2 and 3600 seconds).
- Page 35 Using CentreWare Internet Services Configuration Connection [Enabled] is displayed. Physical Connection [Ethernet] is displayed. Keep Alive Timeout The keep-alive timeout period is displayed. Port Number You can set the port No. used for HTTP communication (a value between 1 and 65535). You must set a unique number for each port.
- Page 36 Environment Settings Edit/Delete selection checkbox You can select the IP Filter to edit/delete. IP Filter Rule List The accessible IPv4 address is displayed. [Add] button The Add IP Filter Rule - IPv4 screen is displayed. You can add the accessible IPv4 address. You can add up to 10 IPv4 addresses.
- Page 37 Using CentreWare Internet Services [Apply] button You can apply changes by pressing this button. Note Reboot the machine to enable new settings. System Administrator Settings (Security) You can set the system administrator's user ID and the passcode. System Administrator Settings Administrator's Login ID You can enter the system administrator's user ID (between 1 and 32 ASCII code characters in length, excludes "+", ";", "<", ">", """, "?", "[", "]", "'", "{", "}", "|", ":".
-
Page 38: [Support] Tab
Environment Settings [Support] Tab The link for support information is displayed. The link settings can be changed. Support [Change Settings] button You can change the link for support information by pressing this button. Name You can enter the link name (between 1 and 63 ASCII code characters). You can enter the link address (between 1 and 63 alphanumeric characters including the at symbol (@), percent sign (%), period (.), colon (:), forward slash (/), underline(_), hyphen (-), tilde (~), question mark (?), and ampersand (&), which are valid). -
Page 39: Installing The Print Driver/Scan Driver
Installing the Print Driver/Scan Driver Installing the Print Driver/Scan Driver To enable the machine to print and scan, you need to install respective drivers on your computer. The following drivers are included in the Media (Software/Product Manual). Driver Name Description Print Driver The recommended print driver for this model Common Print Driver... -
Page 40: Using Print & Scan Hub
2) Select [Print & Scan Hub] under [Install Software]. Starting Print & Scan Hub To start Print & Scan Hub on your computer: Click [Start] > [All Programs] > [Fuji Xerox Print & Scan Hub] > [Print & Scan Hub]. ® For Windows 10, click [Start] >... -
Page 41: Product Overview
Product Overview... -
Page 42: Machine Components
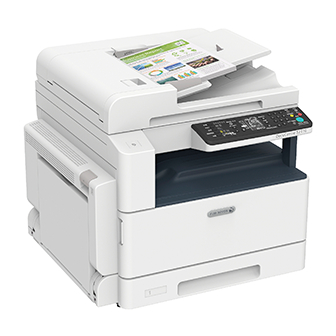
Product Overview Machine Components This section describes the machine components and their functions. Front, Left Side Component Description Document cover Holds document in place. Document glass Place document here. Control panel Contains the buttons, LED indicators, and status machine diagram used for operations. Reference For more information, refer to "Control Panel"... -
Page 43: Right Side, Rear
Machine Components Component Description Bypass tray Load paper here. The tray can be extended. Left cover [A] Open this cover to remove any jammed paper. Note When the machine works properly, this cover is locked. To open this cover, make sure to exit Sleep mode and turn the machine's power OFF. -
Page 44: Inside
Product Overview Inside Component Description Toner cartridge Contains toner (the powder used to form the image). Drum cartridge Contains photoconductors. Fusing unit Fuses toner on paper. Important Do not touch this unit as it is extremely hot. -
Page 45: Duplex Automatic Document Feeder
Machine Components Duplex Automatic Document Feeder Component Description Lever Turn this lever to clear paper jams. Document feeder cover Open this cover to clear paper jams. Inner cover Open this cover to clear paper jams. Document guides Use these guides to align the edges of documents. Document feeder tray Load documents here. -
Page 46: Power Source
Product Overview Power Source Switching the Power On The following describes how to switch the power on. The machine takes approximately 19 seconds or less to warm up and to be ready to copy or print after the power is turned on. It may take slightly longer than normal depending on the device configuration. -
Page 47: Switching The Power Off
Power Source Switching the Power Off The following describes how to switch the power off. Important Do not switch the power off in the following situations. If the power is switched off, the processing data may be erased. While data is being received While a job is being printed While a job is being copied While a job is being scanned... -
Page 48: Power Saver Mode
Product Overview Power Saver Mode The machine is installed with the Power Saver function that will automatically cut off the electricity to the machine if no copy or print data is received for a certain duration. There are two Power Saver modes: Low Power mode and Sleep mode. Low Power Mode The machine's power is not turned OFF completely in Low Power mode. -
Page 49: Exiting Power Saver Mode
Power Saver Mode Exiting Power Saver Mode The following describes how to deactivate Power Saver mode. The machine exits Power Saver mode and the <Power Saver> button light is turned off in the following instances: Exiting Low Power mode Receiving a job Entering System Administration mode from a computer Pressing any button on the control panel Taking paper out or putting in a tray... -
Page 50: Control Panel
Product Overview Control Panel The names and functions of the control panel's components are described below. Component Description <2 Sided> button Press this button to select 1 Sided or 2 Sided copying. Normally, the icon is off (1 1 Sided). The selection moves to the right from off (1 1 Sided) 2 Sided]... - Page 51 Control Panel Component Description <Power Saver> button Press this button to enter the Power Saver mode to save the electricity when the machine is not in use, and then the button is lit. Press the <Power Saver> button to exit the Power Saver mode.
- Page 52 Product Overview Component Description <Reduce/Enlarge> button Press this button to select a zoom ratio. The Reduce/Enlarge indicator next to a fixed zoom ratio moves to the next zoom ratio and the zoom ratio changes on the status machine diagram every time that the button is pressed.
- Page 53 Control Panel Component Description <Pages per Side> button Press this button to use Pages per Side feature. Normally, the light is off (Off). The selection moves to the right from [Off] (disabled) [2-up] [4-up] every time that the button is pressed. When the button is pressed while [4-up] is lit, the light is turned off again.
-
Page 54: Machine Status
Product Overview Machine Status The Status Machine Diagram (mimic) consists of the following contents to display the machine status. This section provides detailed description of each indicator on the status machine diagram (mimic). Component Description Reduce/Enlarge indicator Indicates the selected zoom ratio. Document indicator This indicator is lit when a document is placed in the document feeder or a document jam occurs. -
Page 55: Icons
Machine Status Icons This section describes icons that may appear in the status machine diagram. Toner Cartridge This icon is lit when the toner cartridge needs to be replaced in the near future. Prepare a new toner cartridge. No error code is displayed at this point. The icon blinks when the toner cartridge needs to be replaced immediately. - Page 56 Product Overview Error This icon is lit when an error occurs such as a tray problem, the toner cartridge runs out of ink, and the drum cartridge ends its life. Area - blinking When a paper/document jam occurs or any cover is open, the notification area blinks as shown below.
-
Page 57: Account Mode
Account Mode Account Mode This section describes three different account modes that the machine offers to manage accounts effectively for copy jobs, and how to log in to the machine. Types of Account Modes You can select one of the following account modes in the System Settings: No Account Mode, Single Account Mode, or Multiple Account Mode. - Page 58 Product Overview Enter a passcode using the numeric keypad. Numeric keypad Note The passcode is the same as the system administrator's passcode used for entering the system administration mode from the control panel. For information, refer to "Enter System Administration Mode" (P.122).
- Page 59 Account Mode Press the <Start> button to confirm the entered passcode. <Start> button If the entered passcode is correct, the machine enters Copy Mode, and [1] appears in the display. The <Log In/Out> button is lit while you are logged in to the machine. <Log In/Out>...
- Page 60 Product Overview Logging in the Machine in Multiple Account Mode The following procedure describes how to log in to the machine when the machine is in Multiple Account Mode. When the machine is in Multiple Account Mode, [Id _ _ ] appears blinking in the status machine diagram.
- Page 61 Account Mode Press the <Start> button to confirm the entered account number. <Start> button [_ _ _ _ _ _] appears in the status machine diagram. Enter a passcode which corresponds to the account number that you just entered, using the numeric keypad.
- Page 62 Product Overview Press the <Start> button to confirm the entered passcode. <Start> button If the entered passcode is correct, the machine enters Copy Mode, and [1] appears in the display. The <Log In/Out> button is lit while you are logged in to the machine. <Log In/Out>...
-
Page 63: Setting The Options Configuration
Setting the Options Configuration Setting the Options Configuration You can retrieve the information of machine configuration into the print driver. Update the information of machine configuration when any optional component is changed. When using the Ethernet interface You can load the machine's option configuration automatically to the print driver. Note When using this function, activate the SNMP port. - Page 64 Product Overview Click [Bi-Directional Setup]. Click [Get Information from Printer]. If [Printer Searching Method] is displayed The machine's information is not loaded onto the print driver. Complete the following operations. 1) Select [Specify Address], and click [Next].
- Page 65 Setting the Options Configuration 2) Enter the printer name or IP Address in the [Printer Name or IP Address] field. 3) Click [Finish]. Click [OK].
- Page 66 Product Overview...
-
Page 67: Loading Paper
Loading Paper... -
Page 68: Paper Types
Use of non-recommended paper types may result in paper jams, lower print quality, malfunctions, or damage to the machine. To achieve optimum machine performance, use only paper types recommended by Fuji Xerox. If you desire to use paper other than the paper recommended by Fuji Xerox, contact our Customer Support Center. WARNING Do not use conductive paper such as origami paper, carbonic paper or conductively-coated paper. -
Page 69: Supported Paper Type
Paper Types Duplexing (two-sided printing) The following paper types are supported for automatic duplexing: Paper Type (Quality) Lightweight (60 to 63 gsm) Plain 1 (64 to 74 gsm) Plain 2 (75 to 90 gsm) Supported Paper Type Standard Paper When printing or copying on commonly used paper (plain paper), use paper meeting the standards described below. -
Page 70: Unusable Paper
Plain 2 Attitude Plain 1 Unusable Paper Using paper not recommended by Fuji Xerox may cause a paper jam or machine malfunction. Use paper recommended by Fuji Xerox. Damp or wet paper Paper pre-printed with other printer or copying machine... -
Page 71: Storing And Handling Paper
Paper Types Storing and Handling Paper Please keep the following points in mind when storing paper Store paper inside a cabinet or other dry place. Paper that has absorbed moisture may result in paper jams and lower image quality. After opening a package of paper, wrap and store any remaining paper. We recommend that you store remaining paper in moisture prevention packets. -
Page 72: Loading Paper
Loading Paper Loading Paper This section describes how to load paper in a paper tray. Automatic Tray Selection When processing a print job, specify the settings in the print driver's screen by selecting [Automatically Select] for [Select By Tray] under [Paper] in the [Paper/Output] tab. The machine automatically selects a tray to match the specified document size and orientation. - Page 73 Loading Paper Pulling out all the trays at once may cause the machine to tilt or fall, causing injury. For Tray 1, push down the metal plate. Adjust the paper guides to the correct position before loading paper. Load paper with the side to copy or print on facing up. Align the leading edge of paper with the left side of the tray.
-
Page 74: Loading Paper In Bypass Tray
Loading Paper Push the tray in gently until it stops. Important When pushing the tray in, do it slowly. If the tray is pushed with too much force, it may cause machine malfunctions. Push the tray in all the way until it stops to prevent paper jams. Loading Paper in Bypass Tray When printing or copying on the paper that cannot be set in Tray 1 or 2, use the Bypass tray. - Page 75 Loading Paper Gently align the paper guides to paper loaded. Execute the copy or print operation.
-
Page 76: Changing Paper Size
Loading Paper Changing Paper Size This section describes how to change paper size in Trays 1 and 2. Important Do not load mixed paper sizes into a tray. Note When you change the size and orientation of paper in a tray, change the paper size setting to match the paper size. - Page 77 Changing Paper Size While pinching the levers of the two paper guides, move them to the edges of paper. Load paper with the side to copy or print on facing up. Align the leading edge of paper with the left side of the tray. Important Do not load paper above the maximum fill line.
-
Page 78: Setting The Paper Size
Loading Paper Setting the Paper Size This section describes how to set the paper size and orientation for Trays 1 and 2, and the bypass tray. After you load paper, make sure to set the size and orientation of the paper loaded into the tray. - Page 79 Setting the Paper Size Press the <Size (Press 2sec)> button to select the size and orientation of the paper loaded in the selected tray. The selected paper size and orientation are displayed in the status machine diagram. The <Start> button lights up blinking during the settings. Press the <Start>...
-
Page 80: Setting The Paper Type
Loading Paper Setting the Paper Type This section describes how to set the type of paper loaded in tray. The paper type is set to standard type as default. When loading a different type of paper into a tray, change the paper type setting according to the type of paper loaded in the tray to keep the print quality. - Page 81 Setting the Paper Type Enter the program number of the paper type that you want to set, and press the <Start> button. Program Number Item Normal Heavyweight Lightweight After the entered program number blinks twice, the new setting is confirmed. After you confirm the setting, press the <Log In/Out>...
- Page 82 Loading Paper...
-
Page 83: Copy
Copy... -
Page 84: Overview Of Copy Operations
Copy Overview of Copy Operations This section describes the basic copy procedures. Placing Document The following two methods are available to place document: Document feeder Single sheet Multiple sheets Document glass Single sheet Bound documents, such as books Document Feeder Supported document sizes You can place standard size documents in the document feeder. - Page 85 Overview of Copy Operations Place the document in the center of the document feeder, with the side to be scanned (or the front surface of a 2 sided document) facing up. Important Make sure to exit the power saver mode before loading documents on the document feeder. Note The document indicator lights up when a document is placed in the document feeder.
- Page 86 Copy Document Glass Supported document sizes You can select one of the following document sizes for using the document glass. A5 , A4 , A4 , A3 , B5 , B5 , B4 , 8.5 x 11" , 8.5 x 11" , 8.5 x 13" , 8.5 x 14" , 11 x 17"...
-
Page 87: Making Advanced Settings
Overview of Copy Operations Close the document cover. Note Make sure to set the size and orientation of document when using the document glass. Reference Refer to "Original Size" (P.102). Making Advanced Settings Note The displayed settings may vary according to models. You may need to enter a passcode to use the copy feature. -
Page 88: Entering The Number Of Copies
Copy Entering the Number of Copies You can enter a value between 1 and 999 for the number of copies. Use the numeric keypad to enter the desired number of copies. Numeric keypad The entered value appears in the status machine diagram. Note If you have entered an incorrect value, press the <C>... -
Page 89: Starting The Copy Job
Overview of Copy Operations Starting the Copy Job Press the <Start> button. <Start> button Important If document is placed in the document feeder, do not press down on the document while it is being fed through the machine. Note If a problem occurs, an error code appears in the status machine diagram. For information on error codes, refer to "Error Code"... -
Page 90: Operations Performed While Copying
Copy Operations Performed While Copying You can stop the currently copying job. Canceling the Current Copy Job To cancel the currently executing copy job: Press the <Stop> button. <Stop> button... -
Page 91: Advanced Copy Settings
Advanced Copy Settings Advanced Copy Settings This section describes all the settings you can set for the copy feature. Setting Item Description Page: 2 Sided Used to select 1 Sided or 2 Sided copying. (P.91) Pages per Side Used to copy multiple documents on a single (P.93) page. - Page 92 Copy 1 2 Sided Copies 1 Sided document on both sides of paper for long side binding. 2 2 Sided Copies 2 Sided document on both sides of paper, same appearance as the document. 2 1 Sided Copies 2 Sided document on one side of paper. The 2 Sided document is scanned as the document for long side binding.
-
Page 93: Pages Per Side
Advanced Copy Settings Pages per Side Use this setting to copy 2 or 4 pages of a document together on one sheet of paper. Selecting [Pages per Side] automatically sets a zoom ratio that will enable the document to fit on the page. Important Align the top edge of the paper against the top edge of the tray. -
Page 94: Collated
Copy When using the document glass and all documents have been scanned, press the <Last Original> button. This step is necessary when the <Last Original> button is blinking. <Last Original> button Collated You can set the output method for copying sets of multiple documents. Press the <Collated>... -
Page 95: Original Type
Advanced Copy Settings When using the document glass and all documents have been scanned, press the <Last Original> button. This step is necessary when the <Last Original> button is blinking. <Last Original> button Original Type You can set the type of document to optimize copies. Press the <Original Type>... -
Page 96: Lighten/Darken
Copy Lighten/Darken You can set the density from five levels. The farther left the position of , the darker the copy; the farther right, the lighter. You can also set the toner saver mode. Press the <Lighten/Darken> button to select a copy density level. <Lighten/Darken>... -
Page 97: Reduce/Enlarge
Advanced Copy Settings Reduce/Enlarge You can set the copying zoom ratio. Press the <Reduce/Enlarge> button to select a zoom ratio. In the status machine diagram, the selected zoom ratio is displayed on the Reduce/Enlarge display. <Reduce/Enlarge> button 100% The machine makes the copy the same size as the document. Aut% (Automatic zoom ratio) The machine automatically sets an appropriate zoom ratio by calculating the document size and the specified paper size to enable the document to fit on the page. -
Page 98: Id Card Copy
Copy Magnification Table When you make enlarged/reduced copies from standard size documents on standard size paper, the following copy ratios will be applied. Copy Documents 100% 122% 141% 172% 200% 100% 115% 141% 163% 100% 122% 141% 100% 115% 100% ID Card Copy You can copy both sides of an ID card (name card, employee card, etc.) on one side of paper. - Page 99 Advanced Copy Settings Multiple mode: Copying multiple cards or an ID card with another document Place the documents inside A4 LEF size referring to the document glass scale with 5 mm of distance in four directions. Note The layout is automatically adjusted depending on the size, position, and orientation of documents. Front side Back side Another document...
- Page 100 Copy Press the <ID Card Copy> button. The <ID Card Copy> button lights up. <ID Card Copy> button Press the <Original Size> button to select the copy mode between the one card mode or the multiple mode. Each time you press the <Original Size> button, the setting value is switched between one card and multiple.
- Page 101 Advanced Copy Settings When the skew correction feature is disabled, the machine scans the area of 100 x 100 Note The skew correction feature is enabled by factory default. Only the system administrator can disable the feature, when the machine cannot detect the document size correctly.
-
Page 102: Original Size
Copy Press the <Start> button. When one-side is finished scanning, the <Start> button lights up blinking. Note If you copy only the one side of a card, press the <Last Original> button to finish scanning. <Start> button Place the other side of the ID card face down slightly away from the top left corner of the document glass, and then close the document cover. -
Page 103: Paper Supply
Advanced Copy Settings Press the <Original Size> button to select a document size. In the status machine diagram, the selected document size and the orientation are displayed on the original size display. <Original Size> button Fixed document size (Preset) You can set the document size of the placed document by selecting from the preset document sizes. -
Page 104: Sharpness
Copy Aut (Automatic paper selection) Automatically determines the tray holding the appropriate paper, based on the document size and the specified zoom ratio. Note When using the automatic paper selection, you cannot set the automatic zoom ratio. Tray 1, Tray 2, and Bypass tray Select one of the selectable trays. -
Page 105: Managing The Copy Paper With Accounting
Managing the Copy Paper with Accounting Managing the Copy Paper with Accounting You can manage the copy paper usage for up to 10 users. You can set the passcode and the maximum number of copied impressions permitted for each user. The following features are available with Accounting function. - Page 106 Copy...
-
Page 107: Scan
Scan... -
Page 108: Scanning Procedure
Scan Scanning Procedure The basic flow of scan operations including placing document in the machine and making advanced settings is described below. Placing the Document The following two methods are available to load documents: Document feeder Single sheet Multiple sheets Document glass Single sheet Bound documents, such as books... - Page 109 Scanning Procedure Supported documents types (weights) Documents with weights from 38 to 128 gsm (50 to 128 gsm for 2 Sided documents) can be placed in the document feeder and scanned. The document feeder accepts the following number of sheets. Document Type (gsm) Number of Sheets Lightweight (38 to 49 gsm)
- Page 110 Scan Align the document guides to each side of the document. Open the document stopper. Document Glass Supported document sizes The maximum size is 297 x 432 mm. Selectable document sizes in the scan driver , A4 , A4 , A3 , B5 , B4 , 5.5 x 8.5"...
- Page 111 Scanning Procedure Open the document cover. Important When using the document glass, make sure to close the document cover after finishing your scan job. Place the document face down, and align it against the top left corner of the document glass.
-
Page 112: Using The Scan Feature
Scan Using the Scan Feature You can select the scan functions from the following list. Scan Function Connection Details See Page Using an application Network/USB Scan data is loaded into the (P.113) computer using the TWAIN or Windows Image Acquisition (WIA)-compatible application. -
Page 113: Loading Scan Data Using The Pc-Based Application
Refer to "Placing the Document" (P.108). Start the PC application on your computer. Select the menu item for selecting a scanner (source). Select [FX DocuCentre S2110]. Setting the Machine's IP Address for Network Scanning You can search network scanners on the Scanner Connection Tool. - Page 114 Scan Make advanced settings as needed. Note For information on the Scan functions, click [Help] in the screen to display Help Information. Click [Scan].
-
Page 115: Operations During Scanning
Operations during Scanning Operations during Scanning You can stop the currently scanning job. Canceling the Current Scan Job To cancel the currently scanning job: On the machine Press the <Stop> button. <Stop> button On the computer Press [Cancel] on the screen that appears while scanning. - Page 116 Scan...
-
Page 117: Print
Print... -
Page 118: Major Print Driver Functions
Print Major Print Driver Functions This section describes the major print driver functions used for printing. The print driver must be installed before use. Reference For information on how to install the print driver, refer to "Installing the Print Driver/Scan Driver" (P.39). Note For information on the Print functions, click [Help] in the print driver screen to display the Help Information. -
Page 119: Printing
The procedure used to print will vary according to the application you are using. See your application's manual for the specific procedure. The steps below are the operation used in the [FX DocuCentre S2110] print driver screen. Select [Print] from the application's [File] menu. -
Page 120: Operations During Printing
Print Operations during Printing You can cancel the currently printing job. Stopping the Print Job To cancel the currently printing job: On the machine Press the <Stop> button. <Stop> button On the computer Double-click the printer icon located on the task bar in the lower right corner of the screen. -
Page 121: Tools
Tools... -
Page 122: System Settings Procedure
Tools System Settings Procedure This section describes the overview of how to change the machine's default settings and check the machine information. Important If there are any current or pending jobs, you cannot enter the System Administration mode. During System Administration mode, the following operations cannot be performed. Receiving a print job, and starting a print or scan job. -
Page 123: Change Settings
System Settings Procedure The program number input screen appears, and shows the letter [P]. Change Settings Enter a program number using the numeric keypad. Numeric keypad Reference For more information, refer to "System Administrator Program List" (P.125). Press the <Start> button to confirm the entered value. -
Page 124: Exit System Administration Mode
Tools Exit System Administration Mode Press the <Log In/Out> button. <Log In/Out> button Note The <Log In/Out> button light is turned off when the machine exits the System Administration mode. -
Page 125: System Administrator Program List
System Administrator Program List System Administrator Program List This section describes the programmable system settings on the machine. Clock Settings Note When setting the system clock at the first time, set the [Date Format] and the [Time Format] as well. Program Menu Items Descriptions... - Page 126 Tools Program Menu Items Descriptions Values Numbers (*: Default setting) Sleep Mode Timer Set the amount of time that 1* - 239 minutes the machine enters Sleep mode from Low Power mode. You can set a value between 1 and 239 minutes (in 1 minute increments).
- Page 127 System Administrator Program List Program Menu Items Descriptions Values Numbers (*: Default setting) Job History Set whether to log the job 0: No log* Verbose history of Copy and Scan 1: Log (USB). Return from Sleep Set whether to exit the Sleep 0: Invalid* Mode by Any Key mode by touching any button...
- Page 128 Tools Program Menu Items Descriptions Values Numbers (*: Default setting) Limited display of Set whether to limit the 0: (No Limit)* the paper/ display of the paper/ 1: A4 document size document size on the status machine diagram. Limited display of Set whether to limit the 0: (No Limit)* the paper/...
- Page 129 System Administrator Program List Program Menu Items Descriptions Values Numbers (*: Default setting) Limited display of Set whether to limit the 0: (No Limit)* the paper/ display of the paper/ 1: Custom size document size document size on the status machine diagram.
-
Page 130: Account Mode Settings
Tools Program Menu Items Descriptions Values Numbers (*: Default setting) Firmware Version Displays the firmware version of Controller of the controller. Firmware Version Displays the firmware version of UI panel of the UI panel. Firmware Version Displays the firmware version of DADF of the document feeder. - Page 131 System Administrator Program List Program Menu Items Descriptions Values Numbers (*: Default setting) Account Number Specify the account number 4 - 6 digit numbers 2 Password 2's password using three (Default: 0002) digits. Account Number Specify the account number 4 - 6 digit numbers 3 Password 3's password using three (Default: 0003)
-
Page 132: Network Settings
Tools Program Menu Items Descriptions Values Numbers (*: Default setting) Account Number Specify the maximum number 0 (No Limit)* - 255 8 Copy Job Limit of pages allowed to copy for (1 = 1,000) the account number 8. Account Number Specify the maximum number 0 (No Limit)* - 255 9 Copy Job Limit... - Page 133 System Administrator Program List Program Menu Items Descriptions Values Numbers (*: Default setting) 1007 IP Mode Set the type of TCP/IP. 4: IPv4* 6: IPv6 10: Both IPv4 and IPv6 1008 Get IP Address Set the retrieve method for 1: RARP the IP address, subnet mask 2: DHCP and gateway address.
- Page 134 Tools Program Menu Items Descriptions Values Numbers (*: Default setting) 1023 Allowed IPv4 IP Set the 2nd 8-bit of the 0* - 255 Address (1) - 2 Allowed IPv4 IP Address (1) - 1024 Allowed IPv4 IP Set the 3rd 8-bit of the 0* - 255 Address (1) - 3 Allowed IPv4 IP Address (1) -...
- Page 135 System Administrator Program List Program Menu Items Descriptions Values Numbers (*: Default setting) 1049 Allowed IPv4 IP Set the 4th 8 bit of the 0* - 255 Address (4) - 4 Allowed IPv4 IP Address (4) - 1050 IPv4 Access Set the bit length (4) of Access 0* - 32 Control Mask bit...
-
Page 136: Feature Settings
Tools Program Menu Items Descriptions Values Numbers (*: Default setting) 1082 IPv4 Access Set the bit length (8) of Access 0* - 32 Control Mask bit Control Mask for IPv4. length (8) 1086 Allowed IPv4 IP Set the 1st 8 bit of the Allowed 0* - 255 Address (9) - 1 IPv4 IP Address (9) - 1. - Page 137 System Administrator Program List Program Menu Items Descriptions Values Numbers (*: Default setting) 3002 Reduce/Enlarge Set the default zoom ratios. 0: 100% (Copying) 1: 50.0% 2: 70.7% 3: 141.4% 4: 200.0% 254: Preset 255: Auto* 3003 Edge Erase Set the amount of Edge Erase. 0 - 40 mm (Copying) (Default: 2 mm) 3004...
- Page 138 Tools Program Menu Items Descriptions Values Numbers (*: Default setting) 3008 Document Size Set the default document size 1: 11 x 17" (Continued) (Copying) when the program number 2: A3 206 is set to 4 (AB Series (8K/ 3: 8K (China) 16K)).
- Page 139 System Administrator Program List Program Menu Items Descriptions Values Numbers (*: Default setting) 3013 Scanning Mode Set the mode to scan the 1: Scanning 1 card* for ID Card Copy document using the ID Card 3: Scanning multiple cards Copy feature. 3015 Binding side for 2 Set the binding side when the...
- Page 140 Tools...
-
Page 141: Machine Status
Machine Status... -
Page 142: Printing Reports
Machine Status Printing Reports The machine can print the following reports: Report Description System Settings Report Prints the machine's hardware configuration, version information, status of consumables, number of pages printed by each feature, the items that can be set by CentreWare Internet Services, and their values. Service Settings Report Prints the items that can be set from the control panel in the System Administration mode. -
Page 143: Checking The Job Counter
Printing Reports Note To stop the current printing job, press the <Stop> button. When the print job is completed, the status machine diagram displays as shown in the image. When you finish printing, press the <Log In/Out> button to exit the System Administration mode. -
Page 144: Checking Consumables
Machine Status Checking Consumables You can check the statuses of consumables such as toner cartridge and drum cartridge under the "Consumables" on the System Settings Report output. Toner Status Shows the toner cartridge status. [OK] Replacement is not currently needed. [Reorder] Replacement is currently not needed, but the cartridge will need to be replaced soon. -
Page 145: Checking The Total Number Of Impressions Copied
Checking the Total Number of Impressions Copied Checking the Total Number of Impressions Copied The machine can display the total number of impressions each user has copied and the maximum number of impressions each user is permitted to copy. This feature can be used in Multiple Account mode to manage the copy paper. Reference Accounting for copy paper: "Managing the Copy Paper with Accounting"... - Page 146 Machine Status Check the value displayed. Note You can see the next value by pressing the <Start> button when appears. To return to the program number input screen, press the <Stop> button. When you finish checking, press the <Log In/Out> button, and exit the System Administration mode.
-
Page 147: Maintenance
Maintenance... -
Page 148: Replacing Consumables
It may catch fire by electric sparks inside a vacuum cleaner and cause explosion. Use a broom or a wet cloth to wipe off the spills. If you spill a large volume of toner, contact your local Fuji Xerox representative. -
Page 149: Replacing The Toner Cartridge
When calling our Customer Support Center to order consumables/periodical replacement parts, have the product codes ready. The use of consumables/periodic replacement parts not recommended by Fuji Xerox may impair machine quality and performance. Use only consumables/periodic replacement parts recommended by Fuji Xerox. - Page 150 When you replace a toner cartridge, toner may spill and soil the floor. We recommend laying paper on the floor beforehand. The use of toner cartridges not recommended by Fuji Xerox may degrade image quality and performance. Use only the toner cartridges recommended by Fuji Xerox.
- Page 151 Important Pull out the toner cartridge slowly. Otherwise, toner may spill from the cartridge. Return the used toner cartridges to your local Fuji Xerox representative. Unpack a new toner cartridge, and shake it lightly up/down, and left/right 10 times. Important...
- Page 152 Maintenance Orient the toner cartridge with the arrow ( ) facing up, and insert it as far as it will go. Close the front cover. Note If the front cover is not completely closed, an error code will appear and the machine will remain paused.
-
Page 153: Replacing The Drum Cartridge
Replacing Consumables Replacing the Drum Cartridge The following error codes and icons are displayed in the status machine diagram when the drum cartridge is near the end of its service life. Error Code Status Machine Diagram Required Action When the drum cartridge icon is lit, the drum cartridge will need to be replaced after about 4,000 pages . - Page 154 Use the figures above only as a guideline. Important The use of drum cartridges not recommended by Fuji Xerox may lower the machine's output quality or performance. Always use drum cartridges recommended by Fuji Xerox in the machine. Note Do not expose drum cartridges to direct sunlight or strong indoor fluorescent lights.
- Page 155 Take the new drum cartridge out of the box, and insert the used drum cartridge into the supplied plastic bag and place it into the box. Important Do not place the new drum cartridge in an upright position. Return the used drum cartridge to your local Fuji Xerox representative.
- Page 156 Maintenance Peel the protective sheet off the new drum cartridge. Insert the new drum cartridge. Tighten the two screws clockwise. Peel off the drum cartridge's protective strip.
- Page 157 Replacing Consumables Close the front cover. Note If the front cover is not completely closed, an error code will appear and the machine will remain paused. Gently close the left cover and the Bypass tray. Note If the left cover is not completely closed, an error code will appear and the machine will remain paused. Enter the System Administration mode.
- Page 158 Maintenance Enter the program number "8000", and press the <Start> button. <Start> button Enter the value [950807], and press the <Start> button. <Start> button...
- Page 159 Replacing Consumables In the confirmation screen, press the <Start> button. <Start> button When the initializing is completed, the end screen will appear.
-
Page 160: Cleaning The Machine
Maintenance Cleaning the Machine This section describes how to clean the machine such as the outer casing, the document cover, the document feeder, and the document glass. WARNING When cleaning this product, use the designated cleaning materials exclusive to Other cleaning materials may result in poor performance of the product. Never use aerosol cleaners to avoid catching fire and explosion. -
Page 161: Cleaning The Document Cover And The Document Glass
Cleaning the Machine Cleaning the Document Cover and the Document Glass If the document cover and document glass become soiled, smudges may appear on copies, or scanned documents and the machine may not properly detect document sizes. To ensure clean copies at all times, clean the document cover and the document glass about once a month. -
Page 162: Cleaning The Document Presser And The Constant Velocity Transport Glass
Maintenance Cleaning the Document Presser and the Constant Velocity Transport Glass If the document presser or constant velocity transport glass becomes soiled, smudges may appear on copies, or scanned documents and the machine may not properly detect document sizes. To ensure clean copies at all times, clean the document presser and the constant velocity transport glass about once a month. -
Page 163: Cleaning Document Feeder Rollers
Cleaning the Machine Cleaning Document Feeder Rollers If the document feeder rollers become soiled, smudges may appear on copies, or scanned documents and paper jams may occur. To ensure clean copies at all times, clean the document feeder rollers about once a month. Important Do not use benzene, paint thinner, or other organic solvents. - Page 164 Maintenance...
-
Page 165: Problem Solving
Problem Solving... -
Page 166: Troubleshooting
Problem Solving Troubleshooting This section describes troubles that may occur with the machine and their solutions. Follow the troubleshooting procedure below to solve the problems. The machine does not work Action Refer to "Machine Problems" (P.167). properly. An error code is displayed. Cause Is there a paper or document jam? Action For information on paper jams, refer to "Paper Jams"... -
Page 167: Machine Problems
Machine Problems Machine Problems Check the machine's status again if you suspect a malfunction. Symptom Possible Cause Remedy The machine is Is the power switched ON? Switch the power ON. not powered on. Reference Refer to "Power Source" (P.46). Is the power cord plugged Switch the power OFF and make sure the into the power outlet? power plug is inserted securely. - Page 168 Problem Solving Symptom Possible Cause Remedy Unable to print Is the specified paper size Follow the instructions in the displayed error although a print loaded in the tray? code to place paper of the correct size, and job is instructed to then try again.
- Page 169 Machine Problems Symptom Possible Cause Remedy Paper is often Are the paper and tray Correctly set the paper settings to correspond jammed or settings correct? to the paper loaded. wrinkled. Reference Refer to "Changing the Paper Size for Trays 1 and 2" (P.76).
- Page 170 Problem Solving Symptom Possible Cause Remedy Documents often Is a piece of torn paper Open the document feeder cover and check jam. remaining in the document inside. feeder? Reference Refer to "Document Jams" (P.208). An edge of the Is the document curled? Flatten the curl and load the document document is again.
-
Page 171: Image Quality Problems
Image Quality Problems Image Quality Problems If the image quality of the printout is poor, use the table below to find our most likely cause, and take the required action. If the image quality remains poor after taking the required action, contact our Customer Support Center. - Page 172 Problem Solving Symptom Possible Cause Remedy Copies are out of Is the paper loaded correctly Load the paper correctly. position or in the tray? Reference crooked. Refer to "Loading Paper in Trays 1 and 2 (Optional)" (P.72). If using Bypass tray, have you Load the paper correctly.
- Page 173 Image Quality Problems Symptom Possible Cause Remedy Black spots The drum cartridge has Replace the drum cartridge with a new one. appear in copies. deteriorated or been Reference damaged. Refer to "Replacing the Drum Cartridge" (P.153). Black or colored The drum cartridge has Replace the drum cartridge with a new one.
- Page 174 Problem Solving Symptom Possible Cause Remedy White spots The paper is unsuitable. Load the correct type of paper. appear in areas of The drum cartridge has Replace the drum cartridge with a new one. black fill. deteriorated or been Reference damaged.
- Page 175 Image Quality Problems Symptom Possible Cause Remedy The printout The paper is damp. Replace the paper with new paper. contains white The paper is unsuitable. Load the correct type of paper. areas, or white or colored stripes. The printout is When using the Bypass tray Load paper of the correct type and size in the faint overall.
- Page 176 Problem Solving Symptom Possible Cause Remedy White or color The drum cartridge has Replace the drum cartridge with a new one. patches appear deteriorated or been Reference vertically. damaged. Refer to "Replacing the Drum Cartridge" (P.153). The toner cartridge has run Replace the toner cartridge with a new one.
-
Page 177: Copying Problems
Copying Problems Copying Problems This section provides possible solutions to various problems you may encounter when using the Copy features. Unable to Copy The table below lists possible solutions when you are unable to copy. Symptom Possible Cause Remedy The document is The document size is too The minimum size of document that can be not fed properly... - Page 178 Problem Solving Symptom Possible Cause Remedy Copies are dirty. The document is printed on Glossy printing paper easily sticks to the glossy printing paper. document glass, and shadows can resemble dirt in the copy. Place a transparency or transparent film under the document before copying.
- Page 179 Copying Problems Symptom Possible Cause Remedy Copies are out of You have not mounted the Mount the tray by inserting it securely all the position or tray securely. way into the machine. crooked The paper guides of the Place the document correctly, moving the bypass tray are misaligned.
-
Page 180: Printer Problems
Problem Solving Printer Problems This section provides possible solutions to various problems you may encounter when using the Print features. Unable to Print The table below lists possible solutions when you are unable to print. Symptom Possible Cause Remedy Data remains in The machine's power is not Switch the machine's power ON. - Page 181 Printer Problems Symptom Possible Cause Remedy The image at the The document exceeds the Enlarge the machine's print area, or reduce edges of the machine's printable area. the document's print area. paper is missing. The settings The print driver of another Install the machine's print driver.
-
Page 182: Scan Problems
Problem Solving Scan Problems This section provides possible solutions to various problems you may encounter when using the Scan feature. Unable to Scan The table below lists possible solutions when you are unable to scan. Symptom Possible Cause Remedy The document is The document size is too The minimum size of document that can be not fed properly... -
Page 183: Scan Image Quality Problems
Scan Problems Symptom Possible Cause Remedy Unable to find the The machine's IP address has Reset the setting on the Scanner Connection scanner. changed. Tool. Reference Refer to "Loading Scan Data Using the PC-Based Application" (P.113). Unable to load The scan driver is not Install the scan driver. - Page 184 Problem Solving Symptom Possible Cause Remedy The image is not The document cover or Clean the document cover or document glass. the desired size. document glass is dirty. Reference Refer to "Cleaning the Document Cover and the Document Glass" (P.161). The document is a Place a sheet of white paper over the transparency or highly...
-
Page 185: Network Related Problems
Network Related Problems Network Related Problems This section provides possible solutions to network problems. Problems Using TCP/IP (LPD/Port9100) The table below lists possible causes for problems that occur when using TCP/IP (LPD/ Port9100), the methods to check, and the required actions to take. Unable to Print Possible Cause How to Check... -
Page 186: Internet/Intranet Connection Problems
Problem Solving Symptom Remedy Nothing happens after Are you using a supported web browser? pressing [Refresh]. Reference The frame on the right is not See "Using CentreWare Internet Services" (P.27) to check whether your web updated after selecting a menu browser is a supported type. - Page 187 Network Related Problems Possible Cause Remedy The setting of the address that Confirm whether only addresses that do not use a proxy server does not use a proxy server is are set. Even if addresses not through a proxy server are incorrect.
-
Page 188: Ipv4 Or Ipv6 Connection Problems
Problem Solving IPv4 or IPv6 Connection Problems The table below lists possible solutions to problems that may occur when connecting to an IPv4 or IPv6 address. Unable to Connect to an IPv4 Address Symptom Remedy Do not add 0 to the head of address values. When entering an IPv4 address, the machine does not work properly when 0 is added... -
Page 189: Error Code
Error Code Error Code This section describes error codes. An error code (X-X) or (XXX-XXX) blinks if printing terminated abnormally because of an error, or a malfunction occurred in the machine. Display Example of Error Code Refer to the error codes in the following table to resolve problems. Important If an error code is displayed, any print data remaining in the machine and information stored in the machine's memory is not secured. - Page 190 Problem Solving Error code (X-X) Error Code Cause Remedy Documents jammed in the Remove the jammed document. document feeder. Reference Refer to "Document Jams" (P.208). The size of documents that Place the document on the document glass. are loaded in the document If a document is jammed, remove the feeder is not supported.
- Page 191 Error Code Error Code Cause Remedy Out of paper in Tray 2. Reload paper in Tray 2. If the tray is empty, load paper. Reference Refer to "Loading Paper in Trays 1 and 2 (Optional)" (P.72). Out of paper in the Bypass Reload paper in the Bypass tray.
- Page 192 Problem Solving Error Code Cause Remedy When the Pages per Side Press the <Stop> button. feature or the Reduce/Enlarge Change the zoom ratio to fit entirely in the feature is activated, the zoom paper, place all documents, and then press ratio required for page layout the <Start>...
- Page 193 Error Code Error Code Cause Remedy The drum cartridge needs to Turn the power off, wait for 10 seconds after be replaced. the display is turned off, and then turn the power on again. If the display cannot be turned off, replace the drum cartridge.
- Page 194 Problem Solving Error Code Cause and Remedy A document with a non-standard size is set in the document 003-942 [Cause] feeder. [Remedy] Press the control panel's <Stop> button, and check the document. The document for the ID Card Copy feature cannot be detected. 003-957 [Cause] [Remedy] Reset the document on the document glass, and then press the...
- Page 195 Error Code Error Code Cause and Remedy A document jam occurred in the document feeder. 005-907 [Cause] 005-908 [Remedy] Remove the jammed document. 005-913 Reference Refer to "Document Jams" (P.208). An error occurred in the document feeder. 005-940 [Cause] [Remedy] Press the control panel's <Stop> button, and set the document on the document feeder again.
- Page 196 Problem Solving Error Code Cause and Remedy An invalid print parameter is included in the print data of the 016-799 [Cause] application, or the print data and the Print Setup settings may not match. [Remedy] Press the control panel's <Stop> button, and cancel the job. 016-981 [Cause] The EPC memory is full.
- Page 197 Error Code Error Code Cause and Remedy The paper specified for the job is not loaded into any of the trays. 024-965 [Cause] [Remedy] Load the specified paper and press the control panel's <Start> button, or press the control panel's <Stop> button to cancel the job.
- Page 198 Problem Solving Error Code Cause and Remedy An error occurred in the left cover [A] or Tray 1. 071-105 [Cause] [Remedy] Remove the jammed paper. Reference Refer to "Paper Jams" (P.201). An error occurred in the one tray module cover [B] or Tray 2. 072-102 [Cause] [Remedy] Remove the jammed paper.
- Page 199 Refer to "Replacing the Drum Cartridge" (P.153). The drum cartridge life is over. 091-406 [Cause] [Remedy] Replace the drum cartridge. Contact your local Fuji Xerox representative or sales representative. Reference Refer to "Replacing the Drum Cartridge" (P.153). The drum cartridge life is over.
- Page 200 [Remedy] Remove the seal on the drum cartridge. 093-959 [Cause] An error occurred with the drum cartridge. [Remedy] Replace the drum cartridge. Contact your local Fuji Xerox representative or sales representative. Reference Refer to "Replacing the Drum Cartridge" (P.153). An error occurred.
-
Page 201: Paper Jams
WARNING If you need to pull out a tray to remove paper jam, contact your local Fuji Xerox representative. Do not pull out a tray, otherwise it may cause injuries. -
Page 202: E-1: Paper Jam In Left Cover [A]
Problem Solving E-1: Paper Jam in Left Cover [A] Follow the steps below to clear paper jams inside the machine's left cover. Important When removing paper, there may be an image on the machine's Transfer Belt (the black film belt) inside the left cover. - Page 203 Paper Jams If the paper is jammed within the left cover 1) If the paper is jammed in the location as shown in the figure, remove the jammed paper pulling upwards. 2) If the paper is jammed in the location as shown in the figure, remove the jammed paper pulling upwards.
-
Page 204: E-2: Paper Jam In One Tray Module Cover [B]
Problem Solving E-2: Paper Jam in One Tray Module Cover [B] Follow the steps below to clear paper jams inside the machine's one tray module cover. Pull the release lever, and slowly open the one tray module cover. Remove the jammed paper. Note The paper may be jammed in the upper part where it is difficult to see. -
Page 205: E-3: Paper Jams In Tray 1
Paper Jams E-3: Paper Jams in Tray 1 Follow the steps below to clear paper jams in Tray 1. Important "E-3" appears if you start copying or printing with the paper tray slightly open. Make sure that the paper tray is completely closed when loading paper or clearing a paper jam. -
Page 206: E-4: Paper Jams In Tray 2
Problem Solving E-4: Paper Jams in Tray 2 Follow the steps below to clear paper jams in Tray 2. Remove the jammed paper by referring to "E-2: Paper Jam in One Tray Module Cover [B]" (P.204). If the jammed paper cannot be removed, pull out the tray. Important Pulling out a tray after a paper jam without checking where the jam is located may cause the paper to tear and leave shreds inside the machine. -
Page 207: E-5: Paper Jams In Bypass Tray
Paper Jams E-5: Paper Jams in Bypass Tray Follow the steps below to clear a paper jam in the Bypass tray. Inspect the inside (around the paper feed entrance) of the Bypass tray, and remove the jammed paper. Important If multiple sheets of paper were loaded, remove all the paper while you clear the jam. Note If the paper tears, check to make sure there are no remaining shreds in the machine. -
Page 208: Document Jams
Problem Solving Document Jams If a document jams in the document feeder, the machine stops, and an error code [A-1], [A- 2], [A-3] appears in the display. A document indicator and the Paper/Document Jam icon on the status machine diagram (mimic) light up. The following procedure describes how to remove the jammed documents in the document feeder. - Page 209 Document Jams If you cannot find the document, turn the knob to feed the document to the top, then remove it. Important If the document has been fed into the feeder, do not pull it out directly. The document may tear. If you cannot find the document, lift up the handle to open the inner cover.
- Page 210 Problem Solving If you cannot find the document in Step 8, lift up the document feeder tray and remove the document. Carefully move the document feeder tray back into position. Make sure that the document is not torn, wrinkled, or folded, and then reload the documents to complete the job.
-
Page 211: Appendix
Appendix... -
Page 212: Specifications
Tray 2 (optional): 60 - 216 gsm Bypass tray: 60 - 216 gsm Important Use paper recommended by Fuji Xerox. Copying may not be performed correctly depending on the conditions. First Copy Output Time Document glass: 7.4 sec. or less (A4 ) - Page 213 Specifications Reduction/Enlargement Size-for-Size 1:1 ± 0.8% Preset %: 50%, 70%, 100%, 141%, 200% Variable %: 25% - 400% (1% increments) Continuous Copy Speed Paper Trays 1 and 2: Continuous 1 Sided copy/same magnification A4 , B5 , 8.5 x 11" : 21 sheets/minute A4, 8.5 x 11": 15 sheets/minute B4: 12 sheets/minute A3: 10 sheets/minute...
-
Page 214: Print Functions
Appendix Power Consumption AC 220V: 1.3 kW or less AC 240V: 1.4 kW or less Low Power mode: 40.0 W or less Sleep mode: 1.5 W or less Dimensions Width 595 x Depth 580 x Height 484 mm (with platen cover) Width 595 x Depth 580 x Height 576 mm (with document feeder) Weight 28 kg (with platen cover) -
Page 215: Scan Functions
2008 ® ® Microsoft Windows Server 2008 x64 Important For information about the latest supported OS, refer to the Fuji Xerox Web site. Interface USB 2.0, Ethernet 100BASE-TX/10BASE-T Scan Functions Type Color scanner Original Size Same as the Basic Functions/Copy Functions. -
Page 216: Duplex Automatic Document Feeder
® Microsoft Windows Server 2008 x64 Important For information about the latest supported OS, refer to the Fuji Xerox Web site. File Format Depends on the application software used for scanning. Duplex Automatic Document Feeder Type Duplex automatic document feeder Original Size/Paper Weight Maximum:A3, 11 x 17"... -
Page 217: Duplex Output Unit
Specifications Duplex Output Unit Paper Size Maximum:A3, 11 x 17" Minimum:A5 Paper Weight 60 - 110 gsm Note Use the bypass tray when using 91 - 110 gsm paper. One Tray Module (Optional) Paper Size Maximum: A3, 11 x 17" Minimum: A5 Paper Weight 60 - 216 gsm... -
Page 218: Printable Area
Appendix Printable Area The standard printable area is the area of the page within 5.5 mm from the top, left and right edges, and 6.0 mm from the bottom edge of the paper. The actual printable area may vary depending on the printer (plotter) and control language. 5.5 mm Unprintable area Printable area/... -
Page 219: Optional Components
Optional Components Optional Components The following table shows the optional components available. To purchase these options, contact our Customer Support Center. Product Name Description One Tray Module A tray that can load 500 sheets of paper (when using 80 gsm paper). -
Page 220: Notes And Restrictions
Appendix Notes and Restrictions This section describes the notes and restrictions to observe when using the machine. Notes and Restrictions on the Use of the Machine Notes on Switching Off the Power After the power is switched off, the machine performs internal power off processes for a while. -
Page 221: Notes And Restrictions On The Use Of The Copy Feature
Notes and Restrictions Notes and Restrictions on the Use of the Copy Feature Copy Feature The machine does not offer the Improves Fit function. ID Card Copy While the ID Card Copy feature is enabled, you cannot select the automatic paper selection. -
Page 222: Notes And Restrictions On The Use Of The Scan Feature
Appendix Error Codes The error "E-1" occurs besides a paper jam when the paper size setting is not correctly specified. Refer to the Error Code "C-7" and check paper size setting. Refer to "Error Code" (P.189). Notes and Restrictions on the Use of the Scan Feature This section describes notes and restrictions to observe when using the Scan feature. -
Page 223: Notes And Restrictions When Operating From Computers
The supported OS may vary depending on the functions. For more information, refer to "Specifications" (P.212). Important For information about the latest supported OS, refer to the Fuji Xerox Web site. Notes and Restrictions for Using TCP/IP (LPD/Port9100) This section describes notes and restrictions to observe when using TCP/IP (LPD/Port9100). - Page 224 Appendix IPv4 DNS information can sometimes be used directly after machine startup if the IP operation mode is Dual Stack, DNS information has been set for both IPv4 and IPv6, and the machine is communicating with a device specified using an FQDN. The address displayed as the machine's IP address may change.
-
Page 225: Index
Index Index Numerics Cleaning the Document Cover and the Document Glass .......................161 2 Sided ...................91 Cleaning the Document Presser and the Constant 2 Sided Print ................118 Velocity Transport Glass............162 Cleaning the Exterior ............160 Cleaning the Machine ............160 Clock Settings................125 Account Mode................57 Collated ..................94 Account Mode Settings............130... - Page 226 Error Code.................. 189 Error code (X-X) ...............190 Ethernet (Connectivity > Physical Connections)...31 Lighten +1 ..................96 Exit System Administration Mode........124 Lighten +2 ..................96 Exiting Low Power mode ............49 Lighten/Darken................96 Exiting Power Saver Mode .............49 Loading Paper..............67 Exiting Sleep mode ..............49 Loading Paper in Bypass Tray ..........74 Loading Paper in Trays 1 and 2 (Optional).....72 Loading Scan Data Using the PC-Based Application113...
- Page 227 Index [OK] ....................144 Rated Speed ................31 On the computer............115 Reduce/Enlarge ................97 On the machine............115 [Reorder] ..................144 Operating Systems and Web Browsers......27 [Replace Now]................144 Operations during Printing ..........120 [Replace Soon]................. 144 Operations when using the Copy Feature....105 Replacing Consumables............
- Page 228 Supported Paper Type.............69 Unable to Connect to an IPv6 Address ......188 Switching the Power Off............47 Unable to Copy ............... 177 Switching the Power On............46 Unable to Load Scan Data to a Computer ....182 System Administrator Program List ........ 125 Unable to Print ................
- Page 229 DocuCentre S2110 User Guide ME7949E2-1 (Edition 1) May 2017 Fuji Xerox Co., Ltd. Copyright © 2017 by Fuji Xerox Co., Ltd.
Need help?
Do you have a question about the DocuCentre S2110 and is the answer not in the manual?
Questions and answers