Advertisement
Quick Links
Download this manual
See also:
Administrator's Manual
Advertisement

Related Manuals for Fuji Xerox DocuCentre-III 3007


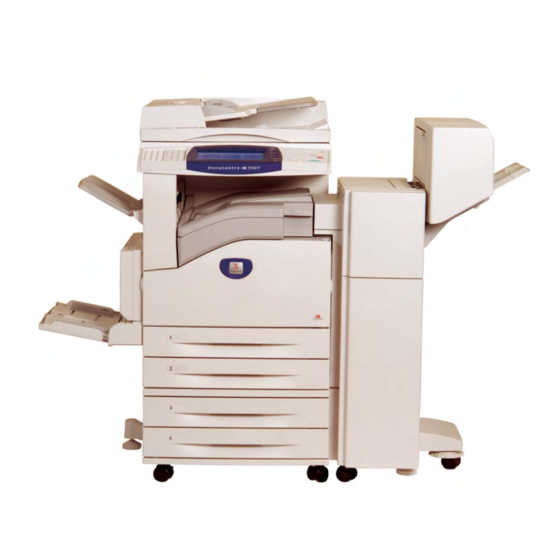
Summary of Contents for Fuji Xerox DocuCentre-III 3007
- Page 1 Quick User Guide Quick User Guide entre III 3007/2007 entre III 3007/2007 This User Guide is printed on FUJI XEROX Office Color Capable Products.
-
Page 2: Troubleshooting
Features Content Features Content Thank you for selecting the Fuji Xerox DocuCentre-III 3007 / 2007. This quick user guide provides the fundamental Copy / Fax / Scan / Print operating procedures for ease use of the machine. Quick User Guide Organization Quick User Guide Organization ♣... - Page 3 Overview Overview Powering On / Off the machine Energy Saver button - Press to exit power saver mode. Log In/Out button -Press enter User & Passcode Power Switch Turn ON Machine Turn OFF machine Login to User Account, press Log In/Out button &...
-
Page 4: Copy Features
COPY FEATURES COPY FEATURES Reduce/Enlarge 2-Sided Copying Page 04 Page 05 To make copies single or double sided output. To make a reduced or an enlarge output size. Book Copying Mixed Sized Originals Page 06 Page 07 To copy bound documents using platen scan different size... - Page 5 Making reduced or enlarged copies from the original You can make copies with scaling by selecting desired copy size ratio. Output A3 Original A4 Select [Copy] Specify a copy ratio; select [More] for other presets. Select a [Paper Tray] that holds the paper you want to use.
- Page 6 Making copies Single Sided / Double Sided You can make copies and output as single-sided / double-sided. Select [Copy] Select [Copy] tab; Select a 2-sided option and select [Save] 1 Sided copy 1-sided document onto 1 side of paper 2 Sided copy 1-sided document onto 2 sides of paper 2 Sided...
- Page 7 Making a copy from a bound document (Book Copying) You can make copies from bound document into separate sheets of paper using platen glass. Select [Copy] Select [Layout Adjustment] tab – Choose [Book Copying] Select an option and Select [Save]; Left Page then Right Right Page then Left Top Page then Bottom...
- Page 8 Making copy of different sized document (Mixed Size) You can make copy of different sizes documents and copies onto matching paper size. Select [Copy] Select [Layout Adjustment] tab Select [Mixed Sized Originals] and Select [ON] Select “Auto%” on [General Settings] and Select Paper Size required.
- Page 9 Making copy of multiple sheets onto 1 sheet paper You can make copies from multiple sheets of documents onto single sheet of paper using Multiple-Up. Select [Copy] Select [Output Format] Select [Multiple-Up] 1 Page Up - Multiple Up is not applied. 2 Pages Up –...
- Page 10 Making multiple copies from the original [sorting] To make copies output collated. Output can be stapled / hole punched. [Collated] 1,2,3…1,2.3… [Uncollated] 1,1...2,2...3,3... [Finishing] Stapled / Hole Punch Select [Copy] Select [Output Format] tab and select [Copy Output] Select [Collated], and select Finishing (if available).
- Page 11 Making copies with edge erased / image shifted To make copies with edge erased / image shifted Select [Copy] Select [Layout Adjustment] tab; Select Edge Erase or Image Shift (where applicable) Edge Erase – set area to erase using arrow keys at 1mm increments each.
- Page 12 Making a copy into a booklet format (Booklet Creation) You can make copies from multiple sheets of documents onto both sides of the paper in page order to make a booklet Optional feature: Folding & Staple Select [Copy] Select [Output Format] Select [Booklet Creation] and choose option “Create Left/Top...
- Page 13 Making an image printed repeatedly (Repeat Image) Make copy of a document / image onto 1 sheet of paper repeatedly. Select [Copy] Select [Output Format] tab. Select [Repeat Image] – Image not repeated Auto Repeat – Auto repeat according original document size, paper size and copy ratio.
- Page 14 Making copies of ID Card To make copy of ID card both sides on the same page of paper Select [Copy] Select [Output Format] [2] ID Card Copying. Select ON – Select [Save] Load ID Card on the top left of the platen glass. Close document cover and press <Start>...
-
Page 15: Fax Features
FAX FEATURES FAX FEATURES Numeric Keypads On-Hook Dialing Page 15 Page 15 To fax document using numeric keypads to a Use this feature to send or receive fax specific location manually. Select {Manual Send} to send or [Exit (Line Cut)] to exit on-hook Speed Dial/One Touch Broadcast Send Page 15... - Page 16 Fax transmission to a single / multiple location(s) You can select fax feature on [Fax] screen to send document to single or multiple recipient(s). Select [Fax] Enter recipient(s) fax number using numeric keypad. 98802485 Select [+Add] button to enter multiple recipients’...
- Page 17 Making a fax transmission using Address Book Entries You can specify fax recipients from pre-registered Address Book Select [Fax] Select [Address Book] button to select recipients from the registered entries. Select [ABC] [DEF] button to search Recipients by Index Search. Or select recipients’...
- Page 18 Making a 2-sided fax transmission You can scan a 2 sided document and send in a single operation. Select [Fax] Select [Address Book] button to select recipients or enter Fax number using Numeric Keypad Or select recipients’ fax number from the One Touch Dial (001 –...
- Page 19 Making a fax with a transmission report printed Fax transmission results can be printed automatically after each fax transmission. Transmission Report– ASDFG EWTEt Select [Fax] Select [Fax Options] tab – Select Confirmation Options Select No Report – No transmission report is printed. Print Report –...
- Page 20 [Setup Menu]. Index: Select [Change Settings] Enter 1 alphanumeric character Note (e.g. Fuji Xerox = F) Max 50 Groups can be created Max 20 Fax Addresses per group Save and Close; Repeat steps 3- 7 to continue or Press [Close] Exit Setup Menu.
-
Page 21: Scan Features
SCAN FEATURES SCAN FEATURES Scan to Mailbox Importing Mailbox data Page 21 Page 22 You can import scanned data to your To scan documents and save the scanned computer using Mailbox Viewer program. data to a mailbox located at the machine. Mailbox Mailbox Scan to Email... - Page 22 To Scan document to Mailbox You can scan and save the scanned data to a pre-registered mailbox and import to the computer using Mailbox Viewer application. Mailbox Select [Scan to Mailbox] Select required mailbox. * Enter password if any Select ‘Color Scanning’ and ‘2 Sided Original’...
- Page 23 You can import scanned documents / data from mailbox to the computer using mailbox viewer program. Mailbox From computer, Select [Start] > All Programs > Fuji Xerox > Network Scanner Utility3 > Mailbox Viewer3 Select scanner name; * e.g. DocuCentre III 3007 (192.168.1.1) –...
- Page 24 To Scan document and transfer via Email You can scan & send the scanned data to selected recipients as e-mail attachment(s). Select [Email] Select [Address Book] or use [Keyboard] to enter email address(s) Select ‘Color Scanning’, ‘2 Sided Originals’ and ‘File Format’...
- Page 25 To Scan document and transfer to PC (SMB) You can scan and transfer the scanned documents to a computer on the network. Select [Scan to PC] Select [Address Book] or select [Browse] to search location Select ‘Color Scanning’, ‘2 Sided Originals’ and ‘File Format’...
- Page 26 To scan a bound document (Book Scanning) Book Scanning allows you to scan a book onto separate sheets of paper in page order and transfer via any scanning method [Mailbox/Email/SMB] Select preferred scan method e.g. Scan to PC Select File Format (e.g.
-
Page 27: Printing Features
PRINTING FEATURES PRINTING FEATURES Printing Job Types Paper Tray Selection Page 27 Page 27 Normal Print – prints as normal print To specify paper tray for printing. Optional: Secure Print – stores print jobs on the Finishing Stapled / Hole Punched. machine and prints when UserID &... - Page 28 Making a Direct Print from computer From your application, you can print directly from computer. From application, Select Printer – [Properties] On the [Paper/Output] tab, select <Paper Summary> to select required paper tray. Click [OK] Select [Layout] tab <Fit to New Paper Size>...
- Page 29 Making a Secure Printing from computer Allows to set a password to a print job and temporarily stores print memory on the machine, and print upon entering password. From application, Select Printer – [Properties] On the [Paper/Output] tab, select <Job Type>...
- Page 30 Making a 2-sided print (optional - Finishing) Files can be printed into 2 sided format with 2 sided flip on long edge or flip on short edge. From application, Select Printer – [Properties] On the [Paper/Output] tab, select <2 Sided Print>...
- Page 31 Making a booklet print from computer Booklet printing enables multi-page files printed 2-sided booklet format arranged in ascending order, and fold to form a booklet. From application, Select Printer – [Properties] On the [Layout] tab, select <Booklet/Poster/Mixed Document>. Select Booklet Creation Choose Binding [Left / Right] * Optional: Fold &...
- Page 32 Prints multi pages in single sheet of paper You can print a multi-page files into a single print using Multiple-Up (from 2 Up to 32 Ups) From application, Select Printer – [Properties] On the [Layout] tab, select <Multiple-Up> Choose from 1 Page Up to 32 Pages Up.
- Page 33 Making a printout with Watermarks From your application, you can insert watermark. From application, Select Printer – [Properties] At the [Watermarks/Forms] tab, select watermark (e.g. Confidential, Urgent, etc.) Select [New Text] to create Select [Edit Watermark] to edit any watermark. Select [Print on Page 1 Only] to print watermark on first page,...
- Page 34 Making direct fax from computer You can perform PC Faxing from your application. From application, Select Printer – [Properties] On the [Paper/Output] tab, select [Job Type List] – Select ‘FAX’ and Click ‘OK’ on all open windows. The ‘Fax Recipient’ window displayed.
-
Page 35: Clearing Paper Jams
MAINTENANCE MAINTENANCE Clearing Paper Jams Paper Jams in the Document Feeder Open Document Feeder Cover and remove the jammed document. 2-3. If necessary, turn green wheel to feed out jammed document. If a document is jammed underneath the inner guide, open inner guide. 5-6. - Page 36 Clearing Paper Jams Paper Jams in Cover B Lift up the Cover B release lever located on the paper, right side of the cover, and open Cover B. Remove the jammed paper. Close Cover B until the cover latches Paper Jams in Cover C Lift up the Cover C release lever located on the paper, right side of the cover, and...
-
Page 37: Replacing Consumables
Replacing Consumables Replacing Toner Cartridge Open the Front Cover by pulling the cover towards you. Pull the Toner Cartridge out until the handle can be lifted on top of the cartridge. Grasp the handle and remove the cartridge from the machine. To install new Toner Cartridge Remove the new Toner Cartridge from the box. - Page 38 Replacing Consumables Replacing Drum Cartridge Open the Front Cover by pulling the cover towards you. Open the Bypass Tray, and Open Cover A while lifting up the release lever. Lift up the colored lever, and slide the Drum Cartridge out until the handle on top of the cartridge can be lifted.
- Page 39 Replacing Consumables Replacing Staple Cartridge (Finisher) Open the Finisher Front Door Rotate the Stapling Unit to the right and pull out on the Staple Cartridge handle Remove the used cartridge Unpack and install the new cartridge. The cartridge will click into place when it is installed correctly. Insert the cartridge into the machine.
- Page 40 Checking Billing Meter / Supplies Status (Consumables) BILLING METER On the Machine Panel, press <Machine Status> button. Select [Billing Meter / Print Report] tab - Select Billing Meter This Billing METER 1 : Total number of Meter 2 + Meter 3 + Meter 4 Information is METER 2 : Total number of copies...
- Page 41 Consumables Part No. Customer Replaceable Units Part Number Qty per box Toner Cartridge CT200417 1 unit Drum Cartridge CT350769 1 unit Staple Cartridge CWAA0540 3pcs (5000 staples) (For Finisher A1/B1/C/C1) Staple Cartridge CWAA0728 4pcs (2000 staples) (For Finisher B1 Booklet) For used cartridges disposal, please call us @ 1-300-88-1163 for collection.
-
Page 42: Checking Job Status
Checking Job Status On the Machine Panel, press the <Job Status> button. To find out more on the Error Codes Cause and Remedy, please refer to “Problem Solving” section in Administrator Guide... - Page 44 This Quick User Guide is printed on FUJI XEROX Office Color Products. Copyright Reserved © 2010 by Customer Training, Fuji Xerox Malaysia Printed in Malaysia For Service & Supplies Enquiries (Nationwide) Toll Free : 1-300-88-1163 Online support: http://onlinesupport.fujixerox.com The contents described herein are correct as of August, 2010.
Need help?
Do you have a question about the DocuCentre-III 3007 and is the answer not in the manual?
Questions and answers