Table of Contents
Advertisement
Quick Links
Advertisement
Table of Contents

Related Manuals for Seat IBIZA SC


Summary of Contents for Seat IBIZA SC
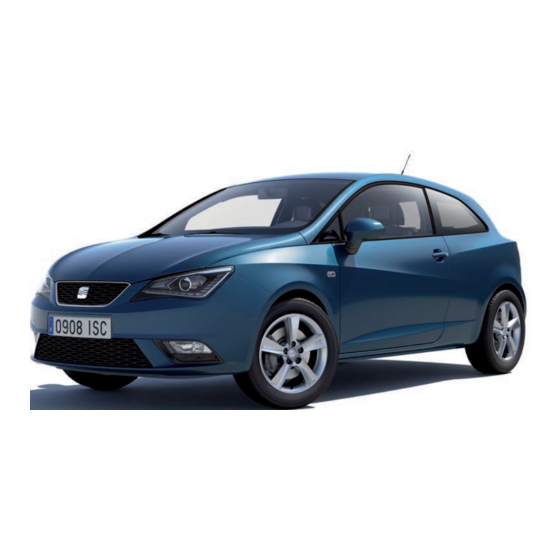
- Page 1 IBIZA SC Owner’s manual...
- Page 3 Foreword This Instruction Manual and its corresponding supplements should be read carefully to familiarise yourself with your vehicle. Besides the regular care and maintenance of the vehicle, its correct handling will help preserve its value. For safety reasons, always note the information concerning accessories, modifications and part replace- ments.
-
Page 5: Table Of Contents
......Seat belts ....... - Page 6 Table of Contents Accessories, replacement of parts and Technical Specifications ... modifications ......Description of specifications Accessories and spare parts .
-
Page 7: Manual Structure
Due to the fact that this is a general manual for the IBIZA SC, some of the For the sake of the environment... -
Page 8: Content
2. Operating instructions Information about the distribution of controls in the driver position of your vehicle, about the seat adjustment possibilities, about how to create a suit- able climate in the vehicle interior, etc. 3. Practical Tips Advice relating to the driving, caring and maintenance of your vehicle and certain problems you can solve yourself. -
Page 9: Safety First
● Front airbags the vehicle, both for the driver and the passengers. The other sections of ● Side airbags in the front seat backrests, with chest and head protection the on-board documentation also contain further information that you ● ISOFIX anchor points for ISOFIX rear child seat system should be aware of for your own safety and for the safety of your passen- gers. - Page 10 – Observe traffic laws and speed limits. according to your size. – Always reduce your speed as appropriate for road, traffic and – Ensure that the passenger in the central rear seat always has weather conditions. the head restraint in the correct position for use.
- Page 11 Safe driving WARNING When driving safety is impaired during a trip, the risk of injury and acci- dents increases. Safety First Operating Instructions Practical Tips Technical Specifications...
-
Page 12: Proper Sitting Position For Occupants
⇒ F ig. steering wheel – Move the driver seat forwards or backwards so that you are able to press the accelerator, brake and clutch pedals to the floor with your knees still slightly angled ⇒ . - Page 13 ● An incorrect sitting position of the driver can lead to severe injuries. – Move the front passenger seat back as far as possible ⇒ . ● Adjust the driver seat so that there is at least 25 cm distance between ⇒ F ig.
- Page 14 ● Always keep your feet in the footwell when the vehicle is moving; never rest them on the dash panel, out the window or on the seat. An in- – Always keep both feet in the footwell in front of the rear seat.
- Page 15 Safe driving Correct adjustment of head restraints Adjust the head restraint correctly in order to achieve maximum protection. Properly adjusted head restraints are an important part of – Adjust the head restraint so that its upper edge is at the same passenger protection and can reduce the risk of injuries in level as the top of your head or as close as possible to the same most accident situations.
- Page 16 Incorrect sitting positions substantially re- duce the protective function of seat belts and increase the risk of injury due to incorrect seat belt position. As the driver, you are re- Fig. 5 Adjusting the rear head restraints sponsible for all passengers, especially children.
- Page 17 ● Never put your feet out of a window. ● Never put your feet on the dash panel. ● Never put your feet on the surface of a seat. ● Do not allow anyone to travel in the footwell. ● Never travel without wearing the seat belt.
-
Page 18: Pedal Area
Safe driving Pedal area Floor mats on the driver side Only floor mats may be used which can be securely fastened Pedals in the footwell and do not impair operation of the pedals. The operation of all pedals must never be impaired by ob- –... - Page 19 Before you lock the vehicle, make sure that there are no adults or children in the vehicle. ● Never transport passengers in the luggage compartment. All vehicle occupants must have their seat belt fastened ⇒ p age 18. Safety First Operating Instructions...
-
Page 20: Seat Belts
Seat belts Brief introduction Number of seats Your vehicle has five seats, two in the front and three in the rear. Each seat Before driving: remember your seat belt! is equipped with a three-point seat belt. Wearing a seat belt properly can save your life! In some versions, your vehicle is approved only for four seats. - Page 21 25 km/h (15 mph). This acoustic signal stops when the seat belt is fastened. The warning lamp* is switched off if the driver seat belt is fastened while the ignition is switched on. ...
-
Page 22: Why Wear Seat Belts
25 km/h (15 mph) to 50 km/h (30 mph), for example, the kinetic energy is multiplied by four. Because the vehicle occupants in our example are not restrained by seat belts, all of the occupants' kinetic energy has to be absorbed at the point of ⇒ ... - Page 23 The airbag system is not a substitute for seat belts. When triggered, airbags provide only additional protection. All occupants (including the driver) must wear seat belts properly at all times during the trip. This will reduce the risk Fig. 8 A driver not wear- of severe injuries in the event of an accident –...
- Page 24 Our examples describe frontal collisions. Of course, properly worn seat belts substantially reduce the risk of injury in all other types of accidents. This is why it is so important to fasten seat belts before every trip, even when "just driving around the corner".
- Page 25 ● The seat belt should never lie on hard or fragile objects (such as glasses or pens, etc.) because this can cause injuries. ● Do not allow the seat belt to be damaged or jammed, or to rub on any sharp edges.
-
Page 26: Seat Belts
● Never put the latch plate in the buckle of another seat. If you do this, the seat belt will not protect you properly and the risk of injury is in- Fig. - Page 27 The seat belt must lie flat and snugly on the torso ● The lap part of the seat belt must lie across the pelvis, never across the stomach. The seat belt must lie flat and snugly on the pelvis ⇒ ...
- Page 28 ● An incorrectly worn seat belt can cause severe injuries in the event of plate from buckle an accident. ● For pregnant women, the lap part of the seat belt must lie as low as ⇒ F ig. – Press the red button on the belt buckle 15.
-
Page 29: Belt Tensioners
Note WARNING ● If the seat belt tensioners are triggered, a fine dust is produced. This is normal and it is not an indication of fire in the vehicle. ● An incorrectly worn seat belt increases the risk of severe injuries. - Page 30 Seat belts So that the effectiveness of the seat belt tensioner is not reduced and that removed parts do not cause any injuries or environmental pollution, regula- tions, which are known to the specialised workshops, must be observed. WARNING ● Improper use or repairs not carried out by qualified mechanics in- crease the risk of severe or fatal injuries.
-
Page 31: Airbag System
● If you are not wearing a seat belt, if you lean forward or to the side The airbag is deployed at high speed in fractions of a second. If you have an... - Page 32 WARNING ● If a child seat is secured to the front passenger seat, the risk to the Control lamp for airbag and seat belt tensioner child of sustaining critical or fatal injuries in the event of an accident in- creases.
- Page 33 Airbag system Monitoring of airbag and belt tensioner system bag system may be damaged. In the event of an accident this could cause the airbag to inflate incorrectly or not inflate at all. Both the airbag and belt tensioner systems operation is constantly moni- tored electronically.
- Page 34 Airbag system For the sake of the environment The airbags, which are a special type of waste, must be disposed of through an authorised service, because they contain pyrotechnic elements. ...
-
Page 35: Front Airbags
The airbag system is not a substitute for seat belts, but it is an integral part of the vehicle's overall passive safety system. Please bear in mind that the... - Page 36 ● there is a rear-end collision ● the vehicle turns over WARNING ● The seat belts and airbags can only provide maximum protection if the occupants are seated correctly ⇒ p age 10, Proper sitting position for occupants. ● If a fault has occurred in the airbag system, have the system checked immediately by a specialised workshop.
- Page 37 Airbag system The airbags deploy extremely rapidly, within thousandths of a second, to develop when the airbag deploys. This is normal and it is not an indication provide additional protection in the event of an accident. A fine dust may of fire in the vehicle.
- Page 38 ● If you are not wearing a seat belt, if you lean forward or to the side while travelling or assume an incorrect sitting position, there is a sub- stantially increased risk of injury.
-
Page 39: Side Airbags
Airbag system Side airbags The airbag system is not a substitute for seat belts, but it is an integral part of the vehicle's overall passive safety system. Please bear in mind that the airbag system can only work effectively when the occupants are wearing their seat belts. - Page 40 WARNING ● If you do not wear a seat belt, if you lean forward, or are not seated correctly while the vehicle is in motion, you are at a greater risk of injury Operation of side airbags if the side airbag system is triggered in an accident.
- Page 41 ● Any damage to the original seat upholstery or around the seams of the side airbag units must be repaired immediately by a specialised workshop.
-
Page 42: Deactivating Airbags
● The driver is responsible for the proper position of the key-operated switch. ● You should only deactivate the front passenger front airbag when, in exceptional cases, you have to use a rear-facing child seat on the front passenger seat ⇒ p age 42, Child safety. ... - Page 43 ● As soon as the child seat is no longer needed on the front passenger seat, enable the front passenger front airbag again.
-
Page 44: Child Safety
Depending on their age, height and weight, children trav- As the driver, you are responsible for any children you transport in elling on the rear seat must use a child seat or a seat belt. For safety rea- your vehicle. - Page 45 However, if it is necessary, in excep- ● Do not allow the seat belt to become twisted or jammed, or to rub on tional cases, to transport a child in the front passenger seat, the front any sharp edges.
-
Page 46: Child Seats
Child seats that have been tested and approved under the ECE R44 stand- ard bear the test mark on the seat (the letter E in a circle with the test num- Group 0+: For babies up to about 18 months old and 13 kg in weight, the ber below it). - Page 47 We recommend you to always include the manufacturer's Child Seat Instruc- Children under 7 years of age weighing between 15 and 25 kg are best pro- tion Manual together with the on-board documentation. tected by group 2 child seats together with properly adjusted seat belts. Group 3 child seats WARNING...
- Page 48 ● The shoulder part of the seat belt must lie approximately on the cen- tre of the shoulder, never across the neck or the arm. The seat belt must lie close to the upper part of the body. The lap belt part must lie across the pelvis, not across the stomach, and always fit closely.
-
Page 49: Securing Child Seats
● When travelling, children must be secured in the vehicle with a re- You can secure a child seat to the rear seat or front passenger seat in the straint system suitable for age, weight and size. - Page 50 – Pull on both sides of the child seat to ensure that it is secure. Two ISOFIX retaining rings are fitted on each rear seat. In some vehicles, the rings are secured to the seat frame and, in others, they are secured to the rear floor.
- Page 51 Top Tether rings on the back of the rear seat Child seats with the Top Tether system come with a strap for securing the seat to the vehicle anchor point, located at the back of the rear seat back- rest. ...
- Page 52 WARNING fitting An undue installation of the safety seat will increase the risk of injury in Securing the Top Tether child restraint to the anchor point situated the event of a crash. on the rear of the backrest ●...
- Page 53 Child safety – Push the lock and release it from the anchoring support. WARNING Read and bear in mind all the WARNINGS ⇒ p age 49. Safety First Operating Instructions Practical Tips Technical Specifications...
- Page 54 Cockpit Fig. 29 Dash panel...
-
Page 55: Operating Instructions
Cockpit Operating Instructions Cockpit Overview Switches for: – Heating and ventilation ....... . . –... - Page 56 Cockpit Fuse housing ..........Control for adjusting electric exterior mirrors* .
-
Page 57: Instruments
Cockpit Instruments Instrument overview The instruments display the vehicle operating status. Fig. 30 Detailed view of the dash panel: instrument panel The layout of the instruments depends upon the model and the engine. Rev counter* ⇒ p age 56 Digital display. Speedometer ⇒ ... -
Page 58: Lpg System
Cockpit LPG system* Rev counter The rev counter displays the engine speed in revolutions per LPG gauge minute. ⇒ F ig. 30 The start of the red zone indicates the maximum engine speed operating at service temperature. However, it is advisable to change up into a higher gear, move the selector lever to D or lift your foot off the accelerator before the needle reaches the red zone. -
Page 59: Digital Instrument Panel Display
Cockpit Digital instrument panel display WARNING LPG is a highly explosive and inflammable substance. It may cause se- Fuel gauge and reserve indicator vere burns and other injury. ● Due care must be taken to avoid any risk of fire or explosion. ●... -
Page 60: Digital Clock
Cockpit Digital clock* Recommended gear display* This display helps to save fuel. ⇒ F ig. – To set the hour, press button 30. The “hour” option flashes on the digital display and is set using button “set” ⇒ F ig. –... - Page 61 Cockpit Multifunction display (MFI)* The trip memory 1 collects the travel and consumption rates from the mo- ment the ignition is switched on until it is switched off. If the journey is con- The multifunction display (MFI) shows you information on tinued within two hours of switching off the ignition, the new values will be added to the existing trip recorder memory.
- Page 62 Cockpit ● Average speed Km (miles) - Fuel range ● Distance The fuel range is calculated using the figures for tank content and current fuel consumption. It shows how far the vehicle can travel using the same ● Fuel range conditions as a reference.
- Page 63 Gearbox lever position ⇒ F ig. The service indication is shown on the instrument panel display for automatic gearbox. SEAT distinguishes between services with engine oil change (e.g. Interval service) and services without engine oil change (e.g. Inspection Service). Safety First...
- Page 64 Resetting service interval display has an interval service when it is necessary. To calculate this (max. two If the service was not performed by a SEAT dealership, the display must be years), the conditions under which the vehicle is used and the individual reset as follows: driving style are also taken into account.
-
Page 65: Warning Lamps
Cockpit Warning lamps Overview of the warning lamps The control lamps indicate a number of different functions and possible faults. Fig. 38 Instrument panel warning and control lamps. Some of the items of equipment listed here are fitted only on certain model versions or are optional extras. ... - Page 66 Rear fog light switched on ⇒ p age 73 Electro-hydraulic steering ⇒ p age 18 Seat belt warning lamp* Fault in the emission control system ⇒ p age 74 ⇒ p age 69 Anti-lock brake system (ABS) * ...
- Page 67 Cockpit Meaning of control and warning Further infor- Item Symbol lamps mation ⇒ p age 75 Turn signals in operation ⇒ p age 75 SAFE Electronic immobiliser ⇒ p age 80 WARNING ● Failure to observe control lamps and warning messages can result in serious personal injuries or damage to your vehicle.
- Page 68 Cockpit Overview of indicator and warning lamps (vehicles with WARNING LPG) ● Failure to observe control lamps and warning messages can result in The control lamps indicate a number of different functions serious personal injury or damage to your vehicle. and possible faults.
- Page 69 Cockpit If several priority 1 faults are detected at the same time, the symbols will be Information messages displayed on the screen* displayed one after the other for about 2 seconds at a time and will contin- ue until the fault is corrected. Message Description No menus will be shown in the display for the duration of a priority 1 warn-...
- Page 70 Cockpit Glow plug system/Engine fault* Warning: Start-Stop system activated. Switch off the ignition SWITCH OFF when you leave the vehicle. The warning lamp lights up to show that the glow plugs are STOP TRANS- preheating the diesel engine. It flashes if there is an engine Warning: Stop the engine.
-
Page 71: Engine Oil Pressure
Cockpit Bulb defect* WARNING The indicator lights up when a bulb is not functioning. ● Always drive according to the road weather conditions, the terrain and traffic. Driving recommendations should never lead to illegal ma- The warning lamp lights up when there is a fault on the turn signals, noeuvres in surrounding traffic. - Page 72 Cockpit There is a fault in the ABS if: Differential lock fault (EDL)* ● The control lamp does not light up when the ignition is switched on. The EDL operates along with the ABS in vehicles equipped ● The control lamp does not go out again after a few seconds with the Electronic Stability Control (ESC)* ●...
- Page 73 Cockpit Electronic Stability Control (ESC)* / Brake system* There are two warning lamps for the Electronic stability con- This warning lamp lights up if the brake fluid level is too low trol. The lamp provides information concerning the func- or if there is a fault in the system.
- Page 74 Cockpit Tyre pressure* Tyre pressure adjustment Following the modification to tyre pressure or changing one or more wheels, ⇒ F ig. 40 the button must be kept pressed while the ignition is on until an audible warning is heard. If the wheels are under excessive load (for example, driving with a trailer or heavy load), the tyre pressure must be increased to the recommended value for a full load (see the sticker on the inside of the fuel flap).
- Page 75 Cockpit Speed selector lever lock* Main beam headlights This control lamp lights up when the main beams are on. The brake pedal must be depressed when this warning lamp lights up. This is necessary when the automatic gearbox* selector lever is moved out of the The warning lamp ...
-
Page 76: Emission Control System
Cockpit Emission control system* If the control lamp lights up again after driving on for a short distance, stop the vehicle and switch the engine off. Contact a Technical Service or a spe- This warning lamp monitors the exhaust system. cialised workshop. - Page 77 If the indicator flashes the voltage is insufficient for normal vehicle opera- Note tion. The vehicle cannot operate properly if you do not have a genuine SEAT key. Turn signals The control lamp flashes when the turn signals are in opera- tion.
-
Page 78: Steering Column Controls
Steering column controls* Steering column controls* General information The column incorporates multifunctional modules from which to control au- dio and telephone functions on the vehicle. There are two versions of the multifunction module: ● Audio version, to control the available audio functions from the steering wheel. -
Page 79: Audio Control
Steering column controls* Audio Control Fig. 41 Audio controls Short press Button Radio CD Audio CD mp3 AUX-IN Volume up Volume down Cycle through source FM - AM - CD - FM... Station search. Higher frequency Next track No function . -
Page 80: Audio + Telephone Control
Steering column controls* Audio + Telephone Control Fig. 42 Audio + Tele- phone Control Short press Long press CD MP3/Micro CD MP3/Micro Button Radio SD/Bluetooth AUX-IN Radio SD/Bluetooth AUX-IN Audio Audio Volume up Continue volume up Volume down Continue volume down Enable voice recognition. - Page 81 Steering column controls* Reject call Accept call/hang up With PID: No function specified Cycle through source FM - AM - CD - Micro SD - Bluetooth Audio - FM ... Cycle through source FM - AM - CD - Micro SD - Bluetooth Audio - FM ... With PID the button, E, performs more functions.
-
Page 82: Opening And Closing
Opening and closing Opening and closing Central locking WARNING ● Locking from the outside carelessly or without good visibility may Description lead to bruising, particularly in the case of children. ● When locking a vehicle, never leave children unaccompanied inside, The central locking system enables you to lock and unlock as from the outside it will be difficult to provide assistance if required. - Page 83 Opening and closing Once this system is activated, opening doors from the outside and the in- WARNING side is not possible. The rear lid can not be opened. The central lock button does not work. No one should remain inside the vehicle if the “Safe” mechanism is acti- vated because opening the doors will not be possible in case of emergen- When the ignition is switched off, the instrument panel display indicates cy neither from the inside nor the outside.
- Page 84 Opening and closing Activating the selective unlocking system* Unlocking With the door open, insert a key into the start cylinder and start the ignition. On withdrawing the ignition key, the vehicle will returns to its status prior to Insert the other key into the driver door lock and turn in the opening direc- self-locking.
- Page 85 Opening and closing Central lock button ● Locking the doors and rear lid prevents access from the outside (for safety reasons, e.g. when stopped at a traffic light). The central lock button allows you to lock and unlock the ve- ●...
-
Page 86: Keys
Opening and closing Keys Duplicate keys If you need a replacement key, go to a Technical Service with your vehicle identification number. Set of keys WARNING The set of keys includes a remote control, a key without a re- mote control and a plastic key tab*. ●... -
Page 87: Radio Frequency Remote Control
Opening and closing Radio frequency remote control* Locking and unlocking the vehicle The radio frequency remote control key is used to lock and unlock the vehicle from a distance. Fig. 46 Range of the ra- dio frequency remote control ⇒ F ig. 45 Using the button (arrow) on the control, the key blade is released. - Page 88 Opening and closing For the sake of the environment WARNING Used batteries must be disposed of at an appropriate waste facility or ● An improper use of the key can cause serious injuries. through an authorised service, given that their components can affect the ●...
-
Page 89: Anti-Theft Alarm System
Opening and closing Anti-theft alarm system* ● Opening of vehicle with mechanical key without switching ignition on within the next 15 seconds ● Opening a door Description of anti-theft alarm system* ● Opening the bonnet ● Opening the rear lid The anti-theft alarm triggers if unauthorised movements are ●... - Page 90 Opening and closing The vehicle interior monitoring and the tow-away protection system are au- Note tomatically switched on again next time the vehicle is locked. ● After 28 days, the indicator light will be switched off to prevent the bat- The vehicle interior monitoring and tow-away protection sensor (tilt sensor) tery from exhausting if the vehicle has been left parked for a long period of are automatically switched on when the anti-theft alarm is switched on.
- Page 91 Opening and closing Note ● If the vehicle is relocked and the alarm is activated without the volumet- ric sensor function, relocking will activate the alarm with all its functions, except the volumetric sensor. This function is reactivated when the alarm is switched on again, unless it is deliberately switched off.
-
Page 92: Rear Lid
Opening and closing Rear lid Unlocking and locking The rear lid opening system operates electrically. It is activa- ted by using the handle on the rear lid. Fig. 48 Detail of the in- side of the rear lid: hand grip Opening the rear lid ⇒ ... - Page 93 Opening and closing Emergency opening WARNING This allows the vehicle to be opened if the central locking ● Always close the rear lid properly. Risk of accident or injury. does not operate (for example, if the battery is flat) ● The rear lid must not be opened when the reverse or rear fog lights are lit.
-
Page 94: Windows
Opening and closing Windows Buttons on the driver door Button for window in front left door Button for window in front right door Opening or closing the windows electrically* All electric windows can be operated using the controls on WARNING the driver door. - Page 95 Opening and closing One-touch opening and closing* The one-touch opening and closing function will not function once the igni- tion has been switched off. One-touch opening and closing means you do not have to The one-touch function and roll-back function will not work if there is a mal- hold down the button.
-
Page 96: Panoramic Tilting Sunroof
Opening and closing – If the automatic raising is stopped and immediately after, the WARNING opening button is kept pressed, the window risers will lower. ● Incorrect use of the electric windows can result in injury. – Once the windows are completely closed, the turn signals will ●... - Page 97 Opening and closing Opening the panoramic/tilting sunroof WARNING – Press and hold down button . The roof starts opening until ● Incorrect use of the tilting sunroof can result in injury. the button is released. ● Never close the tilting sunroof without first checking that there are no Automatic closing of the panoramic/tilting sunroof obstructions.
- Page 98 Opening and closing Roll-back function of the panoramic/tilting sunroof* The panoramic/tilting sunroof has a roll-back function which prevents larger objects getting trapped when the roof is closed. The roll-back function does not prevent fingers getting pinched against the roof opening. The tilting sunroof stops and opens again immediately if it is obstructed when closing.
-
Page 99: Lights And Visibility
Lights and visibility Lights and visibility Lights Switching on the front fog lights* – Turn the switch from position or to the first stop and pull it. The symbol in the light switch lights up. Switching lights on and off Switching on the rear fog light (vehicles with front fog lights) –... -
Page 100: Automatic Lighting
Lights and visibility ● The rear fog light is so bright that it can dazzle drivers behind you. You WARNING should use the rear fog light only when visibility is very poor. ● The use of the lighting described here is subject to the relevant statutory ●... -
Page 101: Daytime Driving Lights
Lights and visibility Instrument and switch lighting / Headlight range control Headlight range control By using the electrical headlight range control, you can adjust the head- light range to the load level that is being carried in the vehicle. This way, it is possible to avoid dazzling oncoming traffic more than necessary. - Page 102 Lights and visibility Insert the key and switch the ignition on, holding it in this position for 3 Note seconds. Then, switch off the ignition. The daytime lights are deactivated and cannot be switched on. The system operates from a speed of about 10 km/h (6 mph). ...
- Page 103 Lights and visibility Coming/leaving Home function* ● If the light switch is turned to position . ● If the ignition is switched on. The Coming Home function is controlled manually. The Leav- ing Home function is controlled with a photosensor. Note ●...
- Page 104 Lights and visibility 3. Switch the ignition off. For the sake of the environment 4. Apply the handbrake. The heated rear window should be switched off as soon as the glass is dem- isted. By saving electrical power you can also save fuel. 5.
- Page 105 Lights and visibility Signalling a lane change Note – Push the lever up or down to the point where you incur ● The battery will run down if the hazard warning lights are left on for a resistance and then release it. The turn signal will flash several long time, even if the ignition is switched off.
-
Page 106: Interior Lights
Lights and visibility Interior lights Note ● The turn signals only work when the ignition is switched on. The corre- sponding warning lamp or flashes in the instrument panel. The control Front interior light lamp flashes when the turn signals are operated, provided a trailer is correctly attached and connected to the vehicle. -
Page 107: Visibility
Lights and visibility Luggage compartment light* Note If not all the vehicle doors are closed, the interior lights will be switched off The light is activated when the rear lid is open, even when the ignition and after approx. 10 minutes, providing the ignition key has been removed and lights are turned off. -
Page 108: Windscreen Wipers
Lights and visibility ⇒ F ig. 63 The sun visors for the driver and the front passenger can be pulled out of The window wiper lever has the following positions: their central supports and turned towards the doors in the direction of the ⇒ ... - Page 109 Lights and visibility seconds after the drip function, a new wash sequence will begin without the WARNING last wipe. For the “drip” function to work again, you have to turn the ignition off and then on again. ● Worn and dirty wiper blades reduce visibility and safety levels while driving.
- Page 110 Lights and visibility Switching on the windscreen wiper and washer system Note ⇒ F ig. – Press the lever fully forwards to position 65. The rear ● Do not put stickers on the windscreen in front of the rain sensor. This wiper and washer operate at the same time.
-
Page 111: Rear View Mirrors
Lights and visibility Headlight washer* Interior rear vision mirror The headlight washers clean the headlight lenses. It is dangerous to drive if you cannot see clearly through the rear window. The headlight washers are activated automatically when the windscreen washer is used and the window wiper lever is pulled towards the steering Manual anti-dazzle function for interior rear vision mirror wheel for at least 1.5 seconds –... - Page 112 Lights and visibility Switching on the anti-dazzle function Electric exterior mirrors* ⇒ F ig. – Press button 66. Control lamp is lit. The exterior mirrors can be adjusted using the rotary knob in the driver door. Anti-dazzle function The anti-dazzle function is activated every time the ignition is switched on. The green indicator lamp lights up in the rear vision mirror housing.
- Page 113 Lights and visibility – The mirrors demist for some minutes to prevent draining the Note battery. ● If the electrical adjustment ever fails to operate, the mirrors can be ad- justed by hand by lightly pressing the edge of the mirror glass. –...
-
Page 114: Seats And Storage Compartments
● Always keep your feet on the footwell when the vehicle is moving; Proper seat adjustment optimises the level of protection of- never rest them on the dash panel, out of the window or on the seat. This fered by seat belts and airbags. -
Page 115: Head Restraints
Fig. 69 Side view: head restraints and seat belts correctly adjusted – Adjust the head restraint so that the top is at the same level as the top of your head or as close as possible to the same level as ⇒ ... - Page 116 – Make sure that it engages securely into position. Note Adjusting height (rear seats) ● To fit and remove the rear head restraints, gently tilt the seat backrest – Press the button on the side and pull upwards to the desired forwards.
-
Page 117: Front Seats
The further the Adjusting the backrest angle seat backrests are tilted to the rear, the greater the risk of injury due to improper positioning of the belt web! ... - Page 118 CAUTION Heated seats* To avoid damaging the heating elements, please do not kneel on the seat or apply sharp pressure at a single point to the seat cushion and backrest. The front seat cushions and backrests can be heated electri- cally.
-
Page 119: Rear Seats
– Pull the release button in the direction of the arrow and fold the backrest forwards. – Insert the head restraints in the spaces on the rear of the seat cushion which are visible when the seat cushion is lowered. Folding seat forward –... - Page 120 ● Do no trap or damage seat belts when raising the backrest. ● After raising the backrest, check it has engaged properly in position. Do this by pulling on the central seat belt or directly on the backrest and check that the position lever is in the neutral position.
-
Page 121: Storage Compartment
Seats and storage compartments Storage compartment This compartment can hold documents in A4 format, a water bottle of 1.5 L,... Storage compartment on the front passenger side WARNING Always keep the storage compartment cover closed while the vehicle is in motion in order to reduce the risk of injury caused by a sudden braking or by an accident. - Page 122 Fig. 78 Mounting brack- et for navigator on dash panel. Fig. 80 Storage com- partment under the front passenger seat To open – The compartment is opened by pulling on the lever and assist- ing it with your hand. To close –...
- Page 123 Seats and storage compartments Seat storage pocket* Front drink holder* Fig. 81 Seat storage Fig. 82 Front drink hold- pocket ers in the centre console There is a storage pocket on the rear of the front seats. There are two cup holders in the centre console in front of the gearbox lever ...
-
Page 124: Ashtrays, Cigarette Lighter And Power Socket
Seats and storage compartments Ashtrays, cigarette lighter and power socket Rear drink holder* Front ashtray* Fig. 83 Drink holder in the centre console On the rear part of the centre console, behind the handbrake, there is a ⇒ F ig. drink holder installed* Fig. -
Page 125: Cigarette Lighter
Seats and storage compartments Cigarette lighter* Power sockets* Fig. 86 Front power Fig. 85 Lighter socket ⇒ F ig. 85 to activate it ⇒ . – Press on the cigarette lighter The 12 Volt cigarette lighter power socket can also be used for other electri- cal components with a power rating of up to 120 Watt. -
Page 126: First-Aid Kit, Warning Triangle, Fire Extinguisher
Seats and storage compartments Auxiliary audio input connection (AUX)* For information concerning the use of this equipment, please see the Radio handbook. First-aid kit, warning triangle, fire extinguisher* First-aid kit, warning triangle and fire extinguisher Fig. 87 AUX connection The use of reflective warning triangles is obligatory in emergencies in some on the central console (depending on the equip-... -
Page 127: Luggage Compartment
Seats and storage compartments Luggage compartment Note The ventilation slots in front of the rear side windows must not be covered as this would prevent stale air being extracted from the vehicle. Storing objects All luggage must be securely stowed. Rear shelf Please observe the following points to ensure the vehicle handles well at all times:... - Page 128 Roof rack* Please observe the following points if you intend to carry loads on the roof: ● For safety reasons, only luggage racks and accessories supplied by SEAT Official Services should be used. ● It is essential that you follow the assembly instructions included with the bars exactly, being especially careful to position front and rear luggage compartment cover bars on the special housings on the longitudinal bars.
-
Page 129: Air Conditioning
Air conditioning Air conditioning Heating which is needed to defrost the windows quickly, is only available when the engine has reached its operating temperature. Blower Controls The air flow can be set at four speeds with switch . The blower should al- ways be set at the lowest speed when driving slowly. - Page 130 Air conditioning Ventilating the vehicle interior WARNING ⇒ F ig. 91 – Turn the temperature selector anticlockwise. ● For your safety, the windows should never be fogged up or covered – Turn blower switch to any of the head settings 1 -4. with snow or ice.
- Page 131 Air conditioning – Turn blower switch to any of the head settings 2 -3. Heating Maximum heat output, which is needed to defrost the windows quickly, is – Turn air distribution control to . only available when the engine has reached its operating temperature. –...
-
Page 132: Air Conditioning
Air conditioning Air distribution The air conditioning system only works when the engine is running and the fan is switched on. Switch on symbol Main air output through outlets: 1, 2 ⇒ F ig. 93 – Using the controls and with the switch ... - Page 133 Air conditioning – Turn the blower switch to any of the settings 1-4. WARNING – Set the air distribution control to the air flow configuration For your safety, the windows should never be fogged up or covered with desired: (towards the windscreen), (towards the chest), ...
-
Page 134: Air Recirculation
Air conditioning ● The outside temperature is below +3°C. Note ● The air conditioning system compressor has been temporarily switched ● When engaging reverse gear, the air recirculation is connected automat- off because of an increased engine coolant temperature. ically to prevent the entrance of exhaust gases in the vehicle on travelling ●... -
Page 135: Climatronic
Air conditioning Climatronic Interior temperature indicator selected Air flow direction indicator Fan speed increase Controls Fan speed decrease Interior temperature increase Interior temperature decrease button – Automatic adjustment of temperature, ventilation and AUTO air distribution Button – Windscreen demisting function. The air drawn in is direc- ... - Page 136 Air conditioning Automatic mode Manual mode In automatic mode air temperature, air flow and distribution In manual mode the air temperature, flow, and the desired are automatically regulated so that a specified temperature air distribution can be adjusted. is attained as quickly as possible, and then maintained. Switching on manual mode Switching on automatic mode ⇒ ...
-
Page 137: General Notes
Air conditioning General notes Air recirculation mode Air recirculation mode prevents fumes or unpleasant smells Pollution filter from coming from the outside. The pollution filter (a combined particulate filter and active carbon filter) serves as a barrier against impurities in the outside air, including dust and –... - Page 138 Air conditioning ● The air conditioner operates most effectively with the windows and the sliding/tilting sunroof* closed. However, if the temperature inside the vehi- cle is excessive because of the sun, the air inside can be cooled faster by opening the windows for a short time. ●...
-
Page 139: Driving
The height and reach of the steering wheel can be freely ad- when the vehicle is stationary. justed to suit the driver. ● Adjust the driver seat or steering wheel so that there is a distance of ⇒ F ig. at least 25 cm between the steering wheel and your chest 96. -
Page 140: Safety
Driving Safety WARNING ● Do not forget that the Electronic stability control ESC cannot defy the Electronic Stability Control (ESC)* laws of physics. This should be kept in mind, particularly on slippery and wet roads and when towing a trailer. The ESC helps make driving safer in extreme driving condi- ●... -
Page 141: Electronic Immobiliser
The engine can only be started using a genuine SEAT key with its correct Every time the vehicle is started again, the ignition key must be turned to code. -
Page 142: Starting And Stopping The Engine
Risk of fatal accidents. Carbon monoxide can cause loss of The engine can only be started using a genuine SEAT key consciousness. It can also result in death. - Page 143 Driving Starting diesel engines WARNING The engine can only be started using a genuine SEAT key ● Never start or run the engine in unventilated or closed rooms. The ex- with its correct code. haust gases contain carbon monoxide, an odourless and colourless poi- sonous gas.
- Page 144 Your SEAT vehicle has a bivalent engine able to run on either LPG or petrol. For this reason, you should idle the engine for approx. 2 minutes before you The LPG tank ⇒ ...
-
Page 145: Start-Stop Function
Driving ● There is enough LPG in the tank. WARNING ● The temperature of the vehicle coolant is above 30°C. LPG is a highly explosive and inflammable substance. It may cause se- ● Engine speed while driving is above 1200 rpm. vere burns and other injury. - Page 146 ● Temperature setting is selected. ● The engine coolant temperature is insufficient. ● The driver seat belt must be buckled. ● The alternator is faulty, for example the V-belt has ruptured. ● The bonnet must be closed. ● The engine must be at operating temperature.
- Page 147 Driving Activating and deactivating the Start-Stop function Driver messages Fig. 100 The Start-Stop function button. Fig. 101 Display on the instrument panel during Start-Stop function operation. Every time the ignition is switched on, the Start-Stop function is au- tomatically switched on. When the engine is turned off by the Start-Stop function, this is displayed on the instrument panel.
-
Page 148: Manual Gearbox
Driving Manual gearbox WARNING ● When the engine is running, the vehicle will start to move as soon as Driving with a manual gearbox a gear is engaged and the clutch released. ● Never select the reverse gear when the vehicle is in motion. Risk of accident. -
Page 149: Automatic Gearbox
Driving Automatic gearbox* Selector lever lock The selector lever lock in position P or N prevents gears from Gearbox programmes being engaged inadvertently, which would cause the vehicle to move. The automatic gearbox has got two gearbox programmes. Fig. 104 Automatic gear- Fig. - Page 150 Driving The selector lever lock is released as follows: Driving a car with an automatic gearbox – Switch the ignition on. The gearbox changes gear ratios automatically as the vehi- cle moves. – Hold the brake pedal pressed down and at the same time, hold the selector lever lock on the left of the selector lever also pressed down.
- Page 151 Driving Stopping briefly – With a selected gear, accelerate slowly and at the same time, release the handbrake. – If stopping for a short time, keep the vehicle stationary by pressing the foot brake hard to prevent the vehicle moving The steeper the slope, the lower the needed gear.
- Page 152 Driving Changing gear in tiptronic mode* WARNING (Continued) ● Never accelerate when moving the selector lever or you may cause an The tiptronic system allows the driver to select gears man- accident. ually ● Never move the selector lever to R or P when driving. Risk of accident! ●...
- Page 153 Driving Changing gear in tiptronic mode Changing gears in the normal or sport programme using the steering wheel paddle levers – Press the selector lever from position D to the right into the tip- ⇒ F ig. 108 If the paddle levers are used in the normal or sport programme, tronic selector gate.
- Page 154 Driving Selector lever positions ● The wiper starts if the windscreen washer is on. ● The parking distance warning system switches on.* The selected gear is displayed on the side of the selector lever and on the instrument panel display. The currently selected gear for the automatic N - Neutral (idling) gearbox will also be shown on the display.
- Page 155 Driving WARNING (Continued) WARNING ● The brake servo does not work with the engine off. You need more If the vehicle moves with no control, an accident and serious injury may force to stop the vehicle. occur. ● Power steering does not work when the engine is not running. That is ●...
-
Page 156: Handbrake
Driving Always apply the handbrake when you leave your vehicle and when WARNING you park. You could lose control of the vehicle if you accelerate on slippery road Applying the handbrake surfaces. Risk of serious injury. ⇒ F ig. ● Be particularly careful when using the kickdown features on slippery –... - Page 157 Driving Parking WARNING The handbrake should always be firmly applied when the ● Take measures to reduce the risk of injury when you leave your vehi- vehicle is parked. cle unattended. ● Never park where the hot exhaust system could ignite inflammable Always note the following points when parking the vehicle: materials, such as dry grass, low bushes, spilt fuel etc.
-
Page 158: Acoustic Parking Aid System
Driving Activation WARNING The system is activated by engagement of the reverse gear. A brief audible warning confirms the activation and correct function of the system. ● If you do not start the vehicle immediately after taking your foot off the brake pedal, the vehicle may start to roll back under certain condi- Reverse gear tions. - Page 159 Driving To ensure that the system works properly, the sensors must be kept clean and free of ice and snow. WARNING ● The sensors have blind spots in which obstacles may not be detected. ● Always look out for small children and animals because the system will not always detect them.
-
Page 160: Cruise Speed* (Cruise Control System)
Driving Cruise speed* (Cruise control system) Switching the cruise control system on and off Description The cruise control system is able to maintain the set speed in the range of 30 km/h (20 mph) to 180 km/h (110 mph). Once the speed setting has been saved, you may take your foot off the ac- celerator. - Page 161 Driving Setting speed* Adjusting set speed* The speed can be altered without touching the accelerator or the brake. Fig. 112 Turn signal and main beam headlight lev- er: switch and rocker switch for the cruise con- Fig. 113 Turn signal and trol main beam headlight lev- er: switch and rocker...
- Page 162 Driving the stored speed for longer than 5 minutes. The speed will have to be stor- ● if the vehicle is accelerated to over 180 km/h (110 mph), ed again. ● when the lever is moved in the direction of without fully being engaged.
- Page 163 Driving Vehicles with an automatic gearbox To completely disengage the system, the selector lever must be placed in one of the following positions: P, N, R or 1 or with the vehicle stopped and the ignition turned off. Safety First Operating Instructions Practical Tips Technical Specifications...
-
Page 164: Practical Tips
Intelligent technology Practical Tips Intelligent technology Brakes Hydraulic Brake Assist (HBA)* The function (Hydraulic Brake Assist HBA) is only included in Brake servo vehicles with ESC. The brake servo increases the pressure you apply to the brake pedal. It In an emergency, most drivers brake in time, but not with maximum force. works only when the engine is running. -
Page 165: Anti-Lock Brake System And Traction Control Abs
Intelligent technology If you brake hard on a slippery road surface, the best possible control is re- WARNING tained as the wheels do not lock. ● The risk of accident is higher if you drive too fast, if you do not keep However, ABS will not necessarily guarantee shorter braking distances in all your distance to the vehicle in front, and when the road surface is slip- conditions. -
Page 166: Electronic Stability Control (Esc)
Intelligent technology The ASR helps the car to start moving, accelerate and climb a gradient in XDS* slippery conditions, where this may otherwise be difficult or even impossi- ble. Driveshaft differential The ASR automatically switches on when the engine is started. If necessary, When taking a bend, the driveshaft differential mechanism allows the outer it may be turned on or off by briefly pushing the ESC button on the centre wheel to turn at a higher speed than the inner wheel. - Page 167 Intelligent technology Electronic Stability Control (ESC)* Anti-lock brake system (ABS) The ESC reduces the risk of skidding by braking the wheels individually. The anti-lock brake system prevents the wheels locking during braking The system uses the steering wheel angle and road speed to calculate the ⇒ ...
- Page 168 Intelligent technology WARNING ● When accelerating on a slippery surface, for example on ice and snow, press the accelerator carefully. Despite EDL, the driven wheels may start to spin. This could impair the vehicle's stability. ● Always adapt your driving style to suit road conditions and the traffic situation.
-
Page 169: Driving And The Environment
Driving and the environment Driving and the environment Running-in Braking capacity and braking distance The braking capacity and braking distance are influenced by Running in a new engine driving situations and road conditions. The engine needs to be run in over the first 1500 km (1000 The efficiency of the brakes depends directly on the brake pad wear. -
Page 170: Exhaust Gas Purification System
Driving and the environment – For engine oil changes, do not replenish with too much engine WARNING (Continued) oil ⇒ p age 199, Topping up engine oil . ● On steep slopes, if brakes are excessively used, they will overheat. Before driving down a long steep slope, it is advisable to reduce speed –... -
Page 171: Economical And Environmentally Friendly Driving
Driving and the environment Diesel engine particulate filter* WARNING The diesel engine particulate filter eliminates soot produced ● The diesel engine particulate filter may reach extremely high temper- by burning diesel. atures; the vehicle should be parked so that the exhaust pipe does not come into contact with flammable materials underneath the vehicle. - Page 172 A badly serviced engine can consume up to 10% more fuel than necessary.
-
Page 173: Driving Abroad
● The use of water-soluble paints Environmental friendliness Environmental protection is a top priority in the design, choice of materials and production of your new SEAT. Driving abroad Design measures for economical recycling ● Joints and connections designed for easy dismantling Observations ●... -
Page 174: Trailer Towing
Driving and the environment SEAT importers and distributors will gladly provide information about the If the trailer has a 7-pin plug you will need to use an adapter cable. This is technical preparations that you vehicle requires and also about necessary available in any Technical Service. -
Page 175: Driving Tips
Driving and the environment Exterior mirrors Driving tips Check whether you can see enough of the road behind the trailer with the Driving with a trailer always requires extra care. standard rear vision mirrors. If this is not the case, you should have addi- tional exterior mirrors fitted. -
Page 176: Vehicle Maintenance And Cleaning
Vehicle maintenance and cleaning Vehicle maintenance and cleaning General notes WARNING Regular washing and care help maintain the value of your ● Car-care products can be toxic. Because of this, they must always be kept closed in their original container. Keep them out of the reach of chil- vehicle. -
Page 177: Care Of The Vehicle Exterior
Vehicle maintenance and cleaning Care of the vehicle exterior Washing by hand Vehicle washing Automatic car washing tunnel – First soften the dirt and rinse it off with water. The vehicle paintwork is so durable that the vehicle can normally be washed –... - Page 178 Vehicle maintenance and cleaning Washing the vehicle with a high pressure cleaner WARNING Be particularly careful when using a high pressure cleaner! ● Wash your vehicle with the ignition switched off. ● Protect your hands and arms from cuts on sharp metal edges when –...
- Page 179 Vehicle maintenance and cleaning Vehicle paint maintenance Caring for plastic parts Regular waxing protects the paintwork. Solvents damage plastic parts. You need to apply wax to your vehicle if water does not form small drops If normal washing fails to clean plastic parts, clean them with approved sol- and run off the paintwork when it is clean.
- Page 180 Vehicle maintenance and cleaning If possible, use a de-icing spray to remove ice. If you use an ice scraper, Rubber seals maintenance push it in one direction only without swinging it. If rubber seals are well looked after, they will not freeze so Use window cleaner or a silicone remover to clean rubber, oil, grease and quickly.
-
Page 181: Underbody Protection
Vehicle maintenance and cleaning Every three months CAUTION – Apply a hard wax compound to the wheels. To prevent scratching chrome surfaces: ● Never use an abrasive cleaning product on chrome. Alloy wheels require regular attention to preserve their appearance. If road ●... -
Page 182: Vehicle Interior Maintenance
Vehicle maintenance and cleaning WARNING WARNING Do not apply underseal or anti-corrosion coatings to the exhaust pipes, ● When working in the engine compartment, always observe the safety warnings ⇒ p age 193. catalytic converter or the heat shields on the exhaust system. The heat of the exhaust system or the engine could cause them to ignite. - Page 183 Cloth seat covers and fabric trim cleaning er-care product, available in your Technical Services. Cloth seat covers and fabric trim on the doors, headlining etc. can be – Apply these products very sparingly. cleaned with a special interior cleaner or with dry foam and a soft brush.
- Page 184 WARNING the leather. ● Do not use chemical cleaning agents on the seat belts, as this can im- Dust and grit in the pores and seams can scratch and damage the surface. If pair the strength of the webbing. Ensure that seat belts do not come into the vehicle is under solar radiation for long periods, the leather should be contact with corrosive fluids.
-
Page 185: Accessories, Replacement Of Parts And Modifications
(e.g. cruise control system or electronically-con- ® cal Service using SEAT Original Spare Parts trolled suspension) must be approved by SEAT and bear the e mark (the Eu- ropean Union's authorisation symbol). Safety First Operating Instructions... -
Page 186: Roof Aerial
You will require an external aerial for mobile phones and ● external aerial incorrectly installed, two-way radios. ● transmitting power output in excess of 10 watts. SEAT has approved for your vehicle the use of mobile telephones and two- way radios providing under the following conditions:... -
Page 187: Fitting A Towing Bracket
Accessories, replacement of parts and modifications The distance between the centre of the ball coupling and the ground should Note never be lower than the indicated value, even with a fully loaded vehicle Please observe the operating instructions of your mobile telephone/two- and including the maximum drawbar load. - Page 188 In certain versions this may entail fitting a heat insulating plate, which is why it is recommended that you go to a SEAT dealership. In the event that the plate is not installed correctly, SEAT is exempt from any liabil- ity.
-
Page 189: Checking And Refilling Levels
Checking and refilling levels Checking and refilling levels Refuelling – Turn the key in the lock, without releasing the cap, clockwise through 180°. The tank flap is released manually. The tank holds approxi- – Remove the key and close the flap until it clicks into place. The mately 45 litres. - Page 190 Checking and refilling levels take longer than normal (up to one minute) for the engine to start firing. WARNING This is due to the fact that the fuel system has to purge itself of air before starting. ● Fuel is highly flammable and can cause serious burns and other inju- ries.
-
Page 191: Lpg System
Checking and refilling levels LPG system* Refuelling with LPG The LPG filler neck is behind the fuel cap, next to the petrol filler neck. Fig. 120 LPG tank in spare wheel well Refuelling with LPG – Before refuelling, stop the engine and switch off the ignition. –... - Page 192 Checking and refilling levels ⇒ F ig. 120 The LPG tank in the spare wheel well has a capacity of 52.8 li- Adapter for the liquid petroleum gas (LPG) filler neck tres. If the outside temperatures are very low, it may not be possible to com- pletely fill the LPG tank.
- Page 193 Note A series of collision tests performed on this vehicle while running with LPG For any fault in the LPG system, please refer to the SEAT web page, which have confirmed its high level of safety. lists the workshops authorised to repair these faults.
-
Page 194: Petrol
Checking and refilling levels Petrol tives. These additives will help to prevent corrosion, keep the fuel system clean and prevent deposits from building up in the engine. If good quality petrol with additives is not available or engine problems oc- Petrol types cur, the required additives must be added during refuelling. -
Page 195: Working In The Engine Compartment
All service fluids and consumables, e.g. coolant, engine oil, spark plugs and batteries, are under constant development. SEAT provides a constant flow of information to the Technical Services concerning modifications. For this reason, we recommend you to have service fluids and consumables re- placed by a Technical Service. - Page 196 Checking and refilling levels WARNING (Continued) WARNING ● If any work has to be performed when the engine is started or with All work on the engine or in the engine compartment, e.g. checking and the engine running, there is an additional, potentially fatal, safety risk refilling fluids, involves the danger of injury and scalding as well as the from the rotating parts, such as the drive belts, alternator, radiator fan, risk of accident or fire.
- Page 197 Checking and refilling levels For the sake of the environment Service fluids leaks are harmful to the environment. For this reason you should make regular checks on the ground underneath your vehicle. If you find spots of oil or other fluids, have your vehicle inspected in a specialised workshop.
-
Page 198: Engine Oil
Checking and refilling levels Engine oil WARNING (Continued) ● Wait until no more steam, smoke or coolant is emitted from the bon- net, then carefully open the bonnet. General notes ● When working in the engine compartment, always observe the safety warnings ⇒ ... - Page 199 Checking and refilling levels Because this oil is essential for extending the service intervals, it must only Oil properties be used observing the following indications: Engine type Specification ● Avoid mixing it with oil for fixed service intervals. Petrol without flexible service in- VW 502 00/VW 504 00 ●...
- Page 200 Checking and refilling levels Checking the engine oil level Oil level in area – You can add oil, but keep the level in this zone. The engine oil dipstick indicates the level of the oil. Oil level in area Oil must be added. Afterwards, the oil level should be in the lined area –...
- Page 201 Checking and refilling levels Topping up engine oil WARNING Top up gradually with small quantities of engine oil. Oil is highly inflammable! Ensure that no oil comes into contact with hot engine components when topping up. CAUTION If the oil level is above the area do not start the engine.
-
Page 202: Coolant
Checking and refilling levels Coolant WARNING Only change the engine oil yourself if you have the specialist knowledge Engine coolant specifications required! ● Before opening the bonnet, read and observe the warnings The engine cooling system is supplied from the factory with a specially trea- ⇒ ... - Page 203 CAUTION The original additives should never be mixed with coolants which are not approved by SEAT. Otherwise, you run the risk of causing severe damage to the engine and the engine cooling system. Fig. 126 In the engine ●...
-
Page 204: Washer Fluid And Windscreen Wiper Blades
Checking and refilling levels Topping up coolant CAUTION – Only use new coolant liquid. ● If you notice a change in the colour of the liquid because it has been in use for a long time, it is recommended to change it, as it will have lost some –... - Page 205 Checking and refilling levels The windscreen washer and the headlight washers are supplied with fluid Changing windscreen wiper blades from the windscreen washer fluid container in the engine compartment. The container holds approx. 2 litres; in vehicles with headlight washers* it holds If the windscreen wiper blades are in perfect condition, you approx.
- Page 206 Checking and refilling levels To change the blades it is necessary to change the rest position of WARNING the wipers to the service position. Do not drive unless you have good visibility through all windows! Do not change the windscreen wipers when out of the service posi- ●...
- Page 207 Checking and refilling levels Changing the rear wiper blade Removing the wiper blade ⇒ F ig. – Lift the wiper arm away from the glass 130. A good rear wiper blade is essential for clear rear vision. Damaged wiper blades should be replaced immediately. –...
-
Page 208: Brake Fluid
The position of the brake fluid reservoir is shown in the corresponding en- gine compartment illustration ⇒ p age 251. The brake fluid reservoir has a You can buy VW 501 14 standard brake fluid in a SEAT dealership or SEAT black and yellow cap. -
Page 209: Vehicle Battery
The brake pads and brake fluid must be collected and disposed of accord- the risk of accident or fire when working on the battery and the electrical ing the applicable regulations. The SEAT Technical Service network has the system: necessary equipment and qualified personnel for collecting and disposing ●... - Page 210 Checking and refilling levels WARNING (Continued) CAUTION ● Fires, sparks, open flames and smoking are prohibited. When han- ● Never disconnect the battery if the ignition is switched on or if the en- dling cables and electrical equipment, avoid causing sparks and electro- gine is running.
-
Page 211: Wheels
Remove any foreign objects embedded in the treads. has special safety features. Storing tyres Genuine SEAT batteries fulfil the maintenance, performance and safety specifications of your vehicle. – When you remove the tyres, mark them in order to maintain the same direction of rotation when they are installed again. - Page 212 Checking and refilling levels – When removed, the wheels and/or tyres should be stored in a Checking tyre pressure cool, dry and preferably dark location. The correct tyre pressure can be seen on the sticker on the – Store tyres in a vertical position if they are not fitted on wheel inside of the fuel tank flap.
- Page 213 Checking and refilling levels Tyre useful life Wear indicators The original tyres on your vehicle have 1.6 mm high “tread wear indicators” The useful life of tyres is dependent on tyre pressure, driving ⇒ F ig. 133, running across the tread. Depending on the make, there will be style and fitting.
- Page 214 The tyres and wheel rims are an essential part of the vehicle's design. The when installing or changing tyres, wheels or wheel trims. tyres and rims approved by SEAT are specially matched to the characteris- tics of the vehicle and make a major contribution to good road holding and safe handling ⇒ ...
- Page 215 This can also apply to wheels of the same model. The use of CAUTION wheels or tyres which have not been approved by SEAT for use with your The prescribed tightening torque for wheel bolts for steel and alloy wheels model may invalidate the vehicle's type approval for use on public roads.
- Page 216 Checking and refilling levels Winter tyres If you have a flat tyre, please refer to the notes on the spare wheel ⇒ p age 212, New tyres and wheels. Winter tyres will improve the vehicles handling on snow and ice. WARNING The maximum speed for the winter tyres must not be exceeded.
- Page 217 Checking and refilling levels CAUTION Remove the snow chains to drive on roads without snow. Otherwise they will impair handling, damage the tyres and wear out very quickly. Note In some countries, the speed limit for using snow chains is 50 km/h (30 mph).
-
Page 218: If And When
If and when If and when Vehicle tools, spare wheel WARNING (Continued) ● Never start the engine when the vehicle is on the jack. Risk of acci- dent. Vehicle Tools ● If work is to be carried out underneath the vehicle, this must be se- The vehicle tools are located under the floor panel in the cured by suitable means. -
Page 219: Wheel Change
If and when If you have a puncture on one of the front wheels when using snow chains, Note fit the compact temporary spare wheel in place of one of the rear wheels. You can then attach the snow chains to the wheel taken from the rear and ●... - Page 220 If and when After changing a wheel WARNING After changing the wheel there are still tasks to complete. Switch on the hazard warning lights and place the warning triangles in position. This is for your own safety and also warns other road users. –...
- Page 221 If and when Wheel covers* Loosening the wheel bolts The wheel covers must be removed for access to the wheel The wheel bolts must be loosened before raising the vehicle. bolts Fig. 136 Changing a wheel: loosen the wheel bolts Fig.
- Page 222 If and when WARNING Loosen the wheel bolts only about one turn before raising the vehicle with the jack, otherwise there is a risk of accident. Note ● If the wheel bolt is very tight, you may be able to loosen it by pushing down the end of the spanner carefully with your foot.
- Page 223 The code number should be noted and kept in a safe place, as it is only by If tyres with a specific direction of rotation are fitted, note the direction of using the code number that a duplicate adaptor can be obtained from the rotation. SEAT Official Services. Safety First Operating Instructions Practical Tips...
-
Page 224: Tyre Repair Kit (Tyre-Mobility-System)
For the sake of the environment If you have to dispose of a sealant container, go to a specialised waste serv- ice or to a SEAT Technical Service, where the product can be recycled in an Tyre repair kit (Tyre-Mobility-System)* appropriate waste container. - Page 225 If and when What to do first Tyre repair Certain steps must be taken before repairing a tyre. The following sections describe the procedures for repairing a tyre. – If you have a flat tyre or puncture, park the vehicle as far away from the flow of traffic as possible.
-
Page 226: Fuses
● Always keep some spare fuses in the vehicle. These are available from SEAT Official Services. – Replace the blown fuse (which will have a melted metal strip) with a new fuse of the same ampere rating. - Page 227 If and when Fuses on left side of dash panel Number Consumer Amps Lights control, instrument panel Fuses Heated mirrors Number Consumer Amps Engine injection module/Rain sensor/Automatic gearbox lever/Main petrol relay Power steering/Engine operation/Flow meter Luggage compartment light, interior light, glove Diagnostics/Heater/Autoclimate/Climatronic/ compartment light, side lights Electric anti-dazzle mirror/Navigator/Air condi-...
- Page 228 If and when Fuses below steering wheel in relay holder Number Consumer Amps Horn PTC fuses Panoramic roof Number Consumer Amps Windscreen wipers Heated rear window Supplementary electrical heating using air Supplementary electrical heating using air Radio/Bluetooth/USB + AUX-In/DC-DC converter for Start-Stop Supplementary electrical heating using air Climatronic/autoclima/Diagnosis/Automatic...
-
Page 229: Bulb Change
If and when Bulb change Fuses in engine compartment above battery General notes Before changing any bulb, first turn off the failed component. Do not touch the glass part of the bulb with your bare hands. The finger- prints left on the glass will vaporise as a result of the heat generated by the bulb, causing a reduction in bulb life and condensation on the mirror sur- face, thus reducing effectiveness. - Page 230 If and when Xenon //adaptive headlights* For the sake of the environment Dipped and full beam - D1S Please ask your specialist retailer how to dispose of used bulbs in the prop- Side - LED er manner. DRL (day light) - LED Turn signals - PY 21W...
-
Page 231: Single Headlight Bulb Change
If and when Single headlight bulb change Turn signal bulb Single headlight bulb Fig. 143 Single turn sig- nal lamp – Raise the bonnet. Fig. 142 Single head- light ⇒ F ig. 143 – Turn bulb holder to the left and pull. Side lights - Dipped beam/main beam. - Page 232 If and when ⇒ F ig. 145 Dipped/main beam headlights – Remove connector from the bulb. ⇒ F ig. 145 – Unclip the retainer spring pressing inwards to the right. – Extract the bulb and fit the replacement so that the rim of the attachment plate is on the reflector cut-out.
-
Page 233: Double Headlight Bulb Change
If and when ⇒ F ig. 144 – Move the loop in the direction of the arrow and Dipped beam headlights remove the cover. Turn signal lights ⇒ F ig. 146 – Remove the bulb holder outwards. – Replace the bulb by pulling it out and inserting the replace- Side light ment. - Page 234 If and when – Raise the bonnet. – Move the loop in the direction of the arrow and remove the ⇒ F ig. cover 148. ⇒ F ig. 149 – Remove connector by pulling outward. – Remove the bulb by pulling it out and fitting the new one. –...
- Page 235 If and when ⇒ F ig. 153 Dipped beam headlights – Remove connector from the bulb. ⇒ F ig. 153 – Unclip the retainer spring pressing inwards to the right. – Extract the bulb and fit the replacement so that the rim of the attachment plate is on the reflector cut-out.
- Page 236 If and when – Remove the bulb by pressing on the bulb holder and rotating at the same time to the left. – Installation involves the above steps in reverse sequence. ...
-
Page 237: Changing The Bulbs Of Afs Headlights
If and when Changing the bulbs of AFS headlights Turn signal light bulb AFS headlight bulbs Fig. 156 Turn signal – Raise the bonnet. Fig. 155 AFS headlight bulbs ⇒ F ig. 156 – Turn bulb holder to the left and pull. Turn signal lights –... -
Page 238: Changing The Fog Light Bulbs
If and when ⇒ F ig. 157 Changing the fog light bulbs – Remove the bolt from the fog light grille with a screwdriver. – Subsequently, remove the clips located on the edge of the grill Fog light bulb with gentle leverage. ⇒ ... -
Page 239: Changing The Rear, Side And Interior Light Bulbs
If and when – Installation involves the above steps in reverse sequence. Tail lights – Check that the bulb works properly. Changing the rear, side and interior light bulbs Summary of LED tail lights LEDS ● Brake lights Fig. 160 Left tail light ●... - Page 240 If and when Retro-fog light (left tail light) Changing bulbs on tail lights Reverse light (right tail light) Note In countries driving on the right (left-driving), both D and E headlights are placed the other way round (Retro-fog light on driver side and reverse light on passenger side).
- Page 241 If and when – Once the bulb holder has been removed, press downwards in – Remove the failed bulb and replace with a new bulb. the direction of the arrow and at the same time, turn in the – Insert the bulb holder in the turn signal guide until it clicks into ⇒ ...
- Page 242 If and when Interior light and front reading light – First fit the glass with the fastening tabs over the frame of the switch. Next press the front part until the two long tabs click on the support. Additional brake light* Given the difficulty involved in the replacement of this light it should be done by the Technical Service.
-
Page 243: Jump-Starting
If and when Luggage compartment light* – Press the bulb sideways and remove it from its housing ⇒ F ig. 168. Jump-starting Jump leads The jump lead must have a sufficient wire cross section. If the engine fails to start because of a discharged battery, the battery can be connected to the battery of another vehicle to start the engine. - Page 244 If and when How to jump start: description – Connect one end of the red jump lead to the positive termi- ⇒ F ig. nal of the vehicle with the flat battery 169. – Connect the other end of the red jump lead to the positive ter- minal in the vehicle providing assistance –...
- Page 245 If and when Starting WARNING (Continued) 5. Start the engine of the vehicle with the boosting battery and let ● Never use jump leads when one of the batteries is frozen. Danger of it run at idling speed. explosion! Even after the battery has thawed, battery acid could leak and cause chemical burns.
-
Page 246: Towing And Tow-Starting
If and when Towing and tow-starting Comments Please observe the following points if you use a tow rope: Tow-starting* Notes for the driver of the towing vehicle The use of jump leads is preferable to tow-starting. – Drive slowly at first until the tow rope is taut. Then accelerate gradually. - Page 247 If and when Do not pull too hard with the towing vehicle and take care to avoid jerking ● The steering wheel is locked when the vehicle has no electrical power. the tow rope. When towing on an unpaved road, there is always a risk of The vehicle must then be towed with the front wheels raised.
- Page 248 If and when Rear towline anchorage Fig. 172 Rear towline anchorage There is a towline anchorage at the rear on the right below the rear bumper. ...
-
Page 249: Description Of Specifications
Description of specifications Technical Specifications Description of specifications Important information Abbrevia- Meaning tion Cetane number, indication of the diesel combustion power. Important Research octane number, indication of the knock resistance of petrol. The information in your vehicle's official documents always ... - Page 250 Description of specifications Vehicle identification data Vehicle data The data sticker is placed on the inside of the spare wheel well, in the lug- The most important information is given on the identifica- gage compartment and on the rear cover of the Maintenance Programme. tion plate and the vehicle data sticker.
-
Page 251: Information On Fuel Consumption
Description of specifications Information on fuel consumption Weights Kerb weight refers to the basic model with a fuel tank filled to 90% capacity Fuel consumption and without optional extras. The figure quoted includes 75 kg to allow for the weight of the driver. The consumption and emission details shown on the vehicle For special versions and optional equipment fittings or for the addition of data sticker differ from one vehicle to another. -
Page 252: Wheels
Description of specifications Drawbar loads Snow chains The maximum permitted drawbar load on the ball joint of the towing bracket Snow chains may be fitted only to the front wheels, and only for the follow- must not exceed 75 kg. ing tyres: In the interest of road safety, we recommend that you always tow approach- 175/70R14... -
Page 253: Technical Specifications
Technical specifications Technical specifications Checking fluid levels From time to time, the levels of the different fluids in the ve- hicle must be checked. Never fill with incorrect fluids, other- wise serious damage to the engine may be caused. Fig. 175 For vehicles with the battery in the luggage compartment. -
Page 254: Petrol Engine 1.2 44 Kw (60 Ps)
Technical specifications Petrol engine 1.2 44 kW (60 PS) Engine specifications Power output in kW (PS) 44 (60)/ 5200 Maximum torque in Nm at rpm 108/ 3000 No. of cylinders/capacity in cm 3/ 1198 Fuel Super 95 RON /Normal 91 RON Research Octane Number = Anti-detonation rating of the petrol. -
Page 255: Petrol Engine 1.2 51 Kw (70 Ps)
Technical specifications Petrol engine 1.2 51 kW (70 PS) Engine specifications Power output in kW (PS) 51 (70)/ 5400 Maximum torque in Nm at rpm 112/ 3000 No. of cylinders/capacity in cm 3/ 1198 Fuel Super 95 RON /Normal 91 RON Research Octane Number = Anti-detonation rating of the petrol. -
Page 256: Petrol Engine 1.2 Tsi 63 Kw (85 Ps)
Technical specifications Petrol engine 1.2 TSI 63 kW (85 PS) Engine specifications Power output in kW (PS) 63 (85) / 4800 Maximum torque in Nm at rpm 160 / 1500-3500 No. of cylinders/capacity in cm 4 / 1197 Fuel Super 95 RON /Normal 91 RON Research Octane Number = Anti-detonation rating of the petrol. -
Page 257: Petrol Engine/Lpg 1.6 60 Kw (81 Ps)
Technical specifications Petrol engine/LPG 1.6 60 kW (81 PS) Engine specifications Power output in kW (PS) 60 (81)/ 4000-6000 Maximum torque in Nm at rpm 145/ 3800 No. of cylinders/capacity in cm 4/ 1598 Fuel Super 95 RON /Normal 91 RON /LPG Research Octane Number = Anti-detonation rating of the petrol. -
Page 258: Petrol Engine 1.4 63 Kw (85 Ps)
Technical specifications Petrol engine 1.4 63 kW (85 PS) Engine specifications Power output in kW (PS) 63 (85)/ 5000 Maximum torque in Nm at rpm 132/ 3800 No. of cylinders/capacity in cm 4/ 1390 Fuel Super 95 RON /Normal 91 RON Research Octane Number = Anti-detonation rating of the petrol. -
Page 259: Petrol Engine 1.2 Tsi 77 Kw (105 Ps)
Technical specifications Petrol engine 1.2 TSI 77 kW (105 PS) Engine specifications Power output in kW (PS) 77 (105)/5000 Maximum torque in Nm at rpm 175/1550-4100 No. of cylinders/capacity in cm 4/ 1197 Fuel Super 95 RON /Normal 91 RON Research Octane Number = Anti-detonation rating of the petrol. -
Page 260: Petrol Engine 1.2 Tsi 77 Kw (105 Ps) Start-Stop
Technical specifications Petrol engine 1.2 TSI 77 kW (105 PS) Start-Stop Engine specifications Power output in kW (PS) 77 (105)/ 5000 Maximum torque in Nm at rpm 175/1550-4100 No. of cylinders/capacity in cm 4/ 1197 Fuel Super 95 RON /Normal 91 RON Research Octane Number = Anti-detonation rating of the petrol. -
Page 261: Petrol Engine 1.6 77 Kw (105 Ps)
Technical specifications Petrol engine 1.6 77 kW (105 PS) Engine specifications Power output in kW (PS) 77 (105)/5600 Maximum torque in Nm at rpm 153/ 3800 No. of cylinders/capacity in cm 4/ 1598 Fuel Super 95 RON /Normal 91 Research Octane Number = Anti-detonation rating of the petrol. Slight power loss. -
Page 262: Petrol Engine 1.4 110 Kw (150 Ps)
Technical specifications Petrol engine 1.4 110 kW (150 PS) Engine specifications Power output in kW (PS) 110 (150)/ 5800 Maximum torque in Nm at rpm 220/ 1250-4500 No. of cylinders/capacity in cm 4/ 1390 Fuel Super 95 RON /Normal 91 RON Research- Octane- Number = Anti-detonation rating of the petrol. -
Page 263: Petrol Engine 1.4 132 Kw (180 Ps) - Cupra
Technical specifications Petrol engine 1.4 132 kW (180 PS) - Cupra Engine specifications Power output in kW (PS) 132 (180)/ 6200 Maximum torque in Nm at rpm 250/ 2000-4500 No. of cylinders/capacity in cm 4/ 1390 Fuel Super 98 RON /Normal 95 RON Research Octane Number = Anti-detonation rating of the petrol. -
Page 264: Diesel Engine 1.2 Tdi Cr 55 Kw (75 Ps) Dpf Start-Stop Ecomotive
Technical specifications Diesel engine 1.2 TDI CR 55 kW (75 PS) DPF Start-Stop Ecomotive Engine specifications Power output in kW (PS) 55 (75)/ 4200 Maximum torque in Nm at rpm 180/ 2000 No. of cylinders/capacity in cm 3/ 1199 Fuel min. -
Page 265: Diesel Engine 1.2 Tdi Cr 55 Kw (75 Ps) Dpf
Technical specifications Diesel engine 1.2 TDI CR 55 kW (75 PS) DPF Engine specifications Power output in kW (PS) 55 (75)/ 4200 Maximum torque in Nm at rpm 180/ 2000 No. of cylinders/capacity in cm 3/ 1199 Fuel min. diesel compliant with DIN EN 590 51 CN Cetane Number (cetane index) = Measure of the diesel combustion power. -
Page 266: Diesel Engine 1.6 Tdi Cr 66 Kw (90 Ps) Dpf
Technical specifications Diesel engine 1.6 TDI CR 66 kW (90 PS) DPF Engine specifications Power output in kW (PS) 66 (90)/ 4200 Maximum torque in Nm at rpm 230/ 1500-2500 No. of cylinders/capacity in cm 4/ 1598 Fuel min. diesel compliant with DIN EN 590 51 CN Cetane Number (cetane index) = Measure of the diesel combustion power. -
Page 267: Diesel Engine 1.6 Tdi Cr 77 Kw (105 Ps) With Without Dpf
Technical specifications Diesel engine 1.6 TDI CR 77 kW (105 PS) with/without DPF Engine specifications Power output in kW (PS) 77 (105)/ 4400 Maximum torque in Nm at rpm 250/ 1500-2500 No. of cylinders/capacity in cm 4/ 1598 Fuel min. diesel compliant with DIN EN 590 51 CN Cetane Number (cetane index) = Measure of the diesel combustion power. -
Page 268: Diesel Engine 2.0 Tdi Cr 105 Kw (143 Ps) Dpf
Technical specifications Diesel engine 2.0 TDI CR 105 kW (143 PS) DPF Engine specifications Power output in kW (PS) 105 (143)/ 4200 Maximum torque in Nm at rpm 320/ 1750-2500 No. of cylinders/capacity in cm 4/ 1968 Fuel min. diesel compliant with DIN EN 590 51 CN Cetane Number (cetane index) = Measure of the diesel combustion power. -
Page 269: Dimensions And Capacities
Technical specifications Dimensions and capacities Dimensions Length, width 4043 mm/1693 mm Height at kerb weight 1428 mm Front and rear projection 857 mm/717 mm Wheelbase 2469 mm Turning circle 10.7 m Front Rear Track width 1465 mm 1457 mm Capacities Fuel tank 45 l. -
Page 271: Index
Index Index Anti-theft alarm system ....87 Battery Switching off ......87 Changing . - Page 272 Side light ......230 Cloth seat covers cleaning ....181 Central lock button Changing windscreen wiper blades .
- Page 273 ......74 senger seat ......30 see Correct sitting position .
- Page 274 Headlight flashers ..... . 103 Front seat adjustment Instrument and switch lighting ... . . 99 Headlight range control .
- Page 275 Index Instrument panel Luggage compartment ....125 Service interval display ....61 see also Loading the luggage compartment .
- Page 276 Roof aerial* ......184 Seat belts ......18 Rear drink holder* .
- Page 277 Vehicle data ......248 Right-hand front seat ....120 Towline anchorages .
- Page 278 Vehicle paintwork Why wear seat belts? ....18, 20, 29 Maintenance ......177 Windows .
- Page 279 SEAT S.A. is permanently concerned about continuous development of its types and models. For this reason we ask you to under- stand, that at any given time, changes regarding shape, equipment and technique may take place on the car delivered. For this reason no right at all may derive based on the data, drawings and descriptions in this current handbook.
Need help?
Do you have a question about the IBIZA SC and is the answer not in the manual?
Questions and answers