
Related Manuals for Haivision Makito


Summary of Contents for Haivision Makito
- Page 1 Makito ™ Compact HD H.264 Video Encoder User’s Guide Version 2.1.0 HVS-07MAK-UG01-210 Issue 01...
- Page 2 No part of this document may be copied, photocopied, reproduced, translated or reduced to any electronic or machine-readable format without prior written permission of Haivision. The information in this document is subject to change without notice. Haivision assumes no responsibility for any damages arising from the use of this document, including but not limited to, lost revenue, lost data, claims by third parties, or other damages.
-
Page 3: Safety Guidelines
Do not touch or push the fan blade with fingers or other objects. Doing so may damage the fan and/or fan bearings, which can result in a noise problem as well as accelerated failure of the mechanical part. Makito User’s Guide, v2.1.0, Issue 01... -
Page 4: Table Of Contents
Physical Description ....................... 22 System Interfaces (Rear Panel) ..................22 Audio/Video Interfaces (Rear Panel) ................24 LED Status Indicators (Rear Panel) ................27 Makito Air Interfaces and LEDs ..................29 Audio Talkback........................30 Hardening..........................31 Chapter 2: Installing the Encoder Setting Up the Encoder ...................... - Page 5 Connecting the DVI-I Interface (Makito) ............... 39 Connecting the BNC/S-Video Interface (Makito-SDI) ........... 40 Modifying the RCA-Terminal Dongle for Balanced Audio ........... 41 Installing and Connecting the Makito Air ................43 Connector Mapping ......................45 Powering Up the Unit ......................47 Single Blade Chassis .......................
- Page 6 Managing User Accounts ....................138 Account Settings ......................140 Account Overview Page ....................142 Managing Banners ........................ 145 Managing Security Policies ....................147 Policy Settings ....................... 148 Managing Certificates......................150 Certificate Settings ......................154 Managing Audits........................158 Makito User’s Guide, v2.1.0, Issue 01...
- Page 7 ............................197 dtconfig ..........................198 ethercfg ..........................199 ..................... 201 haiversion ....................202 ipconfig ....................204 logo messages ..........................207 ....................208 metadata ....................213 mklogo ....................214 mkstill nmcfg ........................... 216 Makito User’s Guide, v2.1.0, Issue 01...
- Page 8 ..........................250 videnc ........................... 252 Appendix B: Technical Specifications Video Encoding ........................260 Supported Video Encoding Resolutions (Makito #B-290E-DVI) ........ 261 Supported Graphic Encoding Resolutions (Makito #B-290E-DVI) ......263 Supported Video Encoding Resolutions (Makito-SDI #B-290E-HDSDI) ....264 Audio Encoding ........................265 Audio/Video Interfaces......................
-
Page 9: Makito User's Guide, V2.1.0, Issue 01
Table of Contents Appendix D: Open Source Software Credits Open Source Software Credits....................278 Appendix E: Warranty Information Haivision One (1) Year Limited Warranty ................280 Haivision End User Software License Agreement ............... 282 Index ........................288 Makito User’s Guide, v2.1.0, Issue 01... -
Page 10: About This Guide
Compact HD H.264 Video Encoder, Version 2.1.0. This User’s Guide describes how to install, configure, and manage the Makito to send audio, video, and data over an Ethernet-based IP network. To access the online help, open the Web interface and click Help from the menu bar. -
Page 11: About Haivision
Telephone: 1-514-334-5445 Email: info@haivision.com Or visit our website at: http://www.haivision.com. Obtaining Documentation You may download the Makito firmware, Readme file, and PDF versions of the User’s Guide and Quick Start Guide through Haivision’s Download Center at http://www.haivi- sion.com/download-center/. All customers may access the Download Center; however, a login is required. If NOTE you do not have a login, select the link to create an account. -
Page 12: Related Documents
• Makito v2.1 Hardening Guide Service Support Haivision is committed to providing the service support and training needed to install, manage, and maintain your Haivision equipment. For more information regarding service programs, training courses, or for assistance with your support requirements, contact Haivision Technical Support via our Support Portal on our website at: http://www.haivision.com/support/. -
Page 13: Safety Information
The definitions and symbols for CAUTION and WARNING comply with ANSI Z535.2, American National Standard for Environmental and Facility Safety Signs, and ANSI Z535.4, Product Safety Signs and Labels, issued by the American National Standards Institute. Makito User’s Guide, v2.1.0, Issue 01... -
Page 14: New Features In Version 2.1.0
Version 2.1.0 of the Makito introduces the following new features and enhancements: RTMP Support The Makito now streams directly to a Flash Media Server (FMS) or Content Delivery Network (CDN) using the RTMP streaming protocol. The supported RTMP servers are: •... - Page 15 New Features in Version 2.1.0 Additional Resolutions The Makito-DVI now supports the detection and encoding of SVGA resolutions (800x600p60/75/85) and VGA resolutions (640x480p60/75/85) at the DVI-A and DVI-D inputs. For more information, see “Supported Graphic Encoding Resolutions (Makito #B-290E- DVI)”...
-
Page 16: Part I: Installation And Setup
I: Installation and Setup... -
Page 17: Chapter 1: Introduction
1: Introduction HAPTER This chapter provides a brief overview of Haivision’s Makito Video Encoder, along with a description of the main hardware components and key features. References to the “Makito” can be taken to include the Makito Compact HD H.264 NOTE Video Encoder with DVI (B-290E-DVI) and the Makito-SDI Compact HD H.264 Video... -
Page 18: Product Overview
HD distribution/record environments such as schools, medical facili- ties, and professional training and simulation environments. The Makito now supports HD up to 1080p60 (Component Analog or Digital) or computer resolutions up to 1280x1024 at 75 Hz (RGB or DVI-D) input via its DVI-I connector. The Makito-SDI supports SDI, HD-SDI, 3G-SDI (the new standard for 1080p60), and Composite on its BNC interface. -
Page 19: Makito Air
Makito Air The Makito Air Ruggedized HD/SD H.264 Video Encoder incorporates the performance and power of the standard Makito in a ruggedized chassis and couples this with full KLV/CoT metadata capabilities. The Makito Air addresses Intelligence, Surveillance, Reconnaissance (ISR) challenges by delivering H.264 video from Standard Definition up to 1080p60 with metadata over IP. - Page 20 “MB6 (6-Slot) Chassis” on page 51. The Makito Dual Height Blade may be used in either the MB21 or MB6 chassis. The Makito Air is shown in the following figure. Figure 1-5 Makito Air - Front and Rear Views...
-
Page 21: Applications
Introduction Product Overview Applications Typical examples of Makito applications include: • IPTV Distribution – delivering video channels to viewers in schools, financial institutions, live event venues, control rooms, and within government organizations. • Medical Systems – driving controlled and secure video throughout healthcare facilities enabling education, consultation, and procedural review. -
Page 22: Physical Description
The Makito comes with a 10/100/1000 Base-T Ethernet Network interface for both traffic and management (RJ45). Figure 1-6 Ethernet Connection (Makito #B-290E-DVI) On the Makito Dual Height Blade, a computer can be connected to the COM1 serial port through its DB9 connector. Figure 1-7 Serial Connection (Makito Dual Height Blade #B-290E-DVI-S) On the Makito-SDI, a computer can be connected to the COM1 RS-232/422 serial port through its RJ45 connector (Serial Management adapter required). -
Page 23: Physical Description
Introduction Physical Description Figure 1-8 Ethernet and Serial Connections (Makito-SDI #B-290E-HDSDI) The COM1 port may also be used for KLV and CoT Metadata Capture and stream NOTE insertion. (This option must be installed at the factory.) Related Topics • “Connecting the Encoder to the Network and a Computer”... -
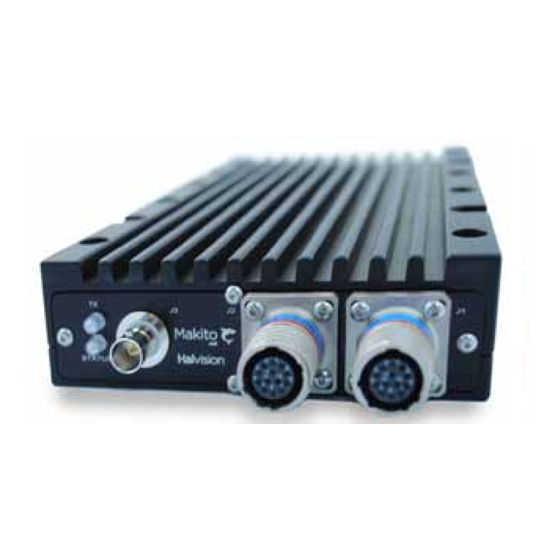
Page 24: Audio/Video Interfaces (Rear Panel)
Introduction Physical Description Audio/Video Interfaces (Rear Panel) The Analog Audio interface is the same for both the Makito (B-290E-DVI) and the NOTE Makito-SDI (B-290E-HDSDI). Makito DVI-I Input The Makito video interface consists of a single DVI-I connector (shown below). Figure 1-9... -
Page 25: Makito-Sdi Bnc/S-Video Input
Introduction Physical Description Makito-SDI BNC/S-Video Input The Makito-SDI video interface consists of one BNC connector and one S-Video connector (shown below). Figure 1-10 BNC/S-Video Interface • The 4-pin Mini-DIN connector is used for S-Video input signals. • The 75 BNC connector is used for Composite (CVBS), SD-SDI (Serial Digital Interface) and HD-SDI video input signals. -
Page 26: Audio Interface
Introduction Physical Description Audio Interface The Makito audio interface consists of a single 8-pin terminal block connector for two- channel balanced/unbalanced analog audio input (one stereo pair) and mono audio output. Figure 1-11 Audio Interface For the pinout, see “Audio Terminal Block Connector Pinout”... -
Page 27: Led Status Indicators (Rear Panel)
Physical Description LED Status Indicators (Rear Panel) The LED colors and flashing (blinking) speed indicate the status (operational state) of the Makito Encoder. Figure 1-12 LED Status Indicators (sample view, Makito-SDI #B-290E-HDSDI) Table 1-1 LED Status Indicators Function Color Description... - Page 28 (PTZ) or Metadata capture GREEN Solid Port Configured in Management Mode GREEN Port Configured in either RS-422/485 RS232 GREEN Solid Port Configured in RS-232 Related Topics • “Powering Up the Unit” on page 47 Makito User’s Guide, v2.1.0, Issue 01...
-
Page 29: Makito Air Interfaces And Leds
Introduction Physical Description Makito Air Interfaces and LEDs The Makito Air is shipped with an optional MIL connector set or cable set. Customers are responsible for assembling their own cables. Please refer to the connector pinouts included “Connector Mapping” on page 45. -
Page 30: Audio Talkback
Figure 1-14 Audio Talkback Signal Path There is no audio mixer on the Makito, so the talkback feature is “First-In/First Served”, meaning that only one user can use the return audio channel at a time. It is recommended that the software player application provide “push-to-talk” functionality, which requires that the user push a button to transmit audio. -
Page 31: Hardening
This includes removing or limiting certain features to prevent their abuse, and securing the data hosted by the device. Version 2.1.0 of the Makito adds features which allow the administrative interface to be secured to meet the requirements for Common Criteria (CC) 3.1 Certification at Evaluation Assurance Level 1 (EAL 1), augmented with security requirements for Network Devices Protection Profile (NDPP) assurance requirements. - Page 32 2: Installing the Encoder HAPTER This chapter explains how to set up and connect the Makito. It also includes the instructions for factory reset. Topics In This Chapter Setting Up the Encoder ......... . . 33 Safety First .
-
Page 33: Chapter 2: Installing The Encoder
Please choose a suitable location for operating the encoder(s). By doing so you will preserve long lifesaving and stability of the unit(s). Set up the encoder on a reliable and flat surface when using the single Makito chassis, or mount in a rack, when using the 1U (MB6) or 4U (MB21) chassis. -
Page 34: Connecting The Encoder To The Network And A Computer
Figure 2-1 Network Connector (Makito #B-290E-DVI) To connect the Serial Interface: The serial interface is available on the Makito Dual Height Blade and the Makito-SDI. (Optional) Connect the COM1 port to the serial port of a computer: • Makito Dual Height Blade: Use the DB9 connector and a null modem serial cable. - Page 35 Installing the Encoder Connecting the Encoder to the Network and a Computer Figure 2-2 Serial Connector (Makito Dual Height Blade #B-290E-DVI-S) Figure 2-3 Network and Serial Connectors (Makito-SDI #B-290E-HDSDI) Figure 2-4 Serial Management Adaptor (Makito-SDI #B-290E-HDSDI) plug into computer Makito User’s Guide, v2.1.0, Issue 01...
-
Page 36: Serial Interface Setup
The serial interface is available on the Makito Dual Height Blade and the Makito-SDI. Prior to logging in to the Makito for the first time, you may wish to change the unit’s default network settings to match the network in which it will be used. You can do so by connecting directly to the Makito’s serial COM1 port from your computer using HyperTerminal (or... -
Page 37: Com1 Serial Port Db9 Pinout (Makito Dual Height Blade)
We recommend that you log out from the Makito and exit from the serial communication application before disconnecting the COM1 port. COM1 Serial Port DB9 Pinout (Makito Dual Height Blade) On the Makito Dual Height Blade, the COM1 serial port uses a DB9 connector which has the following pinout: Table 2-1... -
Page 38: Com1 Serial Port Rj45 Pinout (Makito-Sdi)
Installing the Encoder Connecting the Encoder to the Network and a Computer COM1 Serial Port RJ45 Pinout (Makito-SDI) On the Makito-SDI, the COM1 serial port uses an RJ45 connector which has the following pinout: Table 2-2 COM1 Serial Port RJ45 Pinout (Makito-SDI) -
Page 39: Connecting The Encoder To A/V Sources
Connect your Video Source cable to the Makito DVI-I Input connector. Analog Audio In: Connect your Audio Source cable to the Makito Audio 8-pin terminal block connector (shown below). • For unbalanced audio, use the RCA female to Terminal audio dongle (included in the package, shown below). -
Page 40: Connecting The Bnc/S-Video Interface (Makito-Sdi)
72 (Web interface), or “videnc Parameters” on page 253 (CLI). To connect the BNC/S-Video Interface: Video In: Connect your Video Source cable to one of the Makito-SDI’s Video Inputs, using the appropriate connector: • S-Video: Use the 4-pin mini-DIN connector. -
Page 41: Modifying The Rca-Terminal Dongle For Balanced Audio
Prepare your new audio wires by removing about .150 inch of the wire’s insulation. Insert the new wires by pressing the tension clamp and then removing the screw driver to release the tension clamp. Refer to “Audio Terminal Block Connector Pinout” for the balanced/unbalanced audio pinout. Makito User’s Guide, v2.1.0, Issue 01... -
Page 42: Audio Terminal Block Connector Pinout
Installing the Encoder Connecting the Encoder to A/V Sources Audio Terminal Block Connector Pinout The Makito 8-pin audio terminal block connector has the following pinouts: Figure 2-9 Balanced and Unbalanced Audio Connector Pinouts Related Topics • For more information on the audio connections, see “Audio/Video Interfaces (Rear... -
Page 43: Installing And Connecting The Makito Air
Installing and Connecting the Makito Air To install the Makito Air: Fasten the Makito Air to a flat surface (such as an equipment bay or rack) using the four (4) threaded mounting holes (#10-32 screws). Customers are responsible for assembling their own cables. Please refer to “Connector Mapping”... - Page 44 Installing the Encoder Installing and Connecting the Makito Air To connect the Makito Air to the Network and A/V Sources: Connect the Makito Air’s Ethernet port [J1] to the IP network using a Type Cat 5E cable. Figure 2-11 Makito Air Front View...
-
Page 45: Connector Mapping
Installing the Encoder Installing and Connecting the Makito Air Connector Mapping The following tables show the Makito Air connector pinouts: Table 2-3 J1 Connector Pinout (Ethernet) (13 pin female Amphenol MIL-DTL-38999/ 20MB35SN) Pin # Pin Name Type Description ETH_DAP 10/100 BASE-T Transmit differential pair /... - Page 46 Installing the Encoder Installing and Connecting the Makito Air Table 2-5 J2 Connector Pinout (Serial Port / Analog Audio) (13 pin female Amphenol MIL-DTL-38999/ 20MB35SA) Pin # Pin Name Type Description COM_RXDP Serial Interface: RS-232/RS-422 Receive Data [only use J2-Pin4 in RS232 mode (shaded in gray)]...
-
Page 47: Powering Up The Unit
Installing the Encoder Powering Up the Unit Powering Up the Unit Once all the cables are in place, the Makito is ready to be powered up. Single Blade Chassis Figure 2-12 Rear View (Single Chassis) showing Locking Power Connector Connect power supply here (Power Input jack) - Page 48 To begin configuring video streams, you can either open the Web interface, or log in to the CLI. • To use the Web interface, see “Logging In to the Web Interface” on page 64. • To enter CLI commands, see “CLI Command Reference” on page 174. Makito User’s Guide, v2.1.0, Issue 01...
-
Page 49: Mb21 (21-Slot) Chassis
Since there are two power inlets on the MB21 chassis, the cards in the chassis can operate with only one powered; however, the chassis would not be fully redundant. • The loss of one or two PSUs of the four PSUs in the MB21 chassis in any combination. Makito User’s Guide, v2.1.0, Issue 01... - Page 50 The PSU Status LED will turn green indicating that the chassis is powered up (only if all four Power On/Off switches are On). In the front of the chassis, the Makito Status LEDs will start blinking green, indicating that the encoders are booting up.
-
Page 51: Mb6 (6-Slot) Chassis
MB6-AC and MB6-MED chassis. Therefore, ensure that the socket-outlet is located/installed near the equipment and is easily accessible. The MB6-AC chassis has more than one power supply cord. Be sure to disconnect both (2) power supply cords before servicing to avoid electric shock. Makito User’s Guide, v2.1.0, Issue 01... - Page 52 On the MB6-AC, the PSU Status LEDs will turn green indicating that the chassis is powered up. In the front of either chassis, the Makito Status LEDs will start blinking green, indicat- ing that the encoders are booting up. Wait until the Status LEDs stay solid green, indicating that the encoders are ready for operation.
- Page 53 Installing the Encoder Powering Up the Unit In the front of the chassis, the Makito Status LEDs will start blinking green, indicating that the encoders are booting up. Wait until the Status LEDs stay solid green, indicating that the encoders are ready for operation.
-
Page 54: Resetting The Encoder
To reset the Makito to its factory default settings, press the micro switch (you will feel the button depress) and hold for five (5) seconds. The Makito will reboot on its own. As soon as the lights stop blinking and the Status LED is solid green, the encoder is ready. -
Page 55: Default Network Settings
Installing the Encoder Resetting the Encoder Default Network Settings After a factory reset, the Network settings should be: IP Address Subnet Mask Gateway 10.5.1.2 255.255.0.0 10.5.0.1 Makito User’s Guide, v2.1.0, Issue 01... -
Page 56: Hardware Maintenance
Installing the Encoder Hardware Maintenance Hardware Maintenance The following maintenance tasks are recommended for the Makito appliance. Cleaning the Ventilation (Intake/Outtake) and Filter To clean the intake and outtake vents, use a dry cloth or an aspiration device approved for electronic equipment. -
Page 57: Part Ii: Session Configuration And Management
II: Session Configuration and Management... -
Page 58: Chapter 3: Managing The Encoder
3: Managing the Encoder HAPTER This chapter begins with a management overview of the Makito, followed by system access control information. It then explains how to set up video encoding, as well as manage and maintain the encoder using the Web interface. - Page 59 ........... 116 Makito User’s Guide, v2.1.0, Issue 01...
-
Page 60: Management Overview
Using the CLI Management via the CLI is possible through a telnet session, SSH, or (if applicable) RS-232. For a list and description of the CLI commands to configure and manage the Makito, see Appendix A: “CLI Command Reference”. SNMP-based Management... -
Page 61: Accessing The Encoder
NOTE shipment, the encoder’s IP Address is set by default to: 10.5.1.2. To be able to log in to the Makito Web interface, your computer has to be in the same IP Address range (subnet). You may have to temporarily change your computer’s IP Address to be in the same subnet as the encoder. -
Page 62: Role-Based Authorization
Otherwise if you do not know the current IP Address, you will need to reset the Makito to its factory settings, which will return the unit to the default IP address (and you will lose any saved configurations and settings). For more information, see “Resetting... - Page 63 Note that any changes to the default passwords, created accounts, and deleted default accounts will be lost after a Factory Reset or a firmware downgrade. Factory Reset restores the default accounts and passwords. Related Topics: • CLI Access Control Makito User’s Guide, v2.1.0, Issue 01...
-
Page 64: Logging In To The Web Interface
Logging In to the Web Interface To log in to the Makito configuration Web page: From your Web browser, type the Makito’s IP Address into the address field and press Enter. (Optional) On some systems, you will see an Advisory and Consent Banner page, as shown in the following example. - Page 65 NOTE password has expired, you will see a Change Password dialog (as shown in the following example). For information on changing the default password for your account, see “Changing Your Password” on page 69. Makito User’s Guide, v2.1.0, Issue 01...
-
Page 66: Exploring The Web Interface
After logging in to the Web configuration interface, you will have access to the encoder configuration settings. All of the settings can be adjusted via the Web browser. Navigational Menus You can access the Makito configuration settings by selecting any of the following: Either , or... -
Page 67: Apply And Save Buttons
You can save the current configuration (including the current IDEO UDIO settings) from the page. See “Saving and Loading >C TREAM DMINISTRATION ONFIG Configurations” on page 126. Makito User’s Guide, v2.1.0, Issue 01... -
Page 68: Online Help
Managing the Encoder Exploring the Web Interface Online Help Selecting Help from the menu bar will launch the online help for the Makito. The figure below shows a sample Welcome page. Navigation pane Content pane Makito User’s Guide, v2.1.0, Issue 01... -
Page 69: Changing Your Password
You can also change your own password from the page, as described in this CCOUNT section. This is useful to when logging into a Makito on which the factory defaults have not been changed. To change your password: Click from the main menu, and then click from the submenu. -
Page 70: Password Requirements
Your system may have in place security policies that determine the minimum password length as well as other requirements such as minimum number of upper case characters, digits, and symbols. In this case, you will be prompted to modify your password to comply with these policies. Makito User’s Guide, v2.1.0, Issue 01... -
Page 71: Configuring The Video Settings
Input type, Resolution, GOP Size, and Bit Rate. Note that the available settings and reso- lutions vary according to the Input Format. When configuring the Video Settings, you must select the Input type. The Makito will then auto-detect the incoming resolution and frame rate. If not detected (or outside the supported... -
Page 72: Video Settings
This is auto-detected by the system and cannot be changed. If the signal cannot be detected (or is outside the supported range), the Input Format will be Unknown. Makito User’s Guide, v2.1.0, Issue 01... - Page 73 The usage of the video encoding processor in percentage %. When configuring HiLo IMPORTANT: streaming, make sure the Total Load does not exceed 100%. For supported HiLo video encoding resolutions, see “Video Encoding” on page 260. Makito User’s Guide, v2.1.0, Issue 01...
- Page 74 Input Format detected. “Video Encoding” on page 260. NOTE: • Auto • 1920x1080i (1080i) • 1920x1080p (1080p) • 1440x1080i • 1440x1080p • 960x1080i • 960x1080p • 1280x720 (720p) • 960x720 (720p) • 640x720 (720p) Makito User’s Guide, v2.1.0, Issue 01...
- Page 75 • SD: 150..8000 kbps Closed Captioning Enabled (Optional) Check or clear these checkboxes to enable or disable Closed Captioning on the encoder stream. For more information, see “Closed NOTE: Captioning” on page 272. Makito User’s Guide, v2.1.0, Issue 01...
- Page 76 STC (System Time Clock) and the coded picture STC. • Although LTC (Linear Timecode) and VITC timecodes may be present at the same time, the current release only supports VITC and LTC ancillary packets will be ignored. Makito User’s Guide, v2.1.0, Issue 01...
-
Page 77: Configuring The Audio Settings
Input connector and Audio Bitrate for the encoder. HiLo Audio Streaming You may optionally configure the encoder for “HiLo” audio streaming, in which the Makito encodes a single input and simultaneously sends both a “High” and “Low” audio stream to two different destinations (comparable to HiLo Video Streaming). -
Page 78: Audio Settings
This must correspond to the Audio: NOTE: High/Low selection on the TREAM ETTINGS page. With full HD 1080p 60 resolution input, the Low stream is not available since the High stream consumes all the encoding resources. Makito User’s Guide, v2.1.0, Issue 01... - Page 79 - Encodes audio using the MPEG-4 ADTS ISO/IEC 14496-3 MPEG-4 AAC-LC algorithm with an ADTS header. • - Encodes audio MPEG-4 LOAS/LATM using the ISO/IEC 14496-3 MPEG-4 AAC- LC algorithm with a LOAS/LATM header. Makito User’s Guide, v2.1.0, Issue 01...
-
Page 80: Configuring Metadata Capture
KLV messages coming from a specific sender. When configuring the metadata input, you do not need to select the Input type. The Makito will auto-detect the hardware setup of the encoder; i.e., whether the serial port or SDI video is connected;... -
Page 81: Metadata Overview Page
--Select-- (under Actions ) and select either Start, Stop or Delete. To apply your changes, click The changes will take effect immediately but will not be saved and will be lost after a reboot. Makito User’s Guide, v2.1.0, Issue 01... -
Page 82: Metadata Settings Page
Type in the Name for the input, and select or enter the remaining value(s). For details on the Metadata fields, see “Metadata Settings” on page 83. To apply your changes, click The changes will take effect immediately but will not be saved and will be lost after a reboot Makito User’s Guide, v2.1.0, Issue 01... -
Page 83: Metadata Settings
(see Metadata “Mode” on page 115). must be specified upon purchase. For details, refer to the Makito CoT Addendum. Max AirCraft-SPI 0 ms (Serial> input only) Specifies the Delta maximum delta between SPI and Aircraft... -
Page 84: Metadata Settings
KLV messages coming from a specific sender. Port (UDP input only, required) Specifies the local UDP port on the Makito that is receiving the packets. KLV Metadata over SDI is only used with HD-SDI, and no Closed Captioning NOTE services are presently available on HD-SDI Makito. -
Page 85: Configuring The Stream Settings
Encoder stream, start and stop the streams, as well as pause and resume streams (see “Selective Video Mute” on page 93). The Makito supports two types of stream configurations: • Unicast – Enter a unicast destination IP address. - Page 86 The changes will take effect immediately but will not be saved and will be lost after a reboot. To save the current configuration, open the page. See >C DMINISTRATION ONFIG “Saving and Loading Configurations” on page 126. Makito User’s Guide, v2.1.0, Issue 01...
-
Page 87: Stream Settings Page
Select or enter the new value(s) in the appropriate field(s). See “Stream Settings” page 88. To apply your changes, click The changes will take effect immediately but will not be saved and will be lost after a reboot. Makito User’s Guide, v2.1.0, Issue 01... -
Page 88: Stream Settings
Click a number to display the TREAM page for an existing stream, or ETTINGS to create a new stream. Click the grid to display the TREAM page. VERVIEW Name (Optional) Enter a unique name for the stream. Makito User’s Guide, v2.1.0, Issue 01... -
Page 89: Stream Settings
In this field, select the stream instance to configure: • High • Low This must correspond to the NOTE: Enable: High/Low selection on the IDEO page. ETTINGS Makito User’s Guide, v2.1.0, Issue 01... - Page 90 1025..65,535. Note that RTP streams use even numbers only within this range. NOTE: Direct-RTP QuickTime streams require different UDP ports for video and audio. You must specify the second port number. Makito User’s Guide, v2.1.0, Issue 01...
- Page 91 • (None) • VF The VF FEC is a proprietary FEC NOTE: and is not interoperable with devices outside of the Haivision family. Average Bandwidth (Read-only) The average transmit bandwidth for the unit in kbps. Makito User’s Guide, v2.1.0, Issue 01...
- Page 92 (Optional) Enter an expanded description of the Session. Keywords (Optional) Enter one or more keywords to associate with the Session. Keywords can serve as filters. Author (Optional) Enter the name of the program’s author. Makito User’s Guide, v2.1.0, Issue 01...
- Page 93 The minimum Ceiling Percentage value should be no less than 5. metadata_bitrate = 500 Kbps video_bitrate = 1000 Kbps For example, where , and audio_bitrate = 128 Kbps ceiling percentage = ( 500 / ( 1000 + 128 ) ) * 100 = 44 Makito User’s Guide, v2.1.0, Issue 01...
-
Page 94: Cdn And Flash Interoperability
Managing the Encoder Configuring the Stream Settings CDN and Flash Interoperability The Makito can now stream directly to a Flash Media Server (FMS) or Flash-based Content Delivery Network (CDN) using the Real Time Messaging Protocol (RTMP). • The supported RTMP servers are FMS and Wowza. -
Page 95: Quicktime Sdp And Interoperability
Click to start the stream. QuickTime SDP and Interoperability The Makito supports QuickTime and Flash interoperability (through a Flash gateway) using an SDP (Session Description Protocol) file. From the page, you can select QuickTime as the Stream Protocol (as per... - Page 96 1 1 IN IP4 127.0.0.1 s=RTP session e=NONE c=IN IP4 231.1.1.1/128 b=RR:0 t=0 0 m=video 10000 RTP/AVP 96 a=rtpmap:96 H264/90000 a=control:trackID=0 a=fmtp:96 packetisation-mode=1; sprop-parameter-sets= Z0IAIIxoBQBbv/AAEAARAAADA+kAAdTAhAAAAAAAAAA=,aM48gAAAAAA= m=audio 10002 RTP/AVP 97 a=rtpmap:97 mpeg4-generic/90000/2 a=control:trackID=1 a=fmtp:97 streamType=5;profile-level-id=22;mode=AAC-hbr;sizelength= 13;indexlength=3;indexdeltalength=3;config=1190 Makito User’s Guide, v2.1.0, Issue 01...
-
Page 97: Configuring The Rtsp Server
Configuring the RTSP Server Configuring the RTSP Server From the RTSP S page, you can configure the Makito to interoperate with Real- ETTINGS Time Streaming Protocol (RTSP)-based software players such as HaiPLAY QuickTime, VideoLan VLC, or Wowza Server (Flash) for real-time streaming. - Page 98 To apply and save your changes, click To access the High or Low stream from the decoder, you must specify the correct NOTE RTSP URL. Type either: rtsp://<Makito IP Address>/high -or- rtsp://<Makito IP Address>/low Makito User’s Guide, v2.1.0, Issue 01...
-
Page 99: Configuring Media Effects
NOTE Logo Insertion/Overlay You can configure the Makito to display a graphic file as a logo overlay in the encoded video. There can be one logo per Makito. The image file can be uploaded in either BMP, JPEG, PNG, or GIF format. The logo position can either be relative (top left, top right, centered, etc.) or absolute (positioned at the exact X and Y coordinates specified). - Page 100 By default, the encoder will be temporarily stopped; however, you may uncheck this box to allow the encoder to continue streaming. The image file will be converted to Haivision’s image overlay (.oly) format and will be included on the Logo Filename drop-down list.
-
Page 101: Logo Settings
= no transparency (i.e., a completely solid/opaque logo) • = fully transparent (i.e., a completely transparent/invisible logo) Scaling Specifies the scale factor (percentage) for the logo: • = 1/4 size • = no scaling 100% • = 4x 400% Makito User’s Guide, v2.1.0, Issue 01... -
Page 102: Still Image Streaming
The static image is encoded into a single H.264 GOP sequence and will be used to replace the “real” video stream when the stream is paused. Makito User’s Guide, v2.1.0, Issue 01... -
Page 103: Image Snapshot Capture
To delete an image file from the list of available Still Images, click next to the Still Image field. To apply your changes, click The resulting still image files are stored on the Makito file system in the folder NOTE /usr/share/haivision/still_images. - Page 104 This sets the system defaults for the preferred snapshot format and quality. To take the image snapshot, click Once a snapshot has been taken, a new thumbnail is displayed below the configuration fields (as shown in the following example). Makito User’s Guide, v2.1.0, Issue 01...
- Page 105 To save a snapshot in .yuv format, click the thumbnail and select the filename and location in the Save As dialog. 10.To delete one or multiple snapshots, check the checkbox below the snapshot (or click Check All ) and click Delete Selected Makito User’s Guide, v2.1.0, Issue 01...
-
Page 106: Configuring Video Profiles
Configuring Video Profiles Configuring Video Profiles To help you manage the video quality parameters, the Makito provides a selection of video presets or “Profiles” defined for different contexts, such as computer graphics, movies, news, outdoors, sports, or “talking heads” (Virtual Presence). - Page 107 Managing the Encoder Configuring Video Profiles list of defined video Profiles To view the list of video Profiles supplied with the Makito, refer to “Default Profiles” NOTE on page 113. To view the parameter settings associated with a particular Profile, click the Profile name in the selection list, for example, “News”.
- Page 108 The video Profiles are designed to allow you to experiment with adjusting the settings to get the best output picture quality for your application. Adjusting these parameters has no other impact on encoding, audio, etc., just visual. Makito User’s Guide, v2.1.0, Issue 01...
-
Page 109: Video Quality Parameters
(i.e., in different regions of the picture). When there is a somewhat constant video quality across the picture and video frames (i.e., the complexity is lower), the step usually remains small. Makito User’s Guide, v2.1.0, Issue 01... - Page 110 Generally, a larger buffer will High (1200) provide a higher video stream Very High (1500) quality and result in less Maximum (2000) degradation of the picture. The values are a NOTE: multiplication factor for the default buffer size. Makito User’s Guide, v2.1.0, Issue 01...
- Page 111 (blurry). The default value of 0 is almost always sufficient to get rid of most blocking, but leaves the picture noticeably blurrier. Makito User’s Guide, v2.1.0, Issue 01...
- Page 112 Bitrate is “low”, you will get the low quality you specified. However, if your content is rich and hard to encode, then a larger Buffer size will help achieve a better quality for the same Bitrate. Makito User’s Guide, v2.1.0, Issue 01...
-
Page 113: Default Profiles
Medium Medium Medium Filter Strength Deblock Medium Medium Medium Medium High Medium Medium Filter Level *The “Default” Profile provides the same effect as the previous Makito release NOTE (v1.4.0) in terms of video quality. Makito User’s Guide, v2.1.0, Issue 01... -
Page 114: Managing The Com Port
Managing the COM Port page is only accessible to administrators. NOTE COM P The Makito Dual Height Blade and the Makito-SDI provide a serial interface which you COM P can use to connect to a computer for management of the encoder. The page displays the settings for the COM port. - Page 115 The changes will take effect immediately but will not be saved and will be lost after a reboot For information on connecting a computer to the COM1 port, see “Connecting the Encoder to the Network and a Computer” on page 34. Makito User’s Guide, v2.1.0, Issue 01...
-
Page 116: Logging Out
Managing the Encoder Logging Out Logging Out After you finish using the Makito, be sure to log out. To do so, select from the Main OGOUT Menu. Logging out prevents misuse and unauthorized access to the encoder. Makito User’s Guide, v2.1.0, Issue 01... -
Page 117: Chapter 4: Managing Users And Security
This chapter explains how to set up accounts and configure security settings for the encoder using the Web interface. The Security menu provides the options to configure Makito v2.1.0 encoders to be NOTE “hardened” in compliance with the Common Criteria Network Devices Protection Profile (NDPP). - Page 118 ..........159 Makito User’s Guide, v2.1.0, Issue 01...
-
Page 119: Configuring Network Settings
ETWORK ETTINGS Select or enter the new value(s) in the appropriate field(s). See “Network Settings” page 120. To save your changes, click You must reboot the system for the changes to take effect. Makito User’s Guide, v2.1.0, Issue 01... -
Page 120: Network Settings
Address from a DHCP server on the network. When it is disabled, you must manually enter the encoder’s IP Address, Netmask & Gateway Address. Displays the IP Address for the Makito. This is a unique IP Address address that identifies the unit in the IP network. - Page 121 Managing Users and Security Configuring Network Settings Network Setting Description/Values (Continued) Displays the Subnet Mask for the Makito. This is a 32- Netmask bitmask used to divide an IP address into subnets and specify the network’s available hosts. If DHCP is disabled, you may enter a Netmask in NOTE: dotted-decimal format.
-
Page 122: Viewing System Status Information
Viewing System Status Information Viewing System Status Information From the page, you can view status information about the Makito, such as the TATUS operating system up time, along with information about the hardware and software compo- nents. The page displays a “snapshot” of the encoder faceplate that shows the A/V inter- face. -
Page 123: Status Settings
“Taking a System Snapshot” page 124. Status Settings The following table lists the Status settings and controls. Status information can be useful for troubleshooting and may be forwarded to Haivision Technical Support if you are requesting technical support. Status Setting Description/Values Card Status OK (or error message if applicable). -
Page 124: Rebooting The Encoder
Taking a System Snapshot Taking a system snapshot can be useful for troubleshooting and may be forwarded to Haivision Technical Support if you are requesting technical support. The system snapshot lists information such as component versions, network settings, loaded modules, running processes, system traces, configured streams and stream status... - Page 125 Managing Users and Security Viewing System Status Information You can also take a system snapshot from the CLI using the system_snapshot.sh command. Makito User’s Guide, v2.1.0, Issue 01...
-
Page 126: Saving And Loading Configurations
ONFIG Configuration Management Each Makito is configured by users’ selecting and setting values of applicable system settings, such as Encoder settings and the stream destination. Although these configuration settings are not automatically saved, you can save a list of text-based configuration direc- tives in a file which is stored in the encoder’s flash memory. - Page 127 The selected configuration will be saved as the startup configuration and will be loaded into the current session as well. To view the details of a configuration file, select the filename from the list of Config Files and click View . (See “Viewing Configuration File Details”.) Makito User’s Guide, v2.1.0, Issue 01...
-
Page 128: Viewing Configuration File Details
From the page, click the configuration file to view. ONFIG Click View to display a list of the current configuration settings in a new window, as shown in the example on the following page: Makito User’s Guide, v2.1.0, Issue 01... - Page 129 Managing Users and Security Saving and Loading Configurations Makito User’s Guide, v2.1.0, Issue 01...
-
Page 130: Installing Firmware Upgrades
NOTE PGRADE When you first receive the Makito, the necessary firmware is pre-installed on it. Upgrades of the firmware are issued through Haivision’s Download Center on our website at: http://www.haivision.com/download-center/. Please note that you may download the latest firmware and documentation by registering via the Haivision Support Portal. - Page 131 Wait for the file to be uploaded and verified and the file system synced. IMPORTANT Remain on this page and do not click anything else in the Makito Web interface during the upload. If any of the package components has been modified or is not signed by a valid certif- icate, the verification will fail and the downloaded package will be discarded.
- Page 132 Once the unit has rebooted, the browser will display the Login page for the Web inter- face (depending on your Web browser and settings). If not, reload the Login page. Type the Username and Password and click Login (or press Enter). Makito User’s Guide, v2.1.0, Issue 01...
- Page 133 As a firmware maintenance step, we recommend that you periodically delete old copies of unused firmware. To do so, use the CLI package command (list delete options). See “package” on page 221. Makito User’s Guide, v2.1.0, Issue 01...
-
Page 134: Enabling And Disabling Network Services
ERVICES For security purposes, an administrator may need to stop one or more network services from accessing the Makito. From the Services page, you can enable and disable the following network services: HTTP, RTSP, SNMP, SSH, Talkback, Telnet, and VF. -
Page 135: Service Settings
Talkback Audio Talkback (a Makito feature) allows the audience to “talk back” to the people taking or making the video (i.e., at the encoder). The talkback is played out of the encoder’s 8-pin terminal block connector (see “Audio Interface”... -
Page 136: Managing Messages
To view the messages: Click from the main menu, and then click from the sub- DMINISTRATION ESSAGES menu. page opens displaying the log as shown in the following example. ESSAGES Makito User’s Guide, v2.1.0, Issue 01... - Page 137 Managing Users and Security Managing Messages To delete the messages, click The messages will be deleted immediately. Makito User’s Guide, v2.1.0, Issue 01...
-
Page 138: Managing Accounts
“Managing Security Policies” on page 147. The Makito can also be configured for WCI and CLI account sessions to log out after an idle session timeout period. The session timeout period is selectable via a system-wide parameter. For details, see “Managing Security Policies”... - Page 139 To change the password for another account (not your own), type the new password in the New Password field and again in the Confirm Password field. To apply password changes, click The new password will take effect immediately. Makito User’s Guide, v2.1.0, Issue 01...
-
Page 140: Account Settings
(Read-only for existing accounts) Displays the Role assigned to the account. (New account) Select the Role for the user account, either: • Administrator • Operator • Guest For details on roles, see “Role-based Authorization” on page 62. Makito User’s Guide, v2.1.0, Issue 01... - Page 141 A Public Key fingerprint is a short TIP: sequence of bytes which you can copy and use to identify or look for a Public Key. Last Login (Existing account) Displays the date and time of the previous login. Makito User’s Guide, v2.1.0, Issue 01...
-
Page 142: Account Overview Page
• Lock (if the current State is Enabled) or • Unlock (if the current State is Locked). To delete an account, click --Select-- (under Actions ) and select Delete. To apply your changes, click Makito User’s Guide, v2.1.0, Issue 01... - Page 143 To get the fingerprint for the key (e.g., for identification purposes), select the filename in the list. You will see a progress message (as shown in the example below) and then the key will be displayed. Makito User’s Guide, v2.1.0, Issue 01...
- Page 144 You may have to provide a password to decrypt your private key but this is done by your SSH client. If you no longer use password-based authentication to access your account, it is recommended to set a very long password. Makito User’s Guide, v2.1.0, Issue 01...
-
Page 145: Managing Banners
(if enabled), as shown in ANNER the following example. To upload a new text file for the banner, click Upload… On the banner dialog, click Browse to select the file. Makito User’s Guide, v2.1.0, Issue 01... - Page 146 For example, in some cases, the banner will be displayed right after the login and before the password is entered, whereas with the Web Interface, the banner will be displayed before the user gets to the Login page. Makito User’s Guide, v2.1.0, Issue 01...
-
Page 147: Managing Security Policies
From the page, administrators can set policies for passwords, session timeout, and OLICIES cryptographic strength for Makito user accounts. These policies will apply to all user accounts; therefore, it is recommended to set the policies before beginning to create accounts. -
Page 148: Policy Settings
Disabled (Auto Logout must be enabled) 15 minutes if Type in the maximum length of time the Enabled system may be idle before the user will be logged out (from 1 - 1440 minutes). Makito User’s Guide, v2.1.0, Issue 01... - Page 149 Systems that are left logged on may represent a security risk for an organization. Therefore, you can configure the Makito to automatically log the user out after a specified period of idle time. If the user has been inactive for longer than this period of time, then the user is automatically logged out and redirected to the Login page.
-
Page 150: Managing Certificates
CA that signed the certificate of the configured remote audit server. It is also recommended to import the root certificate of the CA that signed your Makito identity certificate in order to increase your list of trusted root certificates. - Page 151 Managing Users and Security Managing Certificates To generate a Certificate Signing Request, click Generate Select either Self-signed or Certificate Signing Request from the drop-down list. For more information, see “Sign” on page 154. Makito User’s Guide, v2.1.0, Issue 01...
- Page 152 Keep in mind that there is a difference between importing a new certificate (that NOTE was generated externally) and importing a newly signed certificate whose request was previously generated on the Makito and exported for signing. To import an Identity Certificate, click Import Select or enter the new value(s) in the appropriate field(s).
- Page 153 The selected certificate will be saved as the default certificate, and its effect will be di- rectly applied to the Audit but does not apply to HTTP until the next service restart or system reboot. Makito User’s Guide, v2.1.0, Issue 01...
-
Page 154: Certificate Settings
In its generated form, this certificate is still a request and cannot be used as an Identity Certificate before it is signed by a CA, and imported back. Makito User’s Guide, v2.1.0, Issue 01... - Page 155 • If the certificate is a new certificate generated outside of the Makito, the file should also contain the certificate Private Key, and its chosen name should be one that isn't already installed on the device.
- Page 156 Password: if the imported certificate contains a password protected private key, type its password in this field. Leave this field empty if the file is not password-protected. Import File Click to select the file. Browse Makito User’s Guide, v2.1.0, Issue 01...
- Page 157 Managing Users and Security Managing Certificates Importing a CA Certificate is the same as importing an Identity Certificate, except that you need to select the buttons in the CA Certificate section. Import, View Delete Makito User’s Guide, v2.1.0, Issue 01...
-
Page 158: Managing Audits
Managing Audits page is only accessible to administrators. NOTE UDITS From the page, administrators can set up logging to an Audit server for the Makito. UDITS To configure an Audit server: Click from the main menu, and then click from the submenu. -
Page 159: Audit Settings
If the port is not provided, the default port for the chosen transport will be used: Transport Select the Transport Type from the drop- down list: • UDP (default port: 514) • TLS (Transport Layer Security, default port: 6514) Makito User’s Guide, v2.1.0, Issue 01... - Page 160 Trusted Servers) Enter the certificate fingerprint of the server certificate. The fingerprint should be the SHA-1 or MD5 fingerprint of the certificate that belongs to the audit server which was set in Audit Server Address. Makito User’s Guide, v2.1.0, Issue 01...
- Page 161 5: Configuring A/V Services HAPTER Using SNMP This chapter provides information required to manage the Makito through the Simple Network Management Protocol (SNMP). SNMP-based management uses Network Management Stations (NMSs) to collect data or configure devices (SNMP agents) across an IP network.
-
Page 162: Overview
The Makito uses Net-SNMP Version 5.5 and supports SNMP v1, v2c, and v3. NOTE The Makito supports a number of SNMP commands used to set or get Management Infor- mation Base (MIB) objects on the local host or on other SNMP agents reachable over the IP networks. -
Page 163: Supported Mibs
Configuring A/V Services Using SNMP Supported MIBs Supported MIBs The Makito SNMP agent supports the MIB-II (RFC 1213) standard and its updates, SNMPv3 MIBs, as well as the Haivision proprietary Enterprise MIB. The following table lists the supported MIBs: Supported MIBs... -
Page 164: Snmp Agent Components
VACM (View-based Access Control Model) views modeling the privilege levels of the Makito user groups: admins, operators, and users. These groups can be used for v1/v2c communities and v3 USM users. Unless you need to modify the access control model, there is no need to edit this file. Access... -
Page 165: Nmcfg
Traps are SNMP messages that the SNMP agent sends to management stations when events, alarms or faults occur in the system or on the network. The Makito generates trap messages and sends them to active management stations that are identified as the trapcommunity snmpd.conf... - Page 166 <community> {<group>|ro|rw} [<host>] nmcfg community delete <community> [{<group>|ro|rw} [<host>]] nmcfg system help nmcfg system define <param> "<value>" nmcfg system delete <param> nmcfg user help nmcfg user define <uname> [{MD5|SHA} "<apwd>" [{DES|AES} ["<ppwd>"]]] nmcfg user delete <uname> Makito User’s Guide, v2.1.0, Issue 01...
- Page 167 Configuring A/V Services Using SNMP SNMP Agent Components Related Topics • “nmcfg” on page 216 Makito User’s Guide, v2.1.0, Issue 01...
-
Page 168: Snmpv3
The following line is added by the above command in the configuration file: rwuser johndoe auth To assign Makito user group privileges instead of the read-only or read-write permissions nmcfg access (to the whole MIB), the parameter of the command can be replaced by the access group admins, operators, or users. - Page 169 # snmpset -v3 -u johndoe -a SHA -A "password" -x AES -X "pass phrase" -l authPriv localhost haiAvtStreamEncapsulation.1 i directRtp HAI-AVT-STREAM-MIB::haiAvtStreamEncapsulation.1 = INTEGER: directRtp(1) Makito User’s Guide, v2.1.0, Issue 01...
-
Page 170: Snmp Utilities
The retrieval of a complete subtree is referred to as NOTE: “walking the MIB.” /usr/bin The SNMP utilities are located in the directory --help For more information on an SNMP command, enter the command with the argument. Makito User’s Guide, v2.1.0, Issue 01... -
Page 171: Snmp Syntax For Setting Up Streams
Configuring A/V Services Using SNMP SNMP Syntax for Setting Up Streams SNMP Syntax for Setting Up Streams The Haivision Audio/Video Transport Stream MIB (HAI-AVT-STREAM-MIB) is composed of multiple tables described below. Table Index Description haiAvtStreamNewID.0 none Next available stream ID... - Page 172 The example below, using CLI commands on the Makito, creates a streaming 198.51.100.106 session to IP Address at port 2000, and starts streaming immediately. haiAvtStreamTable The Stream ID index) is used to create a stream; this value will be createAndGo set to the first available Stream ID (>=1) on...
-
Page 173: Part Iii: Reference
III: Reference... -
Page 174: Appendix A: Cli Command Reference
A: CLI Command Reference PPENDIX This alphabetical command reference lists and describes the available Makito Command Line Interface (CLI) commands and their parameters. Commands In This Appendix Syntax Conventions ..........176 Command Summary and Usage Information . - Page 175 ............252 Makito User’s Guide, v2.1.0, Issue 01...
-
Page 176: Syntax Conventions
[ x { y | z } ] Vertical bars and braces within square brackets indicate a required choice within an optional element. Parameter names and enumerated values are case-insensitive and can be abbreviated. Makito User’s Guide, v2.1.0, Issue 01... -
Page 177: Command Summary And Usage Information
CLI Command Reference Command Summary and Usage Information Command Summary and Usage Information The Makito CLI commands are divided into two main groups: operation and administra- tion: • Operation Commands are used to manage the Audio/Video data path, processing, and features, including audio/video/metadata content selection, logo, audio/video encoding, H.264 streaming, and image snapshots. -
Page 178: Operation Commands
Profile. snapshot Use to take and manage snapshots from the video input. still Use to manage still image files on the Makito file system. Static images are used to replace the “real” video stream when streaming is paused. talkback Use to manage audio talkback settings to allow two-way audio communication using the encoder’s Audio Output. -
Page 179: Administration Commands
Use to view, manually control, and save the Ethernet configuration parameters. ipconfig Use to set and view the parameters that specify the networking context for the Makito, including the IP settings, hostname, and DNS. nmcfg Used by system administrators or GUI/Web Interface applications in the configuration of SNMP for the Makito. - Page 180 Use to manage the TLS certificates for the Web interface HTTPS server and the secured TLS connection to the remote audit server. messages Use to view and manage administrative login messages. policy Use to manage security policy settings. Makito User’s Guide, v2.1.0, Issue 01...
-
Page 181: Cli Access Control
“get” only snapshot “get” and “list” only still “list” only talkback date temperature “get” only Network and Management haiversion package (for upgrade) config “list” only ethercfg ipconfig “display” only “display” only nmcfg service Makito User’s Guide, v2.1.0, Issue 01... - Page 182 Operator Guest system_snapshot.sh dtconfig tzconfig passwd pubkey reboot iperf ping traceroute Security account audit banner certificate messages policy For an overview of system access control on the Makito, see “Role-based Authorization” on page 62. Makito User’s Guide, v2.1.0, Issue 01...
-
Page 183: Account
Displays the account information for the user or the Makito, including account name, role, state, password expiry status, and Public Key(s). list Lists the account information for the user or the Makito in table format. passwd Modifies the user account password. - Page 184 ----------- ---------------- --------- ---------------- ---- admin Administrator Enabled never fdfdf Guest Enabled never mrmichel Operator Enabled by admin operator Operator Locked never user Guest Enabled never • Managing Accounts on page 138 Makito User’s Guide, v2.1.0, Issue 01...
-
Page 185: Audenc
You can specify configuration, stats, or all audio information. help audenc Displays usage information for the command. AUDENC ARAMETERS Parameter Default Description/Values input Analog The type of Audio Input for the encoder: Makito • Analog Makito User’s Guide, v2.1.0, Issue 01... - Page 186 If you are using HaiPLAY as the decoder, you will need to change the default audio NOTE algorithm parameter setting to mpeg4adts, because HaiPLAY only supports MPEG4 ADTS encapsulated audio. Makito User’s Guide, v2.1.0, Issue 01...
- Page 187 Encoder ID : 0 Name : "Audio Encoder 0" Statistics: State : WORKING Encoded Frames : 22,396 Encoded Bytes : 7,644,453 Encoder Errors : 0 Encoder PTS: 0x03a1db3cb • Configuring the Audio Settings on page 77 Makito User’s Guide, v2.1.0, Issue 01...
-
Page 188: Audit
Displays audit configuration and connection status information. AUDIT ARAMETERS Parameter Default Description/Values server The server IP address. Enter an IP address in one of the following formats: • fqdn[:port] • ipaddr[:port] • hostname[:port] Makito User’s Guide, v2.1.0, Issue 01... - Page 189 If trusted is fingerprint, specify the type: • md5-fingerprint: • sha1-fingerprint: AUDIT XAMPLE #$ audit get Configuration: Audit server address : syslog.haivision.com:10533 Transport : TLS Trusted servers : CA-signed • Managing Audits on page 158 Makito User’s Guide, v2.1.0, Issue 01...
-
Page 190: Banner
Displays banner status information. delete Deletes the banner file from the system. BANNER ARAMETERS Parameter Default Description/Values bannerfile The name of the .txt file to display as the Advisory Notice and Consent Banner for the encoder. Makito User’s Guide, v2.1.0, Issue 01... - Page 191 If enabled, the following banner is displayed upon user login: -------------------------------- *********************** Hello user! *********************** Welcome to Makito SDI #4. ********************************************* * Haivision Systems - Creating IPTV Intelligent Systems * ********************************************* • Managing Banners on page 145 Makito User’s Guide, v2.1.0, Issue 01...
-
Page 192: Certificate
Displays the content of the named certificate file. create Generates a Self-signed certificate or a Certificate Signing Request. sign subject can be specified. See certificate Parameters below. Makito User’s Guide, v2.1.0, Issue 01... - Page 193 Distinguished Name in the form: "/C=US/ST=Maine..." where the most common attributes are: /C Two Letter Country Name /ST State or Province Name /L Locality Name /O Organization Name /OU Organizational Unit Name /CN Common Name Makito User’s Guide, v2.1.0, Issue 01...
- Page 194 Distinguish Encoding Rules infile The name of the file to import. The administrator has previously NOTE: downloaded/uploaded the certificate file to import in its home directory (using SCP, for example). • Managing Certificates on page 150 Makito User’s Guide, v2.1.0, Issue 01...
-
Page 195: Config
[cfgname] config delete [cfgname] config list ESCRIPTION config command is used to manage configurations on the Makito. This includes saving the current configuration, loading a saved configuration, and specifying the configuration file to load at startup. CTIONS save Saves the current configuration. - Page 196 CLI Command Reference config • Saving and Loading Configurations on page 126 Makito User’s Guide, v2.1.0, Issue 01...
-
Page 197: Date
DATE XAMPLE # date Displays the current date, e.g.: Tue Aug 28 11:23:56 EDT 2012 • dtconfig on page 198 • tzconfig on page 250 Makito User’s Guide, v2.1.0, Issue 01... -
Page 198: Dtconfig
Setting the encoder to a date in the past (compared to the current date) may cause NOTE the encoder to reboot. DTCONFIG XAMPLE # dtconfig 201208201100 Sets the encoder clock to Monday August 20 11:00:00 EDT 2012 • date on page 197 • tzconfig on page 250 Makito User’s Guide, v2.1.0, Issue 01... -
Page 199: Ethercfg
Ethernet configu- ration parameters. When the Makito boots up, it automatically initializes and configures the Ethernet interface to match the settings on the Ethernet switch to which it is connecting. However, you may need to disable autonegotiation, and manually force settings such as the Ethernet interface line rate and duplex mode. - Page 200 CLI Command Reference ethercfg • Configuring Network Settings on page 119 Makito User’s Guide, v2.1.0, Issue 01...
-
Page 201: Haiversion
YNOPSIS haiversion ESCRIPTION haiversion command is used to display status information about the Makito. Status information can be useful for troubleshooting and may be forwarded to Haivision Technical Support if you are requesting technical support. HAIVERSION XAMPLE # haiversion Displays information about the hardware and software components. -
Page 202: Ipconfig
Makito, including the IP settings, hostname, and DNS. It may also be used to set the Network Time Protocol (NTP) server address and Time Zone. - Page 203 DHCP: Current IP Settings: ip address : 192.0.2.42 network mask : 255.255.255.0 gateway : 192.0.2.24 hostname : Makito Current NTP Settings: server : 192.0.2.100 timezone : "America/Montreal" • Configuring Network Settings on page 119 Makito User’s Guide, v2.1.0, Issue 01...
-
Page 204: Logo
You can configure a graphic file to display as a logo overlay in the encoded video. There can be one logo per Makito. The logo position can either be relative (top left, top right, centered, etc.) or absolute (posi- tioned at the exact X and Y coordinates specified). - Page 205 Specifies the position for the logo: • BottomRight • TopRight • BottomLeft • TopLeft • Centered • Absolute: Uses the exact X and Y coordinates. • Relative: Uses the X, Y coordinates in relation to a 1920x1080 display area. Makito User’s Guide, v2.1.0, Issue 01...
- Page 206 LOGO XAMPLE logo set filename= Configures the file HaivisionLogoTransparent.oly opacity= HaivisionLogoTransparent.oly 65 positioning=bottomright display=on display as a logo on the system. • mklogo on page 213 • “Logo Insertion/Overlay” on page 99 Makito User’s Guide, v2.1.0, Issue 01...
-
Page 207: Messages
CTIONS add <msgtext> Adds the message text to the log. This could be used to send messages to other administrators. Displays messages. delete Deletes the messages. • “Managing Messages” on page 136 Makito User’s Guide, v2.1.0, Issue 01... -
Page 208: Metadata
This command configures the Makito to capture either KLV (Key Length Value) or CoT (Cursor on Target) metadata and then incorporate data information within the metadata elementary stream of the standard MPEG Transport Stream. - Page 209 Serial Source specific parameters: format Selects the data format for the metadata. • KLV • CoT CoT is only available from the serial NOTE: port. For details on setting up CoT, refer to the Makito CoT Addendum. Makito User’s Guide, v2.1.0, Issue 01...
- Page 210 Name : (None) Configuration: Type : serial Format : KLV Device : "/dev/tts/0" Standard : RS-232 Baud Rate : 115200 Statistics: State : STOPPED Rx Bytes Rx OK Messages Rx Corrupt Messages : 0 Makito User’s Guide, v2.1.0, Issue 01...
- Page 211 [addr=<dest IP>] port=<dest port> vid=<id> aud=<id> data=<id> # stream create port=2222 vid=0 aud=0 data=2 Verify the metadata encoder stats using the following syntax: # metadata <ID> get all # metadata 2 get all Makito User’s Guide, v2.1.0, Issue 01...
- Page 212 : KLV Address : 0.0.0.0 (Any) UDP Port : 8500 Statistics: State : WORKING Rx Bytes Rx OK Messages Rx Corrupt Messages : 0 Source Address : 0.0.0.0 • “Configuring Metadata Capture” on page 80 Makito User’s Guide, v2.1.0, Issue 01...
-
Page 213: Mklogo
ESCRIPTION In order to display an image as a logo overlay on the Makito, you need to copy a still image file to the Makito file system and then convert the file to Haivision’s overlay image format .oly... -
Page 214: Mkstill
H.264 GOP sequence. This is required in order to configure a Makito stream with a static image that will replace the “real” video stream when streaming is paused. - Page 215 XAMPLE # mkstill myimage.jpg Converts the image file myimage.jpg into a resolution=1080 1920x1080 still image. • still on page 237 • “Still Image Streaming” on page 102 • “Selective Video Mute” on page 93 Makito User’s Guide, v2.1.0, Issue 01...
-
Page 216: Nmcfg
<uname> ESCRIPTION nmcfg (Network Management Configuration) command is used by system adminis- trators or GUI/Web Interface applications in the configuration of SNMP for the Makito. nmcfg script reads and edits the standard SNMP configuration files, and then restarts snmpd the SNMP agent ( ) to apply the new settings. - Page 217 Displays usage information for the command, or if specified, the option. nmcfg settings persist after reboots, unlike other Makito settings which are lost NOTE when the unit is rebooted unless saved as a configuration. Makito User’s Guide, v2.1.0, Issue 01...
- Page 218 XAMPLE REATING AN USER Two commands are required to create a USM (v3) user and define its access: # nmcfg user define johnsmith SHA “arfds23dsjs” AES “2394urscxkvn” # nmcfg access usm permit johnsmith operator Makito User’s Guide, v2.1.0, Issue 01...
- Page 219 # nmcfg system parameter value ----------------- ------------------------------------ engineid 0x80001f88802054a68b4b75388e contact "joe net <jnet@example.org>" location "Media Lab" model perm/group level user/community source --------------- ------------- -------- ---------------------- --------- guest auth guest administratorpriv joenet operator priv johnsmith Makito User’s Guide, v2.1.0, Issue 01...
- Page 220 CLI Command Reference nmcfg auth protocol priv protocol user ----------------------- ---------------- ----------- nopriv guest joenet johnsmith • “nmcfg” on page 165 (in “SNMP Agent Components”) Makito User’s Guide, v2.1.0, Issue 01...
-
Page 221: Package
Administrators (see messages CLI command). A successful package installation notice is added to the messages upon successful installation. Makito User’s Guide, v2.1.0, Issue 01... - Page 222 Downloads the specified package file using TFTP and then verifies it. delete Deletes a previously downloaded package file. You can specify the package file or cancel Cancels installation of a package scheduled for the next reboot. Makito User’s Guide, v2.1.0, Issue 01...
- Page 223 CLI Command Reference package PACKAGE XAMPLES # package info haios_v1_2_0.hai Displays information about the package # package install haios_v1_2_0.hai Installs the package Makito User’s Guide, v2.1.0, Issue 01...
-
Page 224: Passwd
“Password Requirements” on page 70 for the supported character set. Password policies set by the administrator may enforce the selection of strong passwords. • “Role-based Authorization” on page 62 • Managing Accounts on page 138 Makito User’s Guide, v2.1.0, Issue 01... -
Page 225: Policy
Specifies the cryptographic policy. compliance parameter can be specified. See crypto under policy Parameters below. policy pname/all get Displays the policy information for either the policy (i.e., password, session, or crypto) or the encoder. Makito User’s Guide, v2.1.0, Issue 01... - Page 226 Enables or disables password expiration: • Yes, No (Password expiry must be Yes) Type in the lifetime 90 days number of days after which users must change their passwords: • 1..180 days (password expiration) Makito User’s Guide, v2.1.0, Issue 01...
- Page 227 Strong, requiring passwords to be minlen=10 minuppers=1 at least 10 characters in length, with minsymbols=1 expiry=yes one uppercase letter, one symbol. lifetime=30 Passwords will expire in 30 days. • Managing Security Policies on page 147 Makito User’s Guide, v2.1.0, Issue 01...
-
Page 228: Profile
<profilename> get ESCRIPTION To help you manage the video quality parameters, the Makito provides a selection of video presets or “Profiles” defined for different contexts, such as computer graphics, movies, news, outdoors, sports, or “talking heads” (Virtual Presence). - Page 229 : Low RateControlBuffer : Low UseDeblockFilter : Enabled DBFStrength : Medium DBFLevel : Medium • “Configuring Video Profiles” on page 106 • “Video Quality Parameters” on page 109 • “Default Profiles” on page 113 Makito User’s Guide, v2.1.0, Issue 01...
-
Page 230: Pubkey
#pubkey list Lists all Public Key files currently loaded on the Encoder along with their fingerprints. In this example, there is one Public Key file: makito.pub : rsa[1024] b7:ae:79:92:0d:86:f9:8d:2d:ee:99:fc :ff:24:95:87:e e:78:1d:fd Makito User’s Guide, v2.1.0, Issue 01... - Page 231 CLI Command Reference pubkey • Managing Accounts on page 138 Makito User’s Guide, v2.1.0, Issue 01...
-
Page 232: Reboot
YNOPSIS reboot ESCRIPTION reboot command is used to is used to halt and restart the Makito. Any unsaved config- urations will be lost. The encoder will restart with the saved startup configuration. XAMPLE # reboot Reboots the Makito. While the unit is rebooting, you will lose your connection to NOTE: the CLI. -
Page 233: Service
Displays the current status of the service, i.e., if it has been started or stopped. XAMPLES # service telnet stop Stops telnet connection to the Makito. # service all stop Stops all network connections to the Makito. • Enabling and Disabling Network Services on page 134 Makito User’s Guide, v2.1.0, Issue 01... -
Page 234: Snapshot
Sets system-wide defaults for the preferred snapshot format and quality. Displays the current format and quality defaults for the snapshot utility. Makito User’s Guide, v2.1.0, Issue 01... - Page 235 0. # snapshot get Returns the current system-wide settings for the snapshot format, for example: Current Defaults: Format : JPEG Quality : 100 Max Storage : 20,480 KBytes Makito User’s Guide, v2.1.0, Issue 01...
- Page 236 The Snapshot capability can be disabled to prevent captured content from being stored on the Makito. Disabling Snapshots is typically done at factory staging when the feature request is part of the P.O. Any Snapshot related functionality (such as Web Interface buttons or CLI command options) is greyed-out, made unavailable, or removed when Snapshots are disabled.
-
Page 237: Still
<filename> ESCRIPTION still command is used to manage available still image files on the Makito file system. Static image files must already have been converted into files containing encoded single /usr/share/haivision/still_images H.264 GOP sequences and be located the folder the Makito file system. -
Page 238: Stream
Starts the specified stream ID or name. start=yes NOTE: By default, a stream will start immediately since by default. To delay the start of a stream, include the parameter start=no stop Stops the specified stream ID or name. Makito User’s Guide, v2.1.0, Issue 01... - Page 239 Most commands will accept the stream id or name (see below) in order select the proper stream to manage. name (Optional) When creating a stream, you can also specify a name for the stream. characters Makito User’s Guide, v2.1.0, Issue 01...
- Page 240 - RFC3984 • - QuickTime (see “QuickTime SDP and Interoperability” on page 95). • - Streams to a Flash Media Server or rtmp Content Delivery Network (see “CDN and Flash Interoperability” on page 94). Makito User’s Guide, v2.1.0, Issue 01...
- Page 241 (Optional) Data (metadata) Packet Identifier. 16..8190 pcrpid (Optional) (Program Clock Reference) Packet Identifier. Timestamp in the TS from which the decoder timing is derived. 16..8190 pmtpid (Optional) (Program Map Table) Packet Identifier. 16..8190 Makito User’s Guide, v2.1.0, Issue 01...
- Page 242 Idle TS cells will be inserted into a TS stream when necessary. yes,no username (Required when streaming to a CDN using RTMP) Enter the CDN login username. password (Required when streaming to a CDN using RTMP) Enter the CDN login password. Makito User’s Guide, v2.1.0, Issue 01...
- Page 243 # videnc 1 start # audenc 1 start videnc audenc commands are required TIP: # stream create addr=198.51.100.106 to activate the Low Video and Audio encoder because port=1234 vid=1 aud=1 the High encoders are activated by default. Makito User’s Guide, v2.1.0, Issue 01...
- Page 244 SSRC : 0x94328a6a (2486340202) Sent Packets : 413,274 Sent Bytes : 417,249,304 Unsent Packets : 1,214 Unsent Bytes : 1,272,100 Last Error : 11, Resource temporarily unavailable Occurred : 6hr44m4s ago RTCP : Off Makito User’s Guide, v2.1.0, Issue 01...
- Page 245 CLI Command Reference stream # stream 1 del Deletes Stream #1. • “Configuring the Stream Settings” on page 85 • “Configuring the RTSP Server” on page 97 Makito User’s Guide, v2.1.0, Issue 01...
-
Page 246: System_Snapshot.sh
ESCRIPTION system_snapshot.sh command is used take a system snapshot for the purpose of troubleshooting and may be forwarded to Haivision Technical Support if you are requesting technical support. The system snapshot lists information such as component versions, network settings, loaded modules, running processes, system traces, configured streams and stream status... -
Page 247: Talkback
(9177 by default). There is no audio mixer on the Makito, so the encoder handles the talkback sessions on a first-come first-serve basis. To prevent a single user from monopolizing the Makito talk- back, the software player application must provide “push-to-talk” functionality, which requires that the talkback user physically push and hold a button (for example by pressing the mouse button). - Page 248 Sets the volume of the audio talkback to 6. # talkback get Returns audio talkback configuration, such as: Volume : 10 UDP Port : 9177 • “Audio Talkback” on page 30 • “Setting up Audio Talkback” on page 277 Makito User’s Guide, v2.1.0, Issue 01...
-
Page 249: Temperature
Displays the current temperature for the unit, see example below: Temperature Status: Current Temperature : 35 Celsius measured 2s ago Maximum Temperature : 36 Celsius measured 5d2h9m2s ago Minimum Temperature : 32 Celsius measured 5d5h34m2s ago Makito User’s Guide, v2.1.0, Issue 01... -
Page 250: Tzconfig
7) Bolivia 8) Brazil 9) Bahamas 10) Belize 11) Canada 12) Chile $? 11 Please select one of the following time zone regions 1) St_Johns 2) Halifax 3) Glace_Bay 4) Goose_Bay 5) Montreal 6) Toronto $? 5 Makito User’s Guide, v2.1.0, Issue 01... - Page 251 CLI Command Reference tzconfig • date on page 197 • dtconfig on page 198 Makito User’s Guide, v2.1.0, Issue 01...
-
Page 252: Videnc
Displays encoder video status information. config stats You can specify to display the configuration ( , or clear Clears the encoder’s statistics. reset Resets the encoder. help videnc Displays usage information for the command. Makito User’s Guide, v2.1.0, Issue 01... - Page 253 720x480p60 • 480p59 720x480p59 • PAL 720x576i25 • 576p 720x576p50 • SXGA 1280x1024p85 • SXGA60 1280x1024p60 • WXGA 1280x768p85 • WXGA75 1280x768p75 • WXGA60 1280x768p60 • XGA 1024x768p85 • XGA75 1024x768p75 • XGA60 1024x768p60 Makito User’s Guide, v2.1.0, Issue 01...
- Page 254 In this case, it is a good idea to enable NTP (see “ipconfig” on page 202). This applies to both TV resolutions and graphic resolutions. “TimeCode Source” on page 76 NOTE: for currently supported TimeCode features. Makito User’s Guide, v2.1.0, Issue 01...
- Page 255 The stream output resolution. Specifies the number of lines per frame and pixels per line to be encoded. Options depend on the Input Format detected. • Auto (output resolution is the same as the input) Makito User’s Guide, v2.1.0, Issue 01...
- Page 256 576i) • 352x576i (only works if input is 576i) • 352x288p (only works if input is 480p,480i, 576p, 576i, WXGA, XGA, SVGA or VGA) • 352x288i (only works if input is 480i or 576i) Makito User’s Guide, v2.1.0, Issue 01...
- Page 257 : "HD Video Encoder 0" Configuration: Video Input : SDI Video Bitrate : 6000 kbps Video GOP Size : 30 Encoded Picture Rate: 60 Output Resolution : Input/Auto Closed Captioning : On PTS Offset : 50 ms Makito User’s Guide, v2.1.0, Issue 01...
- Page 258 Encoder PTS : 0x1708c8ce8 Encoder Load : 50% Closed Captioning : Disabled # videnc videnc 0 set profile= Selects the quality Profile for video Outdoors encoding. • Configuring the Video Settings on page 71 Makito User’s Guide, v2.1.0, Issue 01...
- Page 259 B: Technical Specifications PPENDIX This appendix lists the technical specifications for the Makito. Topics In This Appendix Video Encoding ..........260 Supported Video Encoding Resolutions (Makito #B-290E-DVI) .
-
Page 260: Video Encoding
ITU H.264 AVC (MPEG-4 part 10) / ISO/IEC 14496-10 • Baseline / Main Profile • Level 4.2 and lower Intermediate Levels • I, IP framing only • Configurable Group of Picture (GOP) size • Configurable frame rate • Deblocking filter Makito User’s Guide, v2.1.0, Issue 01... -
Page 261: Supported Video Encoding Resolutions (Makito #B-290E-Dvi)
Technical Specifications Video Encoding Supported Video Encoding Resolutions (Makito #B-290E-DVI) Table B-1 Makito #B-290E-DVI Available Video Resolutions Y,Pb,Pr & Y,Cb,Cr TV Input Resolutions /Scan Rates Output Resolutions 1080p 1080i 720p 480i 480p 576i 576p Name Resolution 60 * / 3 0* 50 / 25 24*... - Page 262 When configuring HiLo streaming, make sure the Total Load does not exceed NOTE 100%. For best results, the “Low” encoder stream may be downscaled, but the “High” stream should be encoded at native resolution. Makito User’s Guide, v2.1.0, Issue 01...
-
Page 263: Supported Graphic Encoding Resolutions (Makito #B-290E-Dvi)
Technical Specifications Video Encoding Supported Graphic Encoding Resolutions (Makito #B-290E-DVI) Table B-2 Makito #B-290E-DVI Graphic Resolutions RGB & RGBHV Computer Graphic Input Resolutions /Scan Rates Output Resolutions 1280x1024 1280x768 1024x768 800x600 640x480 Name Resolution 75/ 60 85/ 75 / 60... -
Page 264: Supported Video Encoding Resolutions (Makito-Sdi #B-290E-Hdsdi)
Technical Specifications Video Encoding Supported Video Encoding Resolutions (Makito-SDI #B-290E-HDSDI) Table B-3 Makito-SDI #B-290E-HDSDI Available Video Resolutions Encoded Output Input Resolutions and Frame Rates Resolutions 1080p 1080i 720p 480i 576i Name Resolution 30* / 60* 25 / 50 23.98 30* /... -
Page 265: Audio Encoding
From 32 to 384 kbps per audio pair Frequency Response From 20 Hz to 22 kHz Sampling Rate 48kHz +6dBU Maximum Analog Audio Input Level Compression Standards MPEG-2 AAC-LC ISO/IEC 13818-7 MPEG-4 AAC-LC ISO/IEC 14496-3 Makito User’s Guide, v2.1.0, Issue 01... -
Page 266: Audio/Video Interfaces
1080p 60 video format Audio (Input) 2 audio channels (analog or digital) Available through Terminal Block connector: • Balanced Stereo Analog Audio • Unbalanced Stereo Analog Audio Digital Embedded Audio • SD-SDI: SMPTE-272M • HD-SDI: SMPTE-299M Makito User’s Guide, v2.1.0, Issue 01... -
Page 267: Klv Data Specifications
MISB EG 0601.1 UAS Datalink Local Metadata Set MISB RP 0604 Time Stamping Compressed Motion Imagery In case the KLV serial data is transmitted from the source to the Makito over NOTE a relatively error-prone medium (such as wireless), it is up to the System Integrator to insure the integrity of the KLV packets by using data recovery mechanisms such as Forward Error Correction, etc. -
Page 268: Network And Management Interfaces
MANAGEMENT INTERFACES Management Protocols HTTP (Web browser) Command line over Telnet, SSH or RS-232 serial line FTP/TFTP Client/Server SNMP Furnace (VF Pilot) Physical Interface RS-232 RJ45 to DB-9 Serial Management Adapter Required (provided with unit) Makito User’s Guide, v2.1.0, Issue 01... -
Page 269: Chassis Options
• DC type 20-36 VDC 200 Watt max. Temperature 0° to 50° C [32° to 122° F] operating -40° to 70° C [-40° to 158° F] non-operating Relative Humidity Up to 95% without condensation Makito User’s Guide, v2.1.0, Issue 01... -
Page 270: Mb21 - 21 Blade Chassis
(1.6”H x 5.6”W x 8.5”D) Weight 1.63 kg / 3.6 Ibs. Power Requirements 28VDC, 17W MIL-STD connector MIL-STD-704 Temperature Operating: -20° to 50° C Non-operating: -40° to 50° C Relative Humidity Up to 95% without condensation Makito User’s Guide, v2.1.0, Issue 01... -
Page 271: Regulatory/Compliance
FCC Part 15, Subpart B, Class A Makito Air Designed for specific sections of: • RTCA-DO-160F • MIL-STD-810F • MIL-STD-704F • IEC60529:2001-02 Compliance with RoHS, European Union Directive 2002/95/EG Environmental RoHS, Marking Control for China, Regulation SJ/T Regulations 11364-2006 Makito User’s Guide, v2.1.0, Issue 01... -
Page 272: Closed Captioning
Technical Specifications Closed Captioning Closed Captioning The Makito supports capture, multiplexing and transport of Closed Captioning (CC) and other Line 21 information over Composite and S-Video (with no 7.5 IRE setup on Line 21), as well as HD/SD SDI input interfaces. - Page 273 Descriptor (CSD) are announced in the Program Map table (PMT) of the MPEG-2 TS as per ATSC A/65. On the Makito, we only support a maximum of three (3) Caption active services at NOTE a time plus CC1-4 Text1-4 and XDS.
-
Page 274: Appendix C: Faq
C: FAQ PPENDIX This FAQ provides answers to some of the most frequently asked questions relating to setting up and using the Makito. Topics In This Appendix General ............275 Audio/Video . -
Page 275: General
54. How do I set up the Makito to interoperate with QTSS? The Makito has been tested with QuickTime Streaming Server (QTSS, Darwin Streaming Server, DSS). You must use the Manual SDP method because the Automatic (Announce) method is not yet supported. -
Page 276: Audio/Video
What are the Power Supply and Heat Dissipation requirements for the Makito? • The Makito power supply can support a range from 100 - 240V AC. • The Makito @ 1080i30 requires 10.7 Watts and heat dissipation of 36.5 BTU. -
Page 277: Setting Up Audio Talkback
Setting up Audio Talkback Setting up Audio Talkback With the Talkback feature, the Makito encoder can be configured to listen for an uncom- pressed PCM audio stream and output it via a mono analog audio connector. However, the customer or system integrator must develop their own application to send the audio stream to the encoder. - Page 278 D: Open Source Software PPENDIX Credits This appendix lists the Open Source software packages used in the Makito haiOS: Open Source Software Credits Haivision is grateful to the following organizations for making available their Open Source software packages: Package Version...
-
Page 279: Open Source Software Credits
Open Source Software Credits Open Source Software Credits Please refer to the URLs listed above for details of each Open Source licensing agreement. Code for GPL-related components is available upon request. For additional information, refer to http://www.fsf.org/licensing. Makito User’s Guide, v2.1.0, Issue 01... - Page 280 Warranty Period, at its option and to the extent permitted by law, Haivision will either (1) repair the hardware defect at no charge, or (2) exchange the product with a product that is new or equivalent to new in performance and reliability and is at least func- tionally equivalent to the original product.
-
Page 281: Haivision One (1) Year Limited Warranty
When calling, Haivision or Authorized Reseller will help determine whether your product requires service and, if it does, will inform you how Haivision will provide it. You must assist in diagnosing issues with your product and follow Haivision’s warranty processes. - Page 282 Software and which add minor new functions to the Licensed Software, but none so significant as to warrant classification as an Upgrade, which may be provided by Haivision to fix critical or non-critical problems in the Licensed Software on a scheduled, general release basis. Updates to the Licensed Software (“Version”) are denoted by number changes to the right of the decimal point for a version and revision number (for example going from 2.0.0 to 2.1.3).
-
Page 283: Haivision End User Software License Agreement
Ownership. The Licensed Software is conditionally licensed and not sold. As between the parties, Haivision and/or its licensors owns and shall retain all right, title and interest in and to all of the Licensed Software, including all copyrights, patents, trade secret rights, trademarks and other intellectual property rights therein, and nothing in this Agreement shall be deemed to transfer to You any ownership or title to the Licensed Software. - Page 284 Haivision. All non-proprietary Hardware, if any, is sold “AS IS”; however, to the extent that Haivision has the legal right to do so, Haivision hereby transfers to You any and all warranties made by Haivision's vendors to Haivision with respect to such non-proprietary Hardware which was sold by Haivision or the Reseller to...
- Page 285 Agreement, or (ii) relating to or arising out of any negligence or wilful misconduct on the part of Haivision or any breach by Haivision of the terms of this Agreement or any Maintenance and Support Agreement, or applicable law.
- Page 286 (whether by operation of law or otherwise) without the prior written consent of Haivision. Any unauthorized assignment, transfer or delegation by You shall be null and void. No other Person shall have or acquire any right under or by virtue of this Agreement.
- Page 287 Warranty Information Haivision End User Software License Agreement If you have questions, please contact Haivision Systems Inc., 4445 Garand, Montréal, Québec, H4R 2H9 Canada. Makito User’s Guide, v2.1.0, Issue 01...
- Page 288 CLI command option 186 coldStart Audio Sample Rate Color Space, Video Audio Settings page 78 Video Settings page 73 CLI command option 186 COM Port Settings page 114 Audio Settings page 77 COM1 port Makito User’s Guide, v2.1.0, Issue 01...
-
Page 289: Index
HiLo video streaming 71 CLI command option 199 configuring from the Web interface (RTSP set- Network Settings page 120 tings page) 97 configuring from the Web interface (Video set- tings page) 71 Host Name Makito User’s Guide, v2.1.0, Issue 01... - Page 290 Video Settings page 76 specifying from the CLI 243 loading configurations specifying from the Web interface 88 from the CLI 195 muting the audio from the Web interface 127 from the CLI 185 logging in Makito User’s Guide, v2.1.0, Issue 01...
- Page 291 Makito 95 serial COM1 port 36 setting up the encoder 33 shell commands reboot syntax 176 snapshot, image CLI command 232 capturing from the CLI 234 rebooting the encoder 124 Makito User’s Guide, v2.1.0, Issue 01...
- Page 292 260 talkback Video Frame Rate CLI command 247 picrate CLI command option (see ) 255 technical specifications 259–273 Video Settings page 75 temperature Video Framing CLI command 249 Video Settings page 75 terminal parameters Makito User’s Guide, v2.1.0, Issue 01...
- Page 293 Web interface (Profiles page) 109 Video Resolution CLI command option 255 supported encoding resolutions 261, 263, 264 Video Settings page 74 Video Settings page 71 Web interface 64–160 accessing 61 updating the firmware 130–133 Makito User’s Guide, v2.1.0, Issue 01...
Need help?
Do you have a question about the Makito and is the answer not in the manual?
Questions and answers