Advertisement
Makito X Encoder Quick Start Guide
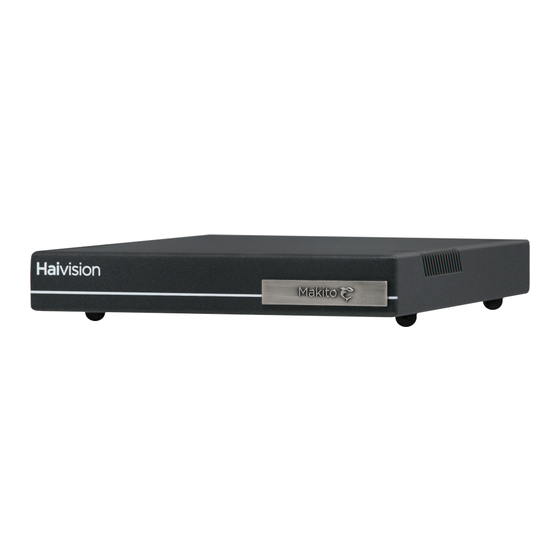
This Quick Start Guide summarizes the steps required to install and configure the Makito X
encoder (single-height or dual-height chassis) to stream to your compatible decoding device or player,
such as the Makito X or the Makito decoder.
For detailed configuration and operation information, please refer to the User's Guide (available at
https://doc.haivision.com
with the appliance or available on the Haivision Support Portal at https://support.haivision.com). For
information on the MB6 (6-slot) or MB21 (21-slot) chassis, refer to the
Installing the Encoder
1.
Unpack the box and visually inspect the package contents for any evidence of shipping
damage. [See the Important Notice postcard in the box for list of contents.]
2.
Install the Makito X as a desktop unit on a flat, well-ventilated surface.
Before You Begin
Use the following guidelines when unsafe conditions exist or when potentially hazardous voltages are
present:
•
Always use caution and common sense.
•
To reduce the risk of electrical shock, do not operate equipment with the cover removed.
•
Repairs must be performed by qualified service personnel only.
Improper handling and/or installation practices of sensitive equipment may VOID the warranty.
Caution
When handling components, or when setting switch options, always use an antistatic wrist strap
connected to a grounded equipment frame or chassis. If a wrist strap is not available, periodically
touch an unpainted metal surface on the equipment. Never use a conductive tool, such as a
screwdriver or a paper clip, to set switches.
Makito X Encoder 2.3
Makito X Encoder Quick Start Guide
Makito X Encoder 2.3
). For the default credentials, refer to the Important Notice (postcard shipped
MB Chassis Installation Guide
1
www.haivision.com
Generated on: 2024-02-09 19:20:26
HVS-ID-QSG-MAKX-23, Issue 02
.
Advertisement
Table of Contents

Related Manuals for Haivision Makito X


Summary of Contents for Haivision Makito X
- Page 1 Makito X Encoder Quick Start Guide Makito X Encoder 2.3 This Quick Start Guide summarizes the steps required to install and configure the Makito X encoder (single-height or dual-height chassis) to stream to your compatible decoding device or player, such as the Makito X or the Makito decoder.
- Page 2 Connecting to the Network To connect the Network Interface: Connect the Makito X’s network port to the IP network using an Ethernet UTP cable (type Cat 5 or higher). This will allow you to telnet to the unit or connect via the Web interface.
- Page 3 DVI Video Input • Component Analog / Digital Video/Computer Graphics: Use the DVI-I Input connector. Analog Audio Input: Connect your audio source cable to the Makito X’s audio input, using the RCA female to audio adapter (unbalanced shown below). Note A balanced audio cable adapter is available from Haivision upon request. Please contact your sales representative or email Haivision at: sales@haivision.com...
- Page 4 Important There is no power switch on the Makito X appliance. The power is automatically on when the unit is plugged in. When using the AC/DC power adapter, the power supply cord is used as the main disconnect device. Ensure that the AC socket outlet is located near the equipment and is easily accessible.
- Page 5 Wait until the Status LED stays solid green, indicating that the encoder is ready for operation. Dual-Height Chassis Single-Height Chassis Single-Height Chassis Rear View (Makito X SDI, #S/B-292E-HDSDI2) showing Conxall 3-pin Locking Connector Power Adapter 12VDC with Conxall 3-pin Connector Single-Height Chassis Dual-Height Chassis...
- Page 6 Power Adapter 12VDC with HiRose 3-pin Connector Makito X Encoder 2.3 Generated on: 2024-02-09 19:20:26 Makito X Encoder Quick Start Guide HVS-ID-QSG-MAKX-23, Issue 02...
-
Page 7: Accessing The Web Interface
IP address back. For details, see Configuring Network Settings in the User's Guide. Note The Makito X identity certificate and trusted root certificates may be managed from the Web interface (Certificates page) or using the CLI certificate command. See Managing Certificates in the User's Guide. - Page 8 Makito X Encoder 2.3 Generated on: 2024-02-09 19:20:26 Makito X Encoder Quick Start Guide HVS-ID-QSG-MAKX-23, Issue 02...
-
Page 9: Configuring The Video Settings
Click Video Encoders on the sidebar (under General Settings). The Video Encoders List View displays information at a glance for the video encoders. On the Makito X HEVC, the List View includes two HEVC encoder instances, as shown in the following example: To change the status for an encoder, click the dropdown list under Action and select either Start or Stop (as applicable). -
Page 10: Configuring The Audio Settings
To start or stop the encoder, click Start or Stop (as applicable). • To mute the audio (when active), click Mute. • To view statistics for the encoder, click Statistics. Makito X Encoder 2.3 Generated on: 2024-02-09 19:20:26 Makito X Encoder Quick Start Guide HVS-ID-QSG-MAKX-23, Issue 02... -
Page 11: Setting Up Streaming
Setting Up Streaming Note On the Makito X with Storage, you can set up streaming only, recording only, or streaming with recording. Click Outputs on the sidebar (under General Settings). On the Outputs List View, click Add to create the first stream or recording session. -
Page 12: Setting Up Recording
Setting Up Recording Note Recording is only available on the Makito X with Storage dual-height model. Recorded sessions may be exported to an FTP/SFTP server or stored locally on an SSD (if installed). To set up a recording session: On the New Stream page (or Outputs Detail View), scroll down the page and toggle the Recording... - Page 13 (e.g., VLC), • are accessible on the same network segment as the Makito X, and • are “tuned” to the Makito X Destination IP address and Port, for example, 239.10.10.100 / port (as defined in Setting Up Streaming). ...
- Page 14 Obtaining Documentation This document was generated from the Haivision InfoCenter. To ensure you are reading the most up-to- date version of this content, access the documentation online at https://doc.haivision.com. You may generate a PDF at any time of the current content. See the footer of the page for the date it was generated.
Need help?
Do you have a question about the Makito X and is the answer not in the manual?
Questions and answers