Haivision S/B-292E-DVI User Manual

Haivision S/B-292E-DVI User Manual

Makito x series
Table of Contents

Advertisement

Makito
X
Encoder Family
User's Guide v2.2
HVS-ID-UG-MAKX-22
Issue 02

Advertisement

Table of Contents
loading

Summary of Contents for Haivision S/B-292E-DVI

  • Page 1 ™ Makito Encoder Family User’s Guide v2.2 HVS-ID-UG-MAKX-22 Issue 02...
  • Page 2: Third Party License Information

    Trademarks The Haivision logo, Haivision, and certain other marks used herein are trademarks of Haivision. All other brand or product names identified in this document are trademarks or registered trademarks of their respective companies or organizations. HDMI, the HDMI logo and High-Definition Multimedia Interface are trademarks or regis- tered trademarks of HDMI Licensing LLC.
  • Page 3 ● Neither the name of the University of Illinois nor the names of its contributors may be used to endorse or promote products derived from this software without specific prior written permission. THIS SOFTWARE IS PROVIDED BY THE COPYRIGHT HOLDERS AND CONTRIB- UTORS “AS IS”...
  • Page 4 libuuid Modified Licensed (Modified BSD) Copyright (C) 1998, 1999 Theodore Ts’o Redistribution and use in source and binary forms, with or without modification, are permitted provided that the following conditions are met: Redistributions of source code must retain the above copyright notice, and the entire permission notice in its entirety, including the disclaimer of warranties.
  • Page 5: Safety Guidelines

    EMC Warnings Notice with respect to Class A (FCC) Changes to equipment without the permission of Haivision may result in its failure to comply with the FCC requirements for Class A digital devices. If applicable, your rights to use the equipment may be limited By the FCC rules and you may be able to remedy, at your own expense, any interference with radio or television equipment.
  • Page 6 Avis relatif aux appareils de classe A (FCC) Toute modification de l'équipement sans l'autorisation de Haivision peut entraîner sa non- conformité aux exigences de la FCC concernant les appareils numériques de classe A. Le cas échéant, vos droits d'utilisation de l'équipement seront susceptibles d'être limités par les règlements de la FCC et vous pourrez être amené...
  • Page 7: Antistatic Precautions

    In accordance with the European Union (EU) WEEE Directive, Haivision products that fall within the scope of the WEEE, are labeled with the above symbol, and customers are encouraged to responsibly recycle their equipment at the time of disposal.
  • Page 8: Table Of Contents

    Antistatic Precautions ......................7 Fan Blade ........................... 7 Waste Electrical and Electronic Equipment (WEEE) Disposal..........7 About This Guide ......................... 15 About Haivision........................16 Audience ..........................16 Reliability of Information ....................... 16 Obtaining Documentation....................... 16 Related Documents ......................... 17 Service Support........................17 Document Conventions......................
  • Page 9 Table of Contents Chapter 2: Installing the Encoder Setting Up the Encoder ......................44 Safety First ........................44 Connecting the Encoder to the Network and a Computer ............45 Serial Interface Setup (Makito X SDI only)..............46 Connecting the Encoder to A/V Sources ................49 Connecting the DVI-I Interface (Makito X-DVI) ............
  • Page 10 Streaming Statistics ......................143 Configuring Recording Outputs.................... 147 Setting Up Recording ....................147 Recording Settings ......................149 Roll-Over and Uploading to HVC / Haivision Media Platform / FTP......150 Managing Recordings ......................151 Viewing Options ......................152 Playing Back .MP4 Recordings ..................154 Managing Recorded Content..................
  • Page 11 Table of Contents Configuring Still Image Streaming..................166 Managing External Storage ....................169 Chapter 5: System Administration and Storage Viewing System Status Information ..................174 Status Settings ........................ 175 Taking a System Snapshot ..................... 176 Saving and Loading Presets....................178 Preset Management .......................
  • Page 12 Table of Contents Managing Audits........................232 Audit Settings......................... 233 Chapter 7: Configuring A/V Services Using SNMP Overview..........................236 Supported MIBs........................237 SNMP Agent Components....................238 snmpd ..........................238 snmpd.conf ........................238 snmpd.local.conf ......................238 nmcfg Script ........................240 SNMPv3..........................242 SNMP Utilities........................
  • Page 13 Table of Contents nmcfg ............................ 314 package ..........................319 passthrough ........................... 322 passwd ........................... 326 personality ..........................327 policy ............................ 328 pubkey ........................... 332 reboot ............................ 333 record ............................ 334 roi ............................337 service ........................... 339 snapshot ..........................341 still ............................345 storage ...........................
  • Page 14 Appendix C: Open Source Software Credits References..........................406 Open Source Software Credits....................406 Appendix D: Warranty Information Haivision One (1) Year Limited Warranty ................411 EXCLUSIONS AND LIMITATIONS ................411 OBTAINING WARRANTY SERVICE ............... 412 APPLICABLE LAW ..................... 412 Software End User License Agreement................413 READ BEFORE USING ....................
  • Page 15: About This Guide

    Topics In This Section About Haivision ..........16 Audience .
  • Page 16: About Haivision

    About Haivision About Haivision Haivision is a global leader in delivering advanced video networking, digital signage, and IP video distribution solutions. Haivision offers complete end-to-end technology for video, graphics, and metadata to help customers to build, manage, and distribute their media content to users throughout an organization or across the Internet.
  • Page 17: Related Documents

    ● Makito X Hardening Guide Service Support Haivision is committed to providing the service support and training needed to install, manage, and maintain your Haivision equipment. For more information regarding service programs, training courses, or for assistance with your support requirements, contact Haivision Technical Support via our Support Portal on our website at: https://support.haivision.com...
  • Page 18: Safety Information

    About This Guide Document Conventions Indicates an emphasized note. It provides information that you should IMPORTANT be particularly aware of in order to complete a task and that should not be disregarded. IMPORTANT is typically used to prevent loss of data. Indicates a potentially hazardous situation which, if not avoided, may result in CAUTION damage to data or equipment, or minor to moderate injury.
  • Page 19: New Product Features

    New Product Features Version 2.2 of the Makito X User’s Guide introduces the following new features and enhancements: Metadata Filtering KLV/SDI metadata objects as defined in MISB 0601 and MISB 0102 can now be filtered to exclude user selected items. Disable Snapshot Capture Snapshot capture can now be disabled allowing faster response when SDI sources are switched upstream of the encoder input.
  • Page 20 References to the “Makito X” can be taken to include the following interfaces NOTE unless specifically stated otherwise: • Makito X DVI (#S/B-292E-DVI) • Makito X SDI: Dual-Channel (#S/B-292E-HDSDI2) or Single-Channel (#S/B-292E- HDSDI1) • Makito X HEVC: Dual-Channel (#S/B-292E-SDI2-HEVC) or Single-Channel (#S/B-292E-SDI1-HEVC) •...
  • Page 21 Introduction Makito X DVI-I Video and Embedded Audio Interface ..33 Makito X SDI Video and Embedded Digital Audio Interface ..34 Analog Audio Interface ........35 LED Status Indicators (Rear Panel) .
  • Page 22: Chapter 1: Introduction Product Overview
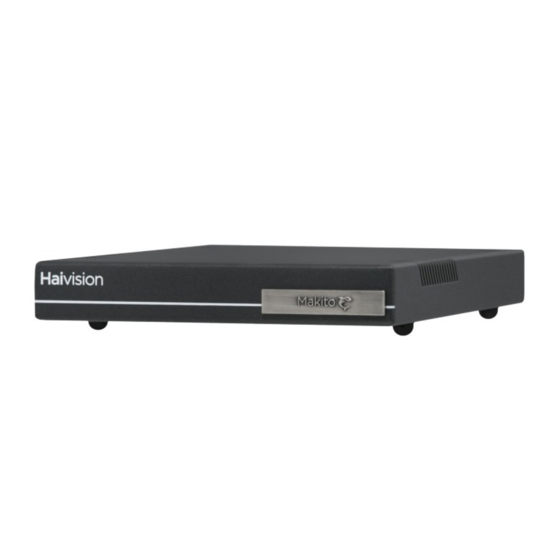
    FTP/SFTP server for use within Haivision media systems including Haivision Media Platform and the Haivision Video Cloud (HVC), or stored locally on an SD card or USB storage device, or transferred to a network attached storage configuration drive (if installed).
  • Page 23: Chassis Styles

    ● as a blade within a 1RU chassis (MB6X) that can contain up to six single-height or three dual-height Makito X or other Haivision encoder/decoder blades, ● as a blade within a 4RU chassis (MB21) that can contain up to 21 single-height or ten dual-height Makito X or other Haivision encoder/decoder blades, ●...
  • Page 24 Introduction Product Overview Figure 1-4 Makito X HEVC Encoder, Rear View (#S-292E-SDI2-HEVC) Figure 1-5 MB21 Multichannel Chassis (Top - Front, Bottom - Rear View) Makito X User’s Guide, v2.2, Issue 02...
  • Page 25 Introduction Product Overview Figure 1-6 MB6X Multichannel Chassis (Top - Front, Bottom - Rear View MB6X-MED) The MB6X is available with a single AC, DC, or medical grade AC power supply. NOTE For details, please refer to the MB6 and MB21 Multichannel Chassis Installation Guide. Figure 1-7 Makito X Harsh (Dual SDI Encoder Appliance) Makito X User’s Guide, v2.2, Issue 02...
  • Page 26: Hevc Encoding

    Makito XR (Ruggedized) (Quad SDI Encoder Appliance) For details on the Makito X Harsh or Makito XR, please refer to the following NOTE documents available through Haivision’s Download Center: • Makito X Harsh Installation Guide • Makito XR (Ruggedized) Installation Guide “Makito X HEVC Encoder, Rear View (#S-292E-SDI2-HEVC)”...
  • Page 27: Dual Channel Vs. High/Low Encoding

    Introduction Product Overview “Makito X HEVC Encoder, Rear View (#S-292E-SDI2-HEVC)” on page 24 and “Configuring HEVC Video Encoding” on page 85. Dual Channel vs. High/Low Encoding In addition to encoding single input sources, the Makito X supports dual channel and High/Low encoding.
  • Page 28: Applications

    Automatically segment recordings to files (i.e., for long duration or continuous recording). ● Automatically export via FTP/SFTP. ● Ingest to Haivision Video Cloud (HVC) through a watch Folder. For more information, see “Storage Options (Rear Panel)” on page 31. Applications Typical examples of Makito X applications include: ●...
  • Page 29: Secure Reliable Transport (Srt)

    Product Overview Secure Reliable Transport (SRT) Haivision’s Secure Reliable Transport (SRT) technology is available on Makito X Series encoders and decoders. The SRT streaming protocol is designed to provide reliable and secure end-to-end transport between two SRT-enabled devices over a link which traverses the public Internet.
  • Page 30: Physical Description

    Physical Description For details on the Makito XR and Makito X Harsh interfaces, please refer to the NOTE Installation Guides available through Haivision’s Download Center. Following is a description of the Makito X interfaces, connectors, and LED status indica- tors:...
  • Page 31: Storage Options (Rear Panel)

    Introduction Physical Description Related Topics ● “Connecting the Encoder to the Network and a Computer” on page 45 ● “Serial Interface Setup (Makito X SDI only)” on page 46 Storage Options (Rear Panel) The Makito X provides the following mezzanine storage options for either the SDI or DVI appliances: ●...
  • Page 32 Introduction Physical Description Figure 1-14 DVI Rear View with Fixed (Internal mSATA SSD) Storage (#S- 292E-DVI-FS) Figure 1-15 DVI Rear View with Removable (SATA SSD) Storage (#S-292E- DVI-RS) The USB port and SD card port are currently limited to a destination for recording NOTE asset moves / copy operations or as a location to save image snapshots.
  • Page 33: Audio/Video Interfaces (Rear Panel)

    Makito X DVI-I Video and Embedded Audio Interface The Makito X DVI video interface consists of a single DVI-I connector (shown below). Figure 1-16 DVI-I Video Interface (#S/B-292E-DVI) The DVI-I connector supports the following inputs: ● Component Analog video (Y,Pb,Pr / RGBHV) ●...
  • Page 34: Makito X Sdi Video And Embedded Digital Audio Interface

    Introduction Physical Description Makito X SDI Video and Embedded Digital Audio Interface The Makito X SDI video interface consists of either one or two 75 BNC connectors (shown below). Figure 1-17 SDI Dual-Channel Video Interface (#S/B-292E-HDSDI2) Figure 1-18 SDI Single-Channel Video Interface (#S/B-292E-HDSDI1) The BNC connector(s) are used for Composite (CVBS), SD-SDI (Serial Digital Interface) and HD-SDI video input signals.
  • Page 35: Analog Audio Interface

    An adapter is required to interface with the audio port. An RCA cable adapter for unbal- anced audio is included in the package. An adapter for balanced audio may be ordered from Haivision. For details, see “Audio Breakout Cables” on page 54.
  • Page 36: Led Status Indicators (Rear Panel)

    Introduction Physical Description LED Status Indicators (Rear Panel) The LED colors and flashing (blinking) speed indicate the status (operational state) of the Makito X encoder. Figure 1-20 LED Status Indicators LED Status Indicators Table 1-1 Function Description Indication No power STATUS RED Solid Error / Fault...
  • Page 37 Introduction Physical Description Table 1-1 LED Status Indicators (Cont.) Function Description Indication Network port Not Connected LINK GREEN Blinking once Connected at 10 Mbps per second GREEN Blinking twice Connected at 100 Mbps per second GREEN Blinking three Connected at 1000 Mbps times per second No Activity GREEN Intermittent...
  • Page 38: Storage Mezzanine Led Status Indicators

    Introduction Physical Description Storage Mezzanine LED Status Indicators The Makito X Storage Mezzanine LEDs are shown following. Figure 1-21 Fixed Storage LED Status Indicators Fixed mSATA SSD with USB & SD LED Status Indicators Table 1-2 Function Description Indication LED remains Off until drive has booted. GREEN Solid Indicates drive is ready to use.
  • Page 39 Introduction Physical Description Figure 1-22 Removable Storage Unmount Button/LED Status Indicator Removable SATA SSD LED Status Indicators Table 1-3 Function Description Indication SSD not mounted. Mount Status LED /Unmount BLUE Solid SSD mounted and ready to use. Button BLUE Blinking Blinks briefly off when the SATA drive is being accessed.
  • Page 40: Audio Talkback

    Introduction Audio Talkback Audio Talkback The Audio Talkback feature allows users to stream a mono channel of audio back to a Makito X encoder over a reliable LAN or WAN. Audio talkback enables end users moni- toring a streaming session to “talk back” to individuals at the video source. For example, talkback enables students at remote classroom locations to ask their teacher questions, or a chief surgeon observing a surgery to collaborate.
  • Page 41 Introduction Audio Talkback There is no audio mixer on the Makito X, so the talkback feature is “First-In/First Served”, meaning that only one user can use the return audio channel at a time. The InStream player application provides “push-to-talk” functionality, which requires that the user push a button to transmit audio.
  • Page 42: Hardening

    As of Version 1.5, the Makito X includes features that allow the administrative interface to be secured. These features are described in detail in the Makito X Hardening Guide, available from Haivision’s Download Center at: https://support.haivision.com. Any Makito X encoder at Version 1.5 or higher can be hardened by following the NOTE procedures described in this guide.
  • Page 43 • Makito X Harsh Installation Guide For the steps to install the MB6 or MB21 chassis, please refer to the MB6 and MB21 Multichannel Chassis Installation Guide. All guides are available through Haivision’s Download Center. Topics In This Chapter Setting Up the Encoder .
  • Page 44: Chapter 2: Installing The Encoder

    • Only connect the unit to a compatible power source. • If an electrical fault occurs, disconnect the unit and contact Haivision Technical Support. • Never try to force the connections when setting up the system as this may damage the unit.
  • Page 45: Connecting The Encoder To The Network And A Computer

    (type Cat 5 or higher). This will allow you to telnet to the unit or connect via the Web interface. Figure 2-1 Network Connector (#S/B-292E-DVI) Connect Ethernet cable here To connect the Serial Interface (Makito X SDI only): (Optional) Connect the encoder’s COM1 port to the serial port of a computer. Use the...
  • Page 46: Serial Interface Setup (Makito X Sdi Only)

    Installing the Encoder Connecting the Encoder to the Network and a Computer Figure 2-3 Serial Management Adapter plug into computer Take care not to plug the Ethernet cable from an Ethernet switch (especially a CAUTION Power over Ethernet (PoE) switch) directly into the COM1 serial port as it may damage the encoder.
  • Page 47: Com1 Serial Port Rj45 Pinout (Makito X Sdi Only)

    Installing the Encoder Connecting the Encoder to the Network and a Computer To set up the serial interface: Connect the Makito X’s COM1 port to your computer as described in the previous section, “Connecting the Encoder to the Network and a Computer”.
  • Page 48: Serial Management Adapter Db9 Pinout (Makito X Sdi Only)

    Installing the Encoder Connecting the Encoder to the Network and a Computer Table 2-1 COM1 Serial Port RJ45 Pinout (Cont.) Pin # Signal RS-232 Signal RS-422 Not connected Not connected Not connected Not connected The COM1 Port is DTE (Data Terminal Equipment) which defines the direction of NOTE the signals (IN/OUT).
  • Page 49: Connecting The Encoder To A/V Sources

    For unbalanced audio, use the 8-pin audio to 3-RCA female cable adapter (includ- ed in the package, shown Figure 2-5 below). • A balanced audio cable adapter is available from Haivision upon request. (See “Audio Breakout Cables” on page 54.) Figure 2-4 DVI-I Input Connections (#S/B-292E-DVI)
  • Page 50: Connecting The Bnc/S-Video Interface (Makito X Sdi)

    For unbalanced audio, use the 8-pin audio to 3-RCA female cable adapter (includ- ed in the package, shown in Figure 2-5 on page 49). • A balanced audio cable adapter is available from Haivision upon request. (See “Audio Breakout Cables” on page 54.) Figure 2-6 SDI-I Input Connections (#S/B-292E-HDSDI2)
  • Page 51: Audio Connector Pinout

    Installing the Encoder Connecting the Encoder to A/V Sources Selection between analog and digital (SDI) audio may be done via the Web NOTE interface or the Command Line Interface (CLI). To configure the encoders, see “Video Encoder Settings” on page 86 (Web interface), or “videnc Parameters”...
  • Page 52 Installing the Encoder Connecting the Encoder to A/V Sources Figure 2-8 Unbalanced Audio Connection Details Makito X User’s Guide, v2.2, Issue 02...
  • Page 53 Installing the Encoder Connecting the Encoder to A/V Sources Figure 2-9 Balanced Audio Connection Details Related Topics • For more information on the audio connections, see “Audio/Video Interfaces (Rear Panel)” on page 33. Makito X User’s Guide, v2.2, Issue 02...
  • Page 54: Audio Breakout Cables

    Installing the Encoder Connecting the Encoder to A/V Sources Audio Breakout Cables The following table list the audio breakout cables available for the Makito X, including description and Haivision part numbers. Table 2-3 Audio Breakout Cables for the Makito X Cable...
  • Page 55: Powering Up The Unit

    Installing the Encoder Powering Up the Unit Powering Up the Unit Once all the cables are in place, the Makito X is ready to be powered up. Single-Height or Double-Height Chassis Figure 2-10 Rear View (Single-Height Chassis #S/B-292E-HDSDI2) showing 3-pin Locking Power Connector Connect power supply here (Power Input jack) Figure 2-11...
  • Page 56 Installing the Encoder Powering Up the Unit Figure 2-12 Single or Double-Height Chassis Power Adapter 12VDC with Conxall Connector Conxall Connector There is no power switch on the Makito X appliance. The power is automatically NOTE on when the unit is plugged in. The power supply cord is used as the main disconnect device.
  • Page 57 Installing the Encoder Powering Up the Unit To begin configuring video streams, you can either open the Web interface, or log in to the CLI. • To use the Web interface, see “Logging In to the Web Interface” on page 68. •...
  • Page 58: Resetting The Encoder

    Factory Reset settings it originally had when shipped from Haivision, including the factory default IP address, subnet, and gateway. After a Factory reset, only the firmware revision, serial number, MAC address, and XR personality are preserved.
  • Page 59: Default Network Settings

    Installing the Encoder Resetting the Encoder Default Network Settings After a factory reset, the Network settings should be: IP Address Subnet Mask Gateway 10.5.1.2 255.255.0.0 10.5.0.1 Makito X User’s Guide, v2.2, Issue 02...
  • Page 60: Hardware Maintenance

    Varta CR2032 with 2-wire connector Mfr. Part#: 06032101030 At the end of its life (7-10 years), the battery should be replaced by the end user with the same battery or an equivalent model approved by Haivision. The Makito XR has no battery.
  • Page 61 Installing the Encoder Hardware Maintenance To replace the RTC battery: Disconnect all external devices connected to the appliance. Disconnect the power from the appliance by unplugging the power cord from the AC outlet. To open the chassis, unfasten and remove the two screws on the rear of the appliance. Slide the PCB board out of the chassis.
  • Page 62 Installing the Encoder Hardware Maintenance Figure 2-14 RTC Battery Removal and Installation (5) Disconnect battery connector (10) Reconnect battery connector (6) Remove battery / (9) Press new battery onto PCB (7) Clean surface (TransformerT1) (8) Peel off tape Remove the battery by pulling it upward from the PCB. Clean the surface of transformer T1 with alcohol if there is glue residue.
  • Page 63 3: Getting Started with the Web HAPTER Interface This chapter begins with a management overview of the Makito X, followed by system access control information. It then provides a basic overview of the Web interface. Before proceeding, make sure that the encoder is set up correctly and all NOTE necessary network and A/V connections are established.
  • Page 64: Chapter 3: Getting Started With The Web Interface Management Overview

    Getting Started with the Web Interface Management Overview Management Overview All Makito X interfaces and applications such as Audio/Video services and IP links may be configured, managed, and monitored through the Web interface, the Command Line Interface (CLI), or an SNMP server. All methods require access to the Makito X through its Ethernet LAN port or (if applicable) the Serial Management port.
  • Page 65: Accessing The Encoder

    The encoder automatically generates a self-signed certificate and your browser will recommend that you do not proceed. If you have not changed the factory defaults on the encoder, a certificate with factory default subjects exists (DNS: haivision-ace, IP: 10.5.1.2 ). Proceed temporarily if you can since this default certificate will be deleted and re-generated (see below).
  • Page 66: Default Encoder Ip Address

    VACM (View-based Access Control Model) for SNMP access control. Please refer to the Important Notice document (available from the Haivision Download Center) for the default login credentials. Makito X User’s Guide, v2.2, Issue 02...
  • Page 67 Getting Started with the Web Interface Accessing the Encoder For security purposes, Haivision strongly advises you to change the default CAUTION password for all accounts during initial configuration. Administrators can create, delete, lock, and unlock user accounts, including changing the password, from the Accounts page (see “Managing User Accounts”...
  • Page 68: Logging In To The Web Interface

    Getting Started with the Web Interface Logging In to the Web Interface Logging In to the Web Interface To log in to the Makito X configuration Web page: From your Web browser, type the Makito X’s IP Address into the address field and press Enter.
  • Page 69 Getting Started with the Web Interface Logging In to the Web Interface Makito X provides three pre-defined user accounts. For information, see the previous section, “Role-based Authorization”. Makito X User’s Guide, v2.2, Issue 02...
  • Page 70: Exploring The Web Interface

    Getting Started with the Web Interface Exploring the Web Interface Exploring the Web Interface Clicking from the toolbar will launch the online help. For more information, see “Online Help” on page 74. After logging in to the Web interface, you will have access to the encoder configuration settings.
  • Page 71 Getting Started with the Web Interface Exploring the Web Interface • (Where applicable) On the List View, click a link in the table to open the Detail View. For example, on the Video Encoders List View (shown below), click a link to open the Video Encoder Detail View.
  • Page 72: Selecting Items From Lists

    Getting Started with the Web Interface Exploring the Web Interface Selecting Items from Lists On some pages, configuration items are presented in lists. Examples include recordings on the Recordings page and CoT Relaying destinations on the Metadata Detail View. This section summarizes the different ways to select list items to perform actions such as editing, deleting, copying, moving, downloading, or exporting.
  • Page 73 Getting Started with the Web Interface Exploring the Web Interface To perform actions (such as copy, move, delete or export) on multiple items, you can check multiple items in the list or check You can also shift-click (i.e., click multiple items while holding the Shift key down) to select a range of items (checkboxes).
  • Page 74: Online Help

    Getting Started with the Web Interface Exploring the Web Interface Online Help Clicking on the toolbar will launch the online help for the Makito X. The figure below shows a sample Welcome page. Navigation pane Content pane Makito X User’s Guide, v2.2, Issue 02...
  • Page 75: Changing Your Password

    Getting Started with the Web Interface Changing Your Password Changing Your Password For security purposes, be sure to change the default password! The IMPORTANT first time you sign into a newly created account as well as any time your password has expired, you will see a Change Password dialog (as shown in the following example).
  • Page 76: Password Requirements

    Getting Started with the Web Interface Changing Your Password Type your current password in the Old Password field. Type the new password in the Password field and again in the Confirmation Password field. Click Apply The new password will take effect immediately. You can also upload and manage personal public keys for your account to enable public key authentication (instead of password-based authentication).
  • Page 77 Getting Started with the Web Interface Changing Your Password Your system may have in place security policies that determine the minimum password length as well as other requirements such as minimum number of upper case characters, digits, and symbols. In this case, you will be prompted to modify your password to comply with these policies.
  • Page 78: Logging Out

    Getting Started with the Web Interface Logging Out Logging Out After you finish using the Makito X, be sure to log out. To do so, click from the Log out toolbar. Logging out prevents misuse and unauthorized access to the encoder. Makito X User’s Guide, v2.2, Issue 02...
  • Page 79: Chapter 4: Managing The Encoder

    4: Managing the Encoder HAPTER This chapter explains how to set up and manage video encoding, streaming and recording, as well as recorded assets and other media using the Web interface. For a management overview of the Makito X as well as a basic overview of the NOTE Web interface, see “Getting Started with the Web Interface”...
  • Page 80 ......... . 149 Roll-Over and Uploading to HVC / Haivision Media Platform / FTP .
  • Page 81: Configuring Video Encoders

    Managing the Encoder Configuring Video Encoders Configuring Video Encoders From the Video Encoders pages, you can configure four or eight (Makito X4R only) inde- pendent H.264 video encoders to apply to streams. You can start and stop each video encoder, as well as display statistics for the encoder. With the Makito X HEVC, you can also configure two (additional) HEVC encoders.
  • Page 82 Managing the Encoder Configuring Video Encoders On the Makito X HEVC, the List View includes two HEVC encoder instances: HEVC Encoder instances The Video Encoders List View displays the status LED, Name, Input format, Resolu- tion, GOP Size, and Bitrate for each video encoder. It also provides an option for you to take a snapshot of an input and either start or stop an encoder.
  • Page 83: Configuring Video Encoder Settings

    Managing the Encoder Configuring Video Encoders Configuring Video Encoder Settings From the Video Encoder Detail View, you can define both basic and advanced video encoding parameters for the encoder, such as the Input interface (SDI-only), Bitrate, output Resolution, Frame Rate, and GOP Size. (H.264 only) You can also select a Region of Interest (ROI) to maximize the quality of video within selective portions of the video frame.
  • Page 84 Managing the Encoder Configuring Video Encoders (H.264 only) To set up a Region of Interest, toggle the Region of Interest button to (as shown in the following example). See “Region of Interest (ROI) (H.264 only)” page 92. To start or stop the encoder, click (as applicable).
  • Page 85: Configuring Hevc Video Encoding

    Managing the Encoder Configuring Video Encoders Configuring HEVC Video Encoding From the Video Encoders List View, you can select the HEVC encoding instance and then define the encoding parameters for the HEVC encoder. The Makito X HEVC platform supports three HEVC modes of operation: ●...
  • Page 86: Video Encoder Settings

    Managing the Encoder Configuring Video Encoders Video Encoder Settings The following table lists the Video Encoder controls and settings: Video Encoder Default Description/Values Setting Input Input Select the Video Input port for the encoder: BNC-1 ● BNC-1 ● BNC-2 ● BNC-3* ●...
  • Page 87 Managing the Encoder Configuring Video Encoders Video Encoder Default Description/Values (Cont.) Setting (Cont.) (Cont.) Colorspace Automatic (Optional) Select the color space to use while Control capturing the content. Matching the encoder input color space to the source enhances DVI only and optimizes color reproduction.
  • Page 88 Managing the Encoder Configuring Video Encoders Video Encoder Default Description/Values (Cont.) Setting (Cont.) (Cont.) Basic Parameters Bitrate 6000 kbps Enter the video bitrate for the encoder: 25,000 kbps Resolution Automatic Select the stream output resolution (i.e., the number of lines per frame and pixels per line to be encoded): ●...
  • Page 89 Managing the Encoder Configuring Video Encoders Video Encoder Default Description/Values (Cont.) Setting (Cont.) (Cont.) Framing Select the video compression mode for the encoded video: ● I: I frames only (lowest delay; lowest quality) ● IP: I and P frames only ●...
  • Page 90 Managing the Encoder Configuring Video Encoders Video Encoder Default Description/Values (Cont.) Setting (Cont.) (Cont.) TimeCode Source None Timecodes are used to mark video frames, mainly for editing purposes. This field either disables timecoding, or selects the source to “timecode” the encoded video frame. The following selections are available: ●...
  • Page 91 Managing the Encoder Configuring Video Encoders Video Encoder Default Description/Values (Cont.) Setting (Cont.) (Cont.) Partitioning Disabled (H.264 only) Check this checkbox to enable Intra-Picture Sub-Partitioning. Intra-Partitioning is a setting that allows the use of a smaller macroblock partition during the video macroblock encoding process. Intra-Partitioning requires that the NOTE: H.264 decoder be High Profile compliant.
  • Page 92 Managing the Encoder Configuring Video Encoders Video Encoder Default Description/Values (Cont.) Setting (Cont.) (Cont.) Region of Interest (ROI) (H.264 only) Region of Use to create a static region of interest (one Interest per video encoder) to enhance the quality of the encoded video within the region.
  • Page 93 Managing the Encoder Configuring Video Encoders Video Encoder Default Description/Values (Cont.) Setting (Cont.) (Cont.) Dimensions 100, 100 Specifies the width and height of the region. You can type in a value or use the Up and Down arrows on your keyboard to change the value.
  • Page 94: Video Encoder Statistics

    Managing the Encoder Configuring Video Encoders TimeCode Source The following table provides the list of possible TimeCode sources when “Video” is selected: Input Type Possible TimeCode Source(s) CVBS Input signal 1) VITC (The timecode is extracted from the Vertical Interval TimeCode of the incoming video signal). SD/HD/3G-SDI 1) MISB 0605 KLV micro-second timestamp (if KLV is enabled)
  • Page 95 Managing the Encoder Configuring Video Encoders Video Encoder Statistic Description/Values (Cont.) Input Type The video input for the encoder: For example, SDI, Composite, or DVI. Input Format The input signal detected from the video source. Protected Content (DVI only) Indicates whether or not the video source is protecting/encrypting its output.
  • Page 96: Makito Decoder Interoperability

    Managing the Encoder Configuring Video Encoders Video Encoder Statistic Description/Values (Cont.) H.264 Level The required level of decoder performance to be able to process the video incoming stream: e.g., 3, 3.2, 4, or 4.2 Click to reset the Video Encoder statistics. Makito Decoder Interoperability The following table lists recommended settings to optimize the Makito X encoder config- uration to stream to the Makito X decoder:...
  • Page 97: Configuring Audio Encoders

    Managing the Encoder Configuring Audio Encoders Configuring Audio Encoders From the Audio Encoder pages, you can configure either four or eight independent audio encoders to apply to streams (depending on whether the encoder is single or dual channel). You can also start, mute, and stop each audio encoder, as well as display statistics for the encoder.
  • Page 98: Configuring Audio Encoder Settings

    Managing the Encoder Configuring Audio Encoders To apply your changes, click Apply Configuring Audio Encoder Settings From the Audio Encoder Detail View, you can configure audio encoding properties such as the Input interface, Bitrate, Channel Mode, and Language for the encoder. Analog audio in cross-clock domain streams (such as audio clocked on one BNC NOTE sent with video from another BNC) may have occasional audio artifacts.
  • Page 99: Audio Encoder Settings

    Managing the Encoder Configuring Audio Encoders Select or enter the new value(s) in the appropriate field(s). See “Audio Encoder Settings” on page 99. To start or stop the encoder, click (as applicable). Start Stop To mute the audio (when active), click Mute When an audio encoder is muted, it still generates audio data, but the audio NOTE...
  • Page 100 Managing the Encoder Configuring Audio Encoders Audio Setting Default Description/Values (Cont.) Analog ● Analog ● DVI (1-2) Basic Parameters Channel Mode Stereo Select the number and type of audio channels to encode: ● Stereo ● Mono-Left ● Mono-Right Bitrate 128 kbps Select the Audio Bitrate for the encoder: ●...
  • Page 101: Audio Encoder Statistics

    Managing the Encoder Configuring Audio Encoders Audio Setting Default Description/Values (Cont.) Click to view statistics for the Statistics encoder. See “Audio Encoder Statistics” page 101. Audio Encoder Statistics The following table lists the Audio Encoder statistics: Audio Encoder Statistic Description/Values State The current operating status of the encoder, either: ●...
  • Page 102: Configuring Metadata Capture

    Managing the Encoder Configuring Metadata Capture Configuring Metadata Capture Metadata processing is a licensed feature which may be installed at the IMPORTANT factory or via a field upgrade by installing a license file. From the Metadata pages, you can configure the Makito X to capture either KLV (Key Length Value) or CoT (Cursor on Target) metadata and then incorporate data information within the metadata elementary stream of the standard MPEG Transport Stream.
  • Page 103: Metadata List View

    Managing the Encoder Configuring Metadata Capture CoT/UDP with SPI Message Filtering Based on UID The Makito X accepts raw CoT metadata over UDP (no SerialID wrapper) and filters the SPI (Sensor Point of Interest) messages based on a user-supplied string. If the string appears in the SPI message, then it is passed through and combined with the platform message before conversion to KLV.
  • Page 104 Managing the Encoder Configuring Metadata Capture Click to add a Network or HD-SDI source Click link to open Detail View The Metadata List View displays the Status LED, source Name, Type, Format, and Parameters for each source. It also provides an option for you to change the source status.
  • Page 105: Configuring Serial Metadata Sources

    Managing the Encoder Configuring Metadata Capture To save the current configuration, open the page. See > P DMINISTRATION RESETS “Saving and Loading Presets” on page 178. Configuring Serial Metadata Sources The Makito X auto-detects the hardware setup of the encoder and automatically NOTE creates the source if the serial port is connected.
  • Page 106 Managing the Encoder Configuring Metadata Capture Type in the Name for the source (Serial source example shown following). If CoT has been installed, select CoT for the Data Format (under Input Settings). Select or enter the remaining value(s). For details on the Metadata fields, see “Metadata Settings”...
  • Page 107: Configuring Hd-Sdi Metadata Sources

    Managing the Encoder Configuring Metadata Capture The changes will take effect immediately but will not be saved and will be lost after a reboot To save the current configuration, open the page. See > P DMINISTRATION RESETS “Saving and Loading Presets” on page 178.
  • Page 108 Managing the Encoder Configuring Metadata Capture -or- To create an additional HD-SDI source, from the Metadata List View, click On the New Metadata Source dialog, select HD-SDI for the Metadata Type and click Continue The Create New Metadata Source page opens (shown following). Makito X User’s Guide, v2.2, Issue 02...
  • Page 109 Managing the Encoder Configuring Metadata Capture Type in the Name for the source. To configure frame-decimation to reduce the bandwidth used by the metadata service, select either a decimation factor or reference encoder from the Decimation drop-down list. See “Decimation” on page 118.
  • Page 110: Configuring Network Metadata Sources

    Managing the Encoder Configuring Metadata Capture To view Metadata statistics, click . For details, see “Metadata Statistics” Statistics page 122. To return to List View, click from the sidebar menu. ETADATA Configuring Network Metadata Sources You can configure the Makito X to capture metadata from a user definable network port (up to eight UDP inputs).
  • Page 111 Managing the Encoder Configuring Metadata Capture Type in the Name for the source. If CoT has been installed, select CoT for the Data Format (under Input Settings). Select or enter the remaining value(s). For details on the Metadata fields, see “Metadata Settings”...
  • Page 112: Configuring Cot Retransmission

    Managing the Encoder Configuring Metadata Capture (Optional) To set up CoT retransmission, see “Configuring CoT Retransmission” page 112. (Optional) To configure a mission ID or security data to replace or insert, see “Configuring KLV Metadata Insertion” on page 114. To apply your changes and start the Metadata stream, click Apply The changes will take effect immediately but will not be saved and will be lost after a reboot...
  • Page 113 Managing the Encoder Configuring Metadata Capture To add a CoT retransmission destination, click +Relay On the Add CoT Relay dialog, enter the IP Address and Port for the destination. Adjust the TTL and TOS values if required. Click The stream is added to the list: Makito X User’s Guide, v2.2, Issue 02...
  • Page 114: Configuring Klv Metadata Insertion

    Managing the Encoder Configuring Metadata Capture To edit or delete a CoT relay destination, select the relay from the list and select Edit or Delete from the Actions drop-down menu. Configuring KLV Metadata Insertion From the Metadata Detail View, you can define a small set of static KLV objects (i.e., mission IDs and security classification) for KLV and CoT metadata sources.
  • Page 115 Managing the Encoder Configuring Metadata Capture (Optional) To enable the update/generation of the security data set in UAS messages, toggle the Security Data Set Insertion button to (as shown in the following example). Fill in the remaining fields and click Apply Makito X User’s Guide, v2.2, Issue 02...
  • Page 116: Filtering Uas Klv Metadata Tags

    Managing the Encoder Configuring Metadata Capture Filtering UAS KLV Metadata Tags You can filter MISB 0601 metadata tags on a per tag basis, by specifying all or any subset of the MISB 0601 tags. If a tag is included, it is allowed to proceed to the metadata elemen- tary stream (ES).
  • Page 117 Managing the Encoder Configuring Metadata Capture (Optional) To filter the security metadata tags defined in MISB 0102, toggle the UAS KLV Security Tag Filtering button to and select the scope of filtering from the Included Security Tags drop-down list (as shown in the following example). Make sure #48 is included under UAS KLV Tag Filtering.
  • Page 118: Metadata Settings

    Managing the Encoder Configuring Metadata Capture Metadata Settings The following table lists the encoder Metadata controls and settings: The fields depend on the hardware setup of the encoder; i.e., whether the serial NOTE port or SDI video is connected; UDP is always available. Metadata Setting Default Description/Values...
  • Page 119 Managing the Encoder Configuring Metadata Capture Metadata Setting Default Description/Values (Cont.) only, see “Filtering UAS KLV Metadata Tags” KLV Tag Filtering (HD-SDI page 116) UAS KLV Tag Specifies a list of tag numbers/labels from Filtering the UAS Datalink Local Set that are allowed to be streamed.
  • Page 120 Managing the Encoder Configuring Metadata Capture Metadata Setting Default Description/Values (Cont.) SPI UID (CoT input only) Double-click the text box to display the list of the SPI messages detected by the Makito Xand select a string for the UID filter. Serial Settings (Makito X with SDI, Serial Input only) COM Port RS-232...
  • Page 121 Managing the Encoder Configuring Metadata Capture Metadata Setting Default Description/Values (Cont.) “Configuring CoT Retransmission” CoT Relaying (See on page 112) CoT Relaying When set to On, the system will retransmit received CoT/UDP or CoT/Serial metadata on,off to up to 8 other hosts over UDP. Use to specify the IP address and UDP port +Relay for each relayed packets.
  • Page 122: Metadata Statistics

    Managing the Encoder Configuring Metadata Capture Metadata Statistics The following table lists the Metadata statistics: Metadata Statistic Description/Values State The current operating status of the stream, either: ● WORKING ● STOPPED Rx Bytes Number of received bytes. Rx OK Messages Number of successfully received messages.
  • Page 123: Configuring Streaming Outputs

    Managing the Encoder Configuring Streaming Outputs Configuring Streaming Outputs From the Outputs pages, you can set up either streaming only, recording only, or both streaming with recording. This section covers setting up streaming. Recording is only available on the Makito X with Storage dual-height IMPORTANT model (either fixed or removable SSD).
  • Page 124 Managing the Encoder Configuring Streaming Outputs ● To view the video or audio encoder or metadata source for a stream, hover over a link in the table under to display the configuration information. Content ● To view the status of a stream or recording, hover over the status LED or link (to the left of the row).
  • Page 125: Setting Up Streaming

    Managing the Encoder Configuring Streaming Outputs The changes will take effect immediately but will not be saved and will be lost after a reboot. To save the current configuration, open the page. See > P DMINISTRATION RESETS “Saving and Loading Presets” on page 178.
  • Page 126 Managing the Encoder Configuring Streaming Outputs Enter the stream name and select the sources (video, audio, and metadata, if applicable). See “Streaming Settings” on page 138. To configure multi-track audio, click next to the Audio field and select the next Audio Encoder to add to the stream.
  • Page 127 Managing the Encoder Configuring Streaming Outputs Audio sources should always be associated with the same video IMPORTANT interface for the dual channel SDI encoder. Selecting Analog or SDI audio sources that do not originate from the same video source is not recommended as audio artifacts will result at the decoder.
  • Page 128 Managing the Encoder Configuring Streaming Outputs Under Broadcasting, select the Protocol. See “Protocol” on page 139. To configure the Transport Stream settings (for TS over UDP, RTP, or SRT), click and enter the values. See “Transport Stream Settings” on page 139. Settings Enter the values for the Destination and Link Parameters.
  • Page 129 Managing the Encoder Configuring Streaming Outputs Connection and SRT Settings. See “Configuring Secure Reliable Transport (SRT)” page 133. To configure a static image to display when the stream is paused, select a Still Image file. (Image files must have been previously uploaded for the encoder. To upload image files, see “Configuring Still Image Streaming”...
  • Page 130 Managing the Encoder Configuring Streaming Outputs (Makito X with Storage only) To set up a recording session, toggle the Recording Parameters button to . See “Configuring Recording Outputs” on page 147. If you only want to create a streaming session, click now to apply your Apply changes and start streaming.
  • Page 131 Managing the Encoder Configuring Streaming Outputs To view streaming statistics, click . For details, see “Streaming Statistics” Statistics on page 143. 224.0.0.0 to 239.255.255.255. Multicast The Multicast address range is from NOTE 224.0.0.0 224.0.0.255 addresses from are reserved for multicast maintenance protocols and should not be used by streaming sessions.
  • Page 132 Managing the Encoder Configuring Streaming Outputs Bandwidth Overhead for CBR Streams with Metadata In CBR streams with Traffic Shaping enabled, metadata may cause the stream to exceed the bandwidth overhead (video bitrate + bandwidth overhead percentage). Therefore, when configuring the bandwidth overhead percentage, you need to take into account how much metadata is being generated.
  • Page 133: Configuring Secure Reliable Transport (Srt)

    For additional information required to set up and tune SRT streams from the NOTE encoder to the decoder, please see the SRT Deployment Guide (available through https://support.haivision.com Haivision’s Download Center at: The following table lists the SRT-specific parameters: SRT Stream Setting Description...
  • Page 134 Managing the Encoder Configuring Streaming Outputs SRT Stream Setting Description Destination Port (Caller and Rendezvous Connection Modes) Specifies the UDP destination port for the SRT stream. Port (Listener Connection Mode only) Specifies the UDP local port for the SRT stream. SRT Settings Network Adaptive Check this checkbox to enable Network Adaptive...
  • Page 135: Cdn And Flash Interoperability (Rtmp)

    Delivery Network (CDN) using the Real Time Messaging Protocol (RTMP). ● The supported RTMP servers are FMS and Wowza. ● The supported Transcoders are Wowza and Haivision’s KulaByte Transcoder. ● The supported CDNs are Akamai and Limelight. This section provides the steps to set up an RTMP stream.
  • Page 136 Managing the Encoder Configuring Streaming Outputs For the Destination Address, type in the URL for the application endpoint of the FMS or CDN server. When interoperating with Kaltura using RTMP, add a slash “/” at the end of the NOTE URL provided by Kaltura.
  • Page 137: Publishing An Rtmp Stream To Youtube

    Managing the Encoder Configuring Streaming Outputs When creating a stream to an Akamai HD2 CDN, to avoid dropped frames by the HD2 player, make sure that sufficient bandwidth exists between the Makito X and the HD2 node. Publishing an RTMP Stream to YouTube Following are the steps to publish an RTMP stream from the Makito X to YouTube: Log in to YouTube, and go to “My Channel”...
  • Page 138: Streaming Settings

    Managing the Encoder Configuring Streaming Outputs Streaming Settings The following table lists the Streaming controls and settings: Streaming Setting Default Description/Values Name (Optional) Enter a unique name for the stream. Source Video HD Video Select the Video Encoder to assign to the H.264 Encoder 0 stream:...
  • Page 139 Managing the Encoder Configuring Streaming Outputs Streaming Setting Default Description/Values (Cont.) Metadata None (Only available if KLV or CoT has been installed) To enable metadata, select one of the defined inputs. ● (None) ● Select from list of defined metadata sources, e.g., Serial:CoT or Serial:KLV (if connected), HD-SDI-BNC-1, or HD-SDI-BNC-2.
  • Page 140 Managing the Encoder Configuring Streaming Outputs Streaming Setting Default Description/Values (Cont.) Metadata PID (Optional) Data (metadata) Packet 16..8190 Identifier. PCR PID (Optional) (Program Clock Reference) Packet Identifier. Timestamp in the TS from which the decoder timing is derived. 16..8190 PMT PID (Optional) (Program Map Table) Packet 16..8190 Identifier.
  • Page 141 Pro-MPEG FEC (TS over RTP only) VF FEC is a proprietary FEC and is NOTE: not interoperable with devices outside of the Haivision family. VF Encryption (Read-only) Indicates whether Advanced Encryption Standard (AES) encryption has been enabled through the Furnace Server interface (VF Channel Editor).
  • Page 142 Managing the Encoder Configuring Streaming Outputs Streaming Setting Default Description/Values (Cont.) Idle Cells Disabled (Traffic Shaping must be enabled) When enabled, Idle TS cells will be inserted into a TS stream when necessary. Delayed Audio Disabled (Traffic Shaping must be enabled) When enabled, delays the transmission of audio information to prevent MPEG-2 TS HRD main buffer overflows.
  • Page 143: Streaming Statistics

    Managing the Encoder Configuring Streaming Outputs Streaming Setting Default Description/Values (Cont.) RTMP only Publish Name (RTMP only) Enter a publish name for the stream (512 characters maximum). A stream publishing name is required for RTMP streaming. If you do not enter a publish name, the stream name will be used instead.
  • Page 144 Managing the Encoder Configuring Streaming Outputs Streaming Statistic Description/Values (Cont.) SSRC (RTP only) The synchronization source. Sent Packets Number of RTP or UDP packets sent for that stream. Sent Bytes Number of Bytes sent for that stream. Unsent Packets Number of RTP or UDP packets not sent for that stream.
  • Page 145 Managing the Encoder Configuring Streaming Outputs Streaming Statistic Description/Values (Cont.) Path Max Bandwidth Estimated link bandwidth. This can change due to cross traffic. Measured Round Trip Time. Buffer Encoder buffers in milliseconds. SRT encoder buffers are unacknowledged stream packets (reception not confirmed by the receiver/decoder).
  • Page 146 Managing the Encoder Configuring Streaming Outputs SRT streams include a graphical statistics display as shown in the following example: The Link Bandwidth is an estimate of the actual link bandwidth. NOTE Makito X User’s Guide, v2.2, Issue 02...
  • Page 147: Configuring Recording Outputs

    “Managing Recordings” on page 151. Makito X recordings can be used by either HVC or Haivision Media Platform. These videos can be downloaded from the Makito X Web Interface, exported to a USB, or sent automatically to an FTP location.
  • Page 148 Managing the Encoder Configuring Recording Outputs Under File, enter the name and select the File Format. See “File” on page 149. (Optional) Under Time & Size, specify a Recording Limit and/or Recording Segmentation. See “Time & Size” on page 149. Click Apply to start recording (as well as streaming, if configured).
  • Page 149: Recording Settings

    Managing the Encoder Configuring Recording Outputs Recording Settings The following table lists the Recording controls and settings: Recording Setting Default Description/Values File Name Enter a unique name for the recording. This can be any string that follows standard file naming conventions and must be defined at the recording session start time.
  • Page 150: Roll-Over And Uploading To Hvc / Haivision Media Platform / Ftp

    24 hour file. To do this, you simply set up the recording in Segmented Roll-Over mode and leave it alone. The recording may also be configured to upload completed segments to the Haivision Video Cloud (HVC), Haivision Media Platform (via FTP), or a NAS drive.
  • Page 151: Managing Recordings

    Managing the Encoder Managing Recordings Managing Recordings The Asset Browser is only available on the Makito X with Storage dual-height NOTE model. For details, see “Storage Options (Rear Panel)” on page 31. From the Recordings (Asset Browser) page, you can manage the recordings created from Makito X encoded stream content.
  • Page 152: Viewing Options

    Managing the Encoder Managing Recordings If you have a Removable SSD Storage option, you can review the contents from a removable drive on a PC (Windows 7 to 10) or MAC OS. For details, see “Viewing Recordings from a Removable Drive on a Computer” on page 158.
  • Page 153 Managing the Encoder Managing Recordings options include title (A-Z, default, or Z-A), file size (Smallest or Largest), Sort by and creation date (Oldest or Newest). To change the number of items to display per page, select the number from the drop-down menu (the default is 15).
  • Page 154: Playing Back .Mp4 Recordings

    Managing the Encoder Managing Recordings Playing Back .MP4 Recordings From the Recordings page, you can select and play back .MP4 recordings once a segment of the recording has completed. Clicking a thumbnail of a recording launches it in a default viewer.
  • Page 155 Managing the Encoder Managing Recordings Back Play/Pause Full-Screen Progress/Scrub Bar Scrub Handle Volume From here you can pause and restart playback and adjust the volume. When you hover the cursor over the controls, the progress/scrub bar and scrub handle appear. To move forward or backward through the video, drag the scrub handle along the progress/scrub bar.
  • Page 156: Managing Recorded Content

    The difference is that moving deletes the recordings from the Recordings page. You can also download recordings as MP4 or TS files, export files to an FTP/FTPS server or the Haivision Video Cloud (HVC), and delete recordings. To copy or move recordings: On the Recordings page, click the name or time information (not the thumbnail) to select the recording.
  • Page 157 Managing the Encoder Managing Recordings To download recordings: Select one or more recordings from the Recordings list. Select Download from the Actions drop-down menu. Type in the file name in the Save As window and click Save. To export recordings: Select one or more recordings from the Recordings list.
  • Page 158: Viewing Recordings From A Removable Drive On A Computer

    You will see the EXT4 file system mounted automatically on the desktop. You can view MP4s using VLC. You can view TS files using VLC or another TS player such as Haivision’s InStream. To view recordings on a PC (Windows Professional): Download the ExtFS for Windows Professional and install it.
  • Page 159: Configuring Logo Overlays

    Two logos on the Makito X SDI dual-channel #S/B-292E-HDSDI2 (BNC1 and BNC2); ● One logo on the Makito X DVI #S/B-292E-DVI or the Makito X SDI single-channel #S/B-292E-HDSDI1. The image file can be uploaded in either BMP, JPEG, PNG, or GIF format. The image file will be converted to Haivision’s image overlay (.oly) format.
  • Page 160 Upload To select a different logo file, click Change. To remove the selection, click The image file will be converted to Haivision’s image overlay (.oly) format and will be added to the Logos list. To select the image file to display as a logo overlay, click the area below...
  • Page 161: Logo Settings

    Content toolbar. Delete To apply your changes, click Apply Logos are stored on the Makito X file system in the folder NOTE /usr/share/haivision/logos. Logo Settings The following table lists the Logo controls and settings: Logo Setting Default Description/Values On the Makito X SDI dual channel, ID is the video input, either 0 for BNC-1 or 1 for BNC-2.
  • Page 162 Managing the Encoder Configuring Logo Overlays Logo Setting Default Description/Values (Cont.) Position Bottom Right Select the position for the logo overlay: ● Bottom Right ● Top Right ● Bottom Left ● Top Left ● Centered ● Absolute ● Relative In Absolute mode, the logo will be NOTE: positioned at the exact X and Y coordinates specified.
  • Page 163: Capturing Image Snapshots

    “Configuring Video Encoders” on page 81. Snapshot files are stored on the Makito X file system under NOTE /usr/share/haivision/snapshots. You can also take snapshot of each video input from the IDEO NCODERS To take an image snapshot: On the Streaming page, click from the sidebar menu.
  • Page 164 Managing the Encoder Capturing Image Snapshots To toggle the sort order of the list from newest to oldest, select the order from the drop-down list. Sort by Select the format for the new snapshot, either JPEG or YUV color space (color model).
  • Page 165 Managing the Encoder Capturing Image Snapshots To take the image snapshot, click Once a snapshot has been taken, a new thumbnail is displayed. (JPEG only) To view a full-size image of a snapshot, click the thumbnail. A full-size snapshot opens in a new browser window. To save the snapshot to an external location, right-click either the thumbnail or the full-size image (JPEG only), and select Save image as…...
  • Page 166: Configuring Still Image Streaming

    Managing the Encoder Configuring Still Image Streaming Configuring Still Image Streaming When creating a stream, you can specify a static image that will be used to replace the encoded video stream when the stream is paused. This feature may be used, for example, to block out sensitive content or deliver announcements and other messages.
  • Page 167 Managing the Encoder Configuring Still Image Streaming To upload a new image file, first select the Output Resolution for the image. Click and select the file in the Open File dialog box. Import When you see the filename in the text box, click Upload To select a different image file, click Change.
  • Page 168 Managing the Encoder Configuring Still Image Streaming The resulting still image files are stored on the Makito X file system in the folder NOTE /usr/share/haivision/still_images. Makito X User’s Guide, v2.2, Issue 02...
  • Page 169: Managing External Storage

    Managing the Encoder Managing External Storage Managing External Storage The External Storage page is only available on the Makito X with Storage dual- NOTE height units with face-plate accessible USB 2.0 and SD card interfaces. For details, see “Storage Options (Rear Panel)” on page 31.
  • Page 170 Managing the Encoder Managing External Storage To close the folder and return one folder up in the hierarchy, click To change the sort order of the list of folders, select the order from the drop- Sort by down list. To delete one or multiple folders or files, check the checkbox beside the folder (or check ) and click Delete...
  • Page 171 Managing the Encoder Managing External Storage To unmount one or multiple removable devices (i.e., SD or USB or removable SSD), check the checkbox beside the device (or check ) and click Eject Remove the device from the interface port. Install the device on a computer to view the assets on the device. (See “Viewing Recordings from a Removable Drive on a Computer”...
  • Page 172 5: System Administration and HAPTER Storage This chapter explains how to manage and maintain the encoder, including storage compo- nents. Unless otherwise indicated, the Administration Settings and Storage pages are NOTE only accessible to administrators. Topics In This Chapter Admin Viewing System Status Information .
  • Page 173 System Administration and Storage Network Storage Settings ........200 Configuring Export Destinations .
  • Page 174: Viewing System Status Information

    System Administration and Storage Viewing System Status Information Viewing System Status Information From the Status page, you can view status information about the Makito X, such as the operating system up time, along with information about the hardware and software compo- nents.
  • Page 175: Status Settings

    “Taking a System Snapshot” page 176. Status Settings The following table lists the Status settings. Status information can be useful for trouble- shooting and may be forwarded to Haivision Technical Support if you are requesting technical support. Status Setting Description/Values Card Status OK (or error message if applicable).
  • Page 176: Taking A System Snapshot

    Taking a System Snapshot Taking a system snapshot can be useful for troubleshooting and may be forwarded to Haivision Technical Support if you are requesting technical support. The system snapshot lists information such as component versions, network settings, loaded modules, running processes, system traces, configured streams and stream status...
  • Page 177 System Administration and Storage Viewing System Status Information You can also take a system snapshot from the CLI using the system_snapshot.sh command. Makito X User’s Guide, v2.2, Issue 02...
  • Page 178: Saving And Loading Presets

    System Administration and Storage Saving and Loading Presets Saving and Loading Presets Preset Management Each Makito X is configured by users’ selecting and setting values of applicable system settings, such as encoder and stream settings and the stream destination. Although these configuration settings are not automatically saved, presets provide a way for you to save groups of settings and recall these configurations settings to apply to other streams.
  • Page 179 System Administration and Storage Saving and Loading Presets Startup Preset The startup preset is indicated with a blue check. To load an existing preset into the current session, hover over the preset name or anywhere in the row and click Load To select an existing preset to load at startup, hover over the preset row and click the (grayed out) checkmark under...
  • Page 180 System Administration and Storage Saving and Loading Presets b. To select this preset to load at startup, check the checkbox. Startup c. Click Create To save the current settings as an existing preset, hover over the preset row and click .
  • Page 181: Installing Firmware Upgrades

    (i.e., 1.0.x -> 1.1.x -> 1.2.x -> 1.3.x -> 1.4.x -> 1.5.x). When you first receive the Makito X, the necessary firmware is pre-installed on it. Upgrades of the firmware are issued through Haivision’s Download Center on our website at: https://support.haivision.com.
  • Page 182 System Administration and Storage Installing Firmware Upgrades To select a different file, click Change. The file upload begins, as shown in the following example. Wait for the file to be uploaded and verified and the file system synced. IMPORTANT Remain on this page and do not click anything else in the Makito X Web interface during the upload.
  • Page 183 System Administration and Storage Installing Firmware Upgrades Do not proceed or shut down the system while the Status LEDs are still CAUTION flashing. Failure to wait could result in damage to your system. Once the unit has rebooted, the browser will display the Login page for the Web inter- face (depending on your Web browser and settings).
  • Page 184: Configuring Network Settings

    System Administration and Storage Configuring Network Settings Configuring Network Settings From the Network Configuration page, you can modify the network interface settings for the encoder, including the unit’s IP Address. When you make changes to the Network settings, be sure to write down the CAUTION new encoder IP Address or label the chassis.
  • Page 185: Network Settings

    System Administration and Storage Configuring Network Settings Select or enter the new value(s) in the appropriate field(s). See “Network Settings” page 185. To apply your changes, click Apply You must reboot the system for the changes to take effect. After the encoder reboots, you will be returned to the Login page.
  • Page 186 You may, optionally, specify the DHCP Vendor Class ID (option 60). This allows IT departments to identify Makito X devices on their networks. The default Device Identification value for the Makito X is "Haivision Makito X Encoder". Makito X User’s Guide, v2.2, Issue 02...
  • Page 187 System Administration and Storage Configuring Network Settings Network Setting Description/Values (Cont.) DNS Settings Obtain DNS Settings (DHCP must be enabled) Check this checkbox to obtain Automatically DNS settings from DHCP. DHCP servers often provide DNS information to the device on top of the IP address. When DHCP is enabled and this checkbox is enabled, the system will attempt to learn its DNS settings from the DHCP servers (which avoids unnecessary user configuration).
  • Page 188: Configuring Date And Time

    System Administration and Storage Configuring Date and Time Configuring Date and Time From the Date and Time page, you can configure Network Time Protocol (NTP) support to synchronize the encoder clock with the selected time zone. To view and configure the date and time: On the Administration page, click from the sidebar menu.
  • Page 189: Date And Time Settings

    System Administration and Storage Configuring Date and Time Date and Time Settings The following table lists the Date and Time settings: Network Setting Description/Values Timezone-Locale Select the desired time zone and corresponding city. The times are based on hours added to or NOTE: subtracted from Greenwich Mean Time (GMT).
  • Page 190: Enabling And Disabling Network Services

    System Administration and Storage Enabling and Disabling Network Services Enabling and Disabling Network Services For security purposes, an administrator may need to stop one or more network services from accessing the Makito X. From the Services page, you can enable and disable the following network services: HTTP, SSH, Telnet, SNMP, VF, and Talkback.
  • Page 191: Service Settings

    System Administration and Storage Enabling and Disabling Network Services If the COM1 serial port is used for metadata capture, and all remote IMPORTANT management interfaces (HTTP, telnet, SSH, and SNMP) are disabled, the only way to re-enable these services will be by a Factory Reset. (For details, see “Resetting the Encoder”...
  • Page 192: Managing Licenses

    KLV&CoT SWO-292E-KLV-COT To acquire a new license, please contact your Authorized Reseller or Haivision at: https://support.haivision.com. Indicate the appropriate feature SKU and provide the hardware serial number (or list of numbers in the case of multiple devices) to which it applies.
  • Page 193 System Administration and Storage Managing Licenses To select the license file, click and select the file in the Open File dialog box. Install When you see the filename in the text box, click Upload To select a different license file, click Change. To remove the selection, click To apply your changes, click Reboot The encoder will reboot and you will be returned to the Login page.
  • Page 194: License File Errors

    System Administration and Storage Managing Licenses License File Errors The license file signature check occurs at license installation and system startup time. The following table lists the possible validation errors. Validation Error Description Unrecognized license file The file extension or content is not recognized format or extension as a licensed features license.
  • Page 195: Managing The Com Port

    System Administration and Storage Managing the COM Port Managing the COM Port The COM Port page only accessible to administrators. However, operators can NOTE configure the COM port settings from the Metadata page when the COM port is in Metadata mode. The Makito X with SDI provides a serial interface that you can use to connect to a computer for management of the encoder.
  • Page 196: Com Port Settings

    System Administration and Storage Managing the COM Port To apply your change, click Apply Click Reboot The changes will take effect after the reboot has completed. For information on connecting a computer to the COM1 port, see “Connecting the Encoder to the Network and a Computer”...
  • Page 197: Managing Storage Drives

    System Administration and Storage Managing Storage Drives Managing Storage Drives From the Drives page, you can view and manage storage media for the encoder. This includes removable devices such as SD cards, USB thumb drives, or removable SSDs. From here you can format, mount or unmount storage drives. •...
  • Page 198 System Administration and Storage Managing Storage Drives To change the status for a storage drive, click the drop-down list under Action select either Format, Mount or Eject (as applicable). The Makito X does not support formatting of SD drives. NOTE Makito X User’s Guide, v2.2, Issue 02...
  • Page 199: Managing Network Storage

    System Administration and Storage Managing Network Storage Managing Network Storage Network Storage enables you to move video storage from your Makito X to Network- Attached Storage through an NFS connection. This is useful for storing snapshots or (with the Makito X with Storage) for copying recordings after they are completed. To configure network storage: On the Administration page, click from the sidebar menu.
  • Page 200: Network Storage Settings

    System Administration and Storage Managing Network Storage Network Storage Settings The configurable Network Attached Storage settings are as follows: Network Storage Description Setting NFS – Activate Check this checkbox to activate Network Attached Storage. Remote Host Enter the NFS server hostname or its IP address in dotted- decimal format.
  • Page 201: Configuring Export Destinations

    When setting up Makito X, you can add export destinations to be available to transfer video and metadata to FTP/FTPS servers and the Haivision Video Cloud (HVC) platform. From the Export Destinations page, you can add destinations, edit settings for destinations, and delete destinations.
  • Page 202 System Administration and Storage Configuring Export Destinations To test the connection, click Test Settings You do not need to save in order to test settings. NOTE Click Add Destination The new export destination will be added to the list. Makito X User’s Guide, v2.2, Issue 02...
  • Page 203: Export Destination Settings

    System Administration and Storage Configuring Export Destinations Export Destination Settings The following table lists the Export Destination configuration settings: Export Destination Default Description/Values Setting Name Enter a name for the destination. This name will be selectable on the Export Video list. Type Select the protocol type, either: •...
  • Page 204 System Administration and Storage Configuring Export Destinations Export Destination Default (Cont.) Description/Values (Cont.) Setting (Cont.) Untrusted Do not Accept Check this checkbox to allow Makito X to Certificates connect to an FTPS server that is using an untrusted SSL certificate. HVC - Watch Disabled Check this checkbox to create an HVC-...
  • Page 205: Managing Snapshot Storage Locations

    System Administration and Storage Managing Snapshot Storage Locations Managing Snapshot Storage Locations From the Snapshots Storage Location page, you can specify the location where image snapshots are stored. You may choose to store snapshots on removable storage media (if available) as well as define the number and size of snapshots recorded in order to limit or increase the space allocated for snapshot storage.
  • Page 206: Snapshots Location Settings

    System Administration and Storage Managing Snapshot Storage Locations Snapshots Location Settings The configurable Snapshots Storage Locations settings are as follows: Snapshots Description Location Setting Save to Select the location for snapshot storage: • Internal Flash • Internal SSD (if installed) •...
  • Page 207: Managing File Transfer History

    System Administration and Storage Managing File Transfer History Managing File Transfer History From the File Transfer History page, you can view a list of the files that have been trans- ferred to an external storage location. You can also clear the list from here. File Transfer History is only available on the Makito X with Storage dual-height NOTE model.
  • Page 208: Chapter 6: Managing Users And Security

    6: Managing Users and Security HAPTER This chapter explains how to set up accounts and configure security settings for the Makito X using the Web interface. Unless otherwise indicated, the Administration Security pages are only accessible NOTE to administrators. Topics In This Chapter Security Managing User Accounts .
  • Page 209: Managing User Accounts

    Managing Users and Security Managing User Accounts Managing User Accounts The Accounts pages are available to administrators only (i.e., users assigned NOTE Administrator role). From here, administrators can create and manage user accounts for Makito X (including their own accounts). Operator Guest The My Account page is available to users assigned either...
  • Page 210 Managing Users and Security Managing User Accounts The Accounts List View displays the Name, Role, State (Enabled or Locked), and Password Expiry status for each account. It also provides an option to lock/unlock or delete an account. To view or modify user account details, click the account link in the table to open the Account Settings page.
  • Page 211: Account Management

    Managing Users and Security Managing User Accounts Account Management It is recommended to set the Policies for your system before creating users. The Password Policies do not apply to administrators creating user accounts or setting passwords for accounts other than their own. To add a new account: From the Accounts List View, click In the Add New Account dialog, type a unique user name in the Name text box.
  • Page 212 Managing Users and Security Managing User Accounts To manage existing accounts: From the Accounts List View, click a link in the table for an existing account. The Account Settings page opens for the selected account (as shown in the following example).
  • Page 213: Account Settings

    Managing Users and Security Managing User Accounts To apply your changes, click Apply Account Settings The following table lists the Accounts controls and settings: Account Setting Default Description/Values Name (Read-only for existing accounts) The user name for the account. (New account) Type in a unique name for the account, meeting the following requirements: •...
  • Page 214: Managing Public Key Authentication

    Managing Users and Security Managing User Accounts Account Setting Default (Cont.) Description/Values (Cont.) Public Keys Lists any public key files that have been uploaded for this account. • To add a public key, click Upload. • To delete a public key, select it from the list and click Delete.
  • Page 215 Managing Users and Security Managing User Accounts To select a different public key file, click Change. To remove the selection, click The file is then added to the list of public keys along with the fingerprint for the key (e.g., for identification purposes, as shown in the following example). To delete one or more previously uploaded public key file from the list, check the checkbox next to one or more filenames (or check ) and click...
  • Page 216: Managing Messages

    Managing Users and Security Managing Messages Managing Messages The Messages page displays a limited number of important administrator actions recorded such as installation of a software package, failure to establish or maintain connectivity with a remote syslog server, Power-On Self Test (POST) errors, and other noteworthy events. These events will result in a message being displayed at the next administrative Web interface or CLI login.
  • Page 217 Managing Users and Security Managing Messages To delete the messages, click Delete All The messages will be deleted immediately. Makito X User’s Guide, v2.2, Issue 02...
  • Page 218: Managing Banners

    Managing Users and Security Managing Banners Managing Banners From the Banner page, administrators can upload a text file for the Advisory and Consent Banner page. The banner is typically an advisory/warning notice to be displayed before the Login page. Only ASCII file format is supported for the banner file; the banner is a single text file with a maximum file size of 4KB.
  • Page 219 Managing Users and Security Managing Banners To select a different banner file, click Change. To remove the selection, click Click Upload The banner text is now displayed in the pane. To display the Advisory Notice and Consent Banner upon user login, check the checkbox.
  • Page 220 Managing Users and Security Managing Banners You can also install and manage banner files from the CLI using the banner command. The Makito X supports FTP and TFTP client, as well as SCP client and server. Makito X User’s Guide, v2.2, Issue 02...
  • Page 221: Managing Security Policies

    Managing Users and Security Managing Security Policies Managing Security Policies The Policies page provides the options to configure Makito X encoders to be NOTE “hardened”. For more information, see “Hardening” on page 42. From the Policies page, administrators can set policies for passwords, session timeout, and cryptographic strength for Makito X user accounts.
  • Page 222: Policy Settings

    Managing Users and Security Managing Security Policies Select or enter the new value(s) in the appropriate field(s). See “Policy Settings” page 222. To apply your changes, click Apply Policy Settings The following table lists the Policy settings for the encoder: Policy Setting Default Description/Values...
  • Page 223 Managing Users and Security Managing Security Policies Policy Setting Default (Cont.) Description/Values (Cont.) Change password n/a if Disabled (Password expiration must be enabled) after Type in the number of days after which 90 days if users must change their passwords (from Enabled 1-180 days).
  • Page 224 Managing Users and Security Managing Security Policies Policy Setting Default (Cont.) Description/Values (Cont.) TLS Versions TLSv1.2, Specifies which TLS (Transport Layer TLSv1.1, Security) versions are accepted from the TLSv1.0 HTTPS client. • TLSv1.2 • TLSv1.1 • TLSv1.0 • SSLv3 SSLv3 can be enabled only if NOTE: Compliance is set to None.
  • Page 225: Managing Certificates

    Managing Users and Security Managing Certificates Managing Certificates The Certificates page shows the list of Identity and CA Certificates installed on the Makito X. • An Identity Certificate identifies the Makito X during the Identity Certificates: authentication process when trying to establish a TLS connection in Audit or HTTPS session startup.
  • Page 226 Managing Users and Security Managing Certificates To generate a Self-signed Certificate or a Certificate Signing Request (CSR): On the Certificates page, click Generate (Optional) Type a name for the certificate in the Generate Certificate dialog. Select either Self-signed or Certificate Signing Request from the drop-down list. For more information, see “Sign”...
  • Page 227 Managing Users and Security Managing Certificates To manage Certificates: To import a Certificate, click next to either the Identity Certificates or CA Import Certificates section. a. Type in the Certificate Name. b. Select or enter the new value(s) in the remaining field(s). See “Import Identity or CA Certificate dialog”...
  • Page 228: Viewing Certificate Details

    Managing Users and Security Managing Certificates Viewing Certificate Details To view the details of a certificate file, click the certificate name from the list of Iden- tity or CA Certificates. (See following example.) Makito X User’s Guide, v2.2, Issue 02...
  • Page 229: Certificate Settings

    Managing Users and Security Managing Certificates Certificate Settings The following table lists the Certificates controls and settings: Certificate Setting Default Description/Values Click to generate a Certificate Signing Request. See “To generate a Self-signed Certificate or a Certificate Signing Request (CSR):” on page 226.
  • Page 230 Managing Users and Security Managing Certificates Certificate Setting Default (Cont.) Description/Values (Cont.) Subject The Subject identifies the device being secured, in this case, t Makito X. The special value “auto” used with sets the Subject Common Name Generate to the device’s FQDN if DNS is set, or the IP address otherwise.
  • Page 231 Managing Users and Security Managing Certificates Certificate Setting Default (Cont.) Description/Values (Cont.) Type Identity Select the type of the imported certificate: (Identity • Identity: If you are importing an identity Certificates) certificate. • CA-Chain: If the import is a chain of certificate authorities leading to the root root-CA certificate authority.
  • Page 232: Managing Audits

    Managing Users and Security Managing Audits Managing Audits From the Audits page, administrators can set up logging to an Audit server for the Makito X. To configure an Audit server: On the Administration page, click from the sidebar menu. UDIT The Audit page opens as shown in the following example.
  • Page 233: Audit Settings

    Managing Users and Security Managing Audits If TLS is selected as Transport, choose the type of audit server to be accepted as a trusted server: either All (no server authentication), CA-signed, or Self-signed. If Trusted Servers is set to CA-signed, the root-CA certificate of the audit server cer- tificate chain must be imported in the encoder (see “Managing Certificates”...
  • Page 234 Managing Users and Security Managing Audits Audit Setting Default (Cont.) Description/Values (Cont.) Transport Select the Transport Type from the drop- down list: • UDP (default port: 514) • TLS (Transport Layer Security, default port: 6514) Trusted Servers (TLS must be selected for Transport). Select the type of certificate exchange: •...
  • Page 235 7: Configuring A/V Services HAPTER Using SNMP This chapter provides information required to manage the Makito X through the Simple Network Management Protocol (SNMP). SNMP-based management uses Network Management Stations (NMSs) to collect data or configure devices (SNMP agents) across an IP network.
  • Page 236: Overview

    Configuring A/V Services Using SNMP Overview Overview To support management of the Makito X by third party Network Management Stations (NMSs), the system includes an SNMP agent that may be used to configure and control the system’s Audio/Video services and streams. The Makito X uses Net-SNMP and supports SNMP v1, v2c, and v3.
  • Page 237: Supported Mibs

    Configuring A/V Services Using SNMP Supported MIBs Supported MIBs The Makito X SNMP agent supports the MIB-II (RFC 1213) standard and its updates, SNMPv3 MIBs, as well as the Haivision proprietary Enterprise MIB. The following table lists the supported MIBs: Supported MIBs Standard Description RFC1213-MIB.txt...
  • Page 238: Snmp Agent Components

    Configuring A/V Services Using SNMP SNMP Agent Components SNMP Agent Components This section provides key information for system administrators responsible for setting up SNMP-management on the Makito X. snmpd snmpd is an SNMP agent that binds to a port and listens for requests from SNMP manage- ment software.
  • Page 239: Snmp Community Names

    Configuring A/V Services Using SNMP SNMP Agent Components SNMP Community Names Following are the default SNMP community names and their privileges for accessing the Makito X MIBs. SNMP Community Name Access Rights admin Read and write permission from local network and local host public Read-only permission from local network...
  • Page 240: Nmcfg Script

    Configuring A/V Services Using SNMP SNMP Agent Components nmcfg Script nmcfg is the configuration script that helps the configuration of the SNMP agent. It is particularly useful for the creation and management of SNMPv3 users of the User-based Security Model (USM) and the assignment of VACM (View-based Access Control Model) access rights to communities and users.
  • Page 241 Configuring A/V Services Using SNMP SNMP Agent Components nmcfg access usm delete <uname> nmcfg community help nmcfg community permit <community> {<group>|ro|rw} [<host>] nmcfg community delete <community> [{<group>|ro|rw} [<host>]] nmcfg system help nmcfg system define <param> "<value>" nmcfg system delete <param> nmcfg user help nmcfg user define <uname>...
  • Page 242: Snmpv3

    Configuring A/V Services Using SNMP SNMPv3 SNMPv3 For SNMPv3, the definition of a user and its access permission are separate steps, whereas for v1/v2c community-based security, a single command (e.g., nmcfg community permit admin rw ) defines both. The following command creates the user “johndoe” and defines its authentication protocol and password, and its privacy (encryption) protocol and password.
  • Page 243 Configuring A/V Services Using SNMP SNMPv3 The following command provides the highest security level (authentication and privacy), even if access policy only required authentication, and succeeds. # snmpset -v3 -u johndoe -a SHA -A "password" -x AES -X "pass phrase" -l authPriv localhost haiAvtStreamEncapsulation.1 i directRtp HAI-AVT-STREAM-MIB::haiAvtStreamEncapsulation.1 = INTEGER: directRtp(1)
  • Page 244: Snmp Utilities

    Configuring A/V Services Using SNMP SNMP Utilities SNMP Utilities The following table summarizes the SNMP commands which can be used to set values or request information from the MIB objects on the local host or on other SNMP agents reachable over the IP networks. To do this…...
  • Page 245: Snmp Syntax For Setting Up Streams

    Configuring A/V Services Using SNMP SNMP Syntax for Setting Up Streams SNMP Syntax for Setting Up Streams The Haivision Audio/Video Transport Stream MIB (HAI-AVT-STREAM-MIB) is composed of multiple tables described below. Table Index Description haiAvtStreamNewID.0 none Next available stream ID...
  • Page 246 Configuring A/V Services Using SNMP SNMP Syntax for Setting Up Streams value will be set to the first available Stream ID (>=1) on createAndGo or when set to createAndWait active after snmpset -v2c -c admin localhost haiAvtStreamAddr.0 d 198.51.100.106 haiAvtStreamPort.0 u 2000 haiAvtStreamRowStatus.0 i createAndGo The example below shows the same command, using the prefix (-IS) and suffix (-Is) options to remove repetition: snmpset -v2c -c admin –IS haiAvtStream –Is .0 localhost Addr d 198.51.100.106...
  • Page 247: Editing Snmpd.conf To Enable Traps

    Configuring A/V Services Using SNMP Editing snmpd.conf to Enable Traps Editing snmpd.conf to Enable Traps To enable the generation of SNMP traps, you may need to edit the file /usr/share/snmpd.conf to set the Trap receiving host. You must be logged in with administrative privileges to edit this file.
  • Page 248: Appendix A: Cli Command Reference

    Appendix A: CLI Command Reference This alphabetical command reference lists and describes the available Makito X Command Line Interface (CLI) commands and their parameters. Commands In This Appendix Syntax Conventions ..........250 Command Summary and Usage Information .
  • Page 249 CLI Command Reference personality ........... . 327 policy .
  • Page 250: Syntax Conventions

    CLI Command Reference Syntax Conventions Syntax Conventions The following syntax conventions are used in this appendix: Convention Description MS Sans Serif font Indicates command names and options, filenames and code samples. italic font Indicates variables or placeholders that you replace with a user-defined value or name.
  • Page 251: Command Summary And Usage Information

    CLI Command Reference Command Summary and Usage Information Command Summary and Usage Information The Makito X CLI commands are divided in two main groups: operation and administra- tion: • Operation Commands are used to manage the Audio/Video data path, processing, and features, including audio/video/metadata content selection, logo, audio/video encoding, H.264 streaming, and image snapshots.
  • Page 252: Operation Commands

    Use to manage logo overlays (i.e., a graphic file to display as a logo overlay in the encoded video). mklogo Use to convert a graphic file to Haivision’s overlay image format (.oly) in order to display the image as a logo overlay. mkstill Use to convert a static picture into a file containing an encoded single H.264 GOP sequence.
  • Page 253: Administration Commands

    Use to take a system snapshot for the purpose of troubleshooting, which may be forwarded to Haivision Technical Support if you are requesting technical support. dtconfig Use to set the date and time on the encoder.
  • Page 254 CLI Command Reference Command Summary and Usage Information Table A-2 Administration Commands Command (Cont.) Description (Cont.) passwd Use to change the password for a user account. pubkey Use to manage the user’s own authorized SSH public keys. reboot Use to halt and restart the Makito X Security account Use to manage user accounts for the encoder.
  • Page 255: Cli Access Control

    CLI Command Reference CLI Access Control CLI Access Control Below is a list of CLI commands and other functionalities supported by the system and the privileges for each role. Command Role Administrator Operator Guest Web access Telnet to/from encoder Serial access to encoder Operation - GENERAL videnc “get”...
  • Page 256 CLI Command Reference CLI Access Control Command (Cont.) Role Administrator Operator Guest ipconfig license nmcfg personality service system_snapshot.sh dtconfig tzconfig passwd “operator” “user” password password only only reboot Storage Commands storage transfer Security Commands account audit banner certificate messages policy pubkey Other / Utilities iperf...
  • Page 257: Account

    CLI Command Reference account account YNOPSIS account uname create [role=admin] account uname/all get account uname/all list account uname passwd account uname pubkey add|remove keyfile account uname pubkey list account uname lock account uname unlock account uname delete ESCRIPTION account command is used to create, delete and modify administrative user accounts for the Makito X.
  • Page 258 CLI Command Reference account pubkey list Lists any public key files that have been uploaded for this account. lock Locks the user account (if Enabled). unlock Unlocks the user account (if Locked). delete Deletes the user account. ACCOUNT ARAMETERS Parameter Default Description/Values role...
  • Page 259: Audenc

    CLI Command Reference audenc audenc YNOPSIS audenc ID start audenc ID stop audenc ID mute audenc ID unmute audenc ID set parameter=value [parameter=value …] audenc ID get [config, stats, all] audenc ID clear ESCRIPTION audenc command is used to manage encoder audio acquisition settings. The audenc start audenc stop...
  • Page 260 CLI Command Reference audenc AUDENC ARAMETERS Parameter Default Description/Values input Analog The Audio Input for the encoder: • Analog • DVICH12 • Analog • SDI1CH1+2 • SDI1CH3+4 • SDI1CH5+6 • SDI1CH7+8 • SDI1CH9+10 • SDI1CH11+12 • SDI1CH13+14 • SDI1CH15+16 • SDI2CH1+2 •...
  • Page 261 CLI Command Reference audenc Parameter (Cont.) Default (Cont.) Description/Values (Cont.) level The maximum analog Audio Input level from +5dBU up to +20dBU. Only applies to Analog Audio Input. NOTE: mode stereo The number and type of audio channels to encode. mono (left) •...
  • Page 262 SDI1CH12 (#S/B-292E-HDSDI2) Sets the Audio Input to # audenc 0 set input=DVICH12 DVICH12 (#S/B-292E-DVI) Sets the Audio Input to # audenc 0 set bitrate=128 Sets the Audio Bitrate to 128. You will receive the following confirmation: Audio encoder configured successfully...
  • Page 263 CLI Command Reference audenc # audenc 0 get -or- # audenc 0 get config Returns audio configuration information for the encoder, such as: Encoder ID Name : "Audio Encoder 0" Configuration: Audio Input : SDI1CH12 Audio Bitrate : 128 kbps Audio Samplerate : 48 KHz Audio Mode...
  • Page 264: Audit

    CLI Command Reference audit audit YNOPSIS audit start audit stop audit set parameter=value [parameter=value ... ] audit get [config|stats|all] audit verify [debug] ESCRIPTION audit command is used to enable remote logging of system events and configure the remote audit ( syslog ) server connection.
  • Page 265 CLI Command Reference audit Parameter (Cont.) Default (Cont.) Description/Values (Cont.) transport The transport protocol, either: • (User Datagram Protocol): Default UDP port = • (Transport Layer Security): Default 6514 TLS port = trusted If transport is TLS, the type of server authentication: •...
  • Page 266: Banner

    CLI Command Reference banner banner YNOPSIS banner enable banner disable banner install <bannerfile> banner get banner delete ESCRIPTION banner command is used to manage the Advisory Notice and Consent Banner. This is a single text file that will be displayed to users who log in for interactive sessions on the Makito X.
  • Page 267 **************************************************** Haivision Systems - Makito X SDI #4 **************************************************** Related Topics • Managing Banners on page 218 Makito X User’s Guide, v2.2, Issue 02...
  • Page 268: Bist

    CLI Command Reference bist bist YNOPSIS bist ESCRIPTION bist command provides information about the current status of the device and the results of any BIST (built-in self-test) or POST (power-on self test) operations executed by the device or the administrator. The purpose is to provide confidence that the Makito X hardware and software are operating reliably and correctly.
  • Page 269: Certificate

    CLI Command Reference certificate certificate YNOPSIS certificate name/all get certificate name/all list certificate name view certificate name create [sign=self] [subject=query] certificate name delete [type=id] certificate name import infile=<certfile> [type=id] [fmt=auto] certificate name select certificate name verify ESCRIPTION certificate command is used to manage the system’s certificates that are used to establish TLS connections to the audit server as well as secure HTTPS sessions.
  • Page 270 CLI Command Reference certificate import Imports a certificate to be installed on the device. The infile, i.e., the file to import the certificate from, must be type format provided. The file’s can also be specified. See certificate Parameters below. select Selects the certificate used when establishing a TLS connection with the audit server or starting an HTTPS session.n.
  • Page 271 CLI Command Reference certificate Parameter (Cont.) Default (Cont.) Description/Values (Cont.) type The type of certificate to either import or generate: Only ID certificates can be generated. NOTE: Chain and CA certificates can only be imported. • Identity certificate (for HTTPS service and audit) chain: •...
  • Page 272: Config

    Saves the current configuration. Saves every parameter in the system, including encoder settings and stream destination and status (excluding the system IP address). All configuration files are stored in /usr/share/haivision/config. regarding cfgname. NOTE load Loads a previously saved configuration identified by <cfgname>.
  • Page 273 CLI Command Reference config CONFIG XAMPLES # config save Class430 startup=yes Saves the current configuration under the name “Class430” and sets it to be the startup configuration. # config load Class430 Loads a previously saved configuration identified by the name “Class430” (located in the active (local) directory).
  • Page 274: Date

    CLI Command Reference date date YNOPSIS date ESCRIPTION date command is used to display the current date and time. DATE XAMPLE # date Displays the current date, e.g.: Tue Oct 22 11:23:56 EDT 2013 Related Topics • dtconfig on page 279 •...
  • Page 275: Dest

    CLI Command Reference dest dest YNOPSIS dest create host=addr name=destname [type=ftp,ftps] [path=rpath] [username=uname] [password=pwd] [port=ftpport] [passive=yes, no] [untrust=yes, no] [watchfolder=yes, no] dest id/name/all delete dest id/name/all get dest id set dest id/name test ESCRIPTION dest command is used to manage recording export destinations (i.e., add destinations, edit settings for destinations, and delete destinations).
  • Page 276 CLI Command Reference dest DEST ARAMETERS Parameter Default Description/Values name Specify a name for the destination. characters type Select the protocol type, either: • FTP: File Transfer Protocol • FTPS: FTP with explicit Transport Layer Security (TLS) host The server’s DNS host name or IP address for the destination.
  • Page 277 : Off HVC Watch Folder : Off Destination ID Name : "Active_dest" Configuration: Type : FTP FTP Server : dfs.haivision.com-1 Path FTP Port : 21 Passive Mode : Off HVC Watch Folder : Off Makito X User’s Guide, v2.2, Issue 02...
  • Page 278 Destination ID Name : "s1_HVC" Configuration: Type : FTP FTP Server : 240844.upload.akamai.com Path : /240844/HAIVISION-RD/watch FTP Port : 21 Passive Mode : On HVC Watch Folder : On 3 dests displayed. Related Topics • Configuring Export Destinations on page 201...
  • Page 279: Dtconfig

    CLI Command Reference dtconfig dtconfig YNOPSIS dtconfig YYYYMMDDhhmm[.ss] ESCRIPTION dtconfig command is used to set the date and time on the encoder. Setting the encoder to a date in the past (compared to the current date) may cause NOTE the encoder to reboot. DTCONFIG XAMPLE # dtconfig 201310211100...
  • Page 280: Edid

    CLI Command Reference edid edid YNOPSIS edid set preferred=res edid get edid reset ESCRIPTION edid command is used on the Makito X DVI to set the DVI-D preferred resolution advertised as part of the HDMI EDID (Extended Display Identification Data) so that connected devices do not scale their output resolutions to match the current Makito X DVI default (1080p).
  • Page 281 CLI Command Reference edid EDID ARAMETERS Parameter Default Description/Values preferred 1920x1200p6 Following are the available values for the DVI-D preferred resolution: 1920x1200p60 (default) 1920x1080p60 1680x1050p60 1600x1200p60 1600x900p60 1440x900p60, 1440x900p75 1400x1050p60, 1400x1050p75 1360x768p60 1280x1024p60, 1280x1024p75 1280x800p60, 1280x800p75, 1280x800p85 1280x768p60, 1280x768p75, 1280x768p85 1152x864p75 1024x768p60, 1024x768p75, 1024x768p85, 800x600p60, 800x600p75, 800x600p85,...
  • Page 282: Ethercfg

    CLI Command Reference ethercfg ethercfg YNOPSIS ethercfg [-a on|off] [-s 10|100|1000] [-d half|full] [-c bandwidth] [-w yes| no] ESCRIPTION ethercfg command is used to view, manually control, and save the Ethernet configu- ration parameters. When the Makito X boots up, it automatically initializes and configures the Ethernet interface to match the settings on the Ethernet switch to which it is connecting.
  • Page 283 CLI Command Reference ethercfg When the entire set of parameters is not specified, the system will try to combine NOTE the current Ethernet settings with the newly supplied ones. Therefore, you should carefully review the outputted configuration when the command completes to make sure it matches the desired Ethernet settings.
  • Page 284: Haiversion

    YNOPSIS haiversion ESCRIPTION haiversion command is used to display status information about the Makito X. Status information can be useful for troubleshooting and may be forwarded to Haivision Technical Support if you are requesting technical support. HAIVERSION XAMPLE $ haiversion Displays information about the hardware and software components.
  • Page 285: Hdcp

    CLI Command Reference hdcp hdcp YNOPSIS hdcp enable hdcp disable hdcp get ESCRIPTION hdcp command is used to manage HDCP settings on Makito X DVI systems. CTIONS enable Enables HDCP support on the DVI input interface. disable Disables HDCP support on the DVI input interface. Displays the current status of HDCP support.
  • Page 286: Ipconfig

    DNS settings, NTP settings, and/or Time Zone setting. When DHCP is enabled, you can configure the DHCP Vendor Class ID (option 60), which is set by default to “Haivision Makito X Encoder”. This allows IT departments to identify Makito X devices on their networks.
  • Page 287 : 255.255.254.0 Gateway : 10.65.10.1 Link-Local Address : (Disabled) Hostname : STORAGE-2 DHCP Vendor Class ID : "Haivision Makito X Encoder" Current DNS Settings (Obtained via DHCP): Domain : haivision.com Primary Server : 10.65.0.10 Alternate Server : 10.65.0.11 Current Multicast DNS (mDNS) Settings:...
  • Page 288 : "Haivision Makito X Encoder" Change IP settings? (y,N): y Use DHCP to obtain IP address automatically? (Y,n): y Auto-assign link-local address when DHCP is unavailable? (y,N): Enter DHCP Vendor Class Identifier ("Haivision Makito X Encoder"): Current Hostname : STORAGE-2 Change hostname? (y,N):...
  • Page 289 : 255.255.255.0 Enter default gateway : 192.0.2.24 Current hostname : Makito2 Change hostname? (Y,N): y Current DNS settings: Domain : haivision.com Primary Server : 10.65.0.10 Alternate Server : (None) Change DNS settings? (Y,N): n Current Multicast DNS (mDNS) Settings: Responder...
  • Page 290: License

    Verifies the specified license (either installed or uploaded). delete Deletes a previously installed license file from the system. LICENSE XAMPLES $ license list Displays a list of licenses currently installed on the system: License Files (in /usr/share/haivision/licenses): metadata-PO123456.lic Makito X User’s Guide, v2.2, Issue 02...
  • Page 291 HAI-100022230061=Yes HAI-100009820054=Yes #----------END LICENSING DATA-------------------------------------- $ license verify metadata-PO123456.lic Verifies the specified license: Verifying license /usr/share/haivision/licenses/metadata-PO123456.lic... License verification successful. This command first checks to see if the specified license is in the current NOTE: working directory. If Yes, it will verify that one.
  • Page 292: Logo

    • Two logos on dual channel encoders (Makito X SDI #S/B-292E-HDSDI2); • One logo on single input encoders (Makito X DVI #S/B-292E-DVI or Makito X SDI #S/B-292E-HDSDI1). is used to select the video input on dual channel encoders (either for BNC-1 or BNC-2 on #S/B-292E-HDSDI2).
  • Page 293 Default Description/Values filename .oly The name of the file to display as a logo overlay. The file must be in Haivision’s NOTE: overlay image (.oly) format. See mklogo page 309. display Enables the display of the specified file as a On,Off logo overlay.
  • Page 294 CLI Command Reference logo Parameter (Cont.) Default (Cont.) Description/Values (Cont.) positioning BottomRight Specifies the position for the logo: • BottomRight • TopRight • BottomLeft • TopLeft • Centered • Absolute: Uses the exact X and Y coordinates. • Relative: Uses the X, Y coordinates in relation to a 1920x1080 display area.
  • Page 295: Messages

    CLI Command Reference messages messages YNOPSIS messages add <msgtext> messages get messages delete ESCRIPTION messages command is used to manage administrative login messages. This is a log of a limited number of important events recorded such as installation of a software package, failure to establish or maintain connectivity with a remote audit server, Power-On Self Test (POST) errors, and other noteworthy events that require the administrator’s attention.
  • Page 296: Metadata

    CLI Command Reference metadata metadata Metadata processing is a licensed feature which may be installed at the IMPORTANT factory or via a field upgrade by installing a license file. YNOPSIS metadata ID start metadata ID stop metadata create type=network port=udpport [addr=ipaddr] [name=text] -or- metadata create type=hdsdi [input=bnc1] [decimation=factor] [name=text] metadata ID delete...
  • Page 297 CLI Command Reference metadata KLV/SDI metadata sources can be frame-decimated to reduce the bandwidth used by the metadata service. You can also create additional HD-SDI sources which can be configured to different decimation settings. For more information, see “Metadata Decimation” page 305.
  • Page 298 CLI Command Reference metadata Parameter (Cont.) Default (Cont.) Description/Values (Cont.) Network Source-specific parameters: port Specifies the UDP port for a network metadata source (i.e., the port on which to 1025..65,535 listen for KLV messages). address (optional) Specifies the IP address for a network metadata source.
  • Page 299 CLI Command Reference metadata Parameter (Cont.) Default (Cont.) Description/Values (Cont.) UAS KLV Tag Filtering parameters (See “UAS KLV Metadata Tag Filtering” on page 306) uastags A list of comma-separated tag numbers from the UAS Datalink Local Set that are allowed to be streamed.
  • Page 300 CLI Command Reference metadata Parameter (Cont.) Default (Cont.) Description/Values (Cont.) “CoT Retransmission” CoT Retransmission parameters (See on page 304) retransmit When set to On, the system will retransmit received CoT/UDP or CoT/Serial metadata to on,off up to 8 other hosts over UDP. relays (Mandatory) Specifies the IP address and UDP port of the relayed packets.
  • Page 301 CLI Command Reference metadata Parameter (Cont.) Default (Cont.) Description/Values (Cont.) baudrate 115200 Specifies the baud rate for the serial port: • 115200, 57600, 38400, 19200, 9600, 4800, 2400, 1200 Only required when configuring the NOTE: encoder for metadata capture. When a KLV over SDI metadata source is started but the input signal is not in a NOTE format supported for KLV extraction, its state in the statistics display will show up as “DISABLED”.
  • Page 302 CLI Command Reference metadata #2: C SDI M ID=1] XAMPLE REATING A TREAM WITH ETADATA OURCE Start the SDI metadata encoder instance using the following command: #metadata 1 start Create a stream with video, audio and metadata using the following syntax: #stream create addr=<IPaddr>...
  • Page 303 CLI Command Reference metadata Verify the metadata encoder stats using the following syntax: # metadata <ID> get all # metadata 2 get all The system will return the metadata information: Metadata ID Name : (None) Configuration: Type : Network Format : KLV Address : 0.0.0.0 (Any)|...
  • Page 304 CLI Command Reference metadata Name : "HD-SDI-BNC-1" Configuration: Type : HD-SDI Format : KLV Status : STARTED Reclassification : Off Classification : UNCLASSIFIED Classifying Country: (None) Object Country : (None) Metadata ID Name : "KLV/UDP" Configuration: Type : Network Format : KLV Status : STARTED...
  • Page 305 CLI Command Reference metadata • Enable or disable the update/generation of the security data set in UAS messages: When this feature is enabled, you then specify the classification (Unclassified, Restricted, Confidential, Secret, or Top Secret), the classifying country, and the object country/ies (up to 6) (using the proper ISO 3-letter country code).
  • Page 306 CLI Command Reference metadata #8: C HD-SDI M XAMPLE REATING DDITIONAL ETADATA OURCES To create an additional HD-SDI metadata source and use it in a stream: # metadata create name="Half the KLV of first input" type=hdsdi input= bnc1 decimation=2 Metadata source created successfully - ID: 3 # stream create addr=10.65.11.166 port=5678 vid=1 data=3 Stream created successfully - ID: 3 # stream 1 get...
  • Page 307 CLI Command Reference metadata #10: KLV T XAMPLE ILTERING To enable UAS tag filtering and list the items that will be included in the stream: # metadata 1 set uastags=2,3,13,14,48 sectags=1,2,3 Metadata source configured successfully. # metadata 1 get Metadata ID Name : "HD-SDI-BNC-1"...
  • Page 308 CLI Command Reference metadata You can filter out the entire UAS or security data set by using “ none ” for uastags sectags instead. When security re-classification is enabled on a metadata source, the security tag filtering settings (if configured) will not be used. Related Topics •...
  • Page 309: Mklogo

    ESCRIPTION In order to display an image as a logo overlay on the Makito X, you need to copy a still image file to the Makito X file system and then convert the file to Haivision’s overlay image format ( .oly...
  • Page 310: Mkstill

    1920x1080, 1280x720, 720x480 (NTSC), and 720x576 (PAL). The maximum size of the source image is 2048x2048 pixels. NOTE The resulting still image files are stored on the Makito X file system under /usr/share/haivision/still_images MKSTILL ARAMETER Parameter Default...
  • Page 311 CLI Command Reference mkstill Parameter Default Description/Values (Cont.) • WXGA3 for 1360x768 • WXGA4 for 1366x768 • WXGA+ for 1440x900 • SXGA+ for 1400x1050 • HD+ for 1600x900 • UXGA for 1600x1200 • WSXGA+ for 1680x1050 • WUXGA for 1920x1200 MKSTILL XAMPLE # mkstill myimage.jpg resolution=1080...
  • Page 312: Nas

    Activates Network Assisted Storage and specifies the remote host IP address and path. # nas get Returns NAS configuration information for the encoder, such as: Configuration: Status : Enabled Remote Host : "tserver.haivision.com" Remote Dir : "/NFS" Makito X User’s Guide, v2.2, Issue 02...
  • Page 313 CLI Command Reference # nas get all Returns NAS configuration information and statistics for the encoder, such as: Configuration: Status : Enabled Remote Host : "tserver.haivision.com" Remote Dir : "/NFS" Statistics: Capacity : 49.08GB Used : 79.96MB (0%) Available : 40.94GB (83%) Related Topics •...
  • Page 314: Nmcfg

    CLI Command Reference nmcfg nmcfg nmcfg You must be logged in with administrative privileges to enter commands. NOTE YNOPSIS nmcfg help nmcfg access help nmcfg access usm permit <uname> {<group>|ro|rw} [{noauth|auth|priv}] nmcfg access usm delete <uname> nmcfg community help nmcfg community permit <community> {<group>|ro|rw} [<host>] nmcfg community delete <community>...
  • Page 315 CLI Command Reference nmcfg PTIONS access Defines the access permissions granted to the v1/v2c communities and USM (v3) users. Only the USM security model option is shown in the summary help. The v2c security model, a different format for community configuration, is only displayed in the access detailed help.
  • Page 316 CLI Command Reference nmcfg #1: I XAMPLE NITIALIZING A COMMUNITY BASED SYSTEM In the example below, a system with default settings is configured to add a distant host admin access (198.51.100.122) to the existing localhost and localnet accesses of the community.
  • Page 317 CLI Command Reference nmcfg #3: I USM- (SNMP XAMPLE NITIALIZING A ONLY SYSTEM In the example below, system security is enforced by completely disabling SNMPv1/v2c users access, and by requiring v3 USM authentication only for group-based access, admins operators and encryption for group-based access.
  • Page 318 CLI Command Reference nmcfg model perm/group level user/community source --------------- ------------- -------- ---------------------- --------- guest auth guest administrator priv joenet operator priv johnsmith auth protocol priv protocol user ----------------------- ---------------- ----------- nopriv guest joenet johnsmith Related Topics • “nmcfg Script” on page 240 (in “SNMP Agent Components”)
  • Page 319: Package

    CLI Command Reference package package YNOPSIS package list package info [<pkgfile>.hai] package verify <pkgfile>.hai package install <pkgfile>.hai package download <pkgfile>.hai <tftpipaddr> package delete <pkgfile>.hai | all package cancel <pkgfile>.hai ESCRIPTION package command is used to view and manage software packages. package command can only be used by an administrator.
  • Page 320 CLI Command Reference package #1: P XAMPLE ACKAGE OWNLOAD AND NSTALLATION $ package download makitox_enc_v1.0.0-39.hai mytftp.example.com 1/5) Temporarly pausing encoder(s)... 2/5) Downloading package makitox_enc_v1.0.0-39.hai from mytftp.example.com... 3/5) Verifying integrity of downloaded package... Package verified successfully. 4/5) Synching file system... 5/5) Resuming encoder(s)... Package downloaded successfully.
  • Page 321 CLI Command Reference package PACKAGE XAMPLES # package list Displays the list of downloaded packages: Package Files (in /usr/share/haivision/packages/): makitox_enc_v1.1.0-19.hai makitox_enc_v1.1.0-20.hai makitox_enc_v1.1.0-4.hai makitox_enc_v1.1.0-8.hai # package info makitox_enc_v1_2_0.hai Displays information about the package. # package install makitox_enc_v1_2_0.hai Installs the package. Makito X User’s Guide, v2.2, Issue 02...
  • Page 322: Passthrough

    CLI Command Reference passthrough passthrough YNOPSIS passthrough start passthrough stop passthrough set parameter=value [parameter=value …] passthrough get [config, stats, all] passthrough clear enable_passthrough_on_serial_port ESCRIPTION On the Makito X with SDI, you can enable bi-directional serial passthrough for controlling serially attached devices such as PTZ controlled cameras. Both RS-232 and RS-422 are passthrough supported.
  • Page 323 CLI Command Reference passthrough PASSTHROUGH ARAMETERS Parameter Default Description/Values standard RS232 Specifies the transceiver mode for the passthrough: • RS232 • RS422 Only valid for the serial port. NOTE: baudrate 9600 Specifies the baud rate for the passthrough: • 115200, 57600, 38400, 19200, 9600, 4800, 2400, 1200 databits Specifies the number of data bits in each...
  • Page 324 CLI Command Reference passthrough PASSTHROUGH XAMPLE This example shows how to use TCP port 8888 to listen for passthrough clients. The camera has an RS232 COM port running at 9600 bps: #passthrough set port=8888 baudrate=9600 standard=rs232 Passthrough configured successfully. #passthrough get Configuration: TCP Port : 8888...
  • Page 325 CLI Command Reference passthrough When a remote client is connected, the state will show up as CONNECTED and the IP address of the client will be displayed. The statistics are divided in two sections: network and serial. • The network stats show what is going in terms of the TCP connection with the remote controller, i.e., how many bytes were received from and sent to the remote controller.
  • Page 326: Passwd

    CLI Command Reference passwd passwd YNOPSIS passwd ESCRIPTION passwd command is used to change the user’s own password. account To modify the password for other users’ accounts, see the command on NOTE page 257. PASSWD XAMPLES # passwd Changes the password for the current user account. The system prompts you to enter the old password and then the new password.
  • Page 327: Personality

    (#S-292E-X2R) or the four-port variant (#S-292E-X4R). For details on the Makito XR encoder, please refer to the Makito XR (Ruggedized) Instal- lation Guide available through Haivision’s Download Center. The change of personality takes effect after the next reboot of the unit.
  • Page 328: Policy

    CLI Command Reference policy policy YNOPSIS policy password set [quality=basic] [minlen=6] [minuppers=0] [mindigits=0] [minsymbols=0] [expiry=yes] [lifetime=90] [remember=5] policy session set [autologout=yes] [idletimeout=15] policy crypto set [compliance=None] [tlsv1.{0|1|2}=yes] [sslv3=no] policy crypto set [compliance=None] policy pname/all get ESCRIPTION policy command is used to configure and manage security policy settings. Policies are needed to define security criteria such as the required quality, length and composition of passwords.
  • Page 329 CLI Command Reference policy POLICY ARAMETERS Parameter Default Description/Values crypto compliance None Specifies the required cryptographic compliance, either: • None • NDPP11: Activates cryptographic security to a level compliant with the Network Device Protection Profile v1.1. • FIPS140: All management cryptography is operated in the FIPS 140-2 mode.
  • Page 330 CLI Command Reference policy Parameter (Cont.) Default (Cont.) Description/Values (Cont.) minlen Specifies the minimum password length: • 6..40 minuppers n/a if Basic (Password quality must be Strong) Specifies the minimum number of uppercase letters: if Strong • 0..40 mindigits n/a if Basic (Password quality must be Strong) Specifies...
  • Page 331 CLI Command Reference policy # policy password set quality=strong minlen=10 minuppers=1 minsymbols=1 expiry=yes lifetime=30 Sets the password policy for the encoder to be Strong, requiring passwords to be at least 10 characters in length, with one uppercase letter, one symbol. Passwords will expire in 30 days.
  • Page 332: Pubkey

    CLI Command Reference pubkey pubkey YNOPSIS pubkey add <KEYFILE.pub> pubkey remove <KEYFILE.pub> pubkey list ESCRIPTION pubkey command is used to manage your account’s authorized SSH public keys. You must first get the public key of your SSH client. Note that in the current release, this only applies to SSH CLI access to the encoder.
  • Page 333: Reboot

    CLI Command Reference reboot reboot YNOPSIS reboot ESCRIPTION reboot command is used to turn off and restart the Makito X. Any unsaved configu- rations will be lost. The encoder will restart with the saved startup configuration. reboot command can only be used by an administrator. NOTE XAMPLE # reboot...
  • Page 334: Record

    CLI Command Reference record record YNOPSIS record create stream=id record ID start record ID stop record ID close record ID get record list record delete [filename, all] record copy filename usb record move filename usb ESCRIPTION record command is used to create and manage video recordings. For more informa- tion, see “Configuring Recording Outputs”...
  • Page 335 CLI Command Reference record RECORD ARAMETERS Parameter Default Description/Values name The identifying prefix for recorded files. If not specified, the stream name or ID will be used. format The file format for recordings, either: • mp4 • ts limit The recording duration or size, ex 1h30m, 500M segment Enables segmented recording by specifying...
  • Page 336 CLI Command Reference record RECORD XAMPLES # record all get Returns information for the recording, for example: Recording ID : 1 Recording Name: "continuous" Configuration: Format : TS Recording Limit : 5d5h Segmented : On Segment Limit : 10m Segment Recycling: Off Auto-Export : Off # record list Lists the available recordings, for example:...
  • Page 337: Roi

    CLI Command Reference YNOPSIS roi create roi ID set roi ID delete roi ID get roi ID enable roi ID disable ESCRIPTION (H.264 only) The command is used to create a static region of interest (one per video encoder) to enhance the quality of the encoded video within the region. This allows you to choose what portion of the image is important to have maximum quality.
  • Page 338 CLI Command Reference ARAMETERS Parameter Default Description/Values name Optional name for this region of interest. encoder Specifies the ID of the video encoder. type normal Specifies the effect of the region: • normal: ROI is translucent, therefore enhances the video in the region. •...
  • Page 339: Service

    CLI Command Reference service service YNOPSIS service name action where: name all, http, passthrough, snmp, ssh, talkback, can be: telnet, vf ESCRIPTION For security purposes, you may need to stop one or more network services from accessing the Makito X. The service command is used to enable and disable the following network services: all, or HTTP, Pass-through, SNMP, SSH, Talkback, Telnet, and VF.
  • Page 340 CLI Command Reference service # service all stop Stops all network connections to the Makito X Related Topics • Enabling and Disabling Network Services on page 190 Makito X User’s Guide, v2.2, Issue 02...
  • Page 341: Snapshot

    CLI Command Reference snapshot snapshot Snapshot Capture is an optional feature which may be disabled at the factory. The NOTE following section is only applicable if snapshots are enabled. YNOPSIS snapshot ID take [format=value] [filename=<filename> [overwrite=yes,no]] [quality=value] snapshot set [format=value] [quality=value] [maxsize=value] [location= value] [thumbnail=on,off] [overwrite=yes,no] snapshot get snapshot list...
  • Page 342 CTIONS take Takes a snapshot from either: • the current active video (Makito X DVI, S/B-292E-DVI or Makito X SDI single-BNC, S/B-292E-HDSDI1) • the video received on any input port, where ID is the video input (Makito X SDI dual-BNC, S/B-292E-HDSDI2). ID is either BNC-1 or for BNC-2.
  • Page 343 CLI Command Reference snapshot Parameter Default Description/Values (Cont.) maxsize 100 MB Administrator (Users must be assigned role) Specifies the amount of storage in MB available to -1, 0..4096 snapshots. • disables the snapshot feature. • is used for unlimited storage and is only available when the location is an NFS-mounted...
  • Page 344 CLI Command Reference snapshot # snapshot list Lists the contents of the snapshot folder: Snapshot Files (in /usr/share/haivision/snapshots/): snap-2015-05-01-11h58m15s.jpg (BUSY) snap-2015-05-01-11h58m39s.jpg (BUSY) snap-2015-05-01-12h00m25s.jpg (BUSY) snap-2015-05-01-12h03m19s.jpg (BUSY) 4 snapshot files are available. 5.90MB (5%) of snapshot disk storage space used. Related Topics •...
  • Page 345: Still

    Makito X file system. Static image files must already have been converted into files containing encoded single /usr/share/haivision/still_images H.264 GOP sequences and be located the folder the Makito X file system.
  • Page 346: Storage

    CLI Command Reference storage storage YNOPSIS storage device command [options] [parameters] device = ssd, usb, sd command = format, mount, eject, restart ESCRIPTION storage command is used to manage storage devices on the Makito X with Storage dual-height model. This includes formatting and ejecting storage drives. To display available storage devices use storage list PTIONS...
  • Page 347 CLI Command Reference storage STORAGE XAMPLES # storage usb eject Ejects the installed USB storage device. # storage usb format Formats the USB drive as ntfs by default. # storage list Displays a list of available storage devices, for example: Device Size Used...
  • Page 348: Stream

    CLI Command Reference stream stream YNOPSIS stream create [type=tx] [name=text] [id=number] [addr=ipaddr] [port=udpport] [encapsulation=ts-rtp | ts-udp | direct-rtp | rtmp] [start=yes,no] [ttl=64] [tos=0xB8] [mtu=1496] [videosrc=id/name] [audiosrc=id/name[,id/name,id/name]] [datasrc=id/name[,id/name,id/name]] [stillimage=fname] [shaping=yes,no [ceiling=percentage] [idlecells=yes,no] [delayaudio= yes,no]] [datacarriage=sync] Possible encapsulation formats and their specific options: ts-rtp: MPEG2 transport stream over RTP [rtcp=on [rtcpport=udpport]] [fec=yes,no] [rows=10] [columns=10] [level=A, B] [alignment =yes, no]...
  • Page 349 CLI Command Reference stream stream id/name pause stream id/name resume stream id/name delete stream id/name/all get stream id/name clear ESCRIPTION stream command is used to manage audio/video streams. type parameter only needs to be specified when creating a stream that will be used type=recorder solely for recording and not sent on any network.
  • Page 350 CLI Command Reference stream clear Clears all active sessions on the encoder. help stream Displays usage information for the command. STREAM ARAMETERS Parameter Default Description/Values type The stream type, either transport stream or recorder. type only needs to be specified when NOTE: creating a stream that will be used solely for recording and not sent on any network.
  • Page 351 CLI Command Reference stream Parameter Default (Cont.) Description/Values (Cont.) rtcpport rtcp (Optional, must be On) The destination UDP port for the RTCP session. (Optional) Time to Live. The number of router hops that IP packets from this stream are allowed to traverse before being discarded. 1..255 0xB8 (Optional) (Type of Service) Specifies the...
  • Page 352 CLI Command Reference stream Parameter Default (Cont.) Description/Values (Cont.) videosrc id/name (Optional) The video source. is either 0, 1, 2, or For H.264, the (corresponding to the encoder instance number in the Web interface). For HEVC encoders, two additional are available and should be used to stream HEVC-encoded video.
  • Page 353 CLI Command Reference stream Parameter Default (Cont.) Description/Values (Cont.) datasrc id/name (Optional) The metadata source. (0=serial, 1 or 2=SDI; UDP) all others are “metadata” on page 296 to determine the ID mappings. To stream metadata from multiple NOTE: sources into the same KLV Elementary Stream, use multiple comma separated metadata source id/names to indicate the metadata source ES IDs to be multiplexed in...
  • Page 354 CLI Command Reference stream Parameter Default (Cont.) Description/Values (Cont.) stillimage (Optional) Specifies the filename of a static image that will replace the “real” video stream when streaming is paused. The static image file must already NOTE: have been converted into a file containing an encoded single H.264 GOP sequence.
  • Page 355 Enables Forward Error Correction (FEC). yes,no ts-rtp • Pro-MPEG FEC if encapsulation ts-udp • VF FEC if encapsulation VF FEC is a proprietary FEC and is NOTE: not interoperable with devices outside of the Haivision family. Makito X User’s Guide, v2.2, Issue 02...
  • Page 356 CLI Command Reference stream Parameter Default (Cont.) Description/Values (Cont.) (see “Configuring Secure Reliable Transport (SRT)” on page 133) mode caller Specifies the SRT Connection Mode: • caller • listener • rendezvous “Configuring Secure Reliable Transport (SRT)” on page 133. sourceport auto (SRT connection mode...
  • Page 357 Returns the following confirmation and stream ID: Stream created successfully - ID : 3 # stream create addr=192.0.2.235 port=1234 stillimage=haivision.mp4 Creates and starts a streaming session. Specifies a static image to replace the “real” video stream when streaming is paused.
  • Page 358 CLI Command Reference stream # stream 3 resume Resumes the stream created above. # stream create addr=192.0.2.235 port=1234 vid=0 aud=0 # videnc 1 start # audenc 1 start # stream create addr=198.51.100.106 port=1234 vid=1 aud=1 Creates two streams, the first using Video and Audio encoder 0, and the 2nd using Video and Audio encoder 1.
  • Page 359 CLI Command Reference stream Statistics : State : STREAMING Up Time : 1h16m8s Sent Packets : 1,040,512 Sent Bytes : 1,252,450,560 Bitrate : 198 kbps # stream 2 show stats Returns status information for Stream #2, such as: Session ID : 2 Name : “web1”...
  • Page 360: System_Snapshot.sh

    ESCRIPTION system_snapshot.sh command is used take a system snapshot for the purpose of troubleshooting and may be forwarded to Haivision Technical Support if you are requesting technical support. The system snapshot lists information such as component versions, network settings, loaded modules, running processes, system traces, configured streams and stream status...
  • Page 361: Talkback

    LAN or WAN. See “Audio Talkback” on page 40. The talkback is sent by a software player application (such as Haivision’s InStream) to the Makito X, where it is played out of the encoder’s 8-pin Mini-DIN connector. See “Talkback Audio Format Specifications”...
  • Page 362 CLI Command Reference talkback CTIONS start Starts reception of talkback audio stop Stops reception of talkback audio Configures talkback settings Displays talkback information (i.e., volume and UDP port). You can specify configuration, stats, or all talkback information. clear Clears talkback statistics TALKBACK ARAMETER Parameter...
  • Page 363 40 Talkback Audio Format Specifications Haivision’s InStream software player provides a talkback audio stream to the encoder. The InStream player is available either with the Furnace IP Video System v6.x or as a mobile application. For more information, see the InStream User’s Guide or the InStream Mobile (iOS or Android) Quick Start Guide available through Haivision’s Download Center.
  • Page 364: Temperature

    CLI Command Reference temperature temperature YNOPSIS temperature get ESCRIPTION temperature command is used to display the current temperature of the unit. If the internal temperature of the unit is rising, that is an indication that the fan may not be operating properly.
  • Page 365: Transfer

    CLI Command Reference transfer transfer YNOPSIS transfer create [source=ssd] [dest=text] [file=txt][remove=yes,no] transfer id/name/all start transfer id/name/all delete transfer id/name/all stop transfer id/name/all get [config/stats/all] ESCRIPTION transfer command is used to manage exporting of files to an external storage location. CTIONS create Creates a file transfer from the encoder.
  • Page 366 CLI Command Reference transfer TRANSFER XAMPLE # transfer create dest=usb file=NewOne-2015-06-23-18 Transfer to copy small recording to USB (completed right away). Returns information such as: Transfer created successfully - ID: 1. admin@X-STORAGE-2:~$ transfer 1 get all Transfer ID Name : (None) Configuration: Source : SSD...
  • Page 367: Tzconfig

    CLI Command Reference tzconfig tzconfig YNOPSIS tzconfig ESCRIPTION tzconfig command is used to configure the timezone on the encoder. tzconfig displays the current timezone and prompts you to change the timezone (Y,N). To change the timezone, type and follow the prompts for information about the current location.
  • Page 368 CLI Command Reference tzconfig Related Topics • date on page 274 • dtconfig on page 279 Makito X User’s Guide, v2.2, Issue 02...
  • Page 369: Videnc

    CLI Command Reference videnc videnc YNOPSIS videnc ID start videnc ID stop videnc ID set parameter=value [parameter=value ...] videnc ID get [config, stats, all] videnc ID clear videnc ID reset ESCRIPTION videnc command is used to manage video encoding parameters. The videnc start videnc stop commands can be used to start and stop encoding of the video input.
  • Page 370 CLI Command Reference videnc VIDENC ARAMETERS Parameter Default Description/Values input (SDI Dual-BNC only) The Video Input port for the encoder: • BNC1 • BNC2 timecode None Timecodes are used to mark video frames, mainly for editing purposes. This field either disables timecoding, or selects the source to “timecode”...
  • Page 371 CLI Command Reference videnc Parameter Default (Cont.) Description/Values (Cont.) resizemode Scale By default, input is scaled to the output resolution. • Scale: Input is scaled to output resolution. • Crop: This setting crops the input and encodes to a rectangle within the input image (at the center of the image) while discarding the rest of the input image.
  • Page 372 CLI Command Reference videnc Parameter Default (Cont.) Description/Values (Cont.) entropycoding CAVLC Select the compression scheme: CAVLC: • Context-adaptive Variable-length Coding is a lower-complexity alternative to CABAC. CAVLC produces lower quality, but is easier to decode. CABAC: • Context-adaptive Binary Arithmetic Coding is an algorithm to losslessly compress syntax elements in the video stream.
  • Page 373 CLI Command Reference videnc Parameter Default (Cont.) Description/Values (Cont.) intrarefresh Enables or disables Intra-refresh video On,Off encoding support. Intra-refresh is a video encoding mode of operation in which no distinct IDR frame is sent in the video elementary stream. Instead, the macro-blocks that make up the IDR frame are sent gradually within a certain time so that the entire video reference frame is re-built (at...
  • Page 374 CLI Command Reference videnc Parameter Default (Cont.) Description/Values (Cont.) resolution Auto The stream output resolution. Specifies the number of lines per frame and pixels per line to be encoded. Options depend on the Input Format detected. • Auto (output resolution is the same as the input) •...
  • Page 375 CLI Command Reference videnc Parameter Default (Cont.) Description/Values (Cont.) • WUXGA, 1900x1200 • UXGA, 1600x1200 • WSXGA, 1680x1050 • HD+, 1600x900 • SXGA+, 1400x1050 • WXGA+, 1440x900 1360x768 • SXGA, 1280x1024 • WXGA, 1280x768 • XGA, 1024x768 • SVGA, 800x600 •...
  • Page 376 CLI Command Reference videnc # videnc 0 get Returns video configuration information for the encoder: Encoder ID Name : "HD Video Encoder 0" Configuration: Video Input : BNC-1 Video Format : Auto-Detect Aspect Ratio : Auto-Detect Time Code : VIDEO Video Bitrate : 6000 kbps Video GOP Size...
  • Page 377 CLI Command Reference videnc Closed Captioning : Disabled Timecode Source : SYSTEM Timecode : 20:18:48:07 Source Switches : 1386188328244254 (2013-Dec-4- 20h18m48s244254us) H.264 Profile : Main H.264 Level Related Topics • Configuring Video Encoders on page 81 Makito X User’s Guide, v2.2, Issue 02...
  • Page 378: Vidin

    CLI Command Reference vidin vidin YNOPSIS vidin ID get vidin ID set vidin ID clear ESCRIPTION vidin command is used to view and manage video input parameters. is used to select the video input on dual channel encoders (either for BNC-1 or BNC-2 on #S/B-292E-HDSDI2).
  • Page 379 CLI Command Reference vidin VIDIN XAMPLE # vidin 0 get Returns video input information for the encoder: Input ID Name : "BNC-1" State : ACTIVE Configured Type : Auto-Detect Input Type : SDI Input Format : 1280x720p59 Frame Rate : 60 Output Buffers Captured Frames : 961,721...
  • Page 380 Appendix B: Technical Specifications This appendix lists the technical specifications for the Makito X encoder. References to the “Makito X” can be taken to include all Makito X SDI and NOTE Makito X DVI interfaces unless specifically stated otherwise. For the list of available interfaces, see “Introduction”...
  • Page 381: Appendix B: Technical Specifications

    Technical Specifications Audio/Video Interfaces Audio/Video Interfaces Video Inputs Makito X DVI (#S/B-292E-DVI) Y,Pb,Pr / RGBHV Component Analog video. Also supporting: • RGB with external SYNC (HSYNC & VSYNC) • RGB with SYNC on Green (RsGB) Y,Cb,Cr / DVI Component Digital video...
  • Page 382 Technical Specifications Audio/Video Interfaces Audio Inputs Makito X DVI (#S/B-292E-DVI) • Two analog audio channels per blade. • The DVI interface supports two channels of embedded audio (channels 1 & 2). Makito X SDI (#S/B-292E-HDSDI2 or #S/B-292E-HDSDI1) Makito X HEVC (#S/B-292E-SDI2-HEVC or #S/B-292E-SDI1-HEVC) Makito X Harsh Environment SDI (#S-292E-X2H or #S-292E-X1H) •...
  • Page 383: Video Encoding

    Technical Specifications Video Encoding Video Encoding Video Encoding – H.264 AVC/H.265 HEVC (MPEG-4 Part 10) DVI Input Resolutions / 1920x1200 60 Hz Scan Rates 1680x1050 60 Hz 1600x1200 60 Hz 1600x900 60 Hz 1440x900 75, 60 Hz 1400x1050 75, 60 Hz 1360x768 60 Hz 1280x1024...
  • Page 384 Technical Specifications Video Encoding Video Encoding – H.264 AVC/H.265 HEVC (MPEG-4 Part 10) (Cont.) Encoding Latency Less than 60ms (H.264 encoder at 720p60, 6Mbps) Less than 50ms (HEVC encoder at 720p60, 6 Mbps) Encoding latency refers to the time delay NOTE: between capture of a frame and the instant when the frame is encoded and ready for transmission.
  • Page 385: Supported H.264 Video Encoding Input And Downscale Resolutions

    Technical Specifications Video Encoding Supported H.264 Video Encoding Input and Downscale Resolutions NCODED UTPUT NPUT ESOLUTIONS RAME ATES ESOLUTIONS 1080p 1080i 720p 480i 480P* 576i 576p* Name Resolution 60 / 30 / 23.98 30 / 60 / 30 / 23.98 30 / 60 / 59.94 29.97...
  • Page 386 Technical Specifications Video Encoding NCODED UTPUT NPUT ESOLUTIONS RAME ATES ESOLUTIONS 1080p 1080i 720p 480i 480P* 576i 576p* Name Resolution 60 / 30 / 23.98 30 / 60 / 30 / 23.98 30 / 60 / 59.94 29.97 29.97 59.94 29.97 29.97 59.94...
  • Page 387: Supported H.264 Graphic Encoding Input And Downscale Resolutions

    Technical Specifications Video Encoding Supported H.264 Graphic Encoding Input and Downscale Resolutions (Makito X #S/B-292E-DVI only) YPbPr / RGBHV / DVI-A & DVI-I Computer Graphic Input Resolutions UTPUT ESOLUTIONS 1920 1680 1600 1600 1440 1400 1360 1280 1280 1280 1152...
  • Page 388 Technical Specifications Video Encoding YPbPr / RGBHV / DVI-A & DVI-I Computer Graphic Input Resolutions (Cont.) UTPUT ESOLUTIONS 1920 1680 1600 1600 1440 1400 1360 1280 1280 1280 1152 1024 1200 1050 1200 1050 1024 WXGA 1280x800 WXGA 1280x768 1152x864 XGA 1024x768 SVGA 800x600...
  • Page 389: Audio Encoding

    Technical Specifications Audio Encoding Audio Encoding Audio Encoding – MPEG AAC Audio Channels Up to 16 audio channels in channel pair groups (in any combination): • 16 embedded audio per blade (SDI) • 2 embedded audio per blade (DVI-D) • 2 analog audio per blade Audio Bitrates Mono: 56 to 160 kbps per audio pair Stereo: 80 to 320 kbps per audio pair...
  • Page 390: Advanced Features

    Technical Specifications Advanced Features Advanced Features Advanced Features Multi-bitrate (MBR) Encoding HD/SD De-interlacing Built-in Downscaling EIA-608-B/NTSC Line 21 Closed Captioning EIA-708-B/SDI Closed Captioning Forward Error Correction (FEC) using Furnace format Or PRO-MPEG FEC for TS over RTP streams AES Encryption 128-bit or 256-bit with Furnace systems or SRT Aspect ratio configuration SD AFD and WSS...
  • Page 391: Metadata (Optional)

    Technical Specifications Metadata (Optional) Metadata (Optional) Metadata Inputs: KLV over SD-SDI/HD-SDI/3G-SDI KLV or CoT over Serial (RS-232 or RS-422) KLV or CoT over IP/UDP Metadata Processing: CoT to KLV Conversion CoT relay to another IP device. Limited KLV Insertion and Editing KLV Pass-through KLV over SDI Metadata Rate Decimation CC 608/708 Pass-through...
  • Page 392: Klv Data Specifications

    Technical Specifications KLV Data Specifications KLV Data Specifications KLV Input The serial KLV data is compliant to SMPTE 336M-2007. A 16-byte Universal Key is used to separate successive KLV packets (messages). The first 5-byte preamble (06 0E 2B 34 02) is used by the Makito X to sync on the beginning of a new KLV packet.
  • Page 393: Asynchronous Klv Metadata Support

    Technical Specifications KLV Data Specifications Asynchronous KLV Metadata Support The Makito X supports Asynchronous Key-Length-Value (KLV) metadata stream signaling and AU (Access Unit) transport support (as per MISB 0604.2). The Makito X allows users to select the encapsulation type to use for each metadata source. This provides increased flexibility with regard to systems inter-working with the Makito X.
  • Page 394: Network And Management Interfaces

    Technical Specifications Network and Management Interfaces Network and Management Interfaces IP Network Interfaces Standard Ethernet 10/100/1000 Base-T, auto-detect, Half/Full- duplex Static IP/DHCP (Dynamic Host Configuration Protocol) Unicast streaming Multicast streaming (IGMPv3, Internet Group Management Protocol) Multiple Unicast streaming IPv4 (Internet Protocol version 4) IGMPv3 (Internet Group Management Protocol) for IP Multicast Streaming Protocols...
  • Page 395 Technical Specifications Network and Management Interfaces 1. Support for RS-422 is not currently provided for the Makito X Ruggedized SDI (#S-292E-X2R or #S-292E-X4R) 2. Support for RJ45 to RS-232 is not currently provided for the Makito X Rugge- dized SDI (#S-292E-X2R or #S-292E-X4R) Makito X User’s Guide, v2.2, Issue 02...
  • Page 396: Chassis Options

    20 Watts or 68.3 BTU/hr Sound Emission 41.2 dB(A) L’p(AVG) Dual-Height Appliance (Storage Mezzanine) Dual Height Appliance (#S/B-292E-DVI-FS or -RS, #S/B-292E-SDI2-FS or -RS or #S/B-292E-SDI1-FS or -RS) Dimensions (H x W x D) 44mm H x 149mm W x 202mm D (1.74”...
  • Page 397: Dual-Height Appliance (Hevc Mezzanine)

    Technical Specifications Chassis Options Dual Height Appliance (#S/B-292E-DVI-FS or -RS, #S/B-292E-SDI2-FS or -RS or #S/B-292E-SDI1-FS or -RS) Heat ~20 Watts or 68.3 BTU/hr Sound Emission 41.2 dB(A) L’p(AVG) Dual-Height Appliance (HEVC Mezzanine) Makito X HEVC: Dual-Channel (#S/B-292E-SDI2-HEVC) or Single-Channel (#S/B-292E-SDI1-HEVC)
  • Page 398: Mb6X - 6 Blade Chassis

    Technical Specifications Chassis Options MB6X - 6 Blade Chassis MB6X - 6 Blade Chassis (#F-MB6X-RAC, #F-MB6X-MED, #F-MB6X-DC) Dimensions (H x W x D) 19” rack mountable, 1 RU 43.69mm H x 434.98mm W x 420.37mm D (1.72” H x 17.125” W x 16.55” D) Weight 6 slot empty chassis: 7.94 kg.
  • Page 399: Mb21B (#F-Mb21B-R)

    -40°C to 70°C (-40°F to 158°F) Relative Humidity Up to 95% without condensation Heat 560 Watts or 1910 BTU/hr *assumes chassis full of Makito X or other Haivision blades; Sound Emission • Room temperature: 56.4 dB(A) L’p(AVG) • 50°C Ambient: 63.3 dB(A) L’p(AVG)
  • Page 400: Mb21X (#F-Mb21X-R)

    Technical Specifications Chassis Options MB21X (#F-MB21X-R) MB21 - 21 Blade Chassis (#F-MB21X-R) Dimensions (H x W x D) 19-inch rack mountable, 4RU *178 mm H x †441.35 mm W x 462 mm D (7.00 inches H x 17.38 inches W x 18.19 inches D) *187 mm / 7.35 inches H with rubber feet installed †482.6 mm / 19 inches W including mounting flanges Weight...
  • Page 401: Makito Xr (Military Spec) Appliance

    Technical Specifications Chassis Options Makito XR (Military Spec) Appliance Makito XR (Military Spec) Appliance (#S-292E-X2R #S-292E-X4R) Dimensions 99mm H x 216mm W x 170mm D (3.9” H x 8.5” W x 6.7” D) Weight 3 kg (6.81bs.) Power 28VDC, 30W MIL-STD-1275D Temperature Operating: -40°...
  • Page 402: Supported Storage Devices

    Technical Specifications Supported Storage Devices Supported Storage Devices Makito X Fixed Storage Mezzanine (#S/B-292E-DVI-FS, #S/B-292E-SDI2-FS or #S/B-292E-SDI1-FS) mSATA SSD - 128 GB to 1 TB Recommended Devices: Samsung SSD 850 EVO Series and Crucial MX200 SSD Samsung SSD 850 EVO Series...
  • Page 403: Regulatory/Compliance

    Technical Specifications Regulatory/Compliance Regulatory/Compliance Regulatory/compliance Certification UL / CSA / CE Compliance Electromagnetic Compatibility: EN 55022 (Emissions) / 55024 (Immunity) / EN 61000-3-2 / EN 61000-3-3 Safety (Low Voltage Directives): EN 60950-1 (CSA C/US) / IEC/EN 60950-1 (International /CB Scheme) Industry Canada Warnings: Canadian ICES-003, “Electromagnetic Compatibility”...
  • Page 404: Closed Captioning

    Technical Specifications Closed Captioning Closed Captioning The Makito X supports capture, multiplexing and transport of Closed Captioning (CC) and other Line 21 information over Composite (with no 7.5 IRE setup on Line 21), as well as HD/SD SDI input interfaces. Closed Captioning data, as defined by the EIA-608-B standard, includes the following services over Line 21 Fields 1 and 2 of an NTSC analog video signal: CC1, CC2, CC3, CC4, Text1, Text2, Text3, Text4, and XDS (see...
  • Page 405 Technical Specifications Closed Captioning The extracted CC information from Line 21 is embedded in the MPEG stream as NOTE per ATSC A/72 Part 1:2008 (ATSC A/53 Part 4:2007). Unicast and Multicast streams all carry the same CC data. The Makito X encoder supports the capture of EIA-608 and EIA-708 closed captions from the video input at the HD/SD SDI interface and encodes it in the Makito X Transport Stream using the encapsulation format specified in ATSC A/72.
  • Page 406: References

    See: Permissive free software licence wikipedia entry for more information. Open Source Software Credits Haivision is grateful to the following organizations for making available their Open Source software packages: Package Version Description...
  • Page 407 Open Source Software Credits Open Source Software Credits Package Version Description License coreutils Basic shell, file and text GPL v3, June 2007 manipulation cracklib 2.8.18 Password checking library LGPL v2.1, June 1999 cron 3.0p11 Time base job scheduler permissive free software license 5.1.19 Berkeley Relational Database...
  • Page 408 Open Source Software Credits Open Source Software Credits Package Version Description License jpeg JPEG Software Tools Lane & Vollbeding - permissive free software license lftp 4.6.1 File Transfer Program GPLv3, June 2007 libevent 2.0.17 Event notification library 3-clause (“modified”) BSD License libuuid 1.0.3...
  • Page 409 Open Source Software Credits Open Source Software Credits Package Version Description License openssl 1.0.2k Open Secure Socket Layer Dual OpenSSL / SSLeahy openssl-fips- FIPS Algorithms Multiple Licenses algvs parted GNU Partition Table Editing GPLv3, June 2007 pcre Perl 8.21 Compatible Regular BSD License Expression Library popt...
  • Page 410 Open Source Software Credits Open Source Software Credits Package Version Description License tcpdump 4.3.0 Network Monitoring and Data Acquisition Tool tftp-hpa 0.43 TFTP server. Permissive free software license u-boot 2010.06 U-Boot boot loader. GPL v2, June 1991 UDT4 4.11 UDP-based Data Transfer Permissive free software license “Third Party License...
  • Page 411: Appendix D: Warranty Information

    ONE (1) YEAR from the date of equipment shipment (“Warranty Period”). If a hardware defect arises and a valid claim is received within the Warranty Period, at its option and to the extent permitted by law, Haivision will either...
  • Page 412: Obtaining Warranty Service

    The Authorized Reseller or Haivision will help determine whether your product requires service and, if it does, will inform you how Haivision will provide it. You must assist in diagnosing issues with your product and follow Haivision’s warranty processes.
  • Page 413: Software End User License Agreement

    Product, but none so significant as to warrant classification as an Upgrade, which may be provided by Haivision to fix critical or non-critical problems in the Product on a scheduled, general release basis. Updates to the Product (“Version”) are denoted by number changes to the right of the decimal point for a version and revision number (for example, going from 2.0.0 to 2.1.0).
  • Page 414 You and not, by implication or otherwise, to any parent, subsidiary or affiliate of Yours without Haivision’s specific prior written consent. This license is for the limited use of the Product by You for the purpose of creating, managing, distributing and viewing IP Video assets. This license does not grant any license for content whatsoever.
  • Page 415 Termination; Effect; Survival. All license rights granted hereunder shall terminate; You shall immediately pay to Haivision all amounts due and outstanding as of the date of such termi- nation or expiration; and You shall return to Haivision all Product and all Haivision Reference Manuals or certify that all such Product and Reference Manuals have been destroyed.
  • Page 416 Haivision, which approval shall not be unreasonably withheld. If any Product is, or in the opinion of Haivision may become, the subject of any Claim for infringe- ment, then Haivision may, or if it is adjudicatively determined that any of the Product infringes in...
  • Page 417 You (if any) related to the Product. Haivision may use this information, as long as it is in a form that does not personally identify You, to improve its products or to provide services or technologies to You.
  • Page 418 Third Party Content. Haivision does not warrant or endorse and does not assume and will not have any liability or responsibility to You or any other person for any Third Party content.
  • Page 419 Entitlement (or to such other address as may be designated by a party from time to time in accordance with this Section 6.16. If you have questions, please contact Haivision Systems Inc., at 4445 Garand, Montréal, Québec, H4R 2H9 Canada or legal@haivision.com.

Table of Contents