Table of Contents
Advertisement
Advertisement
Table of Contents

Related Manuals for Hach TU5200


Summary of Contents for Hach TU5200
- Page 1 DOC342.53.80489 TU5200 03/2017, Edition 3 User Manual...
-
Page 3: Table Of Contents
Table of Contents Specifications ......................3 General information ....................4 Safety information ......................4 Use of hazard information ..................4 Precautionary labels ..................... 5 Class 1 laser product .................... 5 RFID module ......................6 Safety information for RFID modules ............6 FCC conformance for RFID ................ - Page 4 Table of Contents Calibrate the instrument ..................... 26 Verification ........................27 Configure the verification settings ................27 Do a calibration verification ..................28 Maintenance ....................... 28 Clean spills ........................ 29 Clean the instrument ....................29 Clean a sample vial ....................29 Clean the vial compartment ..................
-
Page 5: Specifications
Specifications Specifications are subject to change without notice. Specification Details Measurement method Nephelometry with the scattered light collected at a 90° angle to the incident light and 360° around the sample vial. Primary compliance method DIN EN ISO 7027 Dimensions (W x D x H) 41 x 28 x 12.5 cm (16 x 11 x 7.7 in.) Weight 2.37 kg (5.23 lb) -
Page 6: General Information
Specification Details Verification (RFID or Process and laboratory measurements are compared with RFID or Link2SC for ® Link2SC verification of the measurement value. Certifications CE compliant; US FDA accession number: 1420492-xxx. This product complies with IEC/EN 60825-1 and to 21 CFR 1040.10 in accordance with Laser Notice No. 50. -
Page 7: Precautionary Labels
Precautionary labels Read all labels and tags attached to the instrument. Personal injury or damage to the instrument could occur if not observed. A symbol on the instrument is referenced in the manual with a precautionary statement. Electrical equipment marked with this symbol may not be disposed of in European domestic or public disposal systems. -
Page 8: Rfid Module
This instrument is a Class 1 Laser product. There is invisible laser radiation when the instrument is defective and when the instrument lid is open. This product complies with EN 61010-1, "Safety Requirements for Electrical Equipment for Measurement, Control and Laboratory Use" and with IEC/EN 60825-1, "Safety of Laser Products"... -
Page 9: Certification
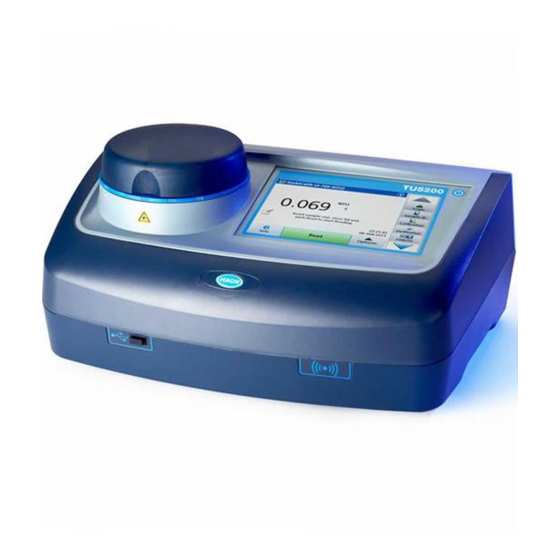
5. Try combinations of the above. Product overview The TU5200 turbidimeter measures low turbidity mostly in finished drinking water applications. This laboratory instrument is factory calibrated and measures scattered light at an angle of 90° in a 360° radius around the axis of the incident light beam. Use the touch screen to operate the instrument. -
Page 10: Product Components
Figure 1 Product overview 1 Lid 6 USB port type A 2 Vial compartment 7 USB port type B 3 Display 8 Ethernet port for LAN connection 4 Power button 9 RFID module indicator (optional) 5 Power supply connection 10 USB port type A Product components Make sure that all components have been received. -
Page 11: Installation
Figure 2 Product components 1 TU5200 4 Power supply with adapters 2 StablCal kit, sealed vials with RFID (10, 20 and 5 Dust cover 600 NTU) 3 Sample vials 6 Vial stand Installation C A U T I O N Multiple hazards. -
Page 12: User Interface And Navigation
USB type A port—Connect to a printer, barcode handset scanner, USB flash drive, keyboard SIP 10 module. USB type B port—Not used. Ethernet port—Connect to a LAN with a shielded cable (e.g., STP, FTP, S/FTP). The maximum length of the shielded cable is 20 m (65.6 ft). To identify if a LAN connection is necessary, refer to Set up a LAN connection on page 16. -
Page 13: Startup
Table 2 Sidebar menu icons Icon Description Logs in or logs out an operator. To log in, select an operator ID and then push Login. To log out, push Logout. Note: When an operator is logged in, the Login icon changes to the icon selected for the operator ID (e.g., fish, Login butterfly or soccer ball) and the text "Login"... -
Page 14: Operation
C A U T I O N Personal injury hazard. Do not look into the vial compartment when the instrument is connected to power. Refer to the illustrated steps that follow to connect power to the instrument and start the instrument. When the language menu shows, select the language and then push OK. -
Page 15: Change The Language
Option Description Network & Shows the connection status of the devices that are directly connected to the instrument Peripherals and connected to the instrument by LAN (local area network). • Printer—Local printer or network printer • Network—LAN connection • Controller—sc controller(s) •... -
Page 16: Configure An Operator Rfid Tag (Optional)
Configure an operator RFID tag (optional) To use an operator RFID tag to log in to the instrument, save the applicable operator ID to an operator RFID tag as follows: 1. Push Login. 2. Select the operator ID, then push Options>Initialize RFID Tag. 3. -
Page 17: Configure The Measurement Settings
1;Aeration;13.09.2015 10:03 2;Outlet;13.09.2015 06:30 3;Feed;13.09.2015 18:00 Note: The date of sample collection is optional. 4. Make a new folder on a USB flash drive. Give the folder the name "SampleID". 5. Save the spreadsheet file to the SampleID folder as a CSV (comma-separated value) or TXT (text) file. -
Page 18: Set Up A Lan Connection
7. To get an IP address for the instrument from a DHCP server, do the steps that follow. a. Select Automatic. b. Push OK two times. The IP address shows on the TU5200 IP menu icon. 8. To manually enter an IP address for the instrument, do the steps that follow. a. Select Fixed. -
Page 19: Connect To A Network Printer
4. Push Network Server. 5. To connect to a folder on an FTP server, do the steps that follow. a. Select FTP. b. Push FTP Server. 6. To connect to a folder on a Netdrive, do the steps that follow. a. -
Page 20: Measurement
4. Push Add. 5. To enter the IP address of the sc controller, do the steps that follow. a. Select IP-Address. b. Push IP-Address, then enter the IP address of the sc controller. 6. To enter the host name of the sc controller, do the steps that follow. a. -
Page 21: Prepare A Sample Vial
Figure 4 Sample vial overview 1 Measurement surface—Do not touch. Prepare a sample vial C A U T I O N Chemical exposure hazard. Dispose of chemicals and wastes in accordance with local, regional and national regulations. N O T I C E Always put a cap on the sample vial to prevent spills in the vial compartment. -
Page 22: Put The Vial In The Instrument
Put the vial in the instrument C A U T I O N Personal injury hazard. Never remove covers from the instrument. This is a laser-based instrument and the user risks injury if exposed to the laser. C A U T I O N Personal injury hazard. -
Page 23: Measure The Sample
When the process instrument and laboratory instrument have the optional RFID module, compare process and laboratory measurements with RFID. Items to collect: • TU5300 sc or TU5400 sc with the optional RFID module • TU5200 with the optional RFID module • TU5200 sample vials English 21... -
Page 24: Compare Measurements With Link2Sc
If "Measurement values do not match." shows on the display, click the link to show the troubleshooting steps. 13. To show the compare log, push Options>Compare Log. Refer to the TU5200 documentation for more options. 14. To send the verification data to external devices that are connected to the instrument, push Options>Send Data. - Page 25 If "Measurement values do not match." shows on the display, click the link to show the troubleshooting steps. 15. To show the compare log, push Options>Compare Log. Refer to the TU5200 documentation for more options. 16. To send the verification data to external devices that are connected to the instrument, push Options>Send Data.
-
Page 26: Show The Recorded Data
Configure the Link2SC settings Select the acceptance range permitted when process and laboratory measurements are compared with Link2SC. 1. Push menu. 2. Select SENSOR SETUP>TU5x00 sc>LINK2SC. 3. Select an option. Option Description ACCEPT. UNIT Sets the units used to compare the process and laboratory measurements. Options: %, NTU or LAB. -
Page 27: Show The Instrument Information
b. Select an option. Option Description Delete Removes one of the items that follow. • The selected log entry • The log entries for a time interval • The log entries with a specific operator ID • The log entries with a specific sample ID •... -
Page 28: Calibration
Calibration W A R N I N G Chemical exposure hazard. Obey laboratory safety procedures and wear all of the personal protective equipment appropriate to the chemicals that are handled. Refer to the current safety data sheets (MSDS/SDS) for safety protocols. The instrument is factory calibrated and the laser light source is stable. -
Page 29: Verification
4. Clean the vial with a no-lint cloth to remove contamination. Keep contamination off the glass. Refer to Prevent vial contamination on page 18. 5. Dry the external surfaces of the vial with a no-lint cloth. Make sure to dry the bottom of the vial. 6. -
Page 30: Do A Calibration Verification
Option Description Verify after Cal. Sets the instrument to start a verification immediately after the instrument is calibrated. When set to on, the verification standard is measured immediately after a calibration is done. Default: ON. Acceptance Sets the maximum difference permitted between the recorded value of the verification Range standard and the measured value of the verification standard during verification. -
Page 31: Clean Spills
C A U T I O N Personal injury hazard. Never remove covers from the instrument. This is a laser-based instrument and the user risks injury if exposed to the laser. N O T I C E Do not disassemble the instrument for maintenance. If the internal components must be cleaned or repaired, contact the manufacturer. -
Page 32: Clean The Vial Compartment
6. For storage, fill the sample vial with distilled or demineralized water. Note: If the sample vial is used to measure low range turbidity samples or dilution water, fill the sample vial with dilution water (not distilled or deionized water). 7. - Page 33 Message Solution Next calibration is due! Calibrate the instrument. Refer to Calibrate the instrument on page 26. Note: The calibration reminder is set to on. Refer to Configure the calibration settings on page 26. Next service is due! Contact technical support. Note: The service reminder is set to on.
- Page 34 Message Solution Instrument update Copy from USB Memory Remove large files from the USB flash drive that use too much space. Start the failed instrument update procedure again. Remove the instrument update files from the USB flash drive. Save the instrument update files again to the USB flash drive.
- Page 35 Message Solution The sample ID list full. Data Remove the sample IDs that are not used. Add a new sample ID. has not been added Documents/Videos The document does not Make sure that the document is saved as a PDF. show on the display.
-
Page 36: Remove Air Bubbles From The Sample
Message Solution Measured with different The verification standard was measured for a different calibration curve (e.g., calibration. Read standard? StablCal, Formazin, SDVB, degrees or custom). Measured with different The verification standard was measured on a different type of instrument (e.g., instrument type. - Page 37 Replacement parts Description Quantity Item no. Cover, USB port type A LZV881 Dust cover LZV947 LZV968 Power supply with adapters, 100 to 240 V, 50/60 Hz LZV798 Sample vials with caps LZV946 Vial stand LZV952 Accessories Description Quantity Item no. Micro fiber cloth, vial cleaning LZY945 RFID tags, operator...
- Page 38 36 English...
- Page 40 Tel. +49 (0) 2 11 52 88-320 SWITZERLAND Fax (970) 669-2932 Fax +49 (0) 2 11 52 88-210 Tel. +41 22 594 6400 orders@hach.com info-de@hach.com Fax +41 22 594 6499 www.hach.com www.de.hach.com © Hach Company/Hach Lange GmbH, 2015–2017. All rights reserved.
Need help?
Do you have a question about the TU5200 and is the answer not in the manual?
Questions and answers