
Related Manuals for Hach POCKET TURBIDIMETER


Summary of Contents for Hach POCKET TURBIDIMETER
- Page 1 52600-18 POCKET TURBIDIMETER™ Analysis System © Hach Company, 1997, 1998. dd/dp 4/15/97 1ed All rights reserved. Printed in the U.S.A Rev. 2, 7/98...
-
Page 3: Certification
Hach Company certifies this instrument was tested thoroughly, inspected and found to meet its published specifications when it was shipped from the factory. The Pocket Turbidimeter Instrument has been tested and is certified as indicated to the following instrumentation standards:... - Page 4 Additional Emissions Standard/s include: CANADIAN INTERFERENCE-CAUSING EQUIPMENT REGULATION, IECS-003, Class A: Supporting test records by Intellistor O.A.T.S., certified compliance by Hach Company. This Class A digital apparatus meets all requirements of the Canadian Interference-Causing Equipment Regulations. Cet appareil numérique de la classe A respecte toutes les exigences du...
- Page 5 FCC PART 15, Class “A” Limits: Supporting test records by Intellistor O.A.T.S., certified compliance by Hach Company. This device complies with Part 15 of the FCC Rules. Operation is subject to the following two conditions: (1) This device may not cause harmful interference, and (2) this device must accept any interference received, including interference that may cause undesired operation.
- Page 6 The following techniques of reducing the interference problems are applied easily. 1. Remove power from the Pocket Turbidimeter Instrument by removing one of its batteries to verify that it is or is not the source of the interference.
-
Page 7: Table Of Contents
OPERATION ..................1 General Description .................. 3 Principle of Operation................5 Battery Installation..................6 Preparing the Pocket Turbidimeter Sample Cell ........9 Oiling the Pocket Turbidimeter Sample Cell.......... 11 Indexing the Sample Cell................ 12 Using StablCal ® Stabilized Standards............. 13 Instructions for Preparing StablCal Stabilized Formazin Standards .. - Page 8 TABLE OF CONTENTS, continued CALIBRATION ..................17 Calibration Helpful Hints................ 17 CALIBRATION PROCEDURE ............19 MEASURING TURBIDITY PROCEDURE........25 MAINTENANCE.................. 29 Helpful Hints................... 29 Cleaning the Sample Cells and Caps ............31 GENERAL INFORMATION .............. 37 PARTS AND ACCESSORIES............... 39 WARRANTY ..................
-
Page 9: Safety Precautions
Read all product labels and the MSDS (Material Safety Data Sheets) before using any chemicals. Please contact Hach with questions about reagents or procedures. Use of Hazard Information If multiple hazards exist, the signal word corresponding to the greatest hazard shall be used. - Page 10 This symbol, if noted on the instrument, references the Instruction Manual for operational and/or safety information. Battery Installation on page 6. The Pocket Turbidimeter Instrument is a Class 1 LED product. A Class 1 LED product has insufficient energy to be considered an eye hazard.
-
Page 11: Specifications
SPECIFICATIONS Range: 0.1 - 400 NTU Accuracy: ≤5% of reading from 0-400 NTU or ±0.1 NTU (whichever is ® greater) when calibrated using StablCal Standards. Accuracy tested at 20-25 °C; accuracy may vary when the instrument is operated at environmental extremes. Resolution: 0.1 NTU below 100 NTU;... - Page 12 Storage Temperature Range: (StablCal Stabilized formazin only) Short Term: -40 to 40 °C Long Term: 5 to 20 °C Operating Humidity Range RH Non-condensing: 0 to 90% at 30 °C; 0 to 80% at 40 °C; 0 to 70% at 50 °C This is a Class 1 LED product.
-
Page 13: Operation
WARNUNG Da das Arbeiten mit chemikalischen Proben, Standards, Reagenzien und Abfällen mit Gefahren verbunden ist, empfiehlt die Hach Company dem Benutzer dieser Produkte dringend, sich vor der Arbeit mit sicheren Verfahrensweisen und dem richtigen Gebrauch der Chemikalien oder Biogefahrgut vertraut zu machen und alle... -
Page 15: General Description
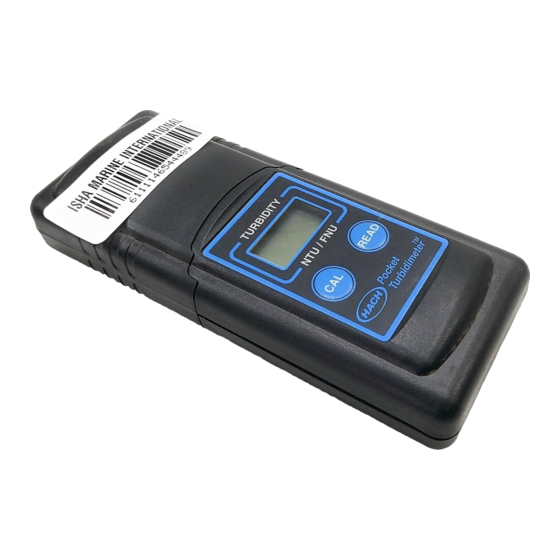
The Pocket Turbidimeter Instrument* measures turbidity and provides a direct readout on the liquid crystal display from 0.0 to 400 NTU. Designed primarily for field use, the Pocket Turbidimeter Instrument is convenient, reliable, and easy to use and calibrate. The instrument operates on four AAA batteries (battery-saving features are incorporated into the software). - Page 16 1. Oiling Cloth ........................... 26873-00 2. Pocket Turbidimeter Instrument .................... 52600-60 3. Instruction Manual ........................ 52600-18 4. Sample Cells with press on caps, 6/pkg ................52631-00 5. StablCal 1.0 NTU, 100 mL ........................26598-42 20 NTU, 100 mL ........................26601-42 6.
-
Page 17: Principle Of Operation
Principle of Operation The Pocket Turbidimeter Instrument operates on the nephelometric principle of turbidity measurement. The optical system includes an infrared LED and detector to monitor scattered light. Variation in the LED is automatically compensated, reducing calibration drift. ® Calibration with StablCal Stabilized Formazin Standards provides the capability for direct readout in FNU or NTU*. -
Page 18: Battery Installation
Battery Installation Caution: This product is designed to use only alkaline batteries. Use of other types of batteries may result in damage to the instrument and injury to the user. Prudence: Cet appareil est conçu pour utiliser seulement des piles alcalines. L'utilisation d'autres types de piles peut endommager l'appareil et blesser l'opérateur. - Page 19 Figure 2 provides an exploded view of the battery installation. Loosen the captive screw to remove the battery compartment cover. Place the four batteries provided with the instrument in the holder as indicated (the proper polarities are shown on the battery holder). Replace the battery compartment cover and tighten the captive screw.
- Page 20 Figure 2 Battery Installation...
-
Page 21: Preparing The Pocket Turbidimeter Sample Cell
Preparing the Pocket Turbidimeter Sample Cell The Pocket Turbidimeter sample cell, supplied with a press-on cap, holds 5 mL of sample or standard (see Figure 2). The optical surfaces are the vertical sides of the lower, rectangular portion of the cell. - Page 22 Note: Do not store formazin or StablCal Stabilized Formazin in the sample cells. Immediately after use, wash the interior surfaces of the sample cells with a ® cotton swab dipped in detergent (Liqui-nox or equivalent) and water. Rinse with turbidity-free water. Cap the cells immediately after cleaning to prevent contamination.
-
Page 23: Oiling The Pocket Turbidimeter Sample Cell
Oiling the Pocket Turbidimeter Sample Cell 1. Thoroughly clean and 2. Apply a small drop of 3. Spread the oil rinse the Pocket silicone oil to each of the uniformly on the optical Turbidimeter sample cell, outside four vertical surfaces of the cell using... -
Page 24: Indexing The Sample Cell
Sample Cell Information Perform the calibration procedure on page 17 using one sample cell for both standards or using two sample cells, one for each NTU value. If two sample cells are used in the calibration and the sample turbidity is expected to be between 0 and 20 NTU, measure the sample turbidity in the sample cell which contained the low calibration (1.0 NTU) standard. -
Page 25: Using Stablcal Stabilized Standards
Using StablCal ® Stabilized Standards Most consistent results will be achieved with the use of StablCal Stabilized Formazin Standards. The Instructions for Preparing StablCal Stabilized Formazin Standards below, provide information on how to accurately prepare StablCal Standards for use. Instructions for Preparing StablCal Stabilized Formazin Standards When using bulk standards that have been sitting undisturbed for longer than a month, start at Step 1. - Page 26 4. Prepare the sample cell for measurement using traditional preparation techniques (oiling the sample cell and marking the cell to maintain the same orientation in the sample cell compartment) to eliminate any optical variations in the sample cell. 5. Rinse the sample cell at least one time with the standard and discard the rinse.
-
Page 27: Precautions For Use Of Standards
Precautions for Use of Standards • Do not store standards in sample cells! • Do not transfer the StablCal standard to another container for storage. • Store between 5 and 20 °C. Avoid prolonged exposure to temperatures exceeding 25 °C. •... -
Page 28: Controlling Ambient Light
Controlling Ambient Light The instrument cap also serves as a light shield when taking readings. In strong ambient light (direct sunlight) the instrument cap may not provide sufficient protection and slightly higher NTU values may be seen. If possible, do not take turbidity readings in bright sunlight. If you must take readings in bright sunlight, take the following measures to minimize the effects of the light: 1. -
Page 29: Calibration
CALIBRATION Calibration Helpful Hints • Complete the entire calibration procedure within four (4) minutes. If any calibration point is changed and the calibration is not completed within the allotted time, an instrument “time out” will occur and all calibration information will be lost. •... - Page 30 • Have both standards prepared (including mixing the bulk standards and transferring them to the sample cells) prior to beginning the calibration. • ® Use freshly mixed StablCal Standards as directed in Using StablCal Stabilized Standards on page 13. • Wash the inside and outside of sample cells before and after use.
-
Page 31: Calibration Procedure
CALIBRATION PROCEDURE 1. Pour 5-mL of 2. Cap the cell, then 3. Place the sample cell properly mixed 1.0 NTU remove dust particles by containing the 1.0 NTU ® StablCal Standard into wiping the cell with the standard into the the clean, indexed and oiling cloth immediately instrument sample... - Page 32 CALIBRATION PROCEDURE, continued Wait 30 seconds. 4. Cover the sample cell 5. Press and hold the 6. If only reviewing the with the light shield and key then press the calibration point, do not READ wait 30 seconds for the key.
- Page 33 CALIBRATION PROCEDURE, continued 7. Press the key. 8. If the 1 NTU value is 9. Pour 5-mL of properly ® After a short delay, the only to be reviewed and mixed 20 NTU StablCal display shows not changed, do not press Standard into the clean, C1.0 alternating with the...
- Page 34 CALIBRATION PROCEDURE, continued Wait 30 seconds. 10.To remove all dust, 11.Cover the sample cell 12.Press the key. wipe the sample cell with the light shield and After a short delay, the exterior with the oiling wait 30 seconds for the display shows cloth then insert it into the standard to stabilize.
- Page 35 CALIBRATION PROCEDURE, continued 13. If the 20 NTU value is 14.Press the key to Note: When the calibration is complete, clean all sample only to be reviewed and end the calibration. The cells and caps using a cotton not changed, do not press instrument displays ®...
-
Page 37: Measuring Turbidity Procedure
ATENÇÃO O Pocket Turbidimeter não se destina a ser utilizado com amostras inflamáveis, ou com as que contêm hidrocarbonetos ou ácidos concentrados que possam atacar os componentes do. Efectue testes de compatibilidade antes da análise, se houver dúvidas sobre a amostra a ser monitorizada. - Page 38 MEASURING TURBIDITY, continued 1. Pour 5 mL of sample 2. Wipe the outside 3. Apply silicone oil to into the Pocket surfaces of the cell with the sample cell using the Turbidimeter sample the oiling cloth to remove procedure presented on cell.
- Page 39 MEASURING TURBIDITY, continued 4. Insert the sample cell 5. Press and hold the Note: If FFF is displayed, the turbidity is either into the instrument key until the reading READ >440 NTU or the ambient sample compartment and stabilizes (approximately light is extremely high.
-
Page 41: Maintenance
MAINTENANCE Helpful Hints • Do not allow liquids to enter any part of the Pocket Turbidimeter. Instrument damage will result. • Store the Pocket Turbidimeter Instrument in a clean, dry environment. If necessary, use a damp, soft cloth to clean the exterior of the instrument. - Page 42 • Clean the sample compartment and the sample cell windows with a cotton swab dampened with isopropyl alcohol or detergent and turbidity- free water. Rinse with turbidity-free water. Do not use acetone or other organic solvents to clean the sample cells; damage to the cells will result. •...
-
Page 43: Cleaning The Sample Cells And Caps
Cleaning the Sample Cells and Caps Rinse with 1:1 HCl followed by multiple rinses with particle-free water. Soak in warm water to which a mild detergent (Liqui-nox ® or equivalent) has been added; use a cotton swab to scrub the cells if necessary. Rinse several times with turbidity-free water. - Page 44 Table 1 Troubleshooting and Error Codes Error Cause Possible Solution Code Invalid interrupt Call Hach Service. Low battery Replace all four batteries and recalibrate the instrument. Light leak during dark Ensure the light shield (instrument cap) point calibration is properly in-stalled. Read and follow the instructions in Controlling Ambient Light on page 16 .
- Page 45 Continue with the calibration. Outside of calibration mode: Verify stan- dards, then redo the entire calibration.* Call Hach Service. First calibration point During a calibration: Verify the proper (1.0 NTU) too high standard is being used and reread the standard.
- Page 46 Continue with the calibration. Outside of calibration mode: Verify standards, then redo the entire cal- ibration.* Call Hach Service. Second calibration point During a calibration: Verify the proper (20 NTU) too high standard is being used and reread the standard.
- Page 47 Cause Possible Solution Code Calibration error or Redo the calibration.* instrument is not cali- Call Hach Service. brated. Turbidity is >440 NTU Dilute the sample with turbidity-free water to within the range of the instru- ment and reread the sample.
- Page 48 valid * If a previous calibration exists, that calibration may be recalled to replace a new calibration which is incorrect. If E04 through E09 is flashing on the display when the cal- ibration routine is complete, press the key within approximately one minute. READ OLd will appear on the display to denote retention of the previous calibration.
-
Page 49: General Information
GENERAL INFORMATION At Hach Company, customer service is an important part of every product we make. With that in mind, we have compiled the following information for your convenience. -
Page 51: Parts And Accessories
PARTS AND ACCESSORIES Replacement Parts Description Cat No. Batteries, AAA alkaline, pkg/4 .............. 46743-00 Instrument Cap/Light Shield, each ............52632-00 Instrument manual, each................. 52600-18 Oiling Cloth for sample cell preparation ..........26873-00 Sample Cell with press-on cap, 5-mL, 6/pkg ......... 52631-00 Silicone Oil, 15 mL .................. -
Page 53: Warranty
WARRANTY Hach warrants the Pocket Turbidimeter Instrument against defective materials or workmanship for two years from the date of shipment. HACH WARRANTS TO THE ORIGINAL BUYER THAT HACH PRODUCTS WILL CONFORM TO ANY EXPRESS WRITTEN WARRANTY GIVEN BY HACH TO THE BUYER. EXCEPT AS... - Page 54 Catalog descriptions, pictures and specifications, although accurate to the best of our knowledge, are not a guarantee or warranty. For a complete description of Hach Company’s warranty policy, request a copy of our Terms and Conditions of Sale for U.S. Sales from our...
-
Page 55: Repair Service
REPAIR SERVICE Authorization must be obtained from Hach Company before sending any item for repair. Please contact the Hach Factory Service Center serving your location. In the United States: In Canada: Hach Company Hach Sales & Service Canada, Ltd. 100 Dayton Ave.
Need help?
Do you have a question about the POCKET TURBIDIMETER and is the answer not in the manual?
Questions and answers