
Related Manuals for Hach TU5200


Summary of Contents for Hach TU5200
- Page 1 DOC022.52.80489 TU5200 09/2014, Edition 1 User Manual -BETA DRAFT-...
- Page 2 -BETA DRAFT-...
-
Page 3: Table Of Contents
Table of Contents Specifications ......................3 General information ....................4 Safety information ......................4 Use of hazard information ..................4 Precautionary labels .....................5 Class 1 laser product ....................5 RFID module ......................6 Safety information for RFID modules ............6 FCC conformance for RFID ................6 Certification ...................... - Page 4 Table of Contents Clean the vial compartment ..................20 Troubleshooting .......................20 Read the diagnostics information ................22 Replacement parts and accessories ............... 22 -BETA DRAFT-...
-
Page 5: Specifications
User prepared formazin, SDVB, kaolin or EBC via factory-defined or custom curves ® Verification options StablCal , formazin (0.1 to 40 NTU), Hach solid verification standards Verification (Link2SC) Verification of the measurement value to compare values to a online instrument via Link2SC. -BETA DRAFT-... -
Page 6: General Information
Specification Details Certifications CE compliant; US FDA accession number: 1420492-xxx. This product complies with IEC/EN 60825-1 and to 21 CFR 1040.10 in accordance with Laser Notice No. 50. Warranty EU: 2 years This is based on formazin primary standard. General information In no event will the manufacturer be liable for direct, indirect, special, incidental or consequential damages resulting from any defect or omission in this manual. -
Page 7: Precautionary Labels
Precautionary labels Read all labels and tags attached to the instrument. Personal injury or damage to the instrument could occur if not observed. A symbol on the instrument is referenced in the manual with a precautionary statement. Electrical equipment marked with this symbol may not be disposed of in European domestic or public disposal systems. -
Page 8: Rfid Module
This instrument is a Class 1 Laser product. There is invisible laser radiation when the instrument is defective and when the instrument lid is open. This product complies with EN 61010-1, "Safety Requirements for Electrical Equipment for Measurement, Control and Laboratory Use" and with IEC/EN 60825-1, "Safety of Laser Products"... -
Page 9: Certification
Refer to the current safety data sheets (MSDS/SDS) for safety protocols. The TU5200 turbidimeter measures low turbidity primarily in drinking water applications. This laboratory instrument is factory calibrated and measures scattered light at an angle of 90 degrees, 360 degrees around the axis of the incident light beam. -
Page 10: Product Components
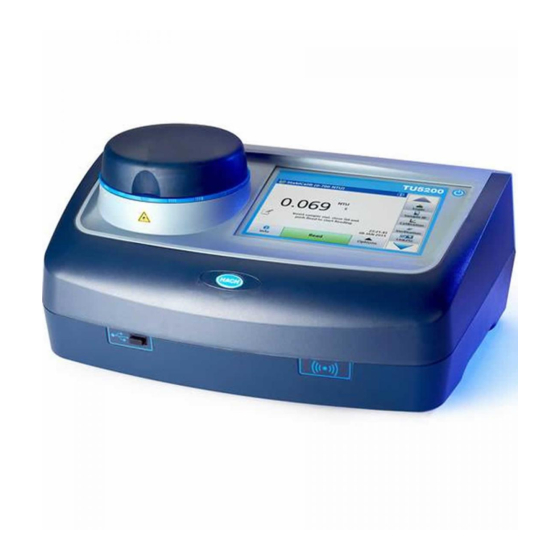
Figure 1 Product overview 1 Lid 6 USB port type A 2 Vial compartment 7 USB port type B 3 Display screen 8 Ethernet port 4 Power button 9 RFID scanner (optional) 5 Power connection 10 USB port type A Product components Make sure that all components have been received. -
Page 11: Installation
Figure 2 Product components 1 Turbidimeter 4 Power supply with adapters ® 2 StablCal calibration set 5 Dust cover 3 Sample vials 6 Vial stand Installation C A U T I O N Multiple hazards. Only qualified personnel must conduct the tasks described in this section of the document. -
Page 12: Connect To Power
Connect to power C A U T I O N Personal injury hazard. Never remove covers from the instrument. This is a laser-based instrument and the user risks injury if exposed to the laser. C A U T I O N Personal injury hazard. - Page 13 Figure 3 Main reading screen 1 Time and date 6 UP/DOWN navigation arrows 2 Comments 7 Menu icons 3 Message display 8 Options (contextual: send data, compare log, setup, import, edit) icon 4 Value and unit 9 Read icon (contextual: read, options, select, delete) 5 Heading bar (contextual: shows the currently- 10 Information icon (contextual: information or back selected screen, active laser icon and active...
-
Page 14: Startup
Table 2 Icon description (continued) Icon Description Configures the instrument settings. Shows instrument-specific data about the instrument: firmware information, instrument backup, instrument updates, signaling information and factory service data. Shows help and more information. If there is more information about a task or an instrument function, then the information icon shows on the display. -
Page 15: Add An Operator Id
Add an operator ID 1. Push Login>Options. 2. Select an option. Option Description Adds a unique operator ID. Edit Changes an existing operator ID and assigns a security level to an operator ID. Delete Removes an existing operator ID. Initialize RFID Enables an operator ID tag (optional) to be initialized. -
Page 16: Measurement
Option Description Compare log Shows the data log from the online turbidimeter to compare results with the laboratory turbidimeter. Shows the data log management options: send data to a job list, view data as a graph, remove data and send data to a connected USB flash drive, PC or printer. Send data Sends the data log to a connected USB flash drive, PC or printer. -
Page 17: Put The Vial Into The Instrument
Put the vial into the instrument C A U T I O N Personal injury hazard. Never remove covers from the instrument. This is a laser-based instrument and the user risks injury if exposed to the laser. C A U T I O N Personal injury hazard. -
Page 18: Do A Measurement
Do a measurement Only do the steps that follow if there is a sample vial in the vial compartment and the instrument lid closed. Refer to Put the vial into the instrument on page 15. 1. The measurement starts automatically when the lid is closed. If not, push Read to start the measurement or select a sample ID to measure. -
Page 19: Import A Sample Id List
Import a sample ID list Make a sample ID list to import to the instrument via USB flash drive. 1. On an external device, open a spreadsheet program. 2. Make three columns that identify the sequential sample ID number, the sample ID name and the sampling date (optional). -
Page 20: Prepare For A Verification Or Calibration
Prepare for a verification or calibration N O T I C E Do not to touch or scratch the glass of the sample vial. Contamination or scratches on the glass can cause measurement errors. The measurement surface must stay clean and have no scratches. Use a no-lint cloth to remove dirt, fingerprints or particles from the glass. -
Page 21: Data Management
The instrument is factory calibrated. Do calibration procedures as necessary. Do the steps that follow to do a full range calibration procedure. 1. Clean the vial, then carefully invert the vial. Do not cause air bubbles. Refer to Prepare for a verification or calibration on page 18. -
Page 22: Clean Spills
N O T I C E Do not disassemble the instrument for maintenance. If the internal components must be cleaned or repaired, contact the manufacturer. Clean spills C A U T I O N Chemical exposure hazard. Dispose of chemicals and wastes in accordance with local, regional and national regulations. - Page 23 Problem Possible cause Solution The standard value is too high. The wrong standard is in the Check the calibration standard and Do a vial compartment. calibration on page 18. There are bubbles in the ???WHAT IS THE SOLUTION??? standard. There is dirt in the vial Clean the vial compartment on page 20.
-
Page 24: Read The Diagnostics Information
Problem Possible cause Solution Selected documents do not The document is not a PDF file. Make sure that the document is a PDF file. show on the display. The network connection does There is no connection to the Contact the network administrator. If not show. - Page 25 Accessories Description Item no. Micro fiber cloth (for vial cleaning) LZY945 Secondary standards, <–0.1 NTU LZY901 Secondary standards, 1 to 4 NTU LZY902 Vial wiper for manual cleaning LZY903 Vial compartment wiper for manual cleaning LZY910 -BETA DRAFT- English 23...
- Page 26 -BETA DRAFT- 24 English...
- Page 27 -BETA DRAFT-...
- Page 28 Tel. +49 (0) 2 11 52 88-320 SWITZERLAND Fax (970) 669-2932 Fax +49 (0) 2 11 52 88-210 Tel. +41 22 594 6400 orders@hach.com info@hach-lange.de Fax +41 22 594 6499 www.hach.com www.hach-lange.de © Hach Company/Hach Lange GmbH, 2014. -BETA DRAFT- All rights reserved. Printed in Germany.
Need help?
Do you have a question about the TU5200 and is the answer not in the manual?
Questions and answers